
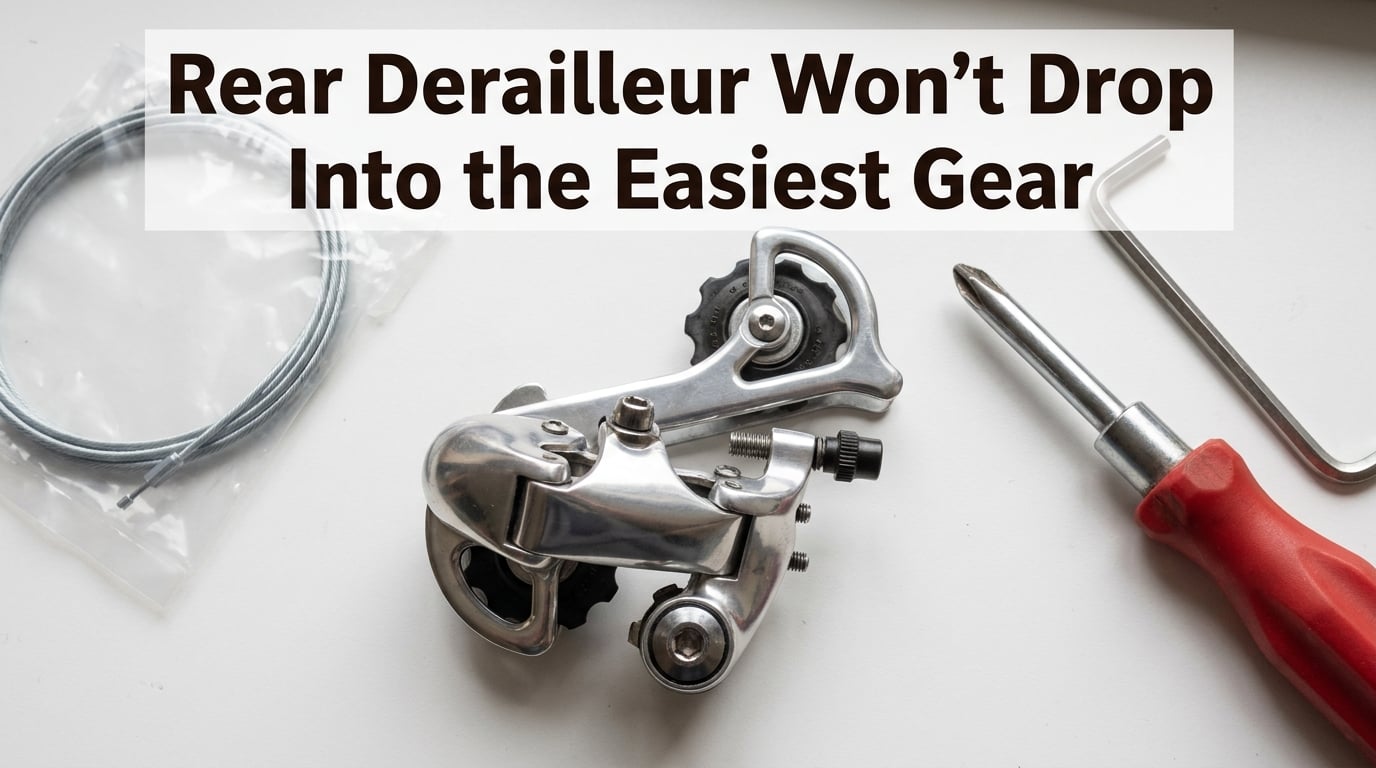
I have been riding and wrenching on bikes for over a decade, and the most common shifting complaint I hear is some version of “my rear derailleur won’t drop into the easiest gear.” When someone says that, they usually mean the chain refuses to climb up to the smallest cog on the cassette, even after they click the shifter a dozen times. It is frustrating, but in most cases the fix takes less than 15 minutes with a single screwdriver.
This guide is the process I walk through with friends, customers, and anyone who texts me a photo of their bike with the caption “help.” I will show you the three things that actually cause this problem, how to test which one is the culprit, and exactly how to correct it without making things worse. By the end, you will know how to fix a rear derailleur that won’t drop into the easiest gear, and you will understand why each step matters.
Table of Contents
Quick Diagnosis: Why Your Rear Derailleur Won’t Drop Into the Easiest Gear
Before we get into the full repair, run through this fast checklist. In roughly 80% of the cases I see, the answer is one of these three things:
- High limit screw (H screw) is set too tight — this physically blocks the derailleur from reaching the smallest cog.
- Cable tension is too high — the cable is over-pulling the derailleur, leaving no room to move further inward toward the smallest cog.
- The derailleur hanger is bent — even by 2 or 3 millimeters, a misaligned hanger will stop the jockey wheels from aligning with the smallest cog.
Here is the test I always use: shift the chain to the smallest cog, then push the derailleur body toward the wheel with your thumb. If it physically moves past the smallest cog and the chain tries to fall off the inside, your high limit screw is the problem. If the derailleur is already pressing hard against the limit and will not budge, your cable tension is too high. If the jockey wheels visibly miss-align with the cassette even when the shifter is clicked all the way, you are looking at a bent hanger.
If that already pointed you to the fix, jump to the matching section. If you want the full picture, keep reading.
Understanding Rear Derailleur Anatomy
I find that most people struggle with rear derailleur adjustment because the parts are small, the labels are confusing, and the screws all look the same. Here is what every mechanical rear derailleur has, regardless of brand.
The derailleur body is a parallelogram mechanism. It pivots on two plates and uses an internal spring to push the cage inward (toward the wheel) so the chain can climb to larger cogs. The cable, when pulled, fights that spring and moves the cage outward (toward the frame) so the chain climbs to smaller cogs.
The two pulleys at the bottom of the cage are called jockey wheels. The top one guides the chain onto the cassette, and the bottom one maintains tension. They must sit directly under the cogs for shifting to work cleanly.
On the back of the derailleur body, you will find two limit screws and possibly a third screw. The high limit screw (marked “H”) controls how far the derailleur can travel toward the smallest cog. The low limit screw (marked “L”) controls how far it can travel toward the largest cog. On many modern derailleurs, there is also a B-tension screw (sometimes called B-gap) that adjusts how far the upper jockey wheel sits from the cassette.
For our specific problem — the rear derailleur won’t drop into the easiest gear — the H screw is the main character. Cable tension is the supporting actor. The B-tension screw is the director. If any of them is off by a fraction of a turn, shifting suffers.
Pre-Adjustment Checks: Inspect Before You Turn Screws
Every mechanic I respect follows the same rule: check the components before you start adjusting. Adjustment only fixes alignment problems. It does not fix worn parts. If something is physically damaged, no amount of turning screws will solve your shifting issue, and you can actually make it worse.
Check the cable and housing. Look at the cable where it enters the shifter, the derailleur, and every housing stop along the frame. If you see frayed strands, kinks, or rust, replace the cable and housing. A sticky cable is one of the top reasons a derailleur will not move freely to the smallest cog. I once spent 20 minutes adjusting a friend’s bike before I noticed the cable housing had a sharp bend at the bottom bracket that was adding drag. Replacing the housing fixed the problem in two minutes.
Check the chain for wear. Use a chain checker tool. If the chain has stretched past 0.5% (Shimano) or 0.75% (SRAM), replace it. A worn chain will skip on the cassette, especially in the easiest gears where the cogs are thinnest. Skipping is often misdiagnosed as a shifting problem when it is really a wear problem.
Check the derailleur hanger for alignment. Stand behind the bike and look down the cassette. The upper jockey wheel should sit directly under the cogs. If it angles in or out, the hanger is bent. A hanger alignment tool (a $25 to $50 investment) will let you confirm and correct this at home. If you do not have one, a shop can usually re-align or replace a bent hanger for less than the cost of a new derailleur.
Check the cassette for damage. Look at the smallest cog. Are the teeth hooked, bent, or worn into a shark-fin shape? If so, the cassette needs to be replaced. Forcing the chain onto a damaged cog will skip and may cause the chain to fall between the cog and the spokes.
Once you have ruled out component wear and damage, you are ready to adjust.
How to Adjust the High Limit Screw When the Rear Derailleur Won’t Drop Into the Easiest Gear
The high limit screw is the most common cause of this specific problem. When the H screw is turned in too far, it physically stops the derailleur from traveling far enough to align the jockey wheels with the smallest cog. The chain sits one or two gears lower than it should, and clicking the shifter does nothing.
Here is the step-by-step process I use, and the one I have seen work hundreds of times.
Step 1: Shift to the Smallest Cog
Click your shifter until the chain is on what you believe is the smallest cog. If you are not sure, look at the cassette. The smallest cog is the one closest to the wheel and the spokes. If the chain sits on the second-smallest cog, you have already confirmed the problem.
Step 2: Locate the H Screw
Look at the back of the derailleur body where the cable enters. You will see two screws, usually marked “H” and “L.” The H screw is the one closest to the cassette, and it controls outward travel (toward the smallest cog). On Shimano derailleurs, the screws are typically Phillips head. On SRAM and older Campagnolo units, they are often hex or Torx.
Step 3: Loosen the H Screw
Turn the H screw counter-clockwise by quarter turns. After each turn, click the shifter to “easiest gear” again and see if the chain moves. You are looking for the derailleur to align with the smallest cog so the chain moves up.
The general rule: if the chain is sitting on a larger cog than it should (so it sits to the inside of the smallest cog), turn the H screw counter-clockwise to let the derailleur travel further outward. If the chain falls off the smallest cog toward the frame or makes a clicking noise near the spokes, you have gone too far and need to turn the H screw clockwise by a quarter turn.
Step 4: Test at the Smallest Cog
With the chain on the smallest cog, look from behind the bike. The upper jockey wheel should sit directly under the smallest cog, with about 1 to 2 millimeters of clearance between the pulley teeth and the cog. The chain should run straight from the pulley into the cog with no sideways angle.
Pedal forward gently. The chain should run quietly. If you hear ticking or feel the chain try to climb over the smallest cog, the H screw is still too loose. Turn it clockwise by an eighth of a turn at a time until the noise stops.
Step 5: Verify by Downshifting and Upshifting
Click through the entire cassette. Every shift should be crisp, with the chain moving up or down one cog at a time. If shifting into the smallest cog is now smooth but shifts to the middle of the cassette feel slow, you have cable tension issues, which we cover next.
That is the high limit screw fix. It usually takes less than five minutes the first time you do it, and even less the second time.
How to Fix Cable Tension When the Rear Derailleur Won’t Drop Into the Easiest Gear
If adjusting the H screw did not solve the problem, or if shifting to the smallest cog is sluggish after the H screw is set, the issue is almost certainly cable tension. This is the second most common reason a rear derailleur won’t drop into the easiest gear.
The shifter and derailleur communicate through the cable. When you click to a higher (smaller) cog, the shifter releases a small amount of cable. The derailleur spring then pulls the cage inward by exactly the right amount to land on the next smaller cog. If there is too much cable tension, the derailleur cannot travel far enough inward, and the chain stays on a larger cog.
How to Test for Cable Tension Problems
Shift to the smallest cog. Now look at the derailleur. Is it sitting visibly inward of where it should be? In other words, does it look like the cage is being held back by a tight cable? If yes, you have too much cable tension.
Another quick test: with the chain on the smallest cog, squeeze the derailleur body inward (toward the wheel) with your thumb. If the chain easily moves to a larger cog, your cable is too tight because the derailleur has more room to travel than the cable is allowing.
How to Adjust Cable Tension with the Barrel Adjuster
The barrel adjuster is the small knurled knob where the cable housing meets the derailleur, or sometimes at the shifter. Turning it counter-clockwise (looking at the open end of the barrel) releases a small amount of cable housing, which increases the effective cable length and reduces tension on the cable. This lets the derailleur travel further inward toward the smallest cog.
Start by turning the barrel adjuster counter-clockwise by a half turn. Click the shifter and watch the chain. If the chain still does not reach the smallest cog, give it another half turn. Keep going until the chain shifts cleanly to the smallest cog.
If your barrel adjuster is already fully turned out (counter-clockwise) and you still have a problem, that means the cable itself has stretched and the only fix is to re-clamp the cable with more tension. This is a deeper adjustment, and I cover it next.
How to Re-Clamp the Cable for a Fresh Tension Baseline
Sometimes cable stretch is the real culprit. Cables stretch slightly with use, and over months of riding, the cumulative stretch can leave you with a barrel adjuster that is fully extended and no room to fine-tune.
Shift to the smallest cog. Loosen the cable pinch bolt on the derailleur (the bolt holding the cable end). Pull the cable taut by hand — firm, but not over-stretched. Re-tighten the pinch bolt to manufacturer spec (usually 4 to 6 Nm). Now use the barrel adjuster for fine-tuning. You should be able to dial in perfect shifting with the barrel adjuster sitting roughly in the middle of its range.
This is a more involved fix, but it is the correct one when the barrel adjuster runs out of travel. I had a customer last summer who had ridden 4,000 miles on the same cable and his barrel adjuster was almost completely unscrewed. Re-clamping the cable bought him another 6 months of life, but I told him to plan on replacing the cable and housing soon.
If you want to learn more about keeping your drivetrain clean so cables last longer, our guide on bike cleaning and maintenance walks through the right way to do it.
How to Set B-Tension for Crisp Shifts Across the Cassette
Once the H screw and cable tension are sorted, the B-tension screw is the final adjustment. B-tension controls the gap between the upper jockey wheel and the cassette. If the gap is too small, the chain will not shift cleanly into the largest cog. If the gap is too large, shifting into the smallest cog can feel sluggish or noisy.
On most modern road and mountain bike derailleurs, the ideal B-gap is between 5 and 6 millimeters for road cassettes, and up to 12 to 15 millimeters for 1x mountain bike setups with very large cogs. The exact spec depends on the derailleur, so check the manufacturer’s instructions if you have them.
To adjust: shift to the largest cog. Loosen the B-tension screw lock ring if there is one, then turn the B-tension screw to bring the upper jockey wheel closer to or further from the cassette. Tighten the lock ring when you are happy with the gap. The chain should shift cleanly into the largest cog without hesitation, and the jockey wheel should not rub the cassette under power.
B-tension does not usually cause the rear derailleur to refuse to drop into the easiest gear, but it does affect the quality of shifting into that gear. If the chain reaches the smallest cog but feels “off” or noisy, B-tension is worth checking.
Cleaning and Lubing the Derailleur Spring: A Step Most Guides Skip
This is the part of rear derailleur maintenance that almost nobody writes about, and I think it is the most underappreciated reason for sluggish shifting. The derailleur’s internal spring is what pulls the cage inward to upshift to smaller cogs. If that spring is gummed up with old grease, dirt, or dried lube, it cannot do its job. The result is a derailleur that feels stiff, slow, or refuses to spring back into the smallest gear.
Here is the cleaning process I use twice a year, or whenever a bike comes in with mystery shifting problems.
Remove the rear wheel so you have clear access to the derailleur. Wipe the derailleur body down with a rag and a mild degreaser. Do not soak it, but do get the visible grime off. Then, with the derailleur still on the bike, drip a small amount of light chain lube or a specific derailleur pivot lube into the spring housing — this is the small hole or seam where the parallelogram plates meet. Work the derailleur back and forth by hand a dozen times to work the lube in. Wipe off the excess.
For deeper cleaning, you can fully remove the derailleur from the bike, disassemble the parallelogram plates, and clean each pivot. This is more involved, but if your bike has been ridden in wet or muddy conditions for a season, it can make a noticeable difference.
When I cleaned the pivots on my own commuter bike last spring, the shifting improved more from that 20-minute job than from the cable replacement I had done the month before. I wish more guides talked about it.
Symptom-to-Fix Diagnostic Reference
To save you from hunting through the article, here is the exact mapping of symptom to cause to fix. If you are in a hurry, scan this table first.
- Symptom: Chain sits on second-smallest cog and won’t shift up further. Likely cause: High limit screw too tight. Fix: Loosen the H screw counter-clockwise in quarter turns.
- Symptom: Chain shifts slowly to smaller cogs with a delay. Likely cause: Cable tension too high or sticky cable housing. Fix: Turn the barrel adjuster counter-clockwise to release cable. If the adjuster is fully out, re-clamp the cable.
- Symptom: Chain shifts to smallest cog but with a clunk or noise. Likely cause: B-tension is off, or H screw is too loose. Fix: Tighten the H screw clockwise by an eighth turn. Check B-tension.
- Symptom: Derailleur looks visibly misaligned with the cassette. Likely cause: Bent derailleur hanger. Fix: Use a hanger alignment tool or take the bike to a shop for re-alignment.
- Symptom: Shifting was fine last week but has gotten worse over time. Likely cause: Cable stretch or housing contamination. Fix: Re-clamp the cable and replace housing if it is old.
- Symptom: Shifting is sluggish even after adjustments. Likely cause: Worn chain or dirty derailleur spring. Fix: Check chain wear with a chain checker. Clean and lube the derailleur pivots.
Common Mistakes to Avoid
I have made every one of these mistakes at some point, and I have seen customers make them too. Avoiding them will save you time and money.
Don’t turn the limit screws more than a quarter turn at a time. Small adjustments have big effects. A half turn in either direction can move the derailleur’s range by multiple cogs.
Don’t skip the pre-checks. Adjusting a derailleur on a bike with a bent hanger or worn chain is like tuning a guitar with a broken string. It is wasted effort, and you can break something else in the process.
Don’t force the derailleur by hand past the limit. When testing, push the derailleur gently. If you have to muscle it, something else is wrong and you risk bending the hanger or damaging the derailleur body.
Don’t use the wrong screwdriver. A worn or wrong-sized screwdriver will strip the limit screw head, and a stripped limit screw is a frustrating problem that sometimes requires drilling the screw out and replacing the derailleur body. Use a JIS-compatible (Japanese Industrial Standard) screwdriver for Shimano derailleurs.
Don’t ignore the housing. Cables rarely fail at the cable itself. They fail inside the housing. If you replace the cable but not the housing, you are likely to have the same shifting problem within a few months.
When to Take the Bike to a Shop
Most of the fixes in this guide are within reach of a home mechanic with basic tools. But there are times when a shop is the right call. If the derailleur hanger is severely bent, if the derailleur body itself is damaged, if the cassette has a broken tooth, or if you have adjusted everything and the shifting is still not right, take the bike in.
A bike mechanic can re-align a hanger with a precision tool, replace a damaged derailleur, install a new cassette, or diagnose issues that are hard to spot at home. The cost of a service is usually modest compared to the cost of damaging a derailleur by over-adjusting.
If you ride into the backcountry often, a basic tool kit and a little practice with these adjustments is also smart preparation. Our piece on building an emergency bike repair kit covers the essentials to carry on a multi-day ride.
Frequently Asked Questions
Why is my derailleur not springing back?
If your rear derailleur is not springing back into the smallest gear, the most likely culprits are a gummed-up internal spring, a sticky cable housing, or a high limit screw that is set too tight. Try cleaning and lubing the derailleur pivots, replacing the cable housing, and loosening the H screw by a quarter turn. If none of those solve it, the spring itself may be worn and the derailleur will need replacement.
Why won’t my rear derailleur go into the smallest cog?
The three most common reasons are: the high limit screw is set too tight and physically blocking travel, the cable tension is too high and pulling the derailleur short, or the derailleur hanger is bent. Start by loosening the H screw counter-clockwise in quarter turns. If that does not help, turn the barrel adjuster counter-clockwise to release cable tension. If the cage still does not align with the smallest cog, check the hanger alignment with a tool or have a shop inspect it.
How do I reset a rear derailleur?
To reset a rear derailleur, start by shifting to the smallest cog. Loosen the cable pinch bolt, turn the H screw until the derailleur aligns under the smallest cog, then pull the cable taut by hand and re-tighten the pinch bolt. Use the barrel adjuster to fine-tune cable tension. Finally, adjust the L screw for the largest cog and the B-tension screw for the jockey wheel gap. This process gives you a clean baseline for indexing the gears.
What is the most common derailleur issue?
The most common derailleur issue is poor shifting caused by cable stretch and cable housing contamination. As cables age, they stretch slightly and the housing fills with grit and moisture, adding drag. This causes slow, hesitant shifts and eventually prevents the derailleur from reaching the smallest cog. Regular cable and housing replacement is the single best preventive maintenance you can do for your drivetrain.
How do I fix a rear derailleur that is not shifting?
Start with the pre-checks: inspect the cable and housing for damage, check the chain with a chain wear tool, and look at the hanger alignment. Then adjust the high limit screw for the smallest cog, the low limit screw for the largest cog, the cable tension via the barrel adjuster, and the B-tension for jockey wheel gap. Work one adjustment at a time and test shifting between each change. If the problem persists, take the bike to a shop for a closer look.
Can I move the rear derailleur by hand to test the limit screw?
Yes, and it is one of the best diagnostic tricks. With the bike off the ground and the chain on the smallest cog, gently push the derailleur body toward the wheel with your thumb. If it moves further inward (toward the wheel) past the smallest cog, the high limit screw is set too tight and is the cause of the problem. If the derailleur is already pressed firmly against the limit and will not move, the issue is cable tension or a bent hanger.
Final Thoughts on Fixing a Rear Derailleur That Won’t Drop Into the Easiest Gear
If your rear derailleur won’t drop into the easiest gear, the fix is almost always one of three things: the high limit screw, the cable tension, or the hanger alignment. The quickest path to a working bike is the diagnostic test I described at the start — push the derailleur with your thumb to see whether the limit screw is the issue, then adjust the barrel adjuster to rule out cable tension. From there, you can solve 90% of these problems in your garage with a single screwdriver and a few minutes.
The other 10% comes down to component wear and damage, and those are cases where a shop is the right call. A bent hanger, a stretched chain, a damaged cassette, or a worn derailleur spring will not respond to adjustment alone. Investing in a chain checker, a hanger alignment tool, and a fresh set of cables and housing will cover you for years of riding.
For more bike maintenance and riding tips, check out our guide on general bike maintenance tips, or any of the other resources on BetterBike. Get the gears working right, and enjoy the ride.