
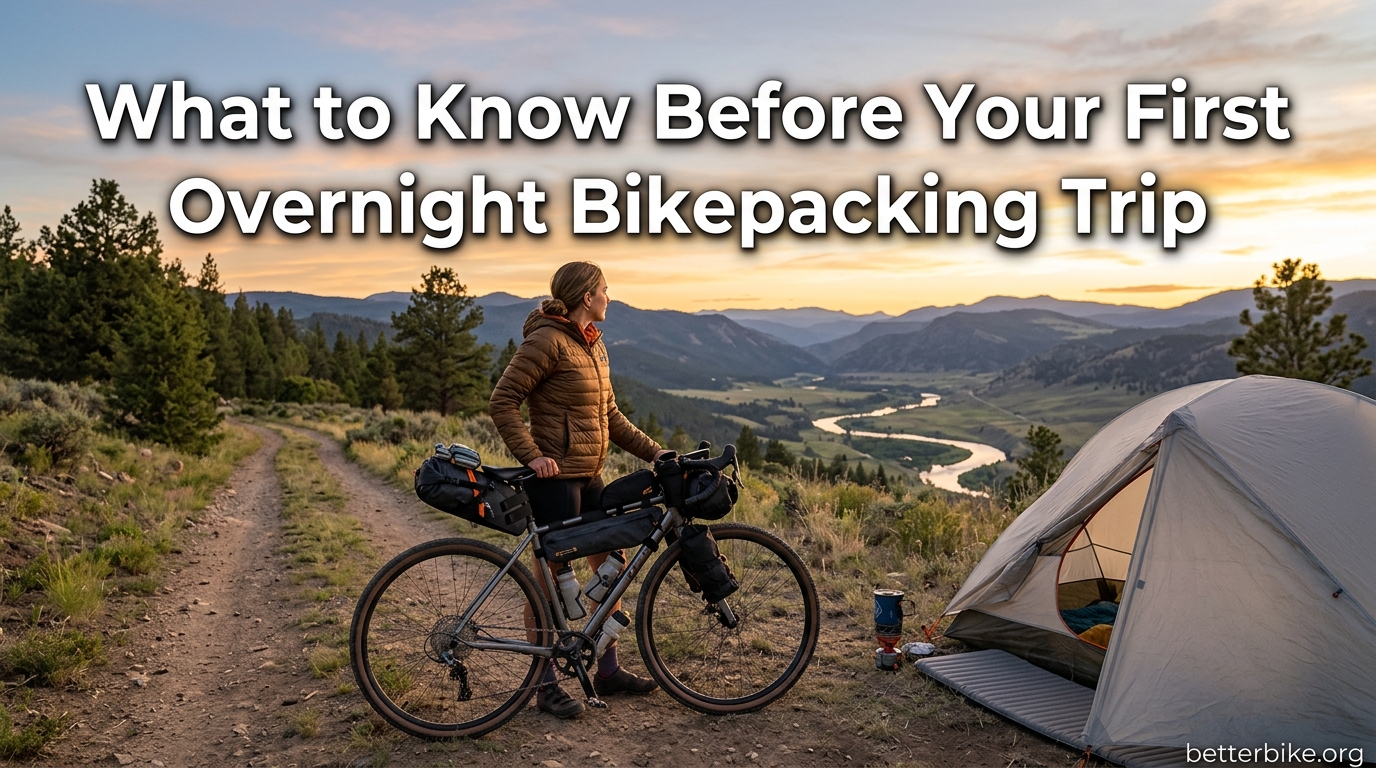
Before your first overnight bikepacking trip, you need to understand what bikepacking actually is, choose the right bike and bags, plan a short route close to home, pack a minimal sleep and repair kit, and rehearse your setup with a loaded test ride. That is the entire formula in one sentence, and it is far less complicated than it looks from the outside.
If you have been staring at glossy photos of riders crossing deserts with $4,000 rigs and wondering whether you are allowed to attempt this sport with a borrowed sleeping bag and the bike already in your garage, the answer is yes. Most lifelong bikepackers started exactly that way, including me on a rainy overnight in 2026 that I was thoroughly unprepared for and loved anyway.
Knowing what to know before your first overnight bikepacking trip removes the intimidation. It also keeps you from spending money you do not need to spend, riding farther than your body is ready for, or lying awake in a leaking tent at 2 a.m. wondering why you ever thought this was a good idea.
This guide covers everything I wish someone had told me before that first night out. We will define bikepacking versus bicycle touring (because the confusion stops beginners cold), break down gear you actually need, share a negative packing list of what to leave at home, give you an honest budget breakdown, and finish with a pre-trip checklist you can run through the morning you leave.
Table of Contents
What Is Bikepacking (and How Is It Different From Bicycle Touring)?
Bikepacking is multi-day cycling where your camping gear lives in soft bags strapped directly to the bike frame, handlebars, and seat post rather than on heavy racks and panniers. The setup is lighter, narrower, and better suited to dirt roads, gravel, and singletrack.
Bicycle touring is the older cousin: think loaded racks, four panniers, a heavier bike, and paved routes linking towns and hostels. Touring favors distance, comfort, and resupply. Bikepacking favors terrain, remoteness, and speed over rough ground.
Neither is better, and the line blurs constantly. Touring bikes handle gentle overnight bikepacking just fine, and a bikepacking rig with a rack can absolutely do credit-card touring. The distinction matters because it shapes the gear you buy, the routes you choose, and how much weight you carry.
Quick distinction: if you picture riding across a country on paved roads staying in inns, you are touring. If you picture pedaling forest roads to a lakeside camp you reached yourself, you are bikepacking. For a first overnight, you are firmly in bikepacking territory even if your bags are not fancy.
Why an Overnight Trip Is the Perfect Starting Point
The sub-24-hour overnight, nicknamed the S24O, is the gold standard for first-time bikepackers. You ride out in the afternoon, sleep somewhere scenic, and pedal home the next morning. Total commitment: about 18 hours including sleep.
This format shrinks the risk to almost nothing. If your rain jacket leaks, you are home by lunch. If you hate the food you packed, you only eat it twice. If a bag rubs on your tire, you fix it and ride back. An S24O is a controlled experiment, not an expedition.
I tell every new rider the same thing: do not plan a three-day desert crossing for trip number one. Plan a 30-mile loop with a campground at the midpoint. Repeat that overnight four times in different weather, then stretch to two nights. The skill compounds fast when failure is cheap.
An overnight also answers the questions you cannot answer at home. Does your sleep system keep you warm at the elevation you picked? Does your chamois cream last 50 miles? Does your headlamp fit over a helmet? You will only learn these things by sleeping out.
Can You Use the Bike You Already Have?
Yes. Almost any functioning bike with attachment points (or even without them) can complete a one-night bikepacking trip. The bike you already own is the best first bikepacking bike, full stop.
The community mantra from riders who have done this for a decade is consistent: do not buy a new bike to try a sport you might not love. Mount bags on whatever you have, ride it loaded for one night, and let the experience tell you what to upgrade later.
How Different Bike Types Handle Bikepacking
Gravel bikes are the most popular modern bikepacking platform. They accept wide tires, have relaxed geometry for long days, and roll fast on dirt roads. Most new bikepacking-specific frames are gravel bikes with extra mounts.
Hardtail mountain bikes shine on rough terrain and singletrack. The suspension fork eats chatter that would rattle a rigid bike, and the upright position is forgiving for new riders carrying unfamiliar weight.
Full suspension mountain bikes work too, but rear shock placement fights with frame bags. Many bikepackers use hardtails or rigid bikes because they carry loads better and have fewer pivots to maintain far from a shop.
Road bikes can pull off a pavement-only S24O with light bags and narrow tires. Skip anything more than smooth gravel.
Hybrids and flat-bar commuters are honestly perfect for that first overnight on rail-trails or bike paths. Use what is in the garage.
Tire Considerations for a First Trip
Tire width matters more than almost any other spec. For mixed dirt and pavement, shoot for at least 40mm on a gravel bike or 2.0 inches on a mountain bike. Run lower pressure than you would on pavement (around 30 to 40 psi for a 200-pound rider on a gravel bike) for grip and comfort.
Tubeless setups seal small punctures on their own, which is a major quality-of-life upgrade for off-road riding. If your bike is not tubeless, carry two spare tubes and a patch kit. That redundancy has rescued more first trips than any other single piece of gear.
Essential Gear Checklist for a First Overnight
Here is the honest, minimal gear list for a single night out. Everything below fits on a single bike without a backpack, and none of it is exotic. If you have backpacked or car-camped before, you may already own half of it.
Sleep System
A sleeping bag rated 10 to 15 degrees Fahrenheit colder than your expected low is non-negotiable. A sleeping pad with a real R-value of 3.0 or higher keeps you warm from the ground up; this is the most-skipped item by beginners and the most common reason for a miserable night. Add a bivy sack or lightweight tarp for shelter unless you know the forecast is guaranteed dry.
A full tent is fine if you already own one and can fit it on your handlebars or in a seat bag. For a first trip in mild weather, many riders skip the tent entirely and use a bivy. Borrow before you buy.
Cooking Kit
A small canister stove, a single pot, a spork, and a lighter cover 90 percent of first-trip meals. Skip the nesting cook sets with four pots and a frying pan. One 750ml pot boils water for freeze-dried meals, coffee, and instant oatmeal, which is all most beginners want to eat on night one.
Food and Water
Plan 2,500 to 3,500 calories per day depending on body size and climbing. Aim for roughly 100 calories per mile ridden as a rough planning figure. Pack dense foods: nuts, cheese, tortillas with nut butter, jerky, bars.
Carry a minimum of two large water bottles for cool weather rides under 40 miles. Add a third bottle or a hydration bladder for warmer days or longer distances. A small water filter (or purification tablets as a cheaper backup) lets you refill from streams if your route crosses them.
Clothing (What to Wear and Pack)
Ride in padded shorts, a jersey or tech tee, and a light wind layer. Off the bike, you want dry layers: merino wool base layer, a puffy or down jacket, a packable rain shell, warm socks, and a beanie. Wool resists odor and stays warm when damp, which is why experienced bikepackers wear it religiously.
Do not pack a second riding kit for an overnight. Wash the chamois in a stream if needed and accept some grit. Pack weight savings come from skipping duplicates.
Tool and Repair Kit
Your minimum repair kit: two tubes, patch kit, tire levers, mini-pump or CO2 inflator, multi-tool with a chain breaker, quick link, spare derailleur hanger, zip ties, and a small tube of chain lube. Know how to use every item before you leave home.
Tire sealant in tubeless setups dramatically reduces flat tire stops. Top off sealant every few months because it dries out.
Electronics
A headlamp (better than a phone flashlight because it leaves your hands free), a 10,000 mAh power bank, charging cable, and your phone with offline maps downloaded. That is the entire electronics kit for one night. Skip the speaker, the camera with three lenses, and the laptop.
First Aid and Toiletries
A small first aid kit with bandages, antiseptic wipes, ibuprofen, antihistamines, tweezers, and any personal meds. Add chamois cream, sunscreen, lip balm, and a small roll of toilet paper in a zip-top bag. A trowel for cat-hole burial matters if your route is away from established bathrooms.
Bikepacking Bags Versus Racks and Panniers
For your first trip, use whatever you already own. If that is rear rack and panniers from a commuting setup, use those. If a friend will loan you a frame bag and seat pack, use those. Soft bikepacking bags shine on rough terrain because they are lighter and do not stress welded rack mounts. Panniers shine for carrying volume and organization. Neither is wrong for an overnight.
What NOT to Bring: The Negative Packing List
More first trips are ruined by overpacking than underpacking. Here is what experienced bikepackers consistently tell beginners to leave at home.
A backpack. Riding loaded with a pack causes back sweat, shoulder fatigue, and shifted center of gravity. Mount everything on the bike. The only exception is a tiny hip pack for snacks and a phone.
A second set of riding clothes. One chamois, one jersey. Reuse them. Pack only dry camp clothes.
A camp chair or pillow. Use a stuff sack stuffed with clothes as a pillow. Sit on your sleeping pad. These “comfort” items are dead weight on a bike.
A giant multitool or full-size knife. A compact multi-tool with 8 to 10 functions handles every realistic repair. Anything bigger is theatre.
Multiple lens cameras, tripods, drones. One phone or one small camera. The trip is for riding, not for content production on night one.
Backup backup backups. Two spare tubes, not four. One lighter, not three. One power bank, not three. Redundancy for safety items is smart; redundancy for redundancies is just weight.
Cooking multiples. One pot, one stove, one spork. Do not bring a frying pan, a kettle, and a French press.
A huge first aid kit. Bandage material for one realistic wound, painkillers, antihistamines, your personal meds. A shoebox-size kit is what people bring car camping, not bikepacking.
Books, journals, kindles. The phone you already carry holds 10,000 books. Save the weight.
The negative packing list matters because every pound on the bike changes how it handles. A 25-pound load feels playful. A 45-pound load feels like a truck. Beginners who carry too much quit the sport at higher rates because the riding is miserable, not because bikepacking is fundamentally hard.
Bike Preparation and the Loaded Test Ride
Your bike needs three things checked before any overnight: brakes that stop confidently under load, tires with no sidewall damage and appropriate pressure, and a chain that is lubed and clean. That is the basic triage.
Check brake pad thickness. Loaded descents burn through pads faster than unloaded riding, and you do not want to discover glazed pads at the top of a hill. Squeeze each brake hard while pushing the bike forward; if either lever pulls to the bar, fix it before you leave.
Run a finger along the chain. If it is dry or squeaky, apply lube, let it sit, and wipe off the excess. A dry chain on a 40-mile ride will not destroy anything, but it makes the pedaling feel awful and accelerates wear.
Inspect tires for cuts, embedded glass, and sidewall fraying. Inflate to the low end of the recommended range for off-road grip. Pump them up the morning of departure, not the night before, because tubes and tubeless setups both lose pressure overnight.
The Loaded Test Ride
Before the real trip, load your bike exactly as you will for the overnight and ride it for an hour around your neighborhood. Every single experienced bikepacker recommends this step, and every single one of them has a story about skipping it.
The test ride reveals problems you cannot see from your living room: the seat bag sways and rubs the tire, the handlebar bag pulls cables when you turn, the frame bag prevents you from standing to pedal, water bottles are now blocked by bags. Each of these is a five-minute fix at home and an hour-long ordeal on a trail.
Pay attention to how the bike steers. Loaded bikes feel sluggish at low speed and twitchy at high speed. Brake earlier than usual. Practice a low-speed u-turn and a dismount, because both feel different with 25 pounds of gear on the frame.
Route Planning for a First Overnight
Route planning is the single biggest source of anxiety for first-time bikepackers. It does not need to be. The formula for a first route is simple: 25 to 50 miles out, a known camp spot at the halfway point, low-elevation dirt or gravel roads, and a bailout option to pavement if anything goes wrong.
How Far Should You Ride?
For your first overnight, plan 30 to 60 miles total over two days. That is 15 to 30 miles out, sleep, ride home. Average bikepacking pace on mixed terrain runs about 8 to 10 miles per hour including short breaks, which means you are pedaling for two to three hours per day. Anyone who can ride a bike can do that.
Long-time bikepackers on multi-week routes average 50 to 70 miles per day. Beginners should not aim for that. Your first trip exists to test your gear and your interest, not to set a distance record.
Tools for Planning a Route
Three free or freemium apps dominate bikepacking route planning. Komoot is best for surfacing interesting routes and showing surface types (paved, gravel, singletrack). RideWithGPS is loved for turn-by-turn reliability and elevation profiles. GaiaGPS shines for public land overlays and offline maps in remote areas.
For a first trip, pick a route someone else has already published. Bikepacking.com, Komoot Collections, and local cycling club forums have thousands of tested overnight routes. Use one. Save the route-finding heroics for trip number five.
Picking a Camp Spot
Established campgrounds are the lowest-stress option for a first overnight. Reserve a site, pay the small fee, and you get a flat spot, a picnic table, and usually a water spigot and bathroom.
Wild camping (also called dispersed camping) is legal on most National Forest and BLM land in the United States as long as you follow Leave No Trace principles. State lands vary widely; check regulations before you go. Private land is off limits without explicit permission.
For a first trip, an established campground removes variables. You have enough new variables to manage already.
Mileage Benchmarks by Terrain
On paved rail-trails and smooth gravel, plan 15 mph average and 30 to 50 mile days. On rougher forest roads, expect 10 to 12 mph and 25 to 40 mile days. On singletrack with loaded bikes, expect 5 to 8 mph and shorter 15 to 25 mile days. Plan for the slow end of those ranges on trip one.
Food and Water Planning
Plan food around calories per hour, not meals per day. A loaded bike burns roughly 500 to 700 calories per hour of riding. A 25-mile day might demand 2,500 to 3,500 calories total, including base metabolism. Pack dense food.
Good bikepacking foods: tortillas with nut butter and honey, hard cheese, salami, trail mix, bars, instant oatmeal, freeze-dried meals, instant coffee. Bad bikepacking foods: anything that bruises (bananas survive only in hard containers), anything that melts, anything that needs refrigeration, anything bulky per calorie.
Eat before you are hungry and drink before you are thirsty. Beginners under-fuel because the riding feels easy at mile 10 and they do not realize they have burned through glycogen until mile 25, when they bonk.
Water
Plan one large water bottle (24 oz) per two hours of riding in cool weather. Double that in heat or on climbs. Know your water sources ahead of time: campgrounds with spigots, gas stations, streams if you carry a filter.
Treat every “reliable” water source as suspect until you see it flowing. Springs go dry in summer, campgrounds shut off spigots off-season, and the creek marked on your map may be a mud puddle. Always carry enough water to get to the next confirmed source plus a two-hour buffer.
Weather Preparation (the Skill Nobody Teaches)
Weather is the single biggest variable on a bikepacking trip, and almost no beginner guides cover it. The good news: for an overnight, you can pick your weather window. Watch the forecast for the morning you leave, and if it looks ugly, reschedule.
Check three things beyond temperature: wind speed and direction, precipitation probability, and overnight low. A 40 F daytime ride feels fine; a 40 F overnight with a 30 F bag feels freezing. Wind doubles your effort on open roads and turns a comfortable descent into a shivering one.
Mountain weather rules: temperatures drop about 3.5 F per 1,000 feet of elevation gain. A 70 F valley day can be a 45 F night at a 7,000-foot camp. Afternoon thunderstorms are routine in the Rockies and Sierra in summer; plan to be off exposed ridges by 1 p.m.
Layer for the cold, not the warm. You can always unzip a jacket; you cannot put on layers you did not bring. Pack a real rain shell even when the forecast shows 0% chance of rain, because forecasts are wrong and a 30-minute rain shower with no shell means a cold, wet night.
Body and Mental Preparation
The physical side of bikepacking is real but overstated. If you can ride 20 miles unloaded without hating life, you can ride 25 miles loaded. The mental side, on the other hand, is where beginners actually struggle.
Body Prep
Aim for at least one ride per week in the month before your trip that is at least 60% of your planned day-one distance. Add some climbing. Ride the bike you will use with bags on it for at least one of those rides.
Two rules that experienced cyclists lean on: the 75% rule says that roughly 75% of your training rides should be at a conversational pace, easy enough that you could talk in full sentences. The 80% rule (also known as the 80/20 rule) says about 80% of training volume should be low-intensity and about 20% at higher intensity. Both point at the same truth: most of your riding should feel almost too easy, and that builds the endurance base you need for loaded miles.
Stretch after rides, especially hip flexors, hamstrings, and lower back. Five minutes of post-ride stretching prevents the stiff-backed walk around camp that screams “first timer.”
Mental Prep
The fear beginners actually carry is rarely about gear or fitness. It is fear of the unknown: what if I get lost, what if my bike breaks, what if I am cold, what if a bear shows up, what if I hate it.
Counter each fear with a specific plan. Lost? Offline maps plus a paper map backup plus a planned route. Bike breaks? Repair kit plus the phone number of someone who can pick you up. Cold? Extra layers plus the option to bail. Bear? Bear hang for food plus standard wildlife practices; in most of the lower 48 this is a low-probability worry.
Imposter syndrome is real and well-documented in bikepacking forums. New riders see Instagram rigs worth more than their car and assume they need that to participate. They do not. The community is overwhelmingly welcoming, and almost everyone who has been at this for a decade started on a janky first setup they now laugh about.
Accept that the first trip will probably be imperfect. The food will be wrong, the bag will rub, the temperature will surprise you. Every experienced bikepacker has the same first-trip story. The point is to take the trip, learn the lessons, and go again.
Safety and Leave No Trace
Safety for a first overnight comes down to four practices: tell someone your route and expected return time, carry a charged phone with offline maps, ride within your limits, and have a bailout plan.
The “phone a friend” rule from the bikepacking community is simple: text one person your route, your camp spot, and when you expect to be back in cell range. If they do not hear from you by that time, they call for help. This is the most-used safety system in bikepacking, and it is free.
For routes that leave cell coverage, a satellite communicator (Garmin inReach, Zoleo, SPOT) lets you trigger SOS and text home. These cost money, both for the device and a subscription, so most beginners skip them for trip one. That is reasonable if your route stays in cell range. For a remote first trip, rent or borrow one.
Leave No Trace
Bikepackers travel through fragile places. Follow Leave No Trace principles: pack out all trash including food scraps, camp on durable surfaces at least 200 feet from water, bury human waste in a 6 to 8 inch cat hole at least 200 feet from water, and avoid loud noise that disturbs wildlife and other visitors.
The two most-violated principles by new bikepackers are leaving micro-trash (orange peels, fruit pits, energy bar wrappers) and creating new fire rings. Carry everything out, including organic waste that does not belong in that ecosystem. Use existing fire rings only, follow local fire restrictions, and consider a small stove instead of a campfire entirely.
Honest Budget Breakdown for a First Trip
One of the biggest content gaps in beginner bikepacking writing is honest money talk. Here is what to expect, based on what first-timers actually spend.
Budget tier (under $200 total): borrow a sleeping bag and pad, use a rear rack and panniers you already own, ride your current bike, eat grocery-store food, sleep in an established campground. This works. I know riders who did a dozen overnights this way before buying anything.
Starter tier ($300 to $600): buy a basic seat pack ($60 to $100), a frame bag or feed bags ($40 to $80), a used or budget sleeping pad ($80 to $120), an entry-level sleeping bag rated to your conditions ($100 to $200), a small canister stove ($30 to $50), and a basic tarp or bivy ($50 to $100). This gets you a real bikepacking kit that will last years.
Mid tier ($800 to $1,500): add a proper bikepacking tent or mid shelter ($250 to $400), a higher-R-value pad ($120 to $180), a nicer 20 F down bag ($250 to $400), a full set of quality bikepacking bags from one brand ($300 to $500), and a small power bank with solar option ($40 to $80).
Premium tier ($2,500+): a dedicated bikepacking bike, ultralight everything, custom bags, satellite communicator. Skip this entirely on trip one.
Borrow Versus Buy
Borrow whatever you can. Sleeping bags, pads, stoves, and bags all loan well. Buy only what you cannot borrow and what you will use on future trips. Almost no one regrets buying a good rain jacket, multi-tool, or chamois cream. Almost everyone regrets buying a fancy bikepacking tent on trip one before knowing if they like the sport.
The Pre-Trip Checklist (Run Through This the Morning You Leave)
Print this or screenshot it. Walk through every item before you pedal away from home. Five minutes here saves a ruined trip later.
- Tires inflated to target pressure, no visible cuts or glass
- Chain lubed within the last week, wiped clean
- Brakes squeeze firmly and stop the loaded bike confidently
- Two spare tubes, patch kit, tire levers, mini-pump or inflator
- Multi-tool with chain breaker, quick link, and zip ties
- Spare derailleur hanger (specific to your bike)
- Phone fully charged, offline maps downloaded, route loaded
- Power bank charged, cable tested
- Headlamp with fresh batteries
- First aid kit with personal meds
- Chamois cream, sunscreen, lip balm
- Enough food for the day plus one emergency meal
- Water bottles filled, plus a backup if your route is long
- Layers packed: rain shell, puffy, wool base layer, beanie, warm socks
- Sleep system: bag, pad, shelter
- Cooking kit: stove, fuel, lighter, pot, spork
- One full set of dry camp clothes
- Toilet paper in a zip-top bag, small trowel
- Cash and ID in a waterproof bag
- Texted your route and expected return time to a friend
- Weather forecast checked within the last two hours
- Bags mounted securely, no rubbing on tires, no cable interference
- Loaded test ride completed within the past week
Common Beginner Mistakes (and How to Dodge Them)
Going too far. The most common first-trip mistake is planning 60-mile days. Cut it in half. The point is to finish wanting more, not to suffer through and quit.
Wearing a backpack. Riding with a loaded pack causes back pain and sweat soak. Mount gear on the bike, even if it takes some creativity with straps.
Skipping the loaded test ride. Bag-rubs-tire issues are universal and impossible to predict without riding the loaded bike. Always test.
Underpacking warm clothes. Days feel warmer than nights, especially at elevation. Pack for the overnight low plus 10 degrees of margin.
Bringing too much food variety. Eat the same simple thing twice. Gourmet camp cooking is for trip five, not trip one.
Not knowing how to fix a flat. Practice at home in your kitchen before you leave. Fixing a flat on a cold trailside with no idea what you are doing is a top reason first trips end early.
Ignoring water planning. “I’ll find water on the way” has ended more first trips than mechanical failures. Know your sources.
Comparing your setup to others. The bikepacking internet is full of beautiful rigs. Your borrowed-sleeping-bag, pannier-and-all setup is what almost every veteran started with. Go ride it.
What is the average mileage for bikepacking?
Average daily mileage on a multi-day bikepacking route runs about 50 to 70 miles per day for experienced riders on dirt and gravel roads. Beginners should plan 15 to 30 miles per day on a first overnight, doubling that only after a few successful trips. Pace on singletrack drops to 15 to 25 mile days because loaded bikes handle slowly on technical terrain.
What is the 75% rule in cycling?
The 75% rule says that about 75% of your training rides should be done at an easy, conversational pace where you could speak in full sentences. This low-intensity volume builds aerobic endurance without burning you out. The remaining 25% of riding can be harder efforts. Applied to bikepacking prep, it means most of your pre-trip rides should feel almost too easy, which is what builds the fatigue resistance needed for loaded miles.
What is the 80% rule in cycling?
The 80% rule, also called the 80/20 rule, states that roughly 80% of training volume should be low-intensity and about 20% at higher intensity. It is the same idea as the 75% rule framed by intensity rather than ride count. For bikepacking preparation, this means the bulk of your miles leading up to a first overnight should be easy endurance riding, with occasional harder efforts mixed in.
What color bike is least likely to be stolen?
Bikes in unusual or muted colors tend to be stolen less often than flashy red, white, or black models. Studies and anecdotal bike theft data suggest that high-visibility colors like bright yellow or orange, and unusual paint jobs, are less attractive to thieves because they are harder to resell. For bikepacking, the practical takeaway is less about theft deterrence and more about visibility on the road: brighter colors also make you more visible to drivers on paved sections of your route.
Can I go bikepacking with a regular bike?
Yes, you can go bikepacking with almost any functioning bike. Gravel, hardtail mountain, hybrid, and even road bikes with light loads have all completed first overnights. The bike you already own is the best first bikepacking bike because it lets you try the sport before investing. Mount bags on what is in your garage and ride it loaded for one night before upgrading anything.
How much weight should I carry bikepacking?
Total loaded gear weight for a first summer overnight should land between 15 and 25 pounds including water and food. This includes sleep system, cooking kit, clothing, tools, food, and water. Aim for the low end on mild-weather routes and the high end if you are carrying extra water or cold-weather layers. Anything over 30 pounds usually means you are overpacking for a one-night trip.
Do I need special bags for bikepacking?
No, you do not need special bags for a first bikepacking trip. A rear rack with panniers, a backpacking backpack strapped to a handlebar, or borrowed soft bikepacking bags all work. Purpose-built frame, handlebar, and seat bags are lighter and handle better on rough terrain, which is why experienced bikepackers use them, but they are an upgrade, not a requirement, for trip one.
How do I find a bikepacking route for my first trip?
The easiest way to find a first bikepacking route is to search published routes on Komoot Collections or the route library at bikepacking.com, both of which include user-tested overnights. Pick a route under 50 total miles with an established campground at the midpoint and a bailout option to pavement. Local cycling forums and bike shops are also excellent sources for regional suggestions tailored to beginners.
What if my bike breaks down on a bikepacking trip?
If your bike breaks down on a bikepacking trip, your repair kit and phone are your two main lifelines. Carry a multi-tool with chain breaker, spare tubes, patch kit, tire levers, mini-pump, quick link, and a spare derailleur hanger, and know how to use them. For problems you cannot fix on the trail, walk to the nearest road, call for a pickup, or use a satellite communicator if you are out of cell range.
Should I go bikepacking alone or with a friend?
For your first bikepacking trip, going with a friend or small group is generally easier and more fun. You can share gear weight, problem-solve together, and lower the intimidation factor. Solo bikepacking is rewarding and absolutely doable for a first trip if you stay close to home, share your route with someone, and carry the safety basics, but the social version is a smoother entry for most beginners.
Final Thoughts: Just Go
If you take one thing from this guide to what to know before your first overnight bikepacking trip, let it be this: you already have enough. The bike in your garage, a borrowed sleeping bag, a stuffed seat pack, and a 30-mile route to a campground are enough for trip one.
Pick a weekend in 2026, watch the weather, run through the pre-trip checklist, and ride out somewhere you can be home by lunch the next day if it goes sideways. Imperfect trips are the only kind of first trips. The point is to start the loop of planning, riding, learning, and going again that turns into a lifelong habit.
The bikepacking community is full of riders who waited years because they thought they needed a better bike or fancier bags. They almost all wish they had just gone sooner. Be the rider who goes sooner. Pack light, tell a friend your route, and pedal out toward a camp you reached under your own power. Everything else will work itself out on the trail.