
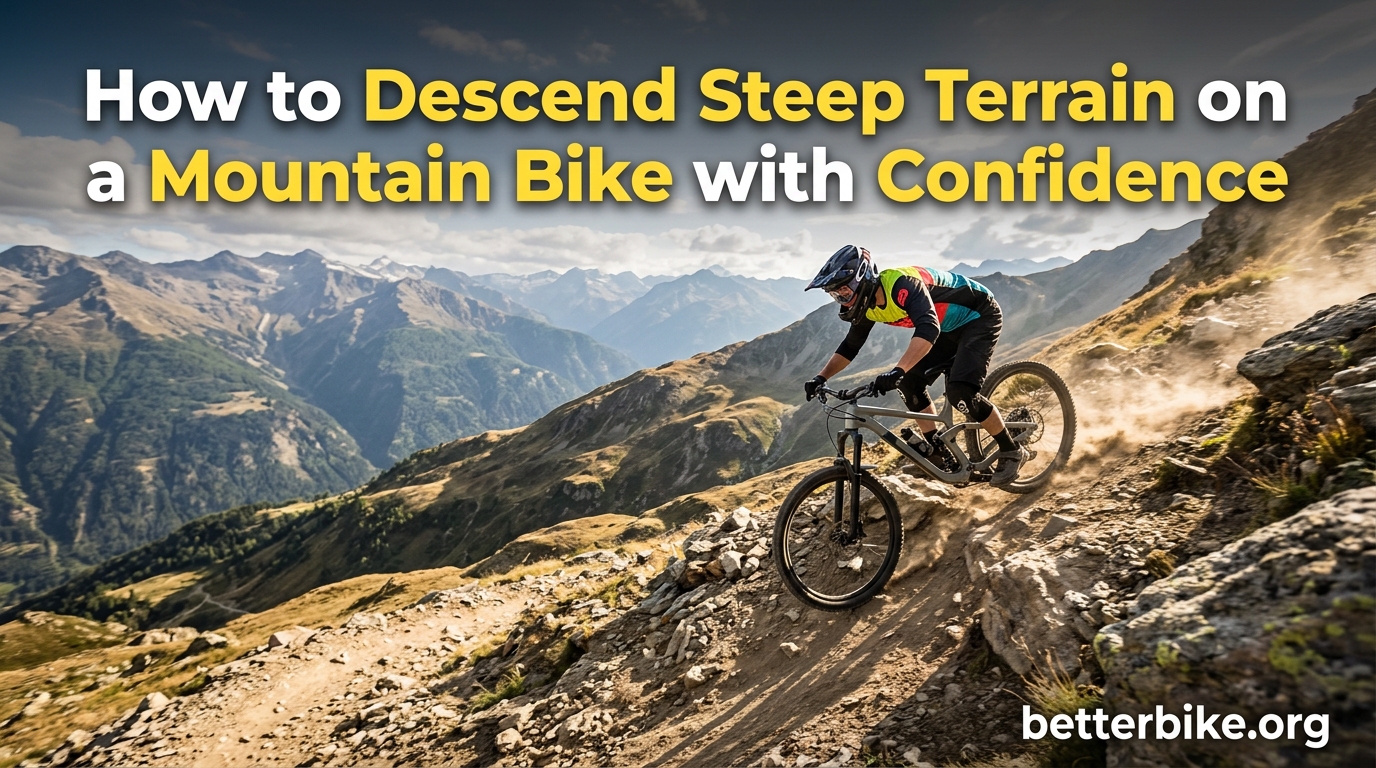
I still remember the first black diamond descent that made my hands shake. I sat at the top, stared down the rock-strewn chute, and wondered if I was about to launch over the bars. That moment taught me something every mountain biker eventually learns: descending steep terrain is less about raw talent and more about repeatable technique. Our team has spent years riding technical trails across the Pacific Northwest, the Mojave, and the Alps, and we have tested what works when the slope gets serious.
Learning how to descend steep terrain on a mountain bike with confidence is a skill that compounds. The first time you roll into a steep section with proper body position, you stop fighting the bike. The second time, you start looking for grip points. By the tenth descent, the trail feels playful instead of punishing. This guide will walk you through the exact technique progression we use with new riders in our coaching clinics, plus the mental tools that keep fear from sabotaging good form.
By the end of this article, you will understand the body position that makes gravity your friend, the braking technique that keeps you controlled, and the practice drills that build real muscle memory. You will also get our team’s favorite mental strategies for managing the fight-or-flight response that hits hard on sketchy terrain. Let us get into it.
Table of Contents
Body Position Fundamentals for Steep Descents
Body position is the single biggest factor separating riders who flow down steep terrain from riders who fight it. Get this right and the rest of the puzzle pieces fall into place. Get it wrong and no amount of brake power or fancy suspension will save you. Here are the seven core cues that our team drills into every new rider:
- Move forward over the bottom bracket to load the front tire.
- Bend your elbows wide and out, like you are hugging a bear.
- Keep your knees bent and active, ready to absorb movement.
- Drop your heels slightly below the pedals for a low center of gravity.
- Keep your chest low and your eyes on the trail 2 to 3 meters ahead.
- Stay loose in the upper body so the bike can move beneath you.
- Keep your fingers covering the brake levers, ready to modulate.
These seven cues form what mountain bike coaches call the attack position. It is the stance you should be in the moment the trail points downward, before any braking or line choice happens. Mastering this neutral, ready stance is the foundation for everything else on a steep descent.
The Attack Position: Your Foundation on Steep Terrain
The attack position gets its name from the military concept of being ready to move at any second. On a mountain bike, it means your body is balanced, your joints are loaded, and you can react instantly to whatever the trail throws at you. Most beginners do the opposite: they sit tall on the saddle, lock their arms, and stare at their front wheel. That position turns the bike into a bucking bronco.
When you commit to the attack position, your hips float just behind or over the saddle, your torso leans forward, and your arms act as separate shock absorbers from your legs. This creates what Fluidride coach Simon Lawton calls “flexion creates extension.” Your bent joints store energy that releases smoothly into the bike, rather than the rigid posture that bounces you around.
On a steep descent, gravity is trying to pull you forward over the handlebars. The attack position counteracts that by keeping your weight centered low and back enough to maintain rear wheel traction, but forward enough to keep the front tire loaded and steering. It is a narrow sweet spot, and it is exactly where you want to be when the trail tilts past 15 degrees.
Why the ‘Weight Back’ Myth Is Dangerous
If you took a mountain bike lesson in the early 2000s, you probably heard the phrase “get your butt off the back of the saddle.” For two decades, this was the standard advice for descending. Our team used to teach it. Then we watched countless riders loop out, slide out, and crash on terrain they would have handled fine with proper technique. The “weight back” approach is broken, and modern coaching has moved on.
When you shift your weight behind the saddle on a steep descent, three bad things happen. First, your front tire unloads and starts wandering, robbing you of steering control right when you need it most. Second, your rear wheel becomes overloaded, breaks traction easily, and can slide out on loose terrain. Third, your arms lock out because your body is bracing against gravity rather than working with the bike.
Instead of thinking “back,” think “low and centered.” Drop your chest toward the stem, keep your hips hovering over the saddle, and let the bike move beneath you. Our team’s head coach, who has ridden World Cup DH courses, sums it up this way: “I never tell riders to get back anymore. I tell them to get low, get forward at the knees, and trust the front wheel.” The result is a bike that steers where you point it and stays planted through rough sections.
Knees-Over-Toes for Proper Balance
The knees-over-toes principle is the simplest cue that fixes 80 percent of body position problems we see in new riders. When you stand on the pedals with your knees tracking directly over your toes, your hips naturally settle into the right spot. Your weight centers over the bottom bracket, which is the lowest and most stable point on the bike.
To find this position, stand on flat ground with one pedal at the 3 o’clock position. Push down on that pedal until your leg is roughly 80 percent extended. Now look down. Your front knee should be directly above your toe, not collapsed inward or flared outward. This is the alignment you want when you are rolling into a steep descent.
Many riders struggle with knee collapse, especially after years of road cycling where the pedaling motion is more linear. Off-road, that inward collapse puts your weight off-center and makes the bike twitchy on side slopes. Practice the knees-over-toes drill on grass before taking it to the trail. After a few sessions, the position becomes automatic, and your descents will start to feel eerily stable.
Braking Technique: Modulation Over Grabbing
Braking on a steep descent is where most beginners sabotage themselves. They see a steep section, grab a handful of front brake, and wonder why they are now sliding down the trail on their side. The truth is that good descending requires you to brake less than you think you should. Speed is often your friend on steep terrain. Traction is your friend. Slamming the brakes is your enemy.
Our team uses what we call the 70/30 braking rule, and it is the single biggest change you can make to your descending. Roughly 70 percent of your stopping power should come from the front brake, and roughly 30 percent from the rear. This ratio keeps the rear wheel stable and prevents the front end from washing out or going over the bars.
How to Control Speed on a Steep Mountain Bike Descent
Speed control on steep terrain is not about riding the brakes continuously. It is about strategic braking in specific zones. The technique is called brake modulation, and it is the difference between a smooth descent and a skid-fest.
Brake modulation means applying the levers with progressive pressure rather than full grab. Most modern mountain bike brakes have excellent modulation, meaning you can feather them lightly without locking up the wheels. On a steep descent, this lets you scrub speed right before a corner or obstacle without losing traction.
Here is the sequence our team teaches: as you approach a steep section, give the brakes a firm squeeze to set your speed. Then release to neutral. Then squeeze again right before the next feature. The pattern is pump-brake-pump-brake, never a continuous drag. Continuous dragging overheats your brake fluid, causes fade, and tends to lock the rear wheel on loose terrain.
The 70/30 Braking Rule
The 70/30 braking rule sounds simple, but executing it under pressure is harder than it looks. When riders panic on steep terrain, they instinctively grab the rear brake because it feels safer. Unfortunately, the rear brake does almost nothing for stopping on a steep descent because the rear wheel is light. Most of your weight is on the front tire, which means most of your grip and most of your stopping power is also up front.
To practice 70/30, find a moderate hill and ride down it while consciously weighting your front brake harder than your rear. Start at 50/50 and gradually shift to 60/40, then 70/30. You will notice the bike stays more composed and your rear wheel stops sliding out. This is the modern mountain bike descending technique, and it is the same approach used by pro downhill racers.
One important caveat: the 70/30 rule applies to steep descents on a mountain bike. On flat terrain or gentle slopes, the rear brake is more useful for speed control. Save the heavy front brake work for when gravity is doing the accelerating.
When to Brake and When to Let Go
Knowing when to let off the brakes is just as important as knowing when to apply them. Counterintuitively, the fastest line down a steep section is often the one where you brake the least. This is because momentum carries you through rough sections, and your suspension can only do its job when the wheels are free to move.
Our rule of thumb: brake before the rough section, not during it. Pick your line, scrub speed with a firm controlled squeeze, then release the brakes and let the bike roll. If you find yourself braking through chunky rock gardens, you entered too fast. Reset, approach slower, and try again.
Trust is the hardest part. After years of being taught that brakes equal safety, letting go on a steep descent feels like stepping off a cliff. Our team has watched dozens of riders gain real confidence by intentionally riding a slightly easier line with no brakes at all. The bike stays planted, the suspension works, and they realize the trail is more manageable than they thought.
Line Choice and Reading Steep Terrain
Reading terrain is the skill that separates riders who pick clean lines from riders who ping-pong between obstacles. On a steep descent, the line you choose determines whether you stay smooth or get bucked around. A good line uses the natural features of the trail, while a bad line fights them.
Our team approaches every steep descent with the same three-step process. First, we look for grip points. Second, we identify the smoothest path between them. Third, we commit to that line at the speed we want to travel. This ritual takes about 5 seconds at the top of a section and saves countless mistakes on the way down.
Spotting Grip Points on Loose or Rocky Trails
Grip points are the spots on the trail where your tires will find the most traction. On a steep descent, your tires are constantly searching for grip, and the difference between a clean descent and a sketchy one is whether you are aiming for the grippy spots or the slippery ones. Grip points include embedded rocks, root tangles, packed dirt, and the inside or outside edge of a berm.
Loose, rocky terrain is where grip point selection matters most. On these surfaces, avoid the smoothest-looking line. Smooth usually means loose rocks that will slide. Instead, aim for the rough-looking patches, the ones with visible rocks, roots, or embedded stones. These provide tire teeth for your knobs to bite into.
A common mistake we see is riders aiming for the path of least resistance, which often takes them down the center of a chute. On loose terrain, the edges of the trail tend to have better grip because fewer riders have scrubbed them smooth. Look for the darker dirt, the off-camber roots, the rough patches. Those are your grip points.
Why Faster Often Means Safer
Here is a counterintuitive truth our team has tested hundreds of times: on steep, rough descents, going slightly faster is often safer than creeping down at walking pace. The reason is physics. At higher speeds, your bike’s suspension cycles through its travel, keeping the wheels in contact with the ground. At slow speeds, the suspension sits in the middle of its travel and can deflect off obstacles, sending you off line.
This does not mean you should huck down every descent. It means you should find the speed where your bike feels composed. That speed is usually faster than you think. Our team uses the phrase “commit speed.” It is the speed at which you have committed fully to the descent, with no temptation to dab a foot or grab a handful of brake mid-section.
To find your commit speed, start at a slow, controlled pace and incrementally add speed on each run. Most riders find their sweet spot about 30 percent faster than they initially thought felt safe. Once you are there, the descent feels almost effortless. Slower than that, you fight the bike. Faster than that, you exceed your reaction time.
The Horizon Line Principle
The horizon line is the principle of looking 2 to 3 seconds ahead on the trail, not at your front wheel. On a steep descent, your natural instinct is to look down at the immediate ground, but this is exactly backwards. Where you look is where you go, and if you are staring at the rock right in front of your tire, you will steer directly into it.
Practicing the horizon line is straightforward. Pick a smooth, low-stakes section of trail. As you ride, deliberately lift your gaze to the trail 10 to 15 meters ahead. Notice how your line choice changes, how you stop reacting to features, and how the bike starts flowing through the terrain. This is the visual technique used by every professional mountain biker on earth.
On a steep descent, the horizon line also helps you spot your braking zones, your grip points, and your cornering entries well in advance. By the time your front wheel arrives at a feature, you have already decided how to handle it. This is what flow feels like, and it is a learnable skill. Practice it on every ride and your descending confidence will grow noticeably within a month.
Practice Drills to Build Real Descending Skills
Reading about descending is one thing. Building the muscle memory to execute under pressure is another. The only way to get good at descending steep terrain is to do it repeatedly, ideally in low-stakes environments where mistakes are cheap. Our team has coached riders from terrified beginners to confident intermediates, and the progression is remarkably consistent.
The drills below are the same ones we use in our weekend clinics. None of them require a coach or a buddy. You can do them solo at your local trail system or even in a quiet park. Do them consistently for a month and your descending will transform.
Start with Rolling Drops
Rolling drops are the single best drill for new descenders. A rolling drop is any feature where the trail drops off slightly and continues. It could be a curb, a root ledge, a small rock step, or a transition into a steeper section. The drop rolls rather than launches you into the air, so the consequences of a mistake are minor.
To practice, find a rolling drop on your local trail. Approach it at a slow, controlled speed in the attack position. Let the front wheel roll off first, then let the rear wheel follow. Your goal is to keep both wheels on the ground throughout. As you get comfortable, gradually add speed until the drop feels automatic.
Our team uses rolling drops as a gateway to bigger features. Once you can roll a small drop with composure, you start to trust your bike, your position, and your technique. The same principles apply on a steep descent, just scaled up. The mental toolkit is identical.
Progression Path: Grass Hills to Technical Trails
Skill progression on the mountain bike should follow a deliberate path. Our team uses a five-step progression that has worked for hundreds of riders. Move through each step only when you feel ready, and never skip ahead under pressure from friends or social media.
Step one is grass hills. Find a moderate grassy slope and ride up and down it repeatedly, focusing on body position. Step two is fire roads. Descend gravel fire roads at increasing speeds, practicing brake modulation. Step three is blue-rated singletrack. Pick the easiest trail in your local system and ride it until it feels boring. Step four is steeper blue trails with small features. Step five is black diamond descents with proper steep terrain.
The mistake most riders make is jumping straight to step four or five because their friends are riding that level. This builds bad habits and creates fear patterns that are hard to break. Be honest about your skill level and follow the progression. You will reach the harder terrain faster than you think, and you will arrive there with solid fundamentals.
Solo Practice Strategies Without a Coach
Not everyone has access to a coach, and most of us ride alone at least some of the time. Solo practice can still be highly effective if you structure it deliberately. Our team uses three techniques when training alone, and they translate directly to descending skill.
First, video yourself. Mount a GoPro or use a helmet camera and watch your runs from a third-person perspective. The mistakes you will see in your form are eye-opening. Most riders have no idea how often they sit too far back, lock their arms, or stare at their front wheel until they see it on video.
Second, walk technical sections before riding them. Scouting a steep descent on foot lets you identify grip points, line choices, and braking zones without the pressure of being on the bike. It is one of the oldest tricks in mountain biking and it still works.
Third, repeat the same descent multiple times in one session. The 5-run rule is a staple of our coaching. Run the same descent five times in a row, focusing on one specific cue each run. By the fifth run, you will have it dialed. This is how professional riders build technical skills, and it works just as well for the rest of us.
Mental Approach: Conquering Fear on Steep Descents
Technique alone will not make you a confident descender. The mind plays a huge role, and most of the crashes we have seen in our coaching career come from fear-driven mistakes, not technique failures. Locking up the brakes, sitting too far back, freezing on the handlebars, these are all mental responses that override good form. Addressing the mental side of descending is what turns a hesitant rider into a confident one.
Our team has worked with riders who had textbook-perfect body position on flat ground but completely fell apart on real descents. The difference was always mental. Once they learned to manage the fear response, their technique took over. The good news is that fear management is a learnable skill, just like body position or braking.
Why Your Body Tenses Up on Steep Trails
When you approach a steep descent, your brain perceives a threat. This triggers the fight-or-flight response, releasing adrenaline and cortisol, tensing your muscles, and narrowing your vision. These responses evolved to help us escape predators, but they are not helpful on a mountain bike. Tension makes you stiff, which makes you slow to react, which makes you crash, which reinforces the fear.
The first step to managing this response is recognizing it. When you feel your arms locking, your grip tightening, your breathing getting shallow, that is the fear response. The second step is interrupting it. Our team teaches a simple 3-second reset: take one deep breath, drop your shoulders, and consciously relax your grip on the bars. The third step is maintaining that relaxed state as you enter the descent.
This is not about being fearless. Even professional downhill racers feel fear. The difference is they have learned to acknowledge the fear and still execute their technique. You can be scared and still ride well. In fact, the most confident descenders we have coached are usually the ones who openly admit they are nervous on certain trails.
Visualization and Pre-Run Scouting
Visualization is a mental rehearsal technique used by athletes in every sport, and it works beautifully for mountain bike descending. Before you ride a steep section, close your eyes for 10 seconds and imagine yourself riding it cleanly. See your body position, your line choice, your braking points. Hear the tires on the dirt. Feel the bike moving beneath you.
This sounds like hocus-pocus, but neuroscience backs it up. When you visualize a movement, your brain activates many of the same neural pathways as physically performing it. By the time you actually ride the descent, your body has already practiced it once. Our team uses visualization before every race run, and it is just as effective for a Saturday trail ride.
Combine visualization with pre-run scouting. Walk the section if you can. Look at the lines other riders have taken. Identify the grip points and the braking zones. By the time you are on the bike, the descent is no longer unknown territory. It is a familiar problem with a clear solution. This is the foundation of trail confidence.
The 5-Run Rule for Building Confidence
The 5-run rule is one of the most powerful tools in our coaching toolbox. The concept is simple: when you encounter a steep descent that scares you, commit to riding it five times in one session. The first run will be slow and tentative. The second will be slightly faster. By the fifth run, something clicks. The descent feels manageable. Your technique starts to flow. The fear begins to fade.
Why five runs? Because the first run is dominated by fear, the second is dominated by overcorrection, the third starts to settle, the fourth starts to feel familiar, and the fifth starts to feel fun. Most riders who commit to five runs report a 70 to 80 percent reduction in perceived fear by the end of the session.
Our team has seen this work with complete beginners on black diamond trails. The key is the commitment. Do not give yourself the option to bail after one or two runs. Pick a section, commit to five, and trust the process. By the end of the session, you will have built real descending confidence that carries over to the next trail.
Weather and Terrain Adjustments for Tricky Conditions
One of the biggest content gaps we found while researching this article was weather-specific descending advice. Most guides cover technique in dry, perfect conditions and ignore the realities of wet, loose, and cold trail riding. Our team rides year-round, including plenty of wet Pacific Northwest sessions, so we have developed specific adjustments for tricky conditions.
These are not major technique overhauls. They are subtle tweaks that keep you upright when conditions are less than ideal. Master them and you can descend with confidence in any weather.
Wet and Muddy Trail Adjustments
Wet trails are slippery. Your tires have less grip, your brakes are less effective, and the line choices that worked in the dry are now treacherous. Our team has a few go-to adjustments for wet descents.
First, lower your tire pressure. Dropping 2 to 3 psi from your usual setting increases the contact patch and gives your tires more bite. Second, shift your weight slightly back from the attack position, just enough to keep the front tire from washing out in slippery corners. Third, brake earlier and lighter. Wet brakes need more distance to scrub speed, and heavy braking on wet roots or rocks is a recipe for disaster.
Finally, avoid the painted lines, the smooth rock slabs, and the metal features. These become ice rinks when wet. Aim for the rough dirt, the embedded rocks, the surfaces with visible texture. Your tires will find grip there when the smooth stuff offers nothing.
Loose Gravel and Dust Tactics
Loose-over-hardpack is a common surface in dry climates and a particularly tricky one for descending. The top layer of gravel wants to slide, and your tires want to slide with it. The technique here is to let the bike move beneath you while staying centered.
On loose gravel, our team recommends keeping your weight slightly forward of center, with your chest low and your arms wide. This loads the front tire for steering and keeps the rear wheel from getting too light. Brake in straight lines only, never mid-corner. And keep your speed moderate. Loose gravel rewards smooth inputs, not aggressive ones.
If you feel the rear wheel starting to slide, do not panic. Look where you want to go, gently counter-steer, and let the bike finish the slide. Counterintuitively, a small, controlled slide is faster and safer than trying to grab the brakes mid-slide. This is the technique used by desert racers and it works for the rest of us too.
Rock Gardens and Technical Sections
Rock gardens are the ultimate test of descending technique. They demand everything: body position, line choice, brake modulation, momentum management, and mental focus. Our team has a few go-to tactics for cleaning rock gardens that translate directly to steep descents in general.
First, pick a line and commit. Waffling mid-garden is the most common cause of crashes. Second, stay off the brakes through the rough section. Braking in a rock garden unweights the front wheel and lets the rocks deflect you off line. Third, keep your chest low and your weight centered. The attack position applies to rock gardens as much as it does to steep pitches.
Finally, walk the garden first if you can. Identify the grip points, the smooth lines, and the features you want to avoid. The first run through a rock garden should be a reconnaissance mission. The second run should be a clean attempt. By the third run, you will have it dialed. This is the same progression that works for any steep terrain, and it is how the best descenders in the world approach new trails.
Frequently Asked Questions
How to go down steep hills on a mountain bike?
To go down steep hills on a mountain bike, get into the attack position: move forward at the knees, bend your elbows wide, keep your heels dropped, and look 2 to 3 meters down the trail. Brake firmly before the steep section, then release the brakes and let the bike roll. Use 70 percent front brake, 30 percent rear, and aim for grip points rather than the smoothest-looking line.
How to gain confidence on MTB?
To gain confidence on a mountain bike, follow the 5-run rule: ride any descent that scares you five times in one session, focusing on one technique cue per run. Combine this with visualization, pre-run scouting on foot, and a deliberate skill progression from grass hills to black diamond trails. Most riders see major confidence gains within a month of consistent practice.
What gear should I be in going downhill MTB?
For downhill mountain biking, use a harder gear than you think you need, typically the middle of your cassette. A harder gear keeps the chain stable, lets you accelerate out of corners, and prevents the sloppy pedaling that comes from spinning in an easy gear. Many riders make the mistake of shifting into their easiest gear, which is for climbing, not descending.
How to go downhill slowly on a bike?
To go downhill slowly on a bike, use both brakes with light, modulated pressure rather than grabbing. Stay in the attack position with weight centered low, drop your heels, and pick the roughest line with the most grip. Look far ahead rather than at your front wheel, and use gentle feathering of the brakes to maintain a controlled speed without skidding.
Final Thoughts on Building Real Descending Confidence
Learning how to descend steep terrain on a mountain bike with confidence is a journey, not a destination. Every rider, including the pros, is still refining their technique and still working through fear on new terrain. The difference is they have built the habits that make new terrain manageable: proper body position, brake modulation, line choice, and the mental tools to handle the fear response.
Start with the attack position. Drill it on grass, on flat ground, and on every descent you tackle. Move on to brake modulation, then line choice, then mental strategies. Follow the 5-run rule on descents that scare you, and trust the progression. Within a season of focused practice, you will be the rider at the top of the trail that everyone else is watching for beta.
Our team believes every mountain biker deserves to feel the joy of a clean, fast descent. It is one of the best feelings in sport, and it is available to anyone willing to put in the practice. Get out there, commit to the work, and enjoy the ride.