
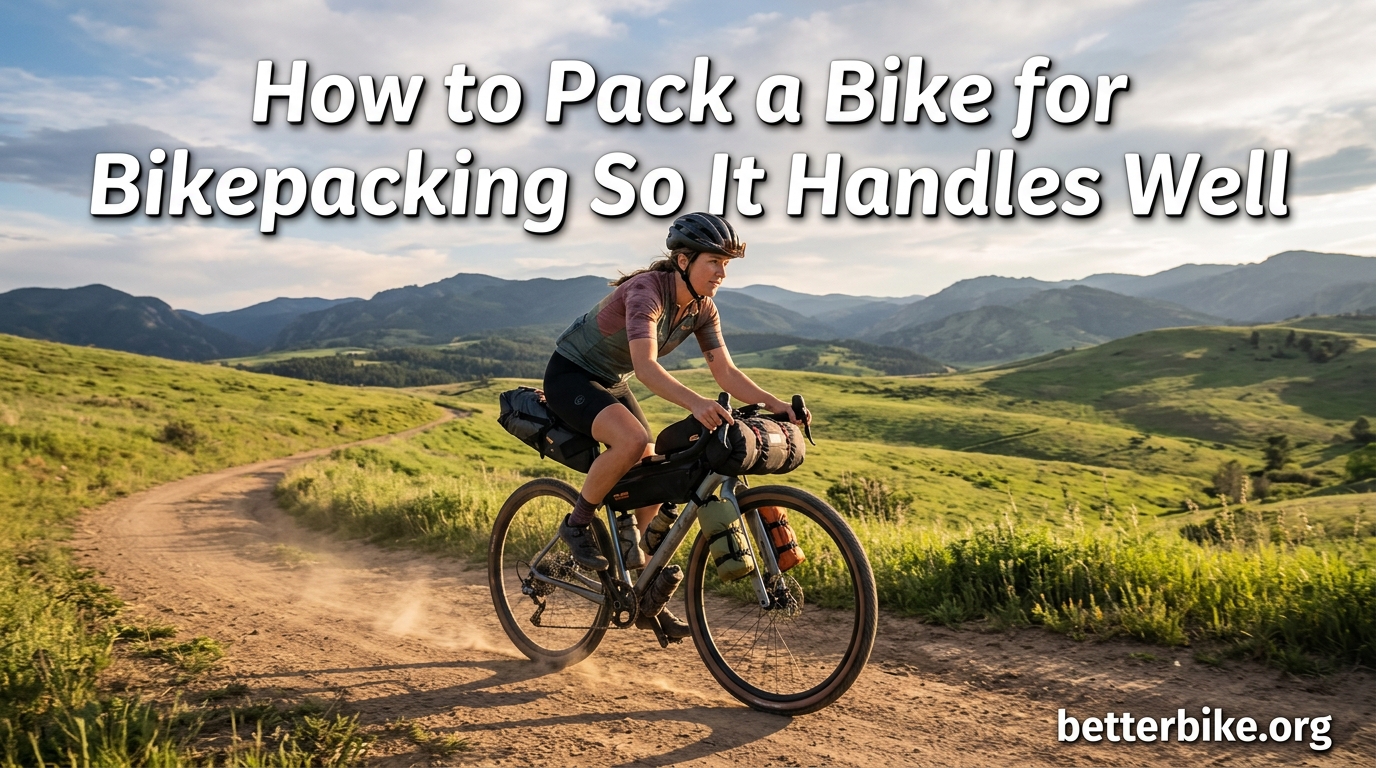
I still remember the first time I tried bikepacking with a fully loaded bike. I threw my sleeping bag, tent, and food into a big handlebar roll, stuffed a couple of water bottles into a frame bag, and pedaled off into the woods. Within twenty minutes, my front end felt like I was steering a couch. The bike wandered on every climb, dipped into every rut, and I had zero confidence on loose descents.
That ride taught me the single most important thing about how to pack a bike for bikepacking: position changes everything. A well-packed bike that handles nimbly and an overloaded beast that fights you on every corner are usually the same bike with different bags in different places.
This guide is everything I learned after a decade of packing for bikepacking trips, from weekend overnights to two-week tours. We will start with the core principle, then walk through each bag one at a time, then cover the special situations that trip up new bikepackers. By the end, you will know exactly how to pack a bike for bikepacking so it handles well on gravel, singletrack, and everything in between.
Table of Contents
Why Packing Position Matters for Bike Handling
Before we talk about any specific bag, you need to understand the one rule that drives every decision: pack heavy things low and close to the center of the bike, and pack light bulky things at the front and rear.
This is not bikepacking folklore. It is basic physics. The lower and more centered your center of gravity, the less your bike sways, dips, and wanders when you steer, lean, or hit a bump. A heavy item placed high on your bars or far behind your seat acts like a lever. Your bike has to work harder just to hold a line, and you feel every input through the handlebars as delayed and vague.
I think of my bike as a tripod. The two wheels and the rider sit on the ground. Anything I attach to the bike shifts the balance point of the whole system. Heavy stuff in the frame triangle sits between the wheels, right where the bike wants the weight anyway. Heavy stuff on the bars or behind the seat pulls that balance point up and away from the middle.
The center of gravity rule
Your center of gravity is the point where the weight of the bike plus the weight of the gear plus the weight of the rider all balance out. On an unloaded road bike, it sits low and slightly toward the front, just behind the bottom bracket. As soon as you add bags and gear, that point moves.
If you load a heavy handlebar bag, your center of gravity climbs upward and forward. The steering feels slow, the front end dives into corners, and the bike becomes twitchy on descents. If you load a heavy seat bag far behind the saddle, the center of gravity slides rearward, and the front wheel feels light. The bike wants to swap end whenever you brake hard.
The goal is to keep that balance point as close to the original, unloaded position as possible. The frame bag, the down tube, and the fork cages are best for heavy things. Handlebar and seat bags are best for light, bulky, compressible items like sleeping bags, tents, and clothing.
Why heavy items belong low and centered
Heavy items include water bottles, tools, a multitool, a spare tube, a pump, dense food like energy bars, a battery bank, and a small lock. These items tend to be 0.5 to 2 pounds each. They are dense, which means they pull a lot of weight in a small space.
Putting a 1.5-pound water bottle in your handlebar bag adds 1.5 pounds of leverage to the end of a long arm (your handlebars). The bike feels it on every input. Putting that same bottle in a frame bag or fork cage adds 1.5 pounds of weight that sits right where the bike is designed to carry it.
Why light bulky items belong at the ends
Light bulky items are mostly soft, compressible gear: sleeping bag, puffy jacket, tent body, rain shell, camp clothes. They are big in volume but light in weight. A typical 20-degree sleeping bag weighs 1.5 to 2 pounds but fills a 10-liter bag.
These items are perfect for the handlebar and seat bags because the bags are designed to swallow volume. They do not pull your center of gravity around the way a 4-pound water jug would. The trick with light bulky items is to compress them, not so much that you damage insulation, but enough to keep the bag from catching wind or rubbing on your tire.
How to Pack a Frame Bag for Bikepacking
The frame bag is the most important bag on your bike for handling. It sits inside the front triangle, between the top tube, down tube, and seat tube. The frame bag is the closest spot to the bike’s center of gravity, which means it is the best place for anything heavy.
Most frame bags are made to order or semi-custom to fit a specific frame. They are usually divided into two or three sections, accessible from one or both sides of the head tube. Good ones have a reinforced base to keep their shape even when fully loaded.
What goes in a frame bag
I pack my frame bag in roughly this order, working from heaviest to lightest. The bottom of the bag, pressed against the down tube, holds the heaviest items. Higher up, closer to the top tube, holds the lighter stuff.
- Tools: multitool, chain breaker, tire plugs, small wrench
- Spare inner tube and patch kit
- Tire pump (frame bags can usually fit a mini pump)
- Water bottle or two (if you do not have bottle cages)
- High-energy food: bars, gels, nut butter packets
- Spare batteries and small electronics
- Rain shell (compact, lightweight)
One of the underrated benefits of packing the frame bag with tools and tubes is that they are the items you reach for in a roadside repair. The frame bag is at hip height when you are off the bike, so you can unzip one side and grab a multitool without having to swing a leg over the seat bag or fumble with a handlebar roll.
Common frame bag mistakes
The biggest mistake I see is stuffing soft, bulky items into the frame bag. A puffy jacket, for example, can fill an entire frame bag without adding much weight. That fills the space where your water and tools should go and forces you to move heavy items to other bags, which kills your handling.
The second mistake is overloading the frame bag. If the bag bulges against the down tube or pinches the top tube, it will rub and eventually wear through the paint. A well-packed frame bag should be snug but not tight. The shape of the bag should hold, and the closure should not strain.
The third mistake is loading the heaviest items at the top of the bag, near the head tube. This raises your center of gravity and counteracts the entire point of using a frame bag. Heavy things low, even in the frame bag.
How to Pack a Handlebar Bag Without Killing Steering
The handlebar bag, sometimes called a handlebar roll or handlebar pack, is the big one at the front of the bike. It is the bag you see in every bikepacking photo, swinging tent poles, sleeping pads, and sleeping bags. It is also the bag that wrecks handling the fastest when overloaded.
Handlebar bags typically come in two types: a side roll (a dry bag that hangs from a harness on either side of the stem) and a top loader (a single horizontal bag that mounts to a handlebar extender). Both are designed for light, bulky, compressible items.
What belongs in the handlebar bag
The handlebar bag is for items that are large but light, or items that you do not need to access during the ride. Here is what I pack in mine, in order of typical volume:
- Sleeping bag (compressed in a dry bag or stuff sack)
- Inflatable sleeping pad
- Tent body, footprint, and rain fly (if not split between the seat bag)
- Camp clothes, packed in a stuff sack
- Camp shoes, lightweight sandals, or camp slippers
All of these items are compressible. They are often the bulkiest items in your whole kit, but their actual weight is low. A compressed sleeping bag that fills a 12-liter roll might weigh only 1.5 pounds. That is the sweet spot for a handlebar bag.
Weight limit and balance tips
The practical weight limit for a handlebar bag is somewhere around 5 to 6 pounds. Past that, even a well-balanced load will start to feel heavy through the bars. Beyond 8 pounds, the steering becomes noticeably sluggish, especially on climbs out of the saddle.
Two balance tips make a huge difference. First, distribute weight evenly side to side. If your dry bag has more stuff on the left, the bike will feel like it is pulling left. Stuff the bag so the mass is centered.
Second, lower the load inside the bag. Most side-roll setups let you put a heavier item at the bottom and a lighter item on top. Putting the sleeping bag at the bottom and the tent on top keeps the mass low, which is better for handling.
Mount the bag as close to the head tube as you can. The further forward the bag sits, the more leverage it has. A bar extender is a great tool, but it adds leverage too. Use it to gain volume, not to push the load further out.
How to Pack a Seat Bag the Right Way
The seat bag, also called a seat pack or saddle bag in bikepacking, is the long, narrow bag that hangs behind your seat. It is bigger than a road cycling saddle bag. A typical bikepacking seat bag holds 8 to 16 liters, attached with a strap to the saddle rails and a couple of straps to the seat post.
The seat bag is the second-best place for light bulky items. It is also the bag most likely to sag, swing, and rub on your rear tire if packed wrong.
Packing order matters
The order in which you pack the seat bag is critical, and it is the opposite of what most people do. The heaviest, most compressed items go at the top of the bag, right up against the seat post. The lightest, most compressible items go at the back end of the bag, closest to the tail.
This is counterintuitive until you think about it. If you put the heavy stuff at the back, the weight is far from the bike and creates a pendulum effect as you pedal. If you put the heavy stuff at the top, close to the seat post, the weight sits close to the bike’s center.
Here is my typical packing order from the top (seat post end) to the back (tail):
- Cookware: small pot, stove, fuel canister, lighter (if not in the frame bag)
- Food: dense items like dehydrated meals, ramen, oatmeal, nuts
- Camp towel, soap, toiletries, in a small dry bag
- Sleeping clothes, base layer, socks
- Sleeping pad, only if it is light and compressible
You want the bag to taper toward the back, not the front. A bag that gets fatter at the tail is more likely to sag and catch on obstacles behind you.
Avoiding tire rub and sag
Tire rub is the most common seat bag problem. The bag sags down as you ride, swings back into the rear tire, and slowly wears a hole in the bag and the tire casing. The fix is mostly packing technique, plus a couple of hardware choices.
Pack the bag tightly. Loose items shift around and pull the bag down. Compression straps help, but a tightly packed bag is the best fix. If you have a few liters of unused space, the bag is not packed right.
Use a spacer or roll. Many bikepackers stuff a foam noodle, pool noodle, or rolled sleeping pad at the bottom of the bag, where it meets the saddle rails. This creates structure and prevents the bag from collapsing onto the tire.
Check the bag with the bike loaded. Sit on the bike, in the position you ride in, and look at the clearance between the bag and the rear tire. The bag should not move when you hit a bump. Bounce the bike a few times to test it. If the bag swings into the tire, tighten the seat post straps.
Stem Bags, Top Tube Bags, and Fork Cages
These are the smaller bags, but they are the ones that make bikepacking life easier on the bike. They handle the items you want to reach without stopping.
Stem bag and top tube bag
The stem bag (also called a feed bag or gas tank) sits in front of the stem, between the handlebars and the rider. It is the perfect place for things you reach for constantly while riding: phone, snacks, sunscreen, lip balm, and the snacks you want to grab one-handed.
The top tube bag sits on the top tube, usually with a strap that wraps around the tube. It is slightly larger than a stem bag and can hold a phone, a small camera, a battery bank, a multi-tool, or a large snack bar.
Both of these bags are for small, frequently-accessed items. Keep the weight light, under 1.5 pounds if possible, and keep the contents secure so they do not rattle around and annoy you for hours.
Fork cages and cargo cages
Fork cages, also called cargo cages, bolt to the fork and add storage for water bottles, dry bags, and oversized items that do not fit anywhere else. A typical triple-bottle cage setup on each fork blade can add 4 to 6 pounds of water plus a dry bag strapped on top.
Pack water bottles in the lower cage position for weight. Pack dry bags in the upper cage position for bulk. The fork is a relatively low and centered place, so the weight does not ruin handling the way a handlebar bag would.
One thing to watch out for: fork cages work best on forks with three mounting eyelets on each leg. Most modern suspension forks have these. If you are running rigid forks, you may need adapter brackets to mount cages.
Special Situations: Suspension, Dropper Posts, and Small Riders
Most bikepacking guides stop at the standard bag setup. But there are a few special situations that make packing more complicated. These are the questions I get most often from readers.
Suspension fork adjustments for loaded riding
If you are running a suspension fork, you can usually add air pressure to compensate for added weight on the front. Most suspension forks have a recommended sag of 20 to 30 percent. With a loaded bike, you can either add air to maintain the same percentage of sag, or you can let the fork sit a little deeper in its travel and use the extra support for the added weight.
For bikepacking, I usually run 5 to 10 PSI more than my unloaded setup. This keeps the fork from diving into its travel under braking on steep descents. I also lock out the fork on smooth gravel climbs to save energy.
Add the air in small increments and test ride. Too much pressure and the fork will feel harsh and skip over roots. Too little and the fork will dive under braking and waste your energy.
Dropper post compatibility
Dropper posts and seat bags do not always play well together. The lower part of the seat bag often sits right where the dropper post extends into, which means lowering the saddle to descend can pull the bag down with it. The fix is usually one of three options:
- Use a smaller seat bag that mounts high on the seat post
- Use a dropper-specific seat bag with a cutout for the post collar
- Add a long valve extender and inflate to high pressure to prevent the post from going all the way down
If you have a dropper post, plan to test your setup before the trip. Drop the post all the way down and see if the bag interferes. Adjust the bag height or replace it with a smaller bag if needed.
Small rider clearance
Smaller riders, especially those on extra-small or small frames, often have very limited clearance for bags. The frame triangle is small, so a standard frame bag may not fit. The handlebars are narrow, so a wide handlebar roll may not fit. The wheelbase is short, so a long seat bag can scrape the tire.
If this is you, look for short-fit or small-frame bags specifically. Many bag makers offer two or three sizes per frame bag. For handlebar bags, a side roll is often a better fit than a top loader, because the roll can be mounted narrower than a fixed-width loader.
For the seat bag, look for a 6 to 9 liter bag rather than the 12 to 16 liter bags most bikepackers use. You will need to trim some gear from the seat bag, but the trade-off is a bike that actually fits you and handles correctly.
Waterproofing, Practice Rides, and Common Mistakes
Packing for bikepacking is more than just stuffing bags. A few finishing touches will keep your gear dry, your bike safe, and your trip on track.
Keeping gear dry
Most bikepacking bags are not fully waterproof. They are water-resistant, which means they will keep out a light rain but not a downpour. The standard approach is to use dry bags or trash compactor bags inside each bag, regardless of what the bag’s marketing copy says.
I use a 12-liter dry bag inside my handlebar roll, a 10-liter dry bag inside my seat bag, and a heavy-duty trash compactor bag as a liner inside the frame bag. If a seam leaks, the dry bag catches it. If the dry bag fails, the trash bag catches it. Belt and suspenders.
For electronics and paper items like maps, a small zip-top bag inside the frame bag is enough. Keep the phone in a clear zip-top if you want to use it for navigation without opening the bag.
Test ride before the trip
Every experienced bikepacker I know does at least one shakedown ride before a big trip. Load the bike exactly as you plan to ride it, including full water bottles, and ride the most technical terrain you can find near home.
On the shakedown, pay attention to:
- Steering feel. Does the front end feel light, heavy, or balanced?
- Tire rub. Does the seat bag swing into the tire over bumps?
- Knee clearance. Do your knees hit the frame bag when pedaling?
- Strap rattle. Are all straps tight and quiet?
- Item accessibility. Can you reach the snacks, phone, and tools without dismounting?
Fix everything you find before the trip. The shakedown ride takes two hours and saves a thousand headaches. A two-week tour with a bad seat bag is not fun.
Common mistakes to avoid
I have made most of these mistakes myself. Save yourself the trouble and skip them the first time around.
First, do not put water in the handlebar bag. Water is heavy and not compressible. It is the worst possible item to put in a handlebar bag. Use frame bag space, fork cages, or bottle cages on the frame for water.
Second, do not put soft, bulky items in the frame bag. Save the frame bag for tools, tubes, food, and electronics. Sleeping bags and tents belong at the ends of the bike.
Third, do not skip the shakedown ride. The bag configuration that looks good in the garage may not work on the trail. The shakedown is the only way to know for sure.
Fourth, do not overpack. The single biggest cause of poor handling is too much gear. Cut anything you can, and your bike will thank you.
What is the best weight distribution for a bikepacking bike?
Pack heavy items low and close to the center of the bike, in the frame bag and fork cages. Pack light, bulky items in the handlebar bag and seat bag, at the front and rear of the bike. This keeps your center of gravity low and centered, which preserves nimble handling.
What goes in a frame bag for bikepacking?
The frame bag is for heavy, dense items you want to keep low and centered. Pack tools, spare tubes, a pump, dense food, water bottles, and a battery bank. Avoid soft, bulky items like sleeping bags and puffy jackets, which take up space better used by the handlebar and seat bags.
How do I keep my seat bag from rubbing the tire?
Pack the seat bag tightly with the heaviest items at the top, near the seat post, and the lightest items at the back. Use a foam spacer or rolled sleeping pad at the top of the bag to add structure. Check tire clearance with the bike loaded and bouncing. If the bag sags, tighten the seat post straps or use a smaller bag.
How much weight can a handlebar bag hold?
A handlebar bag can hold up to 5 to 6 pounds before steering becomes sluggish. Beyond 8 pounds, the front end will feel heavy and the bike will be hard to control on technical terrain. Keep the heaviest items in the frame bag and use the handlebar bag for compressed sleeping bags, tents, and clothing.
Does weight affect how a bike handles during bikepacking?
Yes, both total weight and weight distribution affect handling. A heavier bike is harder to maneuver but the bigger issue is poorly distributed weight. Heavy items placed high on the bars or far behind the seat will make the bike feel slow, twitchy, or unbalanced. Pack heavy items low and centered for the best handling.
What is the difference between a saddle bag and a seat pack?
They are the same bag. Saddle bag is the traditional road cycling name, and seat pack is the bikepacking name. A bikepacking seat pack is much larger than a road saddle bag, typically 8 to 16 liters, and attaches with straps to the seat rails and seat post rather than with a single strap under the saddle.
Final Thoughts on Packing Your Bike for Bikepacking
Learning how to pack a bike for bikepacking so it handles well is mostly about one principle, repeated in different ways for each bag. Heavy items low and centered. Light bulky items at the front and rear. Frequently used items in stem and top tube bags.
Get the principle right, do a real shakedown ride before your trip, and you will have a bike that rides the way it did unloaded. The trail will be more fun, the climbs will be easier, and the descents will not scare you. That is the whole point of packing well.
Pick a date, pack your bags, and go ride. You will learn more on one real trip than in a hundred hours of reading packing guides, and the bike will tell you what works.