
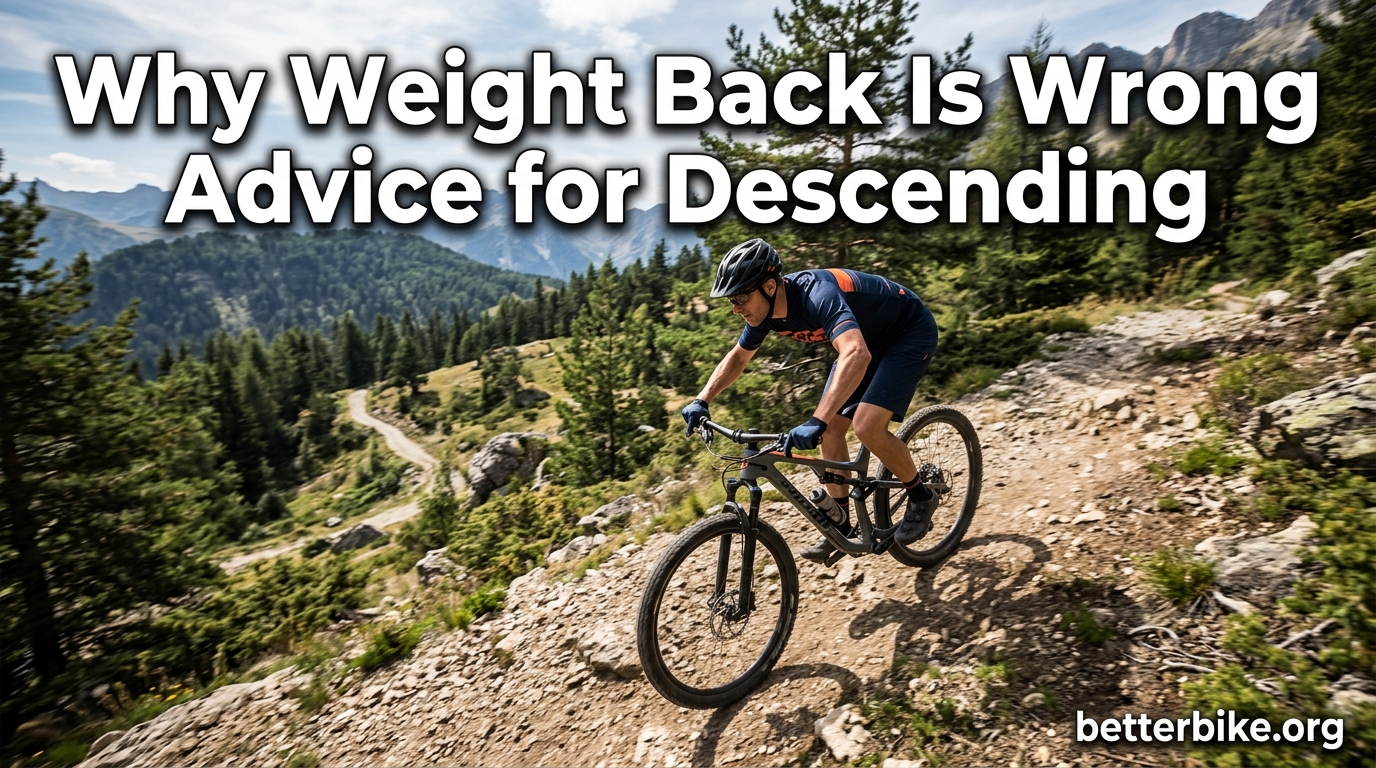
Every cycling coach, friend, and YouTube personality has told you the same thing at some point: “Get your weight back on the descent.” Slide off the saddle, hover behind the seat, stretch your arms out, and let the bike run underneath you. It feels logical. It feels safe. And after years of hearing it, most riders accept it as gospel. I believed it myself for the better part of a decade.
Here is the problem. Putting your weight way back on descents is the wrong advice for almost every road cycling situation, and following it makes you slower, less stable, and more likely to crash. This article explains why putting your weight back on descents is wrong advice in cycling, breaks down the physics in plain language, and shows you the balanced position that actually works.
The “weight back” instruction originated in mountain biking, where riders genuinely do shift rearward on steep, technical terrain to keep the front wheel from diving on drop-offs and rock rolls. Somewhere along the way, that advice leaked into road cycling and got repeated so often that nobody questioned it. Modern bike geometry, modern tire technology, and modern coaching science all point in a different direction. The fastest, safest descenders in the world stay balanced, not way back.
If you have ever felt your front wheel go vague and twitchy on a fast downhill, washed out in a corner you thought you were taking carefully, or struggled to slow down without the back wheel skipping around, the weight-back habit is likely part of the problem. By the end of this guide, you will understand exactly why, and you will have a step-by-step process to fix it.
Table of Contents
Quick Summary: Why Weight Back Is the Wrong Advice
The short version is this. Your front wheel is responsible for steering and roughly 70 percent of your braking power on a descent. When you shift your weight far back, you unload the front wheel, reduce its contact with the road, and strip away the traction you need to turn and stop safely. A front wheel with no grip is a front wheel that will wash out without warning.
The correct approach is a balanced, neutral position with roughly 45 to 50 percent of your weight on the front wheel, hands in the drops, bent elbows, and eyes scanning ahead. You lower your center of gravity by getting low, not by getting back. This keeps both tires planted, keeps the bike stable at speed, and lets you brake and corner with real control.
Key takeaways:
- Weight way back unloads the front wheel and kills steering traction.
- The front wheel handles about 70 percent of braking on descents.
- Ideal front wheel weight distribution is roughly 42 to 50 percent.
- Lower your center of gravity by bending elbows and getting into the drops, not by sliding back.
- Slight weight back is only correct for emergency braking or extreme drop-offs.
- This myth originated in mountain biking and was incorrectly applied to road cycling.
The Weight-Back Myth and Why It Persists
The “get your weight back” instruction has been repeated in cycling magazines, group ride clinics, and online forums for so long that it has taken on a life of its own. To understand why it is wrong, you first need to understand where it came from and why it feels so intuitive.
Where the Advice Came From
The weight-back technique started in mountain biking, and in that context, it has some truth to it. When you ride a mountain bike down a steep chute or off a drop, the bike pitches forward violently. Shifting your weight behind the saddle counteracts that forward pitch and keeps you from going over the bars on terrain where the front wheel is dropping away beneath you. The terrain itself is moving the bike around, and your body position has to compensate.
The problem started when this advice was copy-pasted onto road cycling without anyone asking whether the physics were the same. They are not. On a road descent, you are riding on a relatively smooth, predictable surface. The bike is not dropping out from under you. The forces at play are completely different, and the same body position that saves you on a mountain bike trail can actively hurt you on a paved descent.
Why It Feels Right Even When It Is Wrong
Weight back feels safe because of fear. When you start picking up speed on a descent, your instinct is to lean away from the direction of travel, as if moving your body rearward will protect you from the speed itself. The position mimics what you would do on a steep staircase or a slippery slope on foot. Your brain reads it as “getting away from the danger.”
The reality is the opposite. By sliding back, you are removing weight from the front wheel that you desperately need for control. The bike does not feel safer because it is safer. It feels safer because you have less feedback from the front tire, which your brain misinterprets as calm when it is actually a sign that you have lost connection with the road.
How the Myth Spreads
Coaches pass it along because they were taught it themselves. Group ride leaders repeat it because it is a simple instruction that sounds responsible. Even some professional resources, including the well-known Red Bull descending guide published in 2026, contain the contradiction of telling riders to “shift weight slightly back” while also telling them to “lean the bike, not the body” and keep the front wheel loaded. The two instructions cannot both be correct, and nobody has bothered to resolve the tension.
This matters because newer riders, especially, take these instructions literally. I have watched riders on group descents slide so far back they are practically sitting on the rear tire, arms locked straight, eyes wide, wondering why the bike feels so unstable at 35 mph. The instability is not the speed. It is the position.
The Physics of Weight Distribution on Descents
To understand why weight back is the wrong advice in cycling, you need a basic grasp of how weight creates traction. This is not complicated physics, but it is the part almost no coaching resource explains well.
Center of Gravity and Traction
Your bike contacts the road through two small patches of rubber, each roughly the size of a postage stamp. These are called contact patches. The amount of grip each contact patch has depends almost entirely on how much weight is pressing down on it. More weight on a tire means more grip. Less weight means less grip. This is not a cycling opinion. It is basic friction physics.
When you sit balanced on the bike, your weight is distributed roughly evenly between the two contact patches, with a slight bias toward the rear because of where your body mass sits relative to the bottom bracket. When you slide your weight back, you shift the balance dramatically. The rear wheel gets overloaded with weight, and the front wheel goes light.
What Happens When the Front Wheel Goes Light
A light front wheel is a dangerous front wheel. The tire has less rubber pressing into the road, which means less grip for steering and less grip for braking. The front end starts to feel twitchy and vague, like the handlebars are floating. On a straight descent, this manifests as a wobbly, nervous feeling. In a corner, it manifests as a washout, where the front tire simply lets go and slides out from under you with almost no warning.
Here is the counterintuitive part. Most riders, when they feel that twitchy front end, slide even further back, thinking they need to “get away from the instability.” The instability is caused by their weight being too far back in the first place. It is a feedback loop that makes the problem worse the more they try to fix it.
The 42 to 48 Percent Rule
Wenzel Coaching, one of the few resources that actually cites a number, suggests that for a bike to descend well, the front wheel needs to carry between 42 and 48 percent of the total rider-plus-bike weight. Outside of that range, the bike will not handle predictably no matter how skilled the rider is.
Think about what that means for the weight-back position. If you slide your hips well behind the saddle, you might drop your front wheel loading to 25 or 30 percent. You are now well below the lower end of the range where the bike can descend safely. Every bit of steering precision and braking stability you have just disappeared with that weight shift.
Why Lowering Beats Leaning Back
Riders often confuse two different goals: lowering the center of gravity and moving the center of gravity backward. They are not the same thing. Lowering your center of gravity is good for stability because it makes the bike harder to tip side to side. Moving your center of gravity backward is bad for descending because it unloads the front wheel.
The correct way to lower your center of gravity on a descent is to drop your torso, bend your elbows, and ride in the drops. This brings your body mass closer to the ground without shifting it backward. You get all the stability benefits of a lower center of gravity and none of the traction loss that comes with leaning back.
Why Weight Back Is the Wrong Advice: The Front Wheel Traction Problem
This is the core of the argument, and it is worth spending time on because it is the part that runs against everything most riders have been told.
The Front Wheel Does the Steering
On a bicycle, the front wheel is the steering wheel. It is the only tire that points the bike where you want to go. The rear wheel follows. If the front wheel does not have enough grip to hold its line in a corner, the bike will not turn. It will instead continue straight, sliding out from under you as the corner tightens.
Weight-back positioning strips the front wheel of the grip it needs to steer. This is why riders who sit way back often report that the bike “does not want to turn” or that they have to muscle the handlebars through corners. They are not steering. They are fighting a front tire that does not have enough traction to follow the handlebar input.
The Front Wheel Does Most of the Braking
The front brake provides roughly 70 percent of your stopping power on a descent. This is because when you brake, weight transfers forward, loading the front wheel and unloading the rear. The harder you brake, the more the front wheel is responsible for slowing you down.
If you start from a weight-back position, you begin your braking sequence with the front wheel already underloaded. The first squeeze of the brake lever does less than it should, because there is not enough weight on the front tire to generate braking friction. Riders in this position often grab more brake, lock the rear wheel, and wonder why the bike will not slow down. The answer is that they are trying to brake with a tire they have already unloaded.
The Twitchiness Problem
Bicycle steering geometry relies on a loaded front wheel to self-stabilize. The head tube angle, fork trail, and caster effect all work together to keep the bike tracking straight when the front wheel has proper weight on it. Remove that weight, and the bike loses its self-correcting tendency.
This is why a weight-back descent feels nervous and twitchy at speed. The bike is not actually less stable because of the speed. It is less stable because the front wheel is floating. Add the missing weight back to the front, and the same bike at the same speed suddenly feels calm and planted.
The Cornering Washout
The single most dangerous consequence of weight-back descending is the cornering washout. This happens when you enter a corner with too little weight on the front tire. Halfway through the turn, the front tire reaches the limit of its reduced grip and slides sideways. There is usually no warning. One second you are turning, the next you are on the ground.
Washouts are often blamed on speed, tires, or road conditions. In many cases, the real cause was a body position that set up the front tire to fail. A front tire that is properly loaded can corner much harder than most riders realize. A front tire that is unloaded will let go at surprisingly modest lean angles.
The Correct Body Position for Descending
If weight back is the wrong advice, what is the right advice? The answer is a balanced, low, neutral position that keeps both contact patches loaded and your center of gravity low.
Hands in the Drops
The first and most important change is hand position. On a road bike descent, your hands belong in the drops. This does two critical things. First, it lowers your center of gravity because your torso comes down with your hands. Second, it puts weight on the front wheel through the handlebar, which is exactly what you want.
Liv Cycling, one of the few major brands to address this directly, notes that riding in the drops on a descent puts additional pressure on the front wheel, which adds traction and balance. They are correct. Many riders avoid the drops because they feel “too committed” or because their hands go numb, but those are bike fit and grip pressure issues, not problems with the drops position itself.
Bent Elbows as Suspension
Locked elbows are a recipe for a twitchy descent. When your arms are straight, every bump and vibration travels directly through the handlebars into your body, and any shift in the bike is transmitted instantly to your hands. Bent elbows act as suspension. They absorb road chatter, isolate your upper body from bike movement, and let the front wheel track the road without transferring every imperfection into your steering.
The ideal elbow bend is enough that your forearms are roughly at a 45-degree angle to the ground. This is not a deep tuck. It is a relaxed, athletic bend that lets the bike move beneath you while you stay quiet and stable on top.
Balanced Weight Distribution
Aim for roughly even weight between the front and rear wheels, with a slight rearward bias from your natural seated position. You should feel like you are pressing gently into the handlebars through the drops, not hanging off the back of the bike. If you can lift your hands off the bars without your torso pitching forward, you are sitting too far back.
A useful mental cue is “heavy feet, light hands.” Your weight should be driving through the pedals and bottom bracket, which is the lowest point on the bike and the natural balance point. Your hands should rest on the bars without gripping hard. This puts you in a balanced, athletic stance.
Neutral Spine and Relaxed Shoulders
Keep your spine in a neutral position, neither rounded forward nor arched backward. Your shoulders should be relaxed away from your ears. A tense, hunched upper body transmits tension into the handlebars, which makes the front end feel even twitchier than it already is.
This is harder than it sounds on a fast descent. Fear makes you hunch, grip, and tense. The fix is not to tell yourself to relax. The fix is to address the underlying position and speed that is causing the fear in the first place. A balanced, well-supported position with proper braking control will naturally let your upper body relax.
Eyes Up and Looking Ahead
Your eyes belong far down the road, scanning for corners, debris, surface changes, and traffic. Looking at the wheel in front of you or the patch of pavement directly ahead kills your ability to plan. The bike goes where your eyes go, and on a descent, you need to be planning several seconds ahead because you are covering ground quickly.
Looking ahead also has a calming effect. When your eyes are up, your body naturally settles into a more confident position. When your eyes drop, your shoulders hunch and your weight shifts back. Fix your eyes, and a lot of the other position issues take care of themselves.
Step-by-Step Technique Guide for Proper Descending Position
Here is a repeatable five-step process for getting into the correct descending position. Run through these steps mentally every time you crest a hill and start down the other side.
Step 1: Move Your Hands to the Drops
Before the descent starts, move your hands from the hoods to the drops. Do this while you are still on flat ground or the early, gentle part of the descent, not when you are already picking up speed. Hook your fingers comfortably around the curved portion of the bars, with your wrists in a neutral alignment.
Step 2: Bend Your Elbows and Lower Your Torso
Drop your torso by bending your elbows, not by collapsing your spine. Your chest should come closer to the top tube, but your back should stay flat and neutral. Aim for forearms at roughly 45 degrees. This lowers your center of gravity without shifting your weight backward.
Step 3: Settle Your Weight Over the Bottom Bracket
Keep your hips in a normal position on the saddle. Do not slide back. Think about driving your weight down through the pedals and bottom bracket, which is the lowest, most stable point on the bike. You should feel solidly planted, not stretched out and hovering.
Step 4: Soften Your Grip
Loosen your grip on the bars. You should be able to wiggle your fingers. A white-knuckle grip tenses your whole upper body and makes the bike feel more twitchy than it actually is. Hold the bars firmly enough to steer and brake, but no harder.
Step 5: Lift Your Eyes to the Horizon
Pick a point far down the road and lock your gaze on it. Scan side to side for corners, debris, and traffic, but keep your primary focus well ahead. Your body will follow your eyes into a balanced, confident position. Looking down at the road directly in front of you is one of the fastest ways to end up in a tense, weight-back stance.
Cornering Technique While Descending
Cornering while descending is where the weight-back myth does the most damage. Here is how to do it correctly.
Outside Pedal Down
In every corner, your outside pedal should be down at the 6 o’clock position, with your weight pressed firmly into it. This drops your center of gravity, stabilizes the bike, and loads the contact patches evenly through the turn. It also clears your inside pedal from the road surface so you can lean without striking a pedal.
Community advice on cycling forums consistently highlights this technique. Riders who have fixed their cornering almost always mention outside pedal down as the single biggest change they made. It is the foundation of stable descending corners.
Lean the Bike, Not Your Body
The bike leans into the corner. Your body stays relatively upright over the contact patches. This is different from what many riders do, which is lean their whole body into the turn along with the bike. Leaning your body shifts weight off the contact patches and reduces grip. Leaning only the bike keeps your weight over the tires where it belongs.
This is another place where the weight-back instruction contradicts itself with the lean-the-bike instruction. You cannot effectively lean the bike underneath you if you are stretched out behind the saddle. The two positions are mechanically incompatible.
Look Through the Turn
Your eyes should be looking through the apex of the corner to the exit, not at the apex itself. The bike will follow your eyes. Looking at the inside of the corner tends to make you run wide. Looking at the exit naturally tightens your line and helps you carry speed through.
Brake Before the Corner, Not In It
Do all your braking before the corner starts. Once you tip the bike into the turn, you should be off the brakes or trailing them very lightly. Braking in a corner reduces available traction for turning, which is exactly the scenario where you need maximum traction. Set your entry speed early, then let the bike carve through.
If you enter a corner too hot and grab the brakes mid-turn, the front tire is asked to do two things at once: brake and turn. With limited grip, it will usually pick turning and let go of braking, or pick braking and wash out. Neither outcome is good. Brake early, corner cleanly.
When Slight Weight Back IS Appropriate
To be fair, the weight-back position is not universally wrong. There are a few specific scenarios where shifting back makes sense, and ignoring them would make this article just as dogmatic as the advice it is criticizing.
Emergency Braking
If you need to stop as fast as possible, weight transfers hard to the front wheel under braking. In extreme braking, this can pitch you over the handlebars. Shifting your weight slightly back during emergency braking counteracts this pitch and lets you brake harder without going over the top. Note that this is slight back, not way back, and it is only for emergency stops, not for normal descending.
Extreme Steep Drop-Offs
On very steep descents where the road surface drops away sharply, the front wheel can lose contact with the road momentarily. This is the closest road cycling comes to mountain bike terrain. A small rearward shift helps keep the front wheel tracking the surface. We are talking about gradients where the road falls away at 18 percent or steeper, not your average rolling hill.
Mountain Bike Technical Sections
On a mountain bike, in genuine technical terrain with rocks, roots, drops, and steep chutes, weight back has its place. The terrain moves the bike around, and your body position has to compensate. But this article is about road cycling descents on paved surfaces, where the dynamics are completely different.
Notice the common thread. In every legitimate weight-back scenario, something about the terrain or the braking force is actively trying to pitch the bike forward. On a normal paved descent with normal braking, nothing is pitching the bike forward. The weight-back position solves a problem you do not have.
Common Mistakes and How to Fix Them
Here are the seven most common descending mistakes I see, and the simple fix for each one.
Mistake 1: Riding on the Hoods Instead of the Drops
Problem: Higher center of gravity, less weight on the front wheel, less braking leverage. Fix: Move your hands to the drops before the descent starts. Practice riding in the drops on flat ground until it feels natural.
Mistake 2: Locked Elbows
Problem: Every bump transmits through the bike to your body, making the descent feel twitchy and harsh. Fix: Bend your elbows. Use them as suspension. If you feel every crack in the road, your arms are too straight.
Mistake 3: Sliding Back on the Saddle
Problem: Unloads the front wheel, kills steering and braking traction. Fix: Stay in a normal saddle position. Lower your center of gravity by dropping your torso, not by shifting your hips back.
Mistake 4: Braking in the Corner
Problem: Reduces traction available for turning, risks a washout. Fix: Brake before the corner. Set your entry speed. Trail off the brakes as you tip in, and accelerate out.
Mistake 5: Looking Down at the Road
Problem: Tightens your line, kills your planning, makes you tense. Fix: Lift your eyes to the horizon. Scan for hazards, but keep your primary focus well ahead of where you are.
Mistake 6: White-Knuckle Grip
Problem: Tenses the whole upper body, transmits more vibration, makes the bike feel less stable. Fix: Soften your grip. You should be able to wiggle your fingers. Hold the bars, do not crush them.
Mistake 7: Leaning the Body With the Bike
Problem: Shifts weight off the contact patches, reduces cornering grip. Fix: Lean the bike underneath you. Keep your weight over the tires. Press hard into the outside pedal to stay anchored.
How to Practice and Build Confidence
Knowing the right position is one thing. Trusting it at speed is another. Most riders who default to weight-back do so because they are afraid, and the fear does not go away just because they read an article. Here is how to build real confidence.
Start Small
Pick a descent you know well, with a gentle gradient and a clean, sweeping corner at the bottom. Practice the correct position there, at moderate speed, until it feels natural. Do not try to fix your descending on a strange road at 40 mph. Build the habit somewhere forgiving first.
Focus on One Thing at a Time
Do not try to fix everything at once. Pick one element, like hand position or elbow bend, and work on it for a full ride before adding the next element. Trying to change your entire descending technique in a single session is overwhelming and usually makes things worse.
Brake Less, Not More
Most nervous descenders brake too much and too often. Each brake application unweights the bike, upsets the balance, and requires you to rebuild speed and stability. Brake once, early and decisively, for each hazard or corner. Then let the bike roll. You will be calmer and more stable at a steady speed than you are constantly slowing and accelerating.
Ride With More Experienced Descenders
Find a riding partner or group whose descending you trust, and follow them down. Watch their line, their body position, and their braking points. You will naturally match their speed and rhythm, and you will pick up technique by osmosis. This is how most experienced riders actually learned, not from reading articles.
Give Yourself Permission to Go Slow
The cycling community has a macho streak around descending, and it does riders no favors. There is nothing wrong with descending conservatively while you build skill. Going 25 mph instead of 40 mph is fine. Picking a clean line through a corner at moderate speed is better practice than hacking through it at high speed with bad technique. Speed comes last, after position and confidence are solid.
Forum discussions on Reddit and TrainerRoad are full of riders admitting they are terrified of descending and feeling guilty about it. The fear is normal. The fix is not to push through it at unsafe speeds. The fix is to build a foundation of good technique that lets the confidence follow.
What is the correct body position for descending on a road bike?
The correct body position for descending on a road bike involves hands in the drops, bent elbows acting as suspension, a neutral spine, weight balanced roughly 45 to 50 percent on the front wheel, and eyes looking far ahead through corners. Your weight should drive through the pedals and bottom bracket, not hang off the back of the saddle.
Why is putting weight back on descents dangerous?
Putting weight way back on descents unloads the front wheel, which reduces steering traction and braking power. The front wheel handles about 70 percent of braking and all of the steering, so unloading it makes the bike twitchy, harder to turn, and more likely to wash out in corners. This is why weight back is the wrong advice for road cycling descents.
What percentage of weight should be on the front wheel when descending?
According to coaching research from Wenzel Coaching, the front wheel should carry roughly 42 to 48 percent of total rider-plus-bike weight for the bike to descend predictably. Below that range, the bike loses steering precision and braking stability. Above it, the front wheel can feel heavy and prone to tucking under in corners.
How do you descend without going over the handlebars?
To descend without going over the handlebars, keep your weight balanced over the bottom bracket rather than shifted far back, brake smoothly and progressively with both brakes, keep your elbows bent, and look ahead. The going-over-the-bars feeling usually comes from excessive front braking combined with locked elbows, not from being too far forward. Slight rearward shift is appropriate only for emergency braking scenarios.
Do heavier riders descend faster?
Yes, heavier riders descend faster due to gravity. Assuming similar aerodynamic profiles and rolling resistance, a heavier rider reaches a higher terminal velocity on a descent because gravity provides more force on a larger mass while aerodynamic drag does not increase proportionally. This is why lighter riders often struggle to stay with heavier riders on downhills.
What is the 75% rule in cycling?
The 75% rule in cycling refers to the polarized training principle that suggests spending roughly 75 to 80 percent of training time at low intensity and the remaining 20 to 25 percent at high intensity. This approach is used by endurance cyclists to build aerobic base without overtraining. It is not directly related to descending technique.
Why Weight Back Is the Wrong Advice and What to Do Instead
The weight-back myth has been holding back cyclists for years, and it is time to put it to rest for road descents. Putting your weight way back on descents is the wrong advice because it unloads the front wheel, strips away steering and braking traction, and creates exactly the twitchy, unstable feeling that riders try to escape by shifting back in the first place. The position creates the problem it is supposed to solve.
The correct approach is a balanced, low, athletic position with hands in the drops, bent elbows, weight through the pedals, and eyes scanning ahead. Lower your center of gravity by getting low, not by getting back. Brake before corners, not in them. Lean the bike, not your body. Press hard into the outside pedal through every turn. These are the techniques that the best descenders in the world actually use, regardless of what the conventional coaching wisdom says.
If you take one thing away from this article, let it be this. Your front wheel is your friend on a descent. Load it, trust it, steer with it. Stop running away from it by sliding back off the saddle. Get balanced, get low, get confident, and the speed will follow.
The next time you crest a climb and start down the other side, run through the five-step setup. Hands in the drops, elbows bent, weight over the bottom bracket, soft grip, eyes up. You may be surprised how much calmer and more controlled a balanced descent feels compared to the weight-back position you have been using all along. That calm is not in your head. It is physics, and it is the difference between a descent you survive and a descent you actually enjoy.