
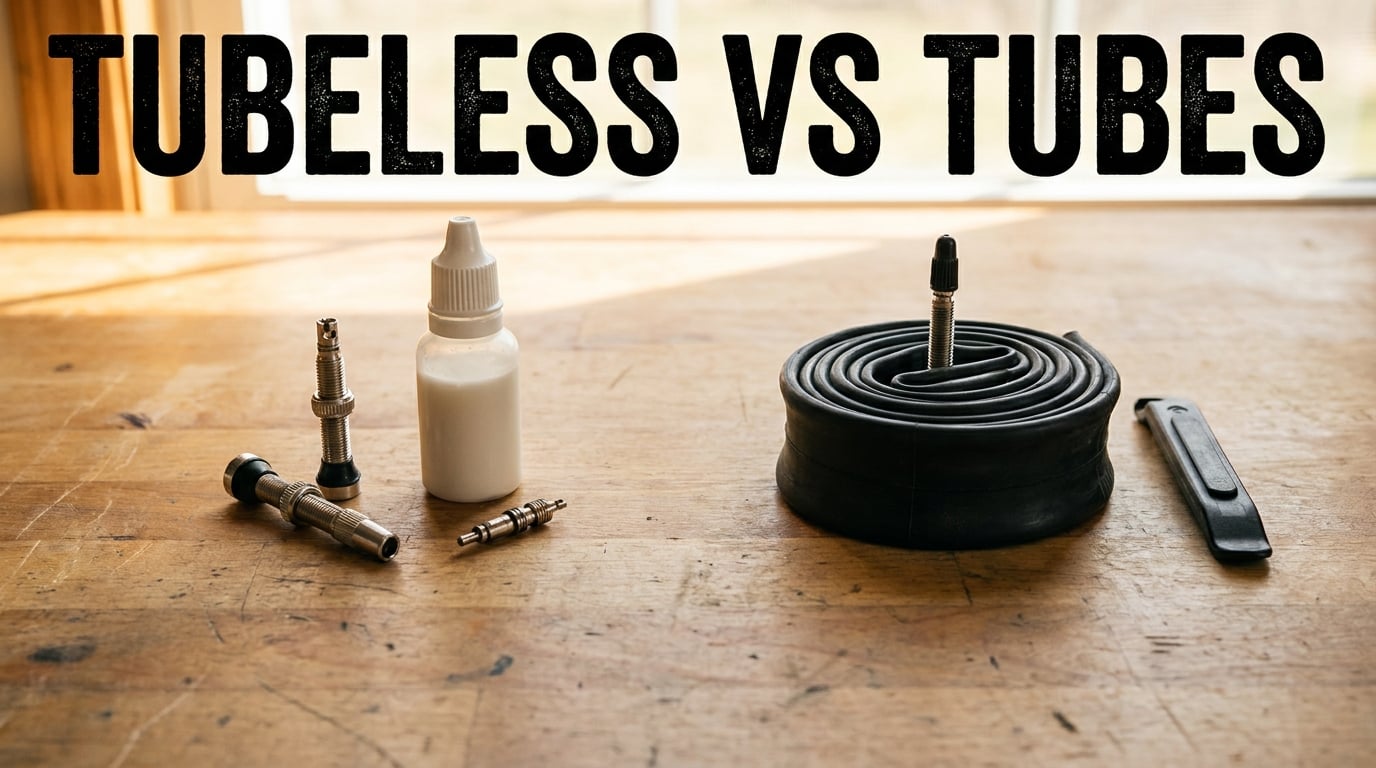
If you have spent any real time on a bike, you have probably heard the debate. Tubeless vs tubes is one of those conversations that splits group rides right down the middle. Some riders swear they will never go back to inner tubes. Others tried tubeless once, got covered in sealant, and went straight back to what they know.
Here is the honest truth from our team after years of riding both systems across road, gravel, and mountain bikes. Neither option is universally better. The right choice depends entirely on how you ride, where you ride, and how much maintenance hassle you are willing to tolerate.
This guide breaks down exactly how each system works, the real-world pros and cons nobody tells you about, and which setup fits your specific riding style. Whether you are bombing rocky descents on a mountain bike, grinding gravel roads for hours, or chasing speed on smooth tarmac, you will have a clear answer by the end. For a deeper look at roadside repair options for both systems, check our guide on what to carry for repairs on long rides.
Table of Contents
How Traditional Inner Tubes Work
Inner tubes are the system most cyclists grew up with, and for good reason. The concept is beautifully simple. A rubber inner tube sits inside the tire between the tire casing and the rim. You inflate the tube, the tube pushes the tire bead outward against the rim hook, and that pressure holds everything in place.
The tire itself does not hold air. The tube does all the work. This means the tire can have small pores, cuts, or even tiny tears in the casing without losing pressure, because the butyl rubber tube inside is what actually contains the air.
Tubes come in different materials. Standard butyl rubber is what most bikes ship with from the factory. Latex tubes are lighter and roll faster but lose air more quickly, requiring daily top-ups. Thermoplastic polyurethane, or TPU tubes, are the newest option and they are changing the conversation, which we cover later in this guide.
When you get a puncture with tubes, the fix is straightforward. Pull the wheel, remove one side of the tire, swap the tube, reinstall, inflate, and ride. Most riders can do this in under five minutes with a bit of practice.
How Tubeless Tires Work
Tubeless systems eliminate the inner tube entirely. Instead, the tire itself holds the air through an airtight seal formed directly between the tire bead and the rim. This requires specific components working together: tubeless-ready tires, tubeless-compatible rims, rim tape that seals the spoke holes, a tubeless valve, and liquid sealant sloshing around inside.
The magic ingredient is the sealant. This liquid latex or particle-based solution coats the inside of the tire as the wheel spins. When a thorn, glass shard, or small nail punches through the tire casing, the sealant rushes into the hole and solidifies on contact with air. Most small punctures seal themselves before you even notice them.
Without a tube, you also eliminate pinch flats. Pinch flats happen when an inner tube gets pinched between the tire and rim during a hard impact, creating two snake-bite holes. Tubeless setups can run much lower pressures because there is no tube to pinch, which improves grip and comfort dramatically on rough terrain.
The trade-off is complexity. Tubeless requires an airtight system, which means every component must work perfectly together. A tiny leak in the rim tape, a valve that is not seated properly, or an old tire with a porous casing will leave you pumping air every few days.
Tubeless vs Tubes: The Core Differences
Understanding the tubeless vs tubes comparison comes down to a handful of core differences that affect how each system performs on the trail and road.
Air containment: Tubes hold air in a separate rubber bladder. Tubeless systems hold air through a bead-to-rim mechanical seal plus liquid sealant.
Puncture handling: Tubes require manual replacement when punctured. Tubeless self-seals most small punctures automatically through sealant action.
Pinch flat risk: Tubes are vulnerable to pinch flats at lower pressures. Tubeless eliminates pinch flats entirely since there is no tube to pinch.
Minimum tire pressure: Tubes typically need higher pressures to avoid pinch damage, usually 30 to 80 PSI depending on tire width. Tubeless can run significantly lower, often 20 to 40 PSI on gravel and as low as 15 PSI on mountain bikes, without risk.
Maintenance: Tubes are install-and-forget until you flat. Tubeless requires sealant refreshes every two to six months depending on climate and riding frequency.
Setup difficulty: Tubes are beginner-friendly and require only tire levers and a pump. Tubeless initial setup often demands a compressor or booster pump to seat the bead, plus patience getting the airtight seal right.
Weight: Tubeless removes the inner tube weight but adds sealant weight. The net savings is modest on road bikes but more meaningful on mountain bikes where tubeless-ready tires and rims can be designed lighter.
Pros and Cons of Inner Tubes
Advantages of Tubes
Inner tubes have survived for over a century because they are genuinely good at what they do. The simplicity is hard to beat.
Easy installation: Anyone can install a tube with tire levers and a basic hand pump. No compressor, no sealant, no special tools.
Quick roadside repair: A flat with tubes takes about five minutes to fix. Pop in a new tube, inflate, and you are rolling again.
Lower initial cost: Tubes cost a few dollars each. No valves, no rim tape, no sealant, no conversion kit required.
Universal compatibility: Almost every clincher rim and tire on the planet works with tubes. No need to check compatibility charts.
Zero maintenance between flats: Install a tube and forget about it. No sealant drying out, no valves clogging, no topping up every few months.
Disadvantages of Tubes
Tubes are not without real drawbacks, especially if you ride aggressively or on rough terrain.
Pinch flat vulnerability: Hit a sharp edge hard enough and the tube gets pinched between tire and rim. Two holes, instant flat, no warning.
Higher required pressure: To avoid pinch flats, you must run higher pressures. This reduces grip on loose surfaces and harshens the ride on rough roads.
Every puncture stops you: A thorn that tubeless would seal instantly becomes a full stop with tubes. Pull over, swap the tube, keep riding.
Rolling resistance: Tubes add friction inside the tire casing. Latex and TPU tubes reduce this, but standard butyl tubes cost a measurable amount of wattage compared to tubeless.
Pros and Cons of Tubeless Tires
Advantages of Tubeless
Tubeless has taken over mountain biking and gravel riding because the benefits are real and significant for off-road riding.
Self-sealing punctures: Most small punctures from thorns, glass, and debris seal automatically. You keep riding without ever stopping. Many tubeless riders report going entire seasons without a single flat that required attention.
Lower tire pressure: Without pinch flat risk, you can run 20 to 30 percent lower pressures. This means more tire contact with the ground, better traction on loose surfaces, and a noticeably smoother ride over rough terrain.
Better grip and cornering confidence: Lower pressures let the tire conform to the surface. On gravel and trail, this translates to grip you can feel in corners and on technical climbs.
No pinch flats: Eliminate an entire category of flats. Rock gardens, potholes, and curb drops no longer threaten your ride with snake-bite punctures.
Reduced rotational weight: Removing the tube saves weight at the outer edge of the wheel where it matters most for acceleration and handling.
Disadvantages of Tubeless
Here is where competitors often go soft. Tubeless has real downsides that you need to understand before committing.
Messy when it fails: When sealant cannot handle a puncture, the result is a spray of liquid latex all over your frame, drivetrain, legs, and kit. Cleaning dried sealant off a chain and cassette is not fun.
Initial setup needs a compressor: Standard floor pumps often cannot deliver enough air fast enough to seat a tubeless bead. You typically need an air compressor, a booster tank, or a tubeless-specific inflator pump for the first installation.
Regular sealant maintenance: Sealant dries out over time. In hot, dry climates it can dry in two months. You need to check and refresh sealant every two to six months, or risk running dry and losing the self-sealing benefit.
More complex roadside repairs: When a puncture is too big for sealant, you need a tire plug kit and the skill to use it. If the plug fails, you are installing a tube roadside, which means dealing with sealant-soaked hands and a messy tire.
Higher initial cost: Valves, rim tape, sealant, and tubeless-ready tires add up. If your wheels are not already tubeless-compatible, you may need new rims or wheels entirely.
Burping risk: At very low pressures with aggressive cornering, the bead can momentarily unseat and release air. This is rare with proper setup but worth knowing about for racers running extreme low pressures.
When Tubes Make More Sense
For certain riders, tubes remain the smarter choice. You should probably stick with tubes if you fall into any of these categories.
- You ride mostly smooth roads: Puncture risk is lower, pressures are naturally higher, and the tubeless benefit of running low pressure does not apply.
- You want simplicity: No sealant checks, no valve core cleaning, no compressor. Install tubes and ride.
- You are a beginner: Learning to fix a tubed flat is a fundamental skill every cyclist should master before moving to tubeless.
- You commute daily: Quick, reliable, cheap. A flat costs you five minutes, not a messy roadside ordeal.
- Your wheels are not tubeless-compatible: Conversion of non-compatible wheels is unreliable and not worth the hassle.
- You ride in extreme cold: Sealant performance degrades in freezing temperatures, making tubes more dependable for winter riding.
When Tubeless Wins
Tubeless shines when the terrain gets rough, the puncture risk goes up, and traction matters more than simplicity.
- Mountain biking: Tubeless is essentially mandatory at this point. Lower pressures for grip, no pinch flats on rock gardens, and self-sealing thorn punctures on overgrown trails.
- Gravel riding: Gravel roads mean constant small debris and rough surfaces. Tubeless lets you run 30 to 40 PSI for comfort and grip while shrugging off goat-head thorns and flint shards.
- Bikepacking: Carrying loaded bags over mixed terrain with no support means puncture reliability is critical. Tubeless dramatically reduces flat stops on multi-day rides. See our coverage of tubeless benefits for bikepacking adventures.
- Racing: Lower rolling resistance, lighter rotational weight, and fewer race-ending flats make tubeless the choice for competitive gravel and mountain bike racing.
- High-puncture environments: If your local trails or roads are covered in thorns, glass, or construction debris, tubeless self-sealing saves you from constant flat tires.
Tubeless vs Tubes by Bike Type
The tubeless vs tubes question answers itself differently depending on what bike you ride. Here is the breakdown by discipline.
Road Bikes: Speed and Efficiency
Road cycling is where the debate is loudest and the answer is least clear-cut. Modern road tubeless has improved dramatically, with better tire options and more tubeless-ready wheels available than ever. Pro teams are increasingly running tubeless in classics and even stage races.
The benefits on road include measurable rolling resistance improvements, typically 5 to 15 watts saved compared to butyl tubes. Tubeless road tires also allow lower pressures on rough pavement, improving comfort on long rides without pinch flat risk. Puncture protection is meaningful for riders who regularly cross debris-strewn urban roads.
However, road tubeless operates at higher pressures than off-road setups, typically 60 to 80 PSI. At these pressures, the self-sealing benefit is reduced because air escapes faster through a puncture. Sealant sometimes struggles to seal holes at high pressure before significant air is lost. Road tubeless setup is also trickier because tighter-fitting road tires make initial bead seating harder.
For pure road riders who rarely flat and value simplicity, high-quality TPU tubes are a compelling alternative that approaches tubeless rolling resistance without the maintenance.
Gravel Bikes: Comfort and Puncture Confidence
Gravel is where tubeless makes the most obvious sense. Gravel tires, typically 35 to 45mm wide, are designed to run at lower pressures for comfort and traction over mixed surfaces. Tubes at these pressures are still pinch-flat vulnerable when hitting embedded rocks or potholes hidden under loose gravel.
Tubeless on gravel means you can run 28 to 40 PSI depending on rider weight and tire width, soaking up chatter while maintaining grip on loose corners. The puncture protection is essential because gravel roads are littered with thorns, wire, and sharp stones that would flat a tubed setup multiple times per ride in some regions.
Most gravel bikes now ship tubeless-ready from the factory. If yours did, conversion is straightforward. If you are still running tubes on a gravel bike, you are leaving performance and flat protection on the table.
Mountain Bikes: Grip, Control, and Durability
Mountain biking went tubeless years ago and never looked back. At this point, running tubes on a modern mountain bike is genuinely unusual outside of budget entry-level bikes. The benefits are too significant to ignore.
Mountain bike tubeless pressures range from 15 to 25 PSI depending on tire width, rider weight, and terrain. At these pressures, grip is transformed. The tire conforms to roots, rocks, and off-camber surfaces, giving you traction that simply is not possible with higher-pressure tubed setups. Cornering confidence goes through the roof.
Pinch flat elimination matters enormously on mountain bikes. Rock gardens, drops, and technical descents deliver impacts that would destroy tubed setups. Tubeless absorbs these hits without flats, letting you ride harder and more aggressively.
What Tubeless Conversion Actually Costs
Cost is where many riders get surprised. The sticker price of sealant and valves is only part of the story. Here is what tubeless really costs over the first year compared to tubes.
Tubes, year one: A handful of spare tubes at a few dollars each, plus a patch kit. Total annual cost for most riders sits under thirty dollars. No tools beyond tire levers and a pump you already own.
Tubeless, year one if your wheels are tubeless-ready: Tubeless valves run about fifteen to twenty-five dollars per pair. Rim tape, if not pre-installed, costs another ten to fifteen dollars. Sealant is roughly fifteen to twenty-five dollars per wheel, and you will need to refresh at least once or twice in the first year, adding another twenty to thirty dollars.
The hidden compressor cost: If you do not own an air compressor, you need one or a booster pump for initial bead seating. A small compressor runs eighty to one hundred fifty dollars. A tubeless booster floor pump costs around fifty to one hundred dollars. This is a one-time purchase, but it is real money that most cost comparisons conveniently ignore.
Tubeless, year one if your wheels are not compatible: You need new tubeless-compatible rims or wheels. Budget wheelsets start around two hundred dollars. Quality mid-range tubeless wheelsets run four hundred to eight hundred dollars. This makes conversion cost-prohibitive for some riders.
Ongoing sealant cost: Plan on refreshing sealant two to three times per year depending on your climate. That is roughly forty to sixty dollars annually in sealant alone. Add valve core replacements and occasional rim tape redos.
Over three years, tubeless costs meaningfully more than tubes for most riders. The payoff comes in fewer flats, better ride quality, and time saved not fixing punctures. Whether that trade is worth it depends on how often you flat and how much you value performance.
The Messy Reality: When Tubeless Sealant Fails
Most tubeless guides gloss over what happens when a puncture is too big for sealant to handle. We think you deserve the unvarnished version because this is the number one complaint from riders who switched back to tubes.
When you hit a sidewall slash, a large glass shard, or a rock cut that sealant cannot close, the tire loses air rapidly. Sealant sprays everywhere. Your frame, drivetrain, brake rotors, shoes, and shorts get coated in liquid latex that dries into a stubborn film. Cleaning sealant off a chain and cassette requires solvent and patience.
Roadside, you have two options. First, try a tire plug kit, which pushes a sticky rubber strip into the hole. This works for medium punctures but not for sidewall tears. Second, install a backup tube, which means removing the tubeless valve, stuffing a tube inside a sealant-covered tire, and dealing with messy hands on the side of the road.
The practical advice from experienced tubeless riders is this: always carry a spare tube, a plug kit, and a small rag or gloves. Even on tubeless setups, the backup tube saves rides. Our team always packs one regardless of system. Learn more about tubeless tire repair techniques for when you are far from help.
TPU Tubes: The Middle Ground
Thermoplastic polyurethane tubes, or TPU tubes, are the most exciting development in the tubeless vs tubes debate in years. These tubes are radically lighter than butyl rubber, often weighing under 50 grams for a road tube. They also roll nearly as fast as tubeless setups, closing much of the rolling resistance gap that pushed riders toward tubeless in the first place.
TPU tubes are also more puncture-resistant than traditional butyl tubes and pack down to the size of a smartphone, making them ideal as spare tubes even on tubeless setups. Brands like Tubolito and Schwalbe have made TPU tubes increasingly popular among weight-conscious road and gravel riders.
The downside is cost. TPU tubes run fifteen to thirty dollars each, roughly three to five times the price of standard butyl tubes. For riders who want tubeless-like performance without sealant maintenance, compressors, and messy roadside repairs, TPU tubes are worth serious consideration.
TPU is not a replacement for tubeless on aggressive off-road riding where low pressures and pinch flat protection matter most. But for road cyclists and casual gravel riders who want simplicity with better performance than butyl, TPU is a genuine third option.
How to Convert to Tubeless: Quick Checklist
If you have decided tubeless is right for your riding, here is a practical checklist for the conversion process.
Step 1: Check compatibility. Confirm your rims are tubeless-ready or tubeless-compatible. Look for markings on the rim or check the manufacturer specs. Your tires must also be tubeless-ready, not standard clinchers.
Step 2: Gather your components. You need tubeless valves, tubeless rim tape if not pre-installed, liquid sealant, tire levers, a valve core removal tool, and an air compressor or booster pump.
Step 3: Clean and tape the rims. Remove the old tube and tire. Clean the rim bed thoroughly. Apply rim tape in a single continuous strip, overlapping the valve hole by a few millimeters on each side. Poke a clean hole through the tape at the valve position.
Step 4: Install the valve and tire. Insert the tubeless valve through the taped valve hole and tighten the lockring by hand. Mount the tubeless tire onto the rim, starting opposite the valve and finishing at the valve.
Step 5: Seat the bead with fast air. Remove the valve core for maximum airflow. Hit the tire with the compressor or booster pump until both beads pop onto the rim shelf. You will hear two distinct popping sounds.
Step 6: Add sealant and finalize. Reinstall the valve core. Deflate slightly, break one small section of bead, pour in the recommended sealant amount, re-seat the bead, and inflate to riding pressure. Spin and shake the wheel to distribute sealant.
Step 7: Check for leaks. Listen for hissing. Spray the bead area with soapy water and look for bubbles. Address any leaks before riding.
Common mistakes include using too little sealant, not cleaning the rim bed before taping, and failing to refresh sealant every few months. Get these right and tubeless rewards you with seasons of trouble-free riding.
Frequently Asked Questions
What are the downsides to tubeless tires?
Tubeless tires require regular sealant maintenance every two to six months, initial setup often needs a compressor, roadside repairs are messier when sealant fails, and conversion costs more than tubes if your wheels are not already tubeless-ready. Big punctures that sealant cannot handle spray liquid latex on your frame and kit.
Do professional cyclists use tubeless?
Yes. Tubeless is now standard in professional mountain biking and increasingly common in professional gravel racing. On the road, adoption is growing among WorldTour teams, especially in classics and rough-stage races. However, some road pros still use tubular or tubed setups depending on conditions and team equipment partnerships.
Do tubeless tires improve ride quality?
Tubeless tires improve ride quality by allowing lower tire pressures without pinch flat risk. Lower pressures mean the tire conforms better to road and trail surface irregularities, absorbing vibrations and improving grip. Most riders report a noticeably smoother, more controlled feel compared to higher-pressure tubed setups.
Why do people ride tubeless?
Riders choose tubeless for self-sealing puncture protection, the ability to run lower pressures for better grip and comfort, elimination of pinch flats, reduced rolling resistance, and lighter rotational weight. For mountain biking and gravel riding, these benefits add up to fewer flats and noticeably better handling on rough terrain.
Can I convert my current bike wheels to tubeless?
You can convert if your rims and tires are tubeless-ready or tubeless-compatible. Check for markings on the rim or consult manufacturer specifications. Conversion requires tubeless valves, rim tape, sealant, and a compressor or booster pump for initial bead seating. If your wheels are not tubeless-compatible, you need new wheels, which significantly increases cost.
Conclusion
The tubeless vs tubes decision is not about which system is universally superior. It is about matching the right setup to how and where you ride. Mountain bikers and gravel riders benefit enormously from tubeless with its lower pressures, self-sealing punctures, and pinch flat elimination. Road riders who value simplicity and rarely flat may find tubes or TPU tubes entirely sufficient.
Consider your terrain, your tolerance for maintenance, and your budget honestly. Whatever you choose, carry a backup tube and a plug kit on long rides. The best system is the one that keeps you rolling with confidence on the routes you actually ride.