
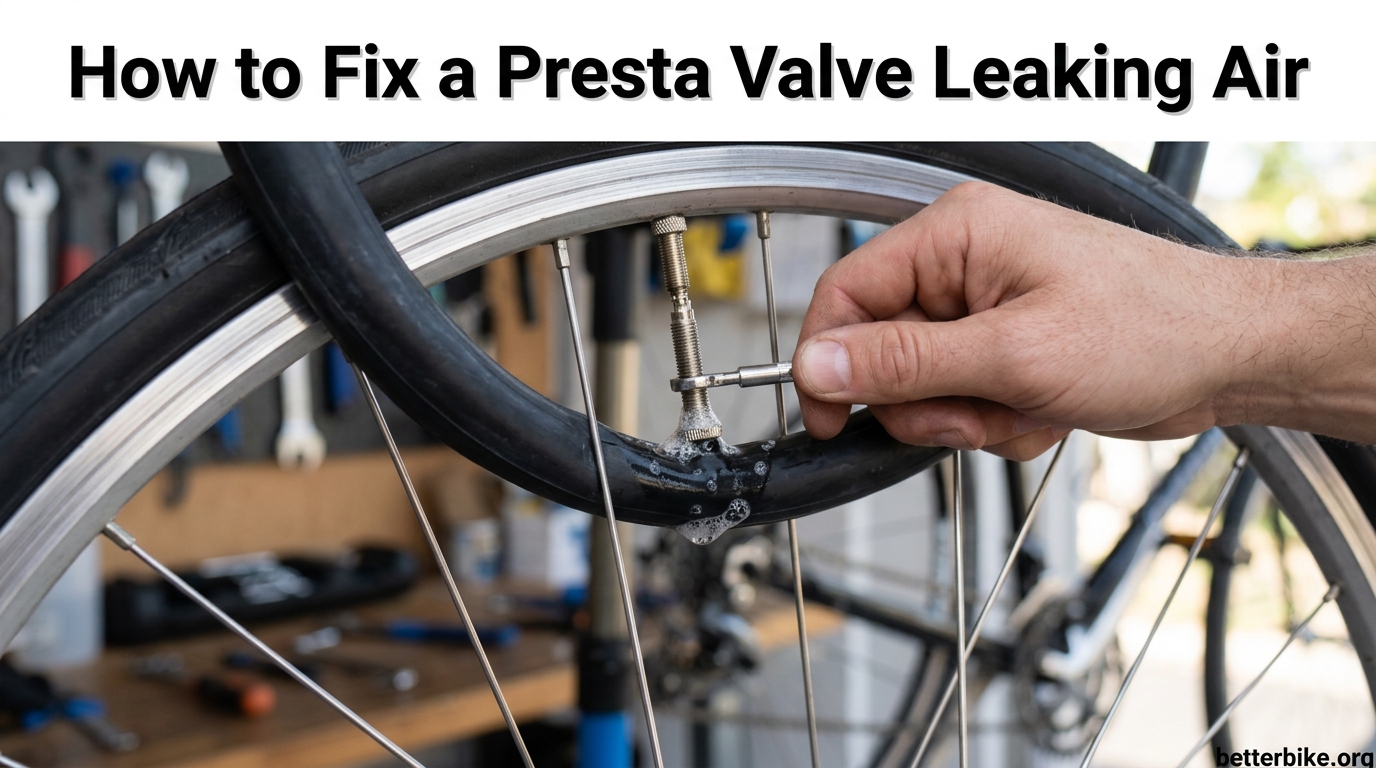
A Presta valve leaking air usually comes down to a loose valve core, a worn O-ring seal, or damage where the valve stem meets the rim. I see this constantly on road and gravel bikes, and the fix is almost always simple: tighten the core with a valve core tool, replace the core, or check the rim tape.
I’ll walk you through the exact diagnosis steps I use in my shop, the tools you actually need, and the clear decision points for repairing versus replacing. By the end, you’ll know whether you can fix the leak at home in 10 minutes or if it’s time to swap the tube.
Table of Contents
What Causes a Presta Valve to Leak Air
A Presta valve holds air using a small threaded core that compresses a rubber O-ring against the valve body. When that core loosens, when the O-ring wears, or when the valve stem gets damaged, air escapes. The three most common leak points are the valve core threads, the base of the valve stem, and the spot where the valve passes through the rim.
Most riders I work with notice the problem when they wake up to a flat tire overnight, or when they hear a faint hissing sound when they put their ear close to the wheel. Slow pressure loss over hours or days is the telltale sign.
The Three Leak Zones on a Presta Valve
Before you grab any tools, you need to know where the air is actually escaping. There are only three possible leak points on a Presta valve setup:
- Zone 1 – Valve core: The small brass piece at the top of the valve where the plunger sits. This is the most common leak point and the easiest to fix.
- Zone 2 – Valve stem base: Where the rubber or metal stem meets the rim, sealed by the rubber grommet or rim tape. Leaks here usually point to rim tape issues.
- Zone 3 – Valve-to-tube junction: Inside the tube, where the valve stem is bonded to the rubber. This kind of leak usually means the tube is done.
How to Diagnose a Presta Valve Leak Step by Step
Diagnosing a Presta valve leak takes about 5 minutes with a simple soapy water test. I do this every time before replacing a tube, because half the time the fix is just a 30-second valve core tightening.
Step 1: Inflate the Tire to Operating Pressure
Pump the tire to its normal riding pressure. For road bikes that’s 80-100 psi, for mountain bikes 25-35 psi, for gravel 40-60 psi. The tire needs to be at full pressure for the leak to show up clearly.
Step 2: Apply Soapy Water to Each Zone
Mix a few drops of dish soap with water in a spray bottle or small cup. Apply it generously to the valve core, the valve stem, and the base where the stem meets the rim. Watch for bubbles forming – that’s your leak.
If you see bubbles around the very top of the valve, the leak is at the core. If bubbles form where the stem exits the rim, the leak is at the rim tape or grommet. If you see bubbles all along the stem itself, the stem is damaged.
Step 3: Listen for Hissing
In a quiet room, bring your ear within an inch of the valve. Slow leaks often produce a faint hissing that you can pinpoint by sound alone. Move around the valve – core, sides, base – and note where the sound is loudest.
Step 4: Check the Valve Core by Hand
With the tire still inflated, try to unscrew the valve core by hand. Place your fingers on the knurled top of the core and turn counter-clockwise. If it moves, even slightly, the core is loose and is almost certainly your leak source.
The 5 Most Common Presta Valve Problems
Over the last decade of working on bikes, I’ve seen the same five Presta valve issues account for nearly every leak complaint. Here’s what each one looks like and why it happens.
Problem 1: Loose Valve Core
This is the number one cause of Presta valve leaking air. The valve core can work itself loose from normal pumping, temperature changes, or vibrations while riding. Many riders don’t even realize the core is removable, let alone that it can unscrew itself.
The fix is to tighten the core clockwise with a valve core tool or needle-nose pliers. I keep a core tool in my saddlebag at all times – they’re tiny and weigh almost nothing.
Problem 2: Worn or Dirty O-Ring Seal
Inside the valve core is a small rubber O-ring that creates the airtight seal. Over time, this O-ring hardens, cracks, or gets coated with dried tubeless sealant. Once it loses its seal, air slips past even with the core tight.
The fix is to replace the valve core. New cores cost about 1-3 dollars and take 30 seconds to swap. This is the single most cost-effective repair in cycling.
Problem 3: Damaged or Bent Valve Stem
A bent Presta valve stem is usually caused by impacts, a bent rim, or improper pump head use. Once the stem is bent, the O-ring inside the valve body cannot seal properly, and air leaks past.
Unfortunately, you can’t straighten a bent valve stem on a tube. The fix is to replace the entire tube or, on a tubeless setup, replace the valve itself.
Problem 4: Rim Tape Failure
The rim tape covers the spoke holes inside the rim. If it shifts, tears, or was installed poorly, air can escape from the inside of the tube where the valve stem passes through. This often masquerades as a valve leak when the real problem is the tape.
The fix is to remove the tire and tube, inspect the rim tape, and replace it if needed. Use cloth-backed or PVC rim tape that fully covers all spoke holes, with a small hole just for the valve.
Problem 5: Valve Separating from the Tube
This is the worst-case scenario. The valve stem is bonded to the inner tube with a small ring of rubber, and if the retaining nut on the valve is over-tightened, the valve can pull away from the tube. Air hisses out from inside the tube, and no amount of valve core tightening will help.
The only fix is a new tube. This is a common mistake I see from riders who crank down the lock nut thinking it will stop a leak, when in fact it creates a much bigger one.
How to Fix a Leaking Presta Valve Step by Step
Now that you’ve diagnosed the leak, here’s how to actually fix it. I’ll go in order from easiest to hardest, so start at the top and only move down if the previous fix didn’t work.
Fix 1: Tighten the Valve Core (2 minutes)
Tools needed: Valve core tool or needle-nose pliers.
Unscrew the lock nut on the valve stem and push it down the stem. Insert the valve core tool into the valve and turn clockwise until snug. Do not over-tighten – finger tight plus a quarter turn is plenty. Inflate the tire and re-test with soapy water.
If you don’t have a core tool, you can use needle-nose pliers carefully. Grip the knurled top of the core and turn gently. BetterBike’s tech team recommends dedicated tools because pliers can damage the core.
Fix 2: Replace the Valve Core (5 minutes)
Tools needed: Valve core tool, new Presta valve core, soapy water for testing.
Remove the old core with the tool by turning counter-clockwise. The air will rush out, so make sure the tire is deflated first or do this quickly. Drop in a new core and tighten it clockwise. Inflate the tire and check for leaks.
Carry a spare core on every ride. They weigh about 2 grams and have saved countless rides for me.
Fix 3: Replace the Entire Tube (15-30 minutes)
Tools needed: Tire levers, new tube, pump, valve core tool.
If the valve stem is bent, damaged, or separating from the tube, the tube needs to be replaced. Deflate the tire fully, unseat the bead with tire levers, and pull out the old tube. Before installing the new tube, inspect the rim tape and the inside of the tire for debris.
When installing the new tube, inflate it just enough to give it shape, insert the valve straight through the rim hole, then work the tube into the tire before seating the bead. Inflate slowly and check that the valve is centered.
Fix 4: Fix Rim Tape Issues (30-45 minutes)
Tools needed: Tire levers, new rim tape, scissors, pump.
Remove the tire and tube. Peel off the old rim tape carefully, noting where the valve hole is. Clean the rim bed thoroughly. Apply new rim tape starting 5 cm before the valve hole, wrapping tightly with 50% overlap, and ending 5 cm past the valve hole. Poke a small hole for the valve stem with a pin or awl.
Reinstall the tube and tire, inflate to pressure, and test with soapy water. If bubbles no longer appear at the rim, you’ve fixed the leak.
Tools You Need for Presta Valve Repair
You don’t need a full workshop. Here’s the minimal kit that handles 95% of Presta valve issues:
- Valve core tool: The single most important tool. Costs about 5 dollars and fits in any saddlebag.
- Spare valve cores: Pack 2-3. They’re cheap insurance against roadside failures.
- Needle-nose pliers: Backup for the core tool, but use carefully.
- Tire levers: For removing the tire when replacing a tube.
- Soapy water spray bottle: For diagnosing leaks quickly.
- Microfiber cloth: For cleaning valve threads before reassembly.
- Rim tape: Cloth or PVC tape in the correct width for your rims.
Quick Roadside Fixes for a Leaking Presta Valve
When you’re 30 miles from home and your tire is going soft, you need a fix that works in the parking lot. These three methods have saved me more times than I can count.
Roadside Fix 1: Tighten the Core Mid-Ride
If you have a valve core tool in your saddlebag (and you should), you can tighten a loose core in under a minute. Unscrew the lock nut, insert the tool, turn clockwise, reinflate, and ride on.
Roadside Fix 2: Replace the Core
Carry spare cores. When a core fails on the road, swap it out in 2 minutes. Deflate, remove the old core, drop in a new one, tighten, and inflate. This works for worn O-rings and dirty cores.
Roadside Fix 3: Remove the Core to Stop a Slow Leak
This is a true emergency hack. If the leak is at the core and you have no spare, removing the core entirely and riding home without it is sometimes possible on tubeless setups. The tire will deflate, but you can limp home at low pressure. Do not try this on a regular tube – the valve cannot seal without the core.
Repair vs Replace Decision Guide
This is the question I get most often. Here’s a clear decision tree based on the cause of the leak:
Repair the valve core when:
- The core is loose but not damaged
- The O-ring is worn or dirty but the core body is intact
- You have a core tool and a spare core
Replace the entire tube when:
- The valve stem is bent, cracked, or visibly damaged
- The valve is separating from the tube
- You cannot stop the leak at the stem with core replacement
Replace the rim tape when:
- Bubbles form at the rim-stem interface
- The old tape is shifted, torn, or peeling
- You replaced the tube but the leak returned within 24 hours
Go to a bike shop when:
- The rim itself is damaged or cracked
- You’re dealing with a tubeless setup that won’t seal
- You cannot remove the valve core (it’s seized)
Presta vs Schrader Quick Comparison
Presta valves are slimmer, lighter, and allow higher pressures, which is why road, gravel, and most mountain bikes use them. Schrader valves are the same as car tire valves – wider, with a spring-loaded core, and more durable but heavier.
The key difference for our purposes: Presta valves have a removable core that can be tightened or swapped, while Schrader cores require a different tool and are less commonly serviced by riders. Presta valves are also more sensitive to damage from pump heads and require the lock nut to be loosened before inflation.
Preventing Presta Valve Leaks Long Term
A little maintenance goes a long way. Here’s what I do on every bike I own, and what I recommend to every rider I work with.
Prevention 1: Check Valve Cores Quarterly
Every 3 months, run your fingers around the valve core while the tire is inflated. If you feel it move at all, tighten it. This 10-second check prevents 90% of slow leaks.
Prevention 2: Use Anti-Seize on Threads
A tiny amount of anti-seize paste or silicone grease on the valve core threads prevents corrosion and keeps the core from seizing in place. The Stack Exchange community has documented this trick for years, and it works.
Prevention 3: Replace Cores During Tire Changes
Whenever you change a tire, swap the valve core as a matter of routine. Fresh cores cost almost nothing and eliminate the O-ring failure mode entirely.
Prevention 4: Don’t Over-Tighten the Lock Nut
The lock nut on a Presta valve only needs to be finger tight. Cranking it down with pliers will either damage the rim or pull the valve away from the tube. This is a fix that creates a worse problem than the original leak.
Prevention 5: Inspect Rim Tape During Tire Changes
Every tire change is a chance to inspect the rim tape. Look for tears, gaps, or shifted sections. Replace the tape if you see any damage.
Tubeless Presta Valve Specific Issues
Tubeless setups add a layer of complexity. The Presta valve on a tubeless rim includes a removable rubber base that seals against the rim, plus the standard valve core at the top. Sealant can clog the core, and the rubber base can degrade over time.
If your tubeless valve is leaking sealant, remove the core and clean it thoroughly with isopropyl alcohol. If the base seal is compromised, replace the entire tubeless valve. Most tubeless valves are easy to swap – just unscrew the lock nut on the rim and pull the valve out from the other side.
When to Call a Bike Shop
DIY works for 90% of Presta valve issues, but some situations call for a professional:
- Seized valve cores that won’t budge with a core tool
- Carbon rims that require specific torque values
- Internal valve nut systems on some high-end rims
- Tubeless setups that won’t seal after multiple attempts
- Any time you feel unsure about the repair
A typical valve core replacement at a shop runs about 10-20 dollars. A full tube replacement with installation is 25-50 dollars including parts and labor. Both are quick jobs that most shops can do while you wait.
FAQ’s
Why does my Presta valve keep leaking air?
A Presta valve keeps leaking air because the valve core has loosened, the O-ring seal inside the core has worn out, or the rim tape is failing. The most common cause is a loose valve core, which can be tightened with a valve core tool in under a minute. If the core is tight and the leak continues, replace the core or check the rim tape.
Can you repair Presta valves?
Yes, Presta valves can be repaired in most cases. A loose valve core can be tightened with a valve core tool, a worn core can be replaced with a new one for about 1-3 dollars, and a leaking rim tape can be replaced. The only Presta valve issue that cannot be repaired is a bent or damaged valve stem, which requires replacing the entire tube.
Can you fix a valve stem leak without removing the tire?
Yes, you can fix a valve stem leak without removing the tire if the leak is at the valve core. Tighten the core with a valve core tool or replace the core. If the leak is at the rim tape or valve base, you will need to remove the tire to access the rim. Removing the core mid-ride can also serve as an emergency fix to stop a slow leak.
How to tell if a Presta valve is damaged?
A Presta valve is damaged if the stem is bent, cracked, or visibly deformed, if the valve is separating from the tube, or if the valve core is seized and cannot be removed. Visible damage, persistent hissing after core replacement, and bubbles forming along the stem itself are the main signs. Soapy water testing will pinpoint the exact location of the damage.
Final Thoughts on Presta Valve Leaks
Most Presta valve leaks come down to a loose valve core, and most loose cores can be fixed in under a minute with a 5-dollar tool. That’s why I tell every rider I work with to buy a valve core tool and two spare cores, then carry them on every ride.
If you’ve tried tightening and replacing the core and the leak persists, move on to checking the rim tape and inspecting the valve stem. The systematic approach in this guide catches every leak source I see in the shop, and it should handle whatever is happening on your bike. Diagnose first, fix second, and you’ll save yourself a lot of unnecessary tube replacements this 2026.