
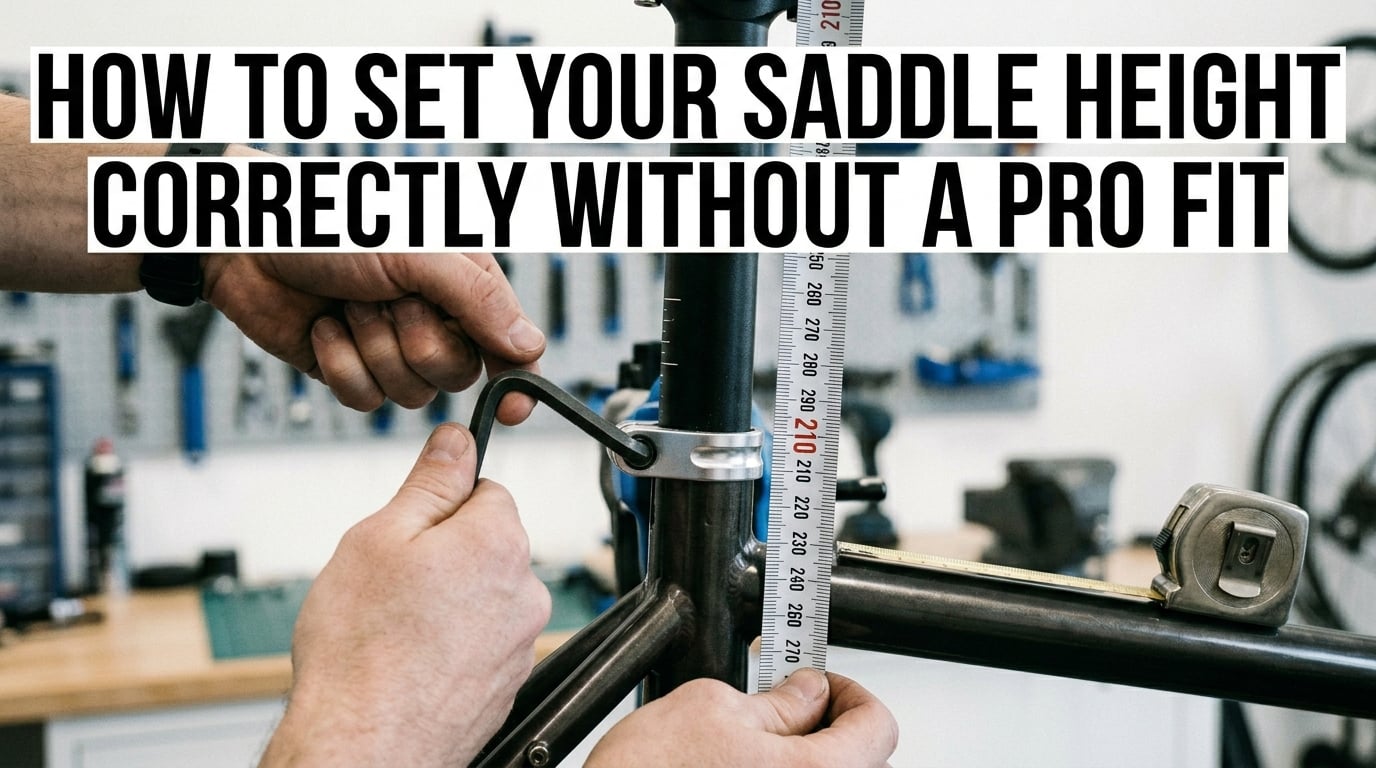
Getting your saddle height right is the single most important adjustment on your bike. It affects your power output, your comfort, and whether you end up with knee pain after every ride. And while a professional bike fit is valuable, you absolutely do not need one to find a saddle height that works.
In this guide, I will walk you through exactly how to set your saddle height correctly without a pro fit. You will learn four proven methods, how to tell if your saddle is too high or too low, and how to fine-tune your position in small increments until everything clicks. Whether you ride a road bike, mountain bike, or indoor trainer, these techniques will get you dialed in.
Our team has tested these methods across dozens of bikes over the years. We have made every mistake possible, from setting the saddle way too high and rocking on the saddle like a boat, to riding too low and wondering why our quads were burning after 10 miles. This guide distills everything we learned into clear, practical steps you can follow today.
If you are preparing for a big event, getting your correct saddle height for long rides sorted early will save you weeks of discomfort. Let’s get into the methods.
Table of Contents
Four Methods to Set Saddle Height at Home
You do not need expensive equipment to find a good saddle height. Cyclists have relied on four main methods for decades, and each one uses either your body measurements or simple on-bike tests to get you in the right ballpark.
Here is a quick comparison of the four methods so you can choose the one that fits your situation:
The Heel Method is the quickest approach. You sit on the bike, place your heel on the pedal at the bottom of the stroke, and adjust until your leg is fully extended with no hip movement. It takes five minutes and requires zero math.
The LeMond Formula uses your inseam measurement multiplied by 0.883 to calculate your saddle height from the center of the bottom bracket to the top of the saddle. Greg LeMond popularized this formula, and it remains one of the most widely used starting points in cycling.
The 109% Method (developed by Hamley and Thomas) measures from the center of the bottom bracket to the top of the saddle along the seat tube, using your inseam multiplied by 1.09. Some riders find this gives a slightly higher, more efficient position than LeMond.
The Holmes Method uses a goniometer to measure your knee angle at the bottom of the pedal stroke. The target is 25 to 35 degrees of knee flexion. This is the most precise method but requires a tool and a helper to measure accurately.
Most riders I know start with the heel method for a quick ballpark, then refine using the LeMond formula or 109% method. From there, you fine-tune by feel over several rides. I will cover each method in detail below.
How to Set Saddle Height: The Heel Method Step by Step
The heel method is the fastest way to get a solid starting saddle height. It works because your heel length roughly accounts for the difference between your cycling shoe sole thickness and the distance your foot sits above the pedal axle.
Here is how to do it:
Step 1: Put on the cycling shorts and shoes you normally ride in. Prop your bike against a wall or mount it on a trainer so you can sit on it without falling over.
Step 2: Unclip or remove your foot from the pedal. Place your bare heel (or socked heel) directly on top of the pedal axle with the crank at the 6 o’clock position, pointing straight down.
Step 3: Your leg should be completely straight, fully extended but not locked. If your heel barely reaches the pedal, your saddle is too high. If your knee is bent, your saddle is too low.
Step 4: Adjust the seatpost up or down in small increments until your leg is fully extended with your heel on the pedal. Tighten the seatpost clamp.
Step 5: Now clip back in normally with the ball of your foot over the pedal axle. At the bottom of the stroke, you should have a slight bend in your knee. This is your riding position.
The heel method gets you within a few millimeters of where you need to be. It is not perfect, because foot length and shoe stack height vary from person to person. But it is an excellent starting point that has served millions of cyclists, and you can refine from there.
One thing to watch for: if your hips rock side to side when you pedal with the ball of your foot, your saddle is too high even if the heel method said it looked right. Drop it 3 to 5 millimeters and try again.
The LeMond Formula: Saddle Height from Inseam
The LeMond formula is one of the most trusted saddle height calculations in cycling. Greg LeMond, three-time Tour de France winner, popularized this method, and it gives you a precise starting measurement based on your actual body proportions.
The formula is simple: measure your inseam in centimeters, then multiply by 0.883. The result is your saddle height, measured from the center of the bottom bracket to the top of the saddle, along the seat tube.
Here is how to measure your inseam correctly for this formula:
Step 1: Stand barefoot with your feet shoulder-width apart, back against a wall. Wear your cycling shorts.
Step 2: Take a hardcover book and place it firmly between your legs, spine up, simulating saddle pressure on your sit bones. Hold it level against the wall.
Step 3: Have a friend measure from the top of the book spine straight down to the floor. If you are alone, mark the wall at the top of the book and measure from that mark to the floor.
Step 4: Record this measurement in centimeters. For example, if your inseam measures 82 cm, your calculation is 82 x 0.883 = 72.4 cm.
Step 5: Set your saddle so that the distance from the center of the bottom bracket to the top of the saddle measures 72.4 cm along the seat tube. Use a tape measure along the seat tube axis, not a straight-line measurement.
The LeMond formula gives you a measurement that works for most riders on road bikes with standard 172.5mm cranks and clipless pedals. If you use flat pedals, you may want to go 3 to 5mm lower since your foot sits differently on the pedal.
One common mistake I see: people measure the straight-line distance from the bottom bracket to the saddle rather than following the seat tube angle. This gives you a shorter measurement than intended. Always measure along the seat tube itself for accuracy.
If you switch between different shoes, pedals, or crank lengths, you will need to adjust from this baseline. I cover those adjustments later in the fine-tuning section.
The 109% Method (Hamley and Thomas)
The 109% method was developed through research by Hamley and Thomas in the 1960s. They found that optimal saddle height correlates to 109% of a rider’s inseam measurement. This method has held up well in subsequent studies and is favored by many coaches.
The key difference from the LeMond formula is the measurement point. The 109% method measures from the center of the bottom bracket to the top of the saddle, but specifically along a line to the saddle surface at your typical sitting position. Some fitters measure to the saddle nose; others measure to the point where your sit bones rest.
To use this method: multiply your inseam by 1.09. If your inseam is 82 cm, your target is 82 x 1.09 = 89.4 cm from the bottom bracket center to the top of the saddle.
Wait, that number seems higher than the LeMond result. That is because the 109% method measures along the full seat tube length from bottom bracket to saddle top, while LeMond’s 0.883 multiplier measures along a slightly different axis and accounts for crank length implicitly. In practice, the two methods often produce very similar saddle positions when applied correctly.
I recommend trying both calculations and seeing which one feels better on the bike. Some riders find the 109% method puts them slightly higher, which can improve pedaling efficiency for riders with good flexibility. If you have tight hamstrings or hip mobility issues, the LeMond position may feel more comfortable.
The important thing is to use one method as your starting point, ride it for a few sessions, and then make small adjustments. No formula is perfect for every body type, but both of these get you close enough to fine-tune by feel.
Signs Your Saddle Height Is Wrong
Formulas and methods get you close, but your body is the ultimate judge. The signs of incorrect saddle height fall into two categories: too high and too low. Knowing these symptoms helps you identify problems quickly and make the right adjustments.
Signs Your Saddle Is Too High
Hip rocking: If your pelvis tilts side to side as you reach for the bottom of each pedal stroke, your saddle is too high. This is the most obvious sign. Have someone ride behind you or film you from behind to check.
Hamstring strain: Overextending your leg at the bottom of the stroke pulls on your hamstrings with every revolution. If the back of your thighs feels tight or sore after rides, try lowering your saddle 3 to 5mm.
Toe pointing: Riders with their saddle too high often unconsciously point their toes down at the bottom of the stroke to compensate. If your calves are cramping or your ankles feel fatigued, this could be the cause.
Lower back pain: When your hips rock to compensate for an overly high saddle, your lower back takes the punishment. Persistent lower back soreness after rides is a red flag.
Numbness or pressure in the perineal area: If you are sliding around on the saddle because you cannot reach the pedals comfortably, you may end up sitting on the wrong part of the saddle, causing numbness.
Posterior knee pain: Pain behind the kneecap, where the hamstring tendons attach, can indicate overextension. This is different from the front-of-knee pain caused by a saddle that is too low.
Signs Your Saddle Is Too Low
Anterior knee pain: Pain in the front of the knee, around the kneecap, is the classic sign of a saddle that is too low. Your knee stays too bent throughout the pedal stroke, putting excessive load on the patellofemoral joint.
Quadriceps fatigue: When your saddle is low, your quads do most of the work and fatigue quickly. If your thighs are burning after 20 minutes of riding, check your height.
Sliding backward on the saddle: A low saddle can cause you to push yourself toward the back of the saddle with each pedal stroke. If you constantly adjust your position forward, try raising the saddle.
Feeling of spinning without power: Your legs may feel like they are moving fast but not generating much force. A slightly higher saddle lets you use your full leg extension for more power per stroke.
Calf tightness: While calf issues can also come from a saddle that is too high, some riders compensate for a low saddle by pushing through their toes, which fatigues the calves.
The “Just Right” Checklist
When your saddle height is dialed in, here is what you should feel:
– A slight bend in your knee at the bottom of the pedal stroke, roughly 25 to 35 degrees of flexion.
– No hip movement or rocking when pedaling at a steady cadence.
– Even pressure across your sit bones on the saddle, no sliding forward or backward.
– Power feels smooth through the entire pedal stroke, not just on the downstroke.
– No knee pain during or after rides of normal duration.
– Your feet feel planted on the pedals without straining to reach the bottom of the stroke.
If you check all six boxes, your saddle height is in a good place. This also ties into overall control on the bike. Having proper saddle height for control on descents and technical terrain matters just as much as pedaling efficiency.
Step-by-Step: Adjusting Your Saddle Height
Once you have a target height from one of the methods above, here is how to make the adjustment on your bike. The process is straightforward but requires a few specific steps to get right.
What you need: an Allen key (usually 4mm, 5mm, or 6mm depending on your seatpost clamp), a tape measure, and a marker or piece of tape.
Step 1: Mark your current height. Before changing anything, wrap a small piece of electrical tape around the seatpost at the junction with the frame. This gives you a reference point so you can always return to where you started.
Step 2: Loosen the seatpost clamp. Use your Allen key to loosen the bolt at the top of the seat tube. Do not remove it entirely, just loosen enough that the post slides freely. If you have a quick-release lever, open it.
Step 3: Adjust to your target height. Slide the seatpost up or down to reach your calculated measurement. If using the LeMond formula, measure from the center of the bottom bracket to the top of the saddle along the seat tube.
Step 4: Check that the saddle is level. Before tightening, make sure your saddle is still level front to back. A tilted saddle changes your effective reach and pressure points. Use a small level or eyeball it against a known flat surface.
Step 5: Tighten the clamp evenly. Tighten the seatpost bolt gradually, alternating if you have a two-bolt clamp. Do not overtighten, especially on carbon seatposts, which can crack under excessive torque. Follow the manufacturer’s torque spec, usually printed near the clamp.
Step 6: Ride and evaluate. Go for a 20 to 30-minute ride at your normal cadence and effort. Pay attention to your knees, hips, and lower back. Do not make any changes during this ride, just observe.
Step 7: Fine-tune in small increments. If something feels off, adjust in 2 to 3mm increments. This sounds tiny, but I have felt a massive difference from a single 3mm change. Forum riders on r/bikefit consistently report that small adjustments are the key to finding the sweet spot. Never move more than 5mm at once.
Step 8: Re-mark your final position. Once you are happy, mark the seatpost again with tape so you have a permanent reference. If you ever travel with your bike, remove the seatpost for packing, or switch bikes, you can quickly return to your known-good height.
This is also a good time to think about your overall bike setup basics. Saddle height is the foundation, but fore-aft position and saddle tilt also affect comfort and handling.
Fine-Tuning Tips and Special Considerations
Getting the initial height is only half the battle. Real-world riding involves variables that formulas cannot fully account for. Here are the situations that require additional adjustments.
Dropper Post Saddle Height
If you ride a mountain bike with a dropper post, setting saddle height requires a slightly different approach. Your pedaling height is the fully extended position of the dropper, so you still use the same methods above. But you also need to set your dropped height for descending.
For climbing and flat pedaling, extend the dropper fully and set your saddle height using the heel or LeMond method. For descending, drop the post enough that you can get your weight behind the saddle and move freely on technical terrain. Most riders drop 100 to 150mm from their pedaling height.
The key is that your extended pedaling height on a dropper should be identical to what you would run on a rigid seatpost. Do not compensate for the dropper mechanism itself. Set it the same way you would any other saddle.
Multi-Bike Consistency
Many cyclists ride more than one bike, a road bike and a mountain bike, or a commuter and an indoor trainer. Getting consistent saddle height across bikes prevents your body from having to adapt every time you switch.
The trick is that bottom bracket to saddle top measurement may not be identical across bikes with different crank lengths, pedal stack heights, or shoe setups. What matters is your leg extension at the bottom of the stroke, not the raw measurement.
To transfer your saddle height between bikes: measure from the center of the bottom bracket to the top of the saddle on Bike A. On Bike B, account for any differences in crank length (if Bike B has 175mm cranks vs 172.5mm on Bike A, lower the saddle by 2.5mm). Also adjust for different pedal stack heights if you use different pedal systems.
Forum riders frequently mention that inconsistency between bikes is a major source of discomfort. If your road bike feels great but your trainer feels wrong, check whether the crank length and pedal type match.
Equipment Changes: Shoes, Pedals, and Cranks
Changing your cycling shoes, pedals, or crank length changes your effective saddle height, even if you never touch the seatpost. Here is how each variable affects your position:
New shoes: Different shoes have different sole thicknesses and cleat stack heights. If you switch from a thick recreational shoe to a low-profile carbon race shoe, you may need to raise your saddle by 2 to 4mm. Always check after a shoe change.
New pedals: Clipless pedal systems sit at different heights above the axle. Switching from Shimano SPD-SL to Look pedals, for example, can change your effective leg extension by a few millimeters. Small adjustments may be needed.
Crank length changes: If you switch from 172.5mm to 175mm cranks, your foot travels 2.5mm further at the bottom of the stroke. Lower your saddle by 2.5mm to maintain the same leg extension. This is a direct 1:1 adjustment.
Saddle changes: Different saddles have different amounts of padding and profile shapes. A thickly padded saddle effectively raises your sitting position compared to a minimalist racing saddle. If you swap saddles, recheck your height.
Indoor vs Outdoor Cycling Differences
Indoor trainers and stationary bikes present a slightly different fit challenge. On a trainer, the bike does not move underneath you the way it does on the road. This means you do not naturally shift your weight or make micro-adjustments during the ride.
Some riders prefer their indoor saddle height 1 to 2mm lower than their outdoor height because of this lack of movement. It reduces strain during long, static trainer sessions. Experiment with this if you experience discomfort indoors but not on the road.
Also, trainer sessions often involve higher cadence work with less coasting. Your muscles are engaged continuously, which can amplify any fit issues. If your knees feel fine outdoors but bother you on the trainer, try a very small downward adjustment.
Common Mistakes to Avoid
Based on forum discussions and our own experience, here are the mistakes that derail saddle height setup:
Changing too much at once. Riders get impatient and move the saddle 10mm or more in a single adjustment. This makes it impossible to tell whether the change helped or hurt. Stick to 2 to 3mm increments.
Not riding long enough before evaluating. Your body needs time to adapt to a new position. Ride at least 20 minutes at a steady pace before deciding if a change is good or bad. A two-minute spin around the block tells you nothing.
Ignoring saddle tilt. A saddle that is tilted down forces you to slide forward, effectively making the saddle lower relative to your pedaling position. Always check tilt before blaming height.
Forgetting to recheck after equipment changes. New shoes or pedals silently alter your fit. Any time you change contact point equipment, recheck your saddle height.
Chasing a number instead of comfort. The formula says 73.2 cm, but your knees hurt. Trust your body over the math. The formulas are starting points, not absolute truth.
FAQ’s
How to get the correct saddle height?
Start with the heel method: place your heel on the pedal at the bottom of the stroke and adjust the saddle until your leg is fully extended. Then refine using the LeMond formula (inseam x 0.883) or the 109% method (inseam x 1.09). Ride for 20 to 30 minutes and fine-tune in 2 to 3mm increments based on how your knees, hips, and lower back feel.
What is the 109 rule for saddle height?
The 109 rule, developed by Hamley and Thomas, states that your saddle height should equal 109% of your inseam measurement. Measure from the center of the bottom bracket to the top of the saddle along the seat tube. For an 80 cm inseam, your target saddle height would be 87.2 cm.
What are the signs of an incorrect saddle height?
If your saddle is too high, you will experience hip rocking, hamstring strain, lower back pain, and posterior knee pain. If it is too low, you will feel anterior knee pain, quad fatigue, a sensation of spinning without power, and you may slide backward on the saddle. The correct height gives you a slight knee bend at the bottom of the stroke with no hip movement.
What is the 75% rule in cycling?
The 75% rule is a training guideline stating that 75% of your riding time should be spent at or below 75% of your maximum heart rate, in the endurance zone. It is not directly related to saddle height, but having proper saddle height does make endurance riding more comfortable and sustainable for longer sessions.
How long does it take to get used to a new saddle height?
Most riders adapt to a new saddle height within 3 to 5 rides of 30 minutes or more. Small adjustments of 2 to 3mm may feel normal after just one or two rides. Larger changes can take up to two weeks as your muscles, tendons, and joints adjust to the new pedaling dynamics.
Should saddle height be the same on all bikes?
Your effective leg extension should be the same across bikes, but the raw bottom-bracket-to-saddle measurement may differ. Account for different crank lengths, pedal stack heights, and shoe setups. If one bike has 175mm cranks and another has 172.5mm cranks, lower the saddle on the longer crank bike by 2.5mm to maintain identical leg extension.
Wrapping Up
Learning how to set your saddle height correctly without a pro fit is one of the most valuable skills in cycling. Start with the heel method for a quick baseline, refine with the LeMond formula or 109% method, and then fine-tune by feel in small increments.
The key takeaways: measure carefully, adjust in 2 to 3mm steps, ride at least 20 minutes before evaluating, and trust your body over any formula. If you experience knee pain, hip rocking, or lower back strain, your saddle height is telling you something. Listen to it and make a small change.
Once your height is dialed in, mark the seatpost so you can return to it anytime. Then get out and ride. The best saddle height is the one that lets you pedal comfortably for hours without thinking about it.