
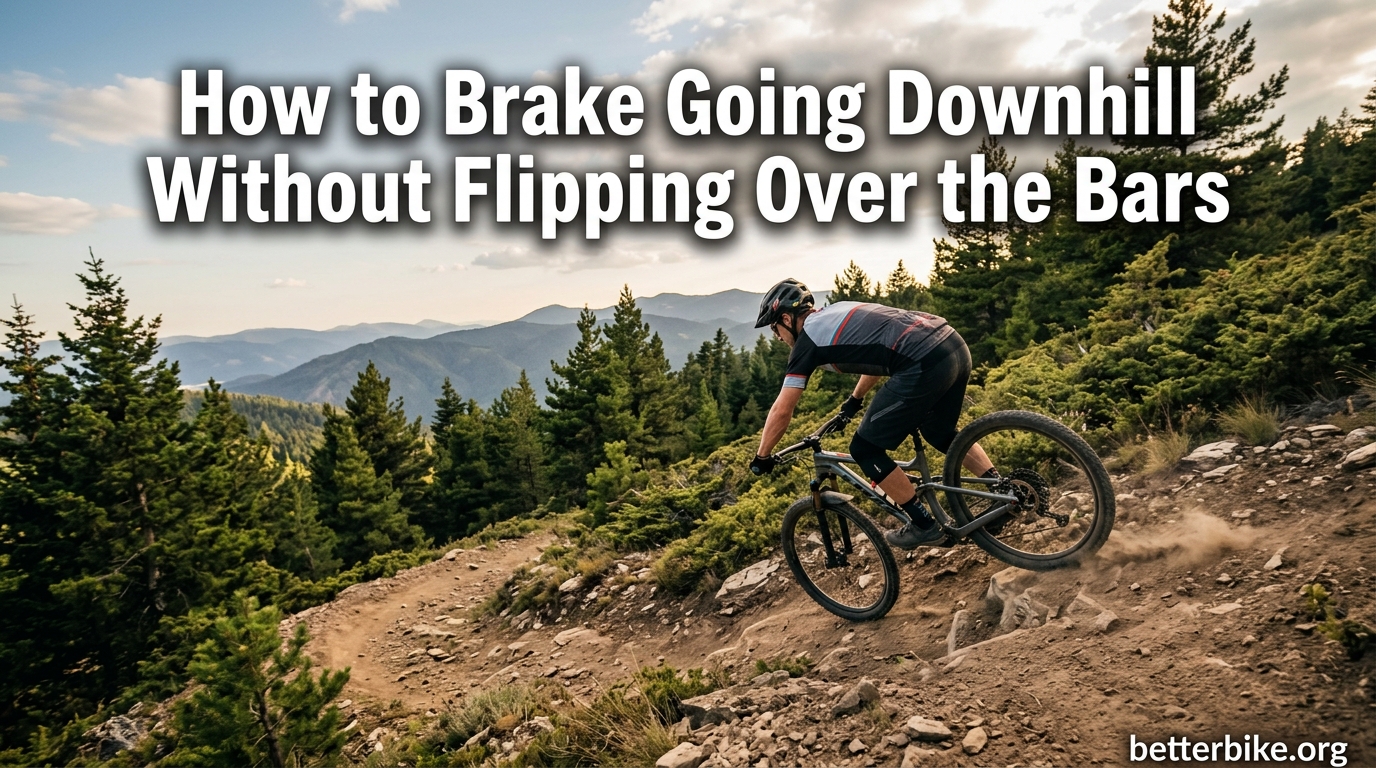
Going over the bars is the crash every cyclist secretly dreads, and I have been there myself. Years ago I grabbed a fistful of front brake on a wet descent, slid forward on the saddle, and learned the hard way why proper technique matters. This guide on how to brake going downhill without flipping over the bars is the article I wish I had read before that day.
The good news is that going over the handlebars (often called OTB in cycling circles) is almost always preventable. It comes down to three things: where your body is on the bike, how you apply the brakes, and how early you read the terrain ahead. Our team has put thousands of miles on road and mountain bikes, and the techniques below work on both.
By the end of this guide, you will understand the physics that cause a bike to flip, the body position that keeps you safe, the right way to balance front and rear brake, and what to do in the seconds before disaster if it ever starts happening to you.
Table of Contents
Quick Answer: How to Brake Downhill Without Flipping Over the Bars
To brake going downhill without flipping over the bars: keep your weight back and low, bend your elbows, and use both brakes progressively. Never grab the front brake suddenly. Brake firmly in a straight line before corners, then release as you tip into the turn. Let aerodynamic drag do most of the speed control on long descents.
Here is the one-sentence version that gets the job done: weight back, elbows bent, squeeze both brakes smoothly, look where you want to go, and brake before the turn rather than inside it.
If you remember nothing else, remember this: the front brake provides 60 to 80 percent of your stopping power, but it is also the brake that throws you over the bars. Use it. Just never slam it.
Why the Front Brake Can Flip You Over the Bars
To brake downhill safely, you first need to understand the physics. The front brake is more powerful than the rear brake because when you brake, your weight shifts forward. This loads the front tire and unloads the rear tire, which means the front tire has more grip available to slow you down. That is why the front brake does most of the work.
But here is the catch. When you brake hard, your momentum carries your body forward. The bike becomes a lever pivoting around the front axle. If the braking force overcomes your grip on the bars, the rear wheel lifts and you go over the handlebars.
I think of it this way: the front brake is a powerful tool that is also the only brake that can launch you. The rear brake cannot flip you, no matter how hard you pull it. It just slides the back wheel. So the question is never “should I use the front brake.” The question is “how do I use it without going OTB.”
Three things cause the front brake to flip you: too much force too quickly, your weight too far forward, and braking mid-corner when the tire is already losing traction. Avoid all three, and you will not flip.
The Weight Transfer Problem
When you ride on the hoods or sit upright on a flat bar bike, your center of gravity sits high and slightly forward. Slam the front brake in that position, and your body wants to keep moving forward at the same speed the bike is decelerating. The bike stops, you do not, and physics takes over.
On a road bike, this is why dropping to the drops (the lower part of drop handlebars) makes such a huge difference. On a mountain bike, this is why coaches hammer “get low, get back” into every descending drill. Lower and farther back is the position that resists forward pitch.
Body Position: The Foundation of Safe Descending
Brake technique starts before you touch the levers. Your body position is what keeps the bike stable while you brake, and it is what prevents the front end from tucking. Get the body wrong and no brake technique will save you.
Get Low and Back on the Bike
On a road bike, get out of the saddle or hoods and drop to the drops. The drops lower your torso, lower your center of gravity, and put your hands in a position where you can brake hard without rotating forward. The drops also let you get your hips back behind the saddle for steeper sections.
On a mountain bike, push your hips back behind the saddle, bend your knees as shock absorbers, drop your heels, and keep your chest low. Your elbows should be wide and bent. Imagine you are standing on the pedals of a stairway heading down, with your butt pointing slightly behind you.
One warning from the forums that changed how I ride: do not lean back so far that your arms lock straight. Locked arms mean you cannot react, and on a rough descent your body bounces around. I once tried the “lean way back” trick on a gravel descent and nearly went OTB anyway, because locked arms cannot absorb a surprise bump. Bent elbows and a slightly rearward weight bias is what you want.
Move to the Saddle or Off It, but Pick One
For long road descents, sitting on the saddle with weight on your sit bones and hands in the drops is the most stable position. For short steep pitches or technical mountain bike sections, get your butt behind the saddle in a hover or attack position.
The key is commitment. Fidgeting between the saddle and a hover position is what makes people wash out or OTB. Pick a position, settle in, and brake from there.
Platform Position: Feet at 3 and 9 O’Clock
Put your pedals level, with one foot forward and one foot back. This is called the platform or ready position. It gives you a stable base, lets you absorb bumps with your legs, and keeps your weight centered over the bike. Cranking the pedals forward to engage the front wheel as a gear only reduces your stability on a steep descent.
Braking Technique: Front vs Rear and the 70/30 Rule
Once your body is in the right position, the next piece of how to brake going downhill without flipping over the bars is the actual lever work. The 70/30 rule is the most common guideline. About 70 percent of your braking power should come from the front brake and 30 percent from the rear brake on a typical descent. This matches the weight transfer that has already happened.
On very steep or loose terrain, shift toward 50/50 or even rear-biased. On long road descents in the dry, 70/30 is fine. Match the ratio to the conditions, not to a number you memorized.
Progressive Braking, Not Panic Grabbing
Progressive braking means squeezing the lever gradually to build force, rather than yanking it. Think of it as a dimmer switch, not a light switch. Start with light pressure, increase until you feel the bike begin to slow, and hold that pressure as you approach the corner.
The moment you feel the front tire begin to slip or the rear tire begin to skid, back off a touch. That is the limit of grip in that moment. If conditions change (loose gravel, a wet patch), the limit changes too, and progressive braking lets you adapt without crashing.
I tell newer riders: your right hand should always know how much further it could squeeze the lever. If you are at 80 percent lever travel and the bike is not slowing enough, something is wrong. Either your speed is too high for the conditions, or you are not in the right gear. Brakes are not magic. They are tools with a fixed limit.
Use Both Brakes Together
Many riders think they have to choose front or rear. They do not. The most stable and effective braking uses both. Squeeze the front lever a little harder than the rear, keep the rear tire just on the edge of traction, and let the front do the heavy lifting.
Using only the rear brake on a long descent is one of the most common ways to overheat your rotors and lose all stopping power. We will cover that in the speed management section.
Feathering vs Pulse Braking
Feathering is gentle, repeated lever pressure. Pulse braking is harder, intermittent braking. Both have their place. For long alpine descents, pulse braking in straight lines with coasting in between is what the pros do, because it gives the brakes time to cool.
For shorter technical descents on a mountain bike, feathering both brakes the whole way down keeps the bike more settled. Match the style to the length and severity of the descent.
Speed Management: How to Control Speed on a Long Downhill
Speed control on a long descent is as much about managing your speed without brakes as it is about braking. The single best technique is to use your body as an air brake.
Let Aerodynamic Drag Do the Work
At speed, the wind resistance on your body is your biggest speed limiter. Sit up, get out of the tuck, and your speed drops fast without ever touching the brakes. Tuck back in to gain speed. This is the technique pro road cyclists use to keep speed in check without overheating their rims or rotors.
On a mountain bike this is less effective because you cannot tuck, but you can use terrain features (rollers, berms, flat sections) to scrub speed before entering technical sections.
Brake in Straight Lines, Not in Corners
One of the most repeated pieces of advice on cycling forums, and for good reason: brake before the turn, not in it. Your tires have a limited amount of grip. In a corner, that grip is needed for turning. If you also ask the tire to brake, you exceed available grip and you crash.
The sequence: brake firmly in a straight line as you approach the corner, release the brakes at the entry, and let the bike coast through the turn with just steering input. This is the outside-inside-outside line, and it is the foundation of safe descending.
Avoid Continuous Dragging
Dragging the brakes the whole way down a long descent is the surest way to overheat them. Rotors or rims heat up, brake fluid can boil (in hydraulic systems), and you end up with brake fade or brake glazing. Once that happens, your levers feel fine but the bike will not slow down.
One commuter on Reddit glazed their rotors in 15 minutes by dragging the rear brake the whole way down a 4 percent grade. The replacement rotors cost more than a coaching session would have. Pulse, coast, repeat. That is the rhythm.
Cornering on Descents
Corners are where most OTB crashes actually happen, because the rider tried to brake and turn at the same time. The technique to fix this is straightforward.
The Outside-Inside-Outside Line
Start wide on the entry, clip the apex in the middle, and exit wide. This line lets you carry the most speed safely because it increases the radius of the turn at the slowest point, which is the apex. Braking is done before you turn in, and accelerating (or just coasting) happens as you exit.
On tight switchbacks, this means slowing almost to walking pace before the turn, not trying to brake your way through it. I learned this lesson the hard way on a mountain pass in the Alps, and it changed how I ride every descent since.
Look Where You Want to Go
Your bike follows your eyes. If you stare at the rock in your line, you will hit the rock. If you look through the corner at the exit, your body and your bike will follow. This is why coaches tell you to keep your chin up and your eyes scanning ahead.
Looking 10 to 20 meters ahead on a road descent, and corner to corner on a mountain bike trail, gives you time to adjust speed and line before you need to brake hard.
Hazard Scanning and Reading the Terrain
Most OTB crashes start long before the rider ever touches the brake. They start with a missed hazard, a wrong line, or a last-second panic grab. The fix is to read the terrain well in advance.
Scan 10 to 20 Meters Ahead
On a road descent, look for paint markings, shadows that hide potholes, gravel in the apex of turns, diesel patches, and tram tracks. On a mountain bike trail, look for braking bumps, wet roots, loose rocks, and ruts. The more you see in advance, the less you have to brake suddenly.
Do not stare at your front wheel or the ground immediately in front of you. That is what causes the panic reactions. The more you look ahead, the more in control you feel.
Anticipate Other Road Users
Cars pulling out, dogs running across, pedestrians stepping into the road, riders ahead braking suddenly. These are the surprises that cause the panic grabs. If you ride expecting them, you ride with your fingers already covering the brake levers and a plan for what to do if they appear.
Covering the brakes (fingers on the levers, not grabbing) is the best balance between ready to brake and not actually braking. This is one habit that has saved me more times than I can count.
Equipment Setup: Small Adjustments That Help a Lot
You do not need new gear to descend safely, but a few small adjustments make a real difference.
Saddle Height and Dropper Post
If your saddle is too high, you cannot get your body low and back without losing contact with the pedals. Lowering the saddle a centimeter or two (or dropping a dropper post on a mountain bike) lets you move your body around more freely. On technical terrain this is the difference between going OTB and rolling through clean.
Brake Lever Reach
If your brake levers are too far from the bars, you cannot easily modulate them. Most brake levers have a reach adjustment. Set them so you can comfortably wrap one finger around the lever without moving your hand from the hoods or drops. If your hands are large or small, get the setup right.
Brake Pads and Rotors
For long mountain descents, metal brake pads handle heat better than resin pads, though they are noisier. Larger rotors (180mm or 200mm front on a mountain bike) dissipate heat and provide more stopping power. None of this matters if your technique is wrong, but if your technique is right and you ride alpine terrain, the right setup is the difference between finishing a descent and cooking your brakes.
Common Mistakes That Cause OTB Crashes
Most going-over-the-bars crashes come from the same handful of mistakes. If you can avoid these, you will not flip.
White Knuckling the Bars
Gripping the bars with a death grip is what every scared rider does. It locks your arms, prevents you from absorbing bumps, and makes any sudden input worse. Relax your grip, bend your elbows, and let the bike move under you.
Dragging the Brakes the Whole Way Down
Already covered above, but worth repeating. Dragging overheats brakes and trains you to be afraid of speed. Pulse, coast, repeat.
Leaning Too Far Back
Counterintuitively, leaning back too far can cause OTB. It straightens your arms, which makes them ineffective shock absorbers, and it shifts your weight off the rear wheel, reducing rear brake effectiveness. The right position is slightly back with bent elbows, not laid out like a motorcycle.
Looking at the Obstacle Instead of Past It
Staring at the rock, the pothole, or the car is the fastest way to hit it. Look at where you want to go, not at what you want to avoid.
Panic Grabbing the Front Brake
The classic move. A surprise appears, the rider grabs a fistful of front brake, and physics does the rest. The fix is to cover the brakes but not use them unless you have planned to, and to scan far enough ahead that surprises are rare.
Putting a Foot Out for Stability
Instinct says put a foot down when things get sketchy. On a descent, this usually makes things worse. A foot out shifts your weight off the centerline, and if you touch a moving pedal to the ground, you can crash immediately. Keep both feet on the pedals in the platform position.
What to Do If You Feel Yourself Going Over the Bars
No article on how to brake going downhill without flipping over the bars would be complete without the emergency recovery section. Sometimes, despite everything, you find yourself pitching forward. Here is what to do in those split seconds.
The Instant You Feel It
Release the front brake immediately. This stops the rotation that is throwing you over the bars. The bike will roll forward, but you will not flip. Loosen your grip on the bars and tuck your chin to your chest to protect your face.
This is counterintuitive. Every instinct says brake harder to stop the fall. In this moment, braking harder is what flips you.
If You Have Already Flipped
If you are going over, get one arm out and try to turn your shoulders so you land on your side, not on your head or your wrist. A separated shoulder is bad. A broken collarbone is worse. A head injury is the worst of all. Always protect your head.
Tuck and roll. It is the same principle as a martial arts fall. The more you can roll with the impact, the less force your body absorbs.
The good news is that with the techniques in this guide, you should almost never reach this point. The emergency recovery is the backup, not the plan.
Skill Progression: Beginner to Advanced
Every rider is at a different point on the skill curve. Here is how to think about progressing your downhill braking ability.
Beginner
Work on getting into the drops or attack position, looking 10 meters ahead, and using both brakes with progressive pressure. Practice on shallow gradients before you tackle steep ones. The goal is comfort with the position and smoothness with the brakes, not speed.
Intermediate
Focus on the outside-inside-outside line, brake before the turn rather than in it, and pulse your brakes on longer descents. Add in aero drag as a speed control technique. Start riding slightly above your comfort zone in a controlled way to build skill.
Advanced
Work on trail reading at 20 meters and beyond, modulating the front brake at the absolute limit of grip, and managing speed on long alpine descents without overheating. The advanced rider uses the brakes as little as possible, relying on body position, line choice, and terrain reading to control speed.
Almost every cyclist has room to grow on this curve. I still learn new things about descending every season. The day you stop learning is the day you stop improving.
Building Confidence on Steep Descents
Confidence on descents comes from reps, not from being brave. The more you descend, the more your body learns what the bike can do and what your brakes can handle. Start on easier terrain, build up gradually, and do not let one bad experience convince you that descending is dangerous.
Forum riders consistently report that the more they ride steep stuff, the less they brake naturally. This is the goal: smooth, controlled, confident descending with minimal braking and maximum flow. It is a skill like any other, and you can build it.
If you ride with a faster group, do not let them push you into terrain you are not ready for. Descend at your own pace, and the skill will come faster than if you push beyond your limits and scare yourself.
Practice Drills to Improve Your Braking
You can practice descending skills on flat ground. Find a quiet road or path and try these.
The Slow Speed Brake Drill
Get up to a moderate speed, then practice progressive braking to a complete stop. Feel the transition from rolling to stopping. Feel how much lever pressure it takes. Do it again, and again, until the lever feel is second nature.
The Threshold Braking Drill
On a gravel road or empty parking lot, get up to speed and brake as hard as you can without locking the front wheel. This teaches you where the limit of grip is. Start slow and build up. The first time you find the threshold, it will surprise you with how hard the bike can brake without flipping.
The One Finger Drill
On a road bike, practice braking using only your index finger. This is the position you want on the hoods or drops for descending, and it is worth training the muscle memory now rather than discovering it does not work on a steep descent.
Frequently Asked Questions
How do I brake downhill cycling without flipping over the bars?
Keep your weight back and low on the bike, bend your elbows, and use both brakes progressively. The front brake provides 60 to 80 percent of stopping power, but never grab it suddenly. Brake firmly in a straight line before corners, then release as you tip into the turn. Let aerodynamic drag do most of the speed control on long descents, and use pulse braking instead of continuous dragging.
What is the 70/30 brake rule for cycling?
The 70/30 brake rule means about 70 percent of your braking power comes from the front brake and 30 percent from the rear brake on a typical descent. This matches the forward weight transfer that loads the front tire. On very steep or loose terrain, shift toward 50/50 or even rear-biased to prevent going over the bars.
Will using the front brake flip me over the handlebars?
The front brake can flip you over the handlebars (OTB) if you grab it too hard or too suddenly, especially when your weight is too far forward. The front brake provides most of the stopping power, but it also creates the rotational force that can launch you. Prevent this by keeping your weight back, using progressive lever pressure, and applying the brake in a straight line rather than mid-corner.
What is the best braking technique for a long downhill grade?
For long descents, the best technique is pulse or intermittent braking. Let your speed build using aerodynamic drag, then brake firmly in a straight line to scrub speed, then release and repeat. Avoid continuously dragging the brakes, as this overheats the rotors and causes brake fade or glazing. Stay in a harder gear, sit up to use your body as an air brake, and reserve braking for the moments you actually need it.
What should I do if I feel myself starting to go over the handlebars?
The instant you feel yourself going over the bars, release the front brake completely. The rotation that throws you forward is caused by the front brake, and letting off stops the rotation. Loosen your grip on the bars, tuck your chin to your chest to protect your face, and try to land on your side with your arms out. If you can roll with the impact, you will absorb much less force.
Final Thoughts on Braking Downhill Safely
Learning how to brake going downhill without flipping over the bars comes down to a few simple habits: weight back, low body, smooth progressive brakes, eyes up and looking ahead, and brake in a straight line before the corner. Master these, and descending becomes one of the most satisfying parts of cycling rather than something to fear.
The most counterintuitive lesson is that confident, smooth descenders use their brakes less, not more. Speed is controlled by body position, line choice, and aerodynamic drag. The brakes are the emergency tool, not the primary tool. Ride within your limits, scan far ahead, and trust the bike underneath you. With practice, you will stop worrying about going OTB and start enjoying the descent.