
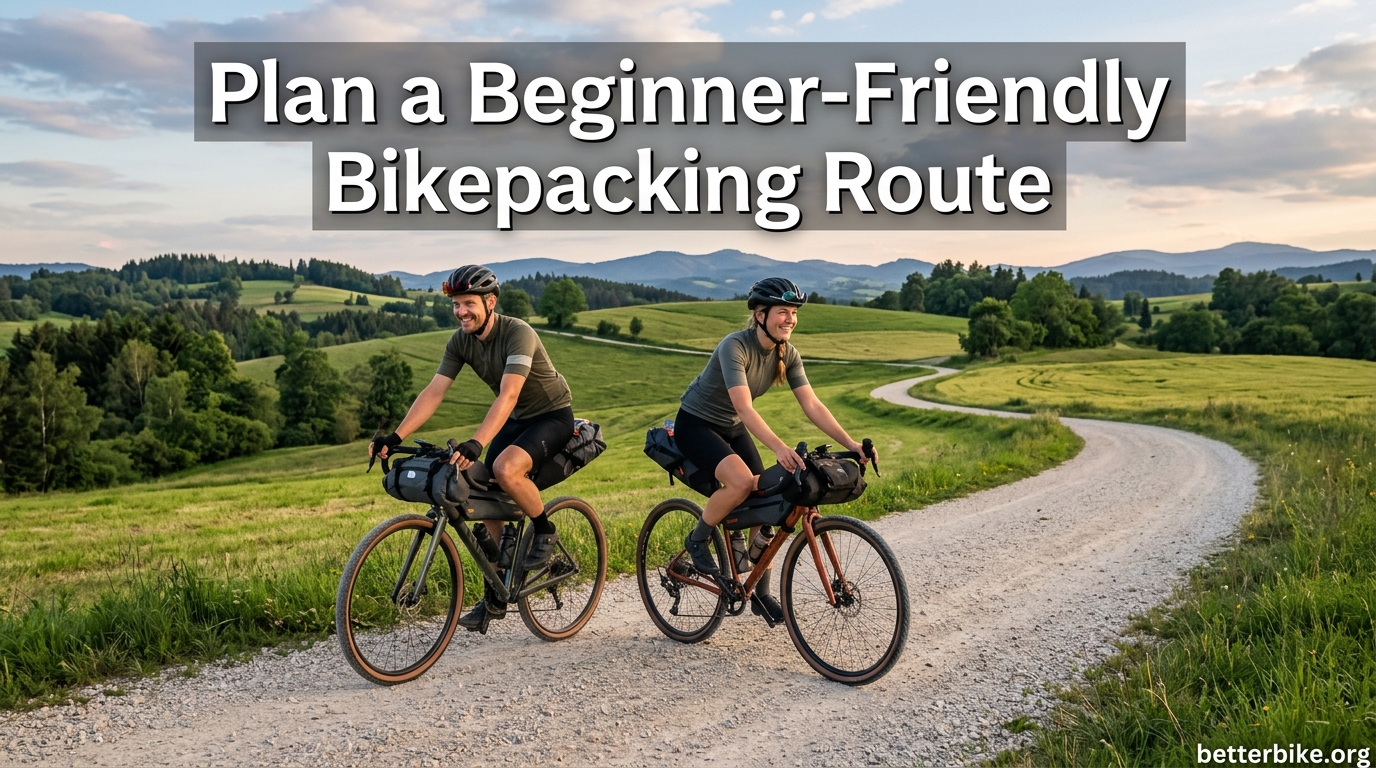
I still remember my first bikepacking trip. I packed everything I owned into a borrowed seat pack, picked a route I found online, and headed out without checking water sources. Six hours later I was dehydrated, lost, and honestly questioning every decision that led me to that dirt road in 90-degree heat.
That experience taught me what most beginners learn the hard way: knowing how to plan a beginner-friendly bikepacking route is the single most important skill you can develop before you ever load up your bike. The route itself shapes your water access, your terrain difficulty, your daily mileage, and ultimately whether the trip feels like an adventure or a survival exercise.
This guide walks through the entire planning process from start to finish. You will learn how to assess your fitness, choose a realistic distance, pick the right terrain, use modern route-planning apps, map out water and camping spots, build a gear list, and avoid the mistakes that derail first trips.
If you want the short version for a quick overview, here is the process in five steps: (1) assess your current fitness and pick a trip length you can comfortably finish, (2) choose beginner-friendly terrain like rail trails, gravel roads, or fire roads, (3) use a route-planning app like Komoot or Ride With GPS to map your path, (4) identify water sources, resupply stops, and campsites along the route, and (5) export a GPX file and do a short test ride before committing.
By the end of this article you will have a repeatable framework you can use for your first overnight trip and every trip after that. I have pulled advice from experienced bikepackers, forum discussions, and lessons learned the hard way so you do not have to repeat them.
Table of Contents
What Is Bikepacking? A Quick Definition
Bikepacking is self-supported bike travel where you carry all your gear — shelter, sleep system, food, water, and tools — strapped directly to your bike in purpose-built bags. Unlike traditional bike touring with heavy rack-and-pannier setups, bikepacking keeps the load compact and close to the frame so you can ride dirt roads, gravel, and even singletrack.
Think of it as backpacking on wheels. You cover more ground than hiking, access more remote terrain than car camping, and carry everything you need between campsites on a single bicycle.
Bikepacking vs Bike Touring
Bike touring typically uses paved roads, heavy racks, and large panniers. Distances are longer (50-80 miles per day) and gear is bulkier. Bikepacking is lighter, dirt-focused, and favors frame bags over racks so you can handle rougher terrain.
For beginners, bikepacking is often the gentler entry point because the routes tend to be shorter, slower, and more scenic. You are not trying to crush miles — you are trying to spend a night or two outdoors under your own power.
The gear is also more accessible than it was a decade ago. Quality bikepacking bags are now available at a range of price points, and route-planning apps have made it possible to design a custom trip in an afternoon rather than weeks of map study.
Key Terms You Will See
Here are a few terms that come up constantly in route planning. Understanding them now will make the rest of this guide easier to follow.
- GPX file — a GPS track format you can load into your phone, bike computer, or mapping app to follow turn-by-turn directions.
- Resupply — a planned stop at a town, gas station, or store where you restock food and water.
- Singletrack — narrow, technical dirt trails built for mountain biking. Not ideal for first trips.
- Gravel road — unpaved roads of packed dirt and gravel. The sweet spot for beginner bikepacking.
- Rail trail — a converted railway line, usually flat, smooth, and car-free. The most beginner-friendly option.
- Wild camping — pitching your shelter outside of established campgrounds, where land access rules allow it.
- Dispersed camping — camping on public land outside of designated campgrounds, common on National Forest and BLM land.
- Hike-a-bike — sections of route where the terrain is too steep or rough to ride, forcing you to push or carry your bike.
How to Plan a Beginner-Friendly Bikepacking Route: Step by Step
This is the heart of the process. Follow these six steps in order and you will end up with a route that matches your skill level, your fitness, and your gear. Each step builds on the one before it, so do not skip ahead.
Step 1: Assess Your Fitness and Skill Level Honestly
The number one mistake beginners make is planning a route based on what they hope they can ride, not what they have actually ridden recently. A loaded bike feels different than an unloaded one. Add 15-25 pounds of gear, food, and water and your average speed drops, your climbing feels harder, and your saddle time tolerance shrinks.
Before you plan a single mile, ask yourself: what is the longest ride I have done in the last two months? Can I ride that distance two days in a row? Can I do it with a loaded bike?
If your longest recent ride is 25 miles unloaded, your first loaded bikepacking day should be in the 20-30 mile range, not 60. Build in a buffer for slower progress, unexpected terrain, and the simple fact that you are also setting up camp and cooking at the end of the day.
Also assess your off-bike skills. Can you fix a flat tire? Can you set up your shelter in the dark? Can you navigate with a paper map if your phone dies? These skills matter more on a bikepacking trip than on a day ride.
Be honest with yourself about all of it. Overconfidence on day one leads to misery on day two. Underestimate your abilities slightly and you will finish each day tired but happy rather than broken down and demoralized.
Step 2: Choose the Right Distance and Duration
For your first bikepacking trip, aim for one night and 30-50 miles total. That is enough to feel like an adventure without becoming an endurance test. A single overnight keeps your gear list short, your food planning simple, and your bailout options open.
Here is a rough guide for daily mileage based on fitness and terrain:
- Beginner on flat rail trails: 30-45 miles per day
- Beginner on rolling gravel: 25-40 miles per day
- Beginner on hilly terrain: 20-30 miles per day
- Intermediate rider on mixed terrain: 45-65 miles per day
Notice these numbers are lower than what you see in bike touring guides. Loaded bikes on unpaved surfaces are slow. A 30-mile day on gravel can take as long as a 60-mile day on pavement.
Plan for a slower pace than you expect. Most experienced bikepackers recommend assuming an average speed of 8-10 mph on mixed terrain with a loaded bike, including short stops but not long lunch breaks.
For your first multi-day trip, plan two nights and 60-90 miles total only if your first overnight went smoothly. Build up gradually rather than leaping from a single night to a week-long expedition.
Step 3: Select Beginner-Friendly Terrain
Terrain matters more than distance. A 30-mile day on a smooth rail trail feels like a casual weekend ride. The same distance on rocky singletrack with hike-a-bike sections can take all day and leave you exhausted.
For a first trip, prioritize these terrain types in order of beginner friendliness:
Rail trails and greenways are the easiest option. They are flat, car-free, well-marked, and usually pass through small towns where you can resupply or bail out if something goes wrong. The Katy Trail in Missouri, the C&O Canal Towpath in Maryland, and the Great Allegheny Passage are classic examples. Rail trails also tend to have packed gravel or paved surfaces that are easy on tires and forgiving for riders new to dirt.
Gravel roads and fire roads are the next step up. They offer more scenery and solitude but require a bit more bike handling skill and a wider tire. Look for routes on US Forest Service roads, county gravel roads, or established gravel route networks. Gravel rides smoothly when the surface is packed and chunkily when it is loose, so check recent conditions reports before committing.
Paved bike paths with dirt connectors work well if you want to keep things comfortable but still get off the beaten path. Plan a route that uses paved trails for most of the distance with short dirt sections to practice your off-road skills.
Avoid technical singletrack, remote desert routes, and high-elevation mountain passes for your first trip. Save those for when you have a few successful overnights under your belt and a clear sense of what your bike and body can handle.
Also consider surface consistency. A route that alternates between smooth pavement and deep sand is harder than one that is uniformly gravel. Aim for predictability on a first trip.
Step 4: Use Route-Planning Tools and Apps
This is where the planning gets fun. Modern route-planning apps make it possible to design a custom route in an afternoon, complete with elevation profiles, surface types, and points of interest.
Start by browsing existing route databases to see what other riders have done in your region. Sites like Bikepacking.com, the Adventure Cycling Association network, and local cycling forums are gold mines for inspiration. You do not have to invent a route from scratch — you can take an existing one and shorten or modify it to fit your needs.
Once you have a rough idea, open a route-planning app and start drawing. The goal at this stage is to get a basic line on the map with realistic distances and elevation. You will refine it in the next steps.
Pay attention to surface type indicators in the app. Komoot and Ride With GPS both show whether a segment is paved, gravel, dirt, or trail. If you see a section marked as “trail” or “singletrack” on a beginner route, find a way around it.
Check elevation gain as you draw. A route with 3,000 feet of climbing over 40 miles is moderate. The same climbing over 20 miles is brutal. Most apps give you a feet-per-mile figure that helps you compare options quickly.
Step 5: Map Campsites, Water Sources, and Resupply Points
This is the step that separates a good route from a great one. A route is more than a line on a map — it is a chain of resources you depend on to stay fed, watered, and sheltered.
Start with water. For each day of your route, identify every reliable water source: town faucets, gas stations, public parks, rivers, lakes, and springs. Mark them on your map and note the distance between each one. If you have a stretch longer than 30 miles with no certain water, you are carrying a heavy load or taking a risk.
Next, plan your campsites. Mark at least one primary campsite and one backup for each night. Look for established campgrounds, designated dispersed camping areas on public land, or private options like Hipcamp. Apps like iOverlander and Campendium are useful for finding spots other cyclists have used.
Finally, identify resupply points. Where can you buy food along the route? A small town with a convenience store can save you from carrying two days of meals. Note the hours of operation — many rural stores close early or are not open every day.
Build redundancy into every system. Two potential campsites per night. Two water sources within reach. Two ways to bail out if conditions change. Redundancy is what turns a fragile plan into a resilient one.
Step 6: Build a GPX Track and Test Your Route
Once your route, campsites, and water sources are mapped, export the route as a GPX file. Load it into your phone navigation app and your bike computer if you have one. Then do something most beginners skip: ride the first 10-15 miles of the route as a day trip before committing to the full overnight.
This test ride tells you things no map can. You will learn whether the gravel road is actually rideable, whether the climb is as steep as the elevation profile suggests, and whether the first town has the services you are counting on.
Adjust the route based on what you find. Better to discover a washed-out bridge on a test ride than at 6pm on day one of your trip with a loaded bike and fading daylight.
Save the final GPX file in at least two places — your phone, your bike computer, and a cloud backup. If you lose one device, you want the route to survive.
Navigation Tools: Apps, GPS Devices, and Paper Maps
Navigation is where beginner bikepacking trips go wrong fast. You need a system that works when your phone battery dies, when the trail disappears, and when you are tired and not thinking clearly. The best approach is redundancy — a primary tool, a backup tool, and a paper map as a last resort.
Route-Planning Apps Compared
Three apps dominate bikepacking route planning in 2026, and each has strengths worth knowing:
Komoot is the most popular choice for beginners. It has excellent surface-type detection, a friendly interface, and a community-built database of highlights and recommended stops. The free tier lets you plan one region; the paid tier unlocks worldwide planning. Komoot is especially good at suggesting bike-friendly routes between two points and offers turn-by-turn voice navigation on your phone.
Ride With GPS is the choice of road and gravel cyclists who want precision. Its route builder is the most detailed in the industry, with custom cue sheets, elevation profiles, and surface data. The free tier is limited but the basic paid plan is enough for most beginners. Ride With GPS is also a great place to discover routes published by local cycling clubs in your area.
Gaia GPS is the backcountry option. It excels at off-trail navigation, public land boundaries, and overlaying maps like Forest Service and topo layers. If your routes venture into remote areas with no cell service, Gaia is worth the learning curve. Many bikepackers use Gaia specifically for its public land overlays, which show exactly where dispersed camping is legal.
For your first trip, pick one app and learn it well. Switching between apps mid-planning creates more confusion than insight.
Bike Computer vs Phone Navigation
You have two main options for navigating on the bike: a dedicated bike computer like a Garmin Edge or Wahoo ELEMNT, or your smartphone running a navigation app.
Bike computers are purpose-built for the job. They are visible in sunlight, run for 15-20 hours on a charge, mount cleanly to your handlebars, and do not drain your phone battery. The downside is cost — a good unit runs several hundred dollars.
Phones work fine for beginners who already own one. The screen is larger, the apps are often free, and you have one device instead of two. The tradeoff is battery life and visibility in direct sun.
If you go the phone route, invest in a good handlebar mount, a high-capacity power bank (10,000mAh minimum), and a weatherproof case. Airplane mode and screen dimming extend battery life dramatically. A phone in airplane mode running just a navigation app can last 8-10 hours on a single charge.
Some bikepackers use both — a bike computer for primary navigation and a phone as a backup for maps, photos, and emergencies. This is the most robust setup but also the most expensive.
Why Paper Maps Still Matter
No matter how good your digital setup, carry a paper map of your route region as a backup. Batteries die. Phones get wet. Screens crack. A paper map weighs almost nothing and never needs charging.
Print your route overview, the surrounding area, and a note of your campsites and bail-out options. Keep it in a ziplock bag in your frame bag. You may never use it, but on the day you need it, you will be glad it is there.
You can also use paper maps during the planning phase. Many riders find it easier to brainstorm a rough route on a large printed map before committing it to a digital app. Topographic maps reveal elevation patterns that are easy to miss on a phone screen.
Battery Management on Multi-Day Trips
Battery life becomes a real issue on trips longer than one night. Here are proven strategies from experienced bikepackers:
- Carry a 10,000-20,000mAh power bank for trips up to three nights
- Put your phone in airplane mode when not actively navigating
- Dim your screen brightness as low as you can read it
- Consider a dynamo hub with a USB charger for trips longer than three nights
- Carry a small solar panel if you expect plenty of sun and long days off-grid
- Turn off background app refresh and location services for apps you do not need
Charge every device whenever you have access to power, even if the battery is not low. You never know when the next outlet will appear.
Water and Food Planning for Your First Trip
Water and food planning is where beginner routes fall apart. Run out of either and your trip becomes a slog. Carry too much and your bike feels like a tank. The goal is enough — not too much, not too little.
How Much Water Should You Carry Bikepacking?
The general rule for bikepacking is to carry enough water to get you to the next reliable source plus a buffer. For most beginner routes on mixed terrain in moderate temperatures, that means 2-3 liters per person.
Here is a practical breakdown:
- Cool weather (40-60°F): 1.5-2 liters between sources
- Moderate weather (60-80°F): 2-3 liters between sources
- Hot weather (80°F+): 3-4 liters between sources, or reroute to shorten gaps
If the gap between reliable water sources exceeds 40 miles, either reroute or plan to filter from natural sources. Carry a lightweight water filter (Sawyer Squeeze or Katadyn BeFree are popular) and know how to use it before your trip.
Plan to drink roughly 500ml per hour of riding in moderate weather, more in heat. Thirst is a late indicator of dehydration, so drink on a schedule rather than waiting until you feel thirsty.
Identifying Reliable Water Sources
Not all water sources are reliable. A creek that flows in spring may be dry by late summer. A gas station may have closed since the map was last updated. Build redundancy into your water plan.
Check these sources when planning:
- Town websites and visitor centers for public water fountains and facilities
- USGS water data for stream flow on natural sources
- Recent trip reports on forums like Reddit r/bikepacking or Bikepacking.com
- Satellite imagery to verify that ponds and lakes still exist
- Phone calls to campgrounds and stores to confirm hours and water availability
When in doubt, carry more water than you think you need. A half-liter of extra weight is worth the peace of mind on a stretch with uncertain water access.
Water Filtration Basics
If your route includes natural water sources like streams, lakes, or springs, you need a way to make that water safe to drink. The two most popular options for bikepacking are squeeze filters and gravity filters.
A squeeze filter like the Sawyer Squeeze or Katadyn BeFree screws onto a soft flask and lets you drink directly or fill a bottle. They weigh around 2-3 ounces, cost less than $40, and last for thousands of gallons with proper care. Backflush them at home after each trip to maintain flow rate.
Chemical purification tablets or drops (like Aquamira) are lighter still and work as a backup if your filter clogs or freezes. They take 20-30 minutes to purify a liter and leave a slight taste, but they are nearly weightless and never fail mechanically.
Whatever system you choose, practice with it at home before your trip. Filtering cold, silty water from a stream in fading light is not the time to learn how your gear works.
Food and Resupply Basics
For a single overnight trip, you do not need to overthink food. Plan roughly 2,500-3,500 calories per day depending on your size, effort, and weather. That is about 1.5-2 pounds of food per person per day.
Favor calorie-dense, low-prep foods: nuts, cheese, tortillas, jerky, nut butter packets, instant oatmeal, freeze-dried meals, and energy bars. Avoid anything that requires refrigeration or significant cooking time.
If your route passes through a town with a grocery store or gas station, plan to resupply there. This cuts your starting food weight significantly and adds a morale boost of fresh snacks mid-trip.
For a two-day trip, plan three meals plus snacks for each day: breakfast before riding, lunch on the trail, dinner at camp, and roughly 200-300 calories of snacks per hour of riding. Pack one extra emergency meal in case you get delayed.
Planning Campsites and Overnight Stops
Where you sleep shapes your route as much as where you ride. A good campsite plan gives you a clear target each day and removes the stress of finding shelter as daylight fades.
Wild Camping vs Established Sites
Established campgrounds are the easiest option for beginners. They offer guaranteed flat ground, water access, and often a picnic table and bathroom. Many have a “hiker-biker” site reserved for cyclists traveling under their own power at a reduced rate.
Wild camping — pitching your shelter on public land outside of designated campgrounds — offers more freedom and solitude. It is legal on most National Forest and BLM land in the United States, but rules vary by region. Check local regulations before you assume you can camp anywhere.
For a first trip, an established campground is the safer choice. You eliminate variables and can focus on the basics of loading your bike and riding your route. As you gain confidence, you can mix in wild camping nights on later trips.
Shelter Options for Beginners
Your shelter choice depends on weather, bugs, and budget. Here are the main options:
Tent: The most versatile choice. A lightweight one-person or two-person backpacking tent (2-4 pounds) handles rain, wind, and bugs. Look for one with a full-coverage rainfly and a bathtub floor to keep splashback out.
Bivy sack: A waterproof cover for your sleeping bag. Lighter and more compact than a tent but offers no sitting room and limited bug protection. Best for fair-weather minimalists or as an emergency shelter.
Tarp and bug net: The ultralight option. A tarp with trekking poles and a separate bug net offers the lightest shelter weight but requires practice to pitch well. Best for experienced campers who want to cut weight.
Hammock: Great if your route has trees and you dislike sleeping on the ground. Requires an underquilt or sleeping pad for warmth and a tarp for rain protection. Not ideal for routes above treeline or in open desert.
Apps and Resources for Finding Campsites
Several apps help you find legal camping options along your route:
- iOverlander — community-driven database of free campsites, hostels, and traveler resources worldwide
- Campendium — detailed listings of campgrounds with reviews and cell service reports
- Hipcamp — Airbnb-style booking for private campsites, farms, and unique outdoor stays
- Freecampsites.net — free dispersed camping sites on public land
- Recreation.gov — reservations for National Park, National Forest, and BLM campgrounds
For your first trip, book a site at an established campground so you do not have to worry about finding a spot at the end of a long day. Once you have a couple of trips under your belt, experiment with dispersed camping to expand your options.
Permits and Access Considerations
Some campgrounds and public lands require permits or reservations. National Parks almost always require backcountry permits for overnight stays. Some National Forest areas require a free permit for dispersed camping in high-use zones.
Check permit requirements before you finalize your route. A small amount of paperwork in the planning phase can save you a citation or a forced reroute mid-trip. Recreation.gov is the central reservation system for most federal campgrounds in the United States.
If you are riding on private land or crossing private property to access public land, get explicit permission first. Gates that look open may not be open to the public.
Beginner Bikepacking Gear Checklist
One of the most common beginner questions on bikepacking forums is whether you need to buy a bunch of expensive gear before your first trip. The short answer is no. Use what you already own, borrow what you can, and buy only the essentials you are missing.
Bike Bags: The Core System
A bikepacking bag system has four main components. You do not need all four for a first trip, but you need at least two.
Seat pack: A large bag that straps under your saddle and holds bulky, lightweight items like your sleeping bag and tent. This is usually the first bag beginners buy. Look for one with a stable mounting system and internal compression to prevent sway.
Frame bag: A bag that fits inside the main triangle of your bike frame. Great for heavy items like food, tools, and water because it keeps weight low and centered. Many frame bags are designed to fit specific bike sizes, so check compatibility before buying.
Handlebar roll: A cylindrical bag that straps to your handlebars. Holds your shelter and sleeping pad. Make sure it does not interfere with your brake and shift cables, and that you can still reach your bike computer or phone mount.
Accessory bags: Small bags that mount on the top tube or fork for snacks, phone, and frequently used items. Optional but convenient for things you want to reach without dismounting.
Sleep System
Your sleep system has three components: sleeping bag, sleeping pad, and shelter. For a summer overnight trip, a 40°F sleeping bag, an insulated pad with an R-value of 3 or higher, and a basic shelter are enough.
If you already backpack, your existing sleep system will work. Just make sure it packs small enough to fit in a bike bag. Compressible down bags and inflatable pads are ideal because they collapse to a fraction of their expanded size.
For shoulder-season trips where temperatures might dip below freezing, upgrade to a 20°F bag and a pad with an R-value of 4 or higher. Cold sleepers should add another 10 degrees of bag rating as a safety margin.
Repair Kit Essentials
Every bikepacking trip needs a basic repair kit. At minimum, carry:
- Tire levers, spare tubes, and a patch kit
- A frame pump or CO2 inflator
- A multi-tool with a chain breaker
- A spare quick link for your chain
- Zip ties and duct tape (wrap a few feet around a tire lever)
- Lube for your chain
- Spare derailleur hanger (specific to your bike)
- A few spare bolts in common sizes
Practice using every item in your repair kit at home before your trip. Fixing a flat in your driveway is easy. Doing it at dusk on a gravel road with a headlamp is harder.
Clothing and Layers
Pack for the weather you expect and the weather you might get. A basic layering system for a summer overnight includes:
- One riding kit (shorts, jersey, socks, gloves)
- One set of camp clothes (lightweight pants or shorts, long-sleeve shirt, warm mid-layer)
- A lightweight rain jacket
- A warm hat and lightweight gloves for cool evenings
- Sleep clothes or a base layer you can wear in your sleeping bag
Avoid cotton for riding layers. It stays wet and cold when you sweat. Merino wool and synthetic fabrics wick moisture and dry quickly.
The “Use What You Have” Philosophy
Reddit’s r/bikepacking community has a common saying: the best gear is what you already have. Before you spend hundreds on bikepacking-specific bags, try strapping a drybag to your handlebars with Voile straps and stuffing your sleeping bag in a backpack.
Plenty of riders have completed overnight trips with a backpack, a drybag, and a borrowed tent. Your first trip is about discovering whether you enjoy bikepacking — not about having the perfect kit.
Once you know you love it, you can invest in purpose-built bags one piece at a time. Start with a seat pack, then a frame bag, then a handlebar roll. Each purchase spreads the cost over multiple trips.
Common Beginner Mistakes to Avoid
After reading dozens of forum posts from riders sharing their first-trip lessons, a clear pattern emerges. The same mistakes come up over and over. Here is what to avoid.
Mistake 1: Overestimating Daily Mileage
This is the number one mistake. Riders who comfortably do 50-mile day rides assume they can do the same with a loaded bike on gravel. They cannot. Loaded bikepacking speeds average 8-10 mph on mixed terrain, and that is before you factor in navigation stops, photo breaks, and the cumulative fatigue of multi-day riding.
Solution: Cut your planned daily mileage by 30% from what you would ride unloaded on pavement. If you normally do 50 miles in a day, plan for 30-35 on your bikepacking trip.
Mistake 2: Packing Too Much Gear
First-timers pack like they are going on a week-long expedition when they are doing one night out. Every extra pound makes the bike harder to handle, the climbs slower, and the trip less fun.
Solution: Lay out everything you plan to bring, then remove one-third of it. Focus on the essentials: shelter, sleep system, food, water, repair kit, layers, and headlamp. Anything beyond that needs to justify its weight.
Mistake 3: Not Practicing Setup Before the Trip
Many beginners load up their bike for the first time on the morning of their trip. They discover that the seat pack swings into their legs, the handlebar roll blocks their GPS, and they cannot reach their water bottles. By mile 10 they are miserable.
Solution: Pack your bike fully the day before. Ride it around the block. Adjust the bags. Pitch your tent in the backyard or living room. Cook a meal on your stove. Every skill you practice at home is one less surprise on the trail.
Mistake 4: Ignoring Weather Forecasts
A clear forecast can change. A 20% chance of rain can become a downpour. Beginners often check the forecast once, pack optimistically, and get caught without rain gear or warm layers.
Solution: Check the forecast the night before and the morning of your trip. Pack a lightweight rain jacket and a warm layer regardless of the forecast. Weather in mountainous and coastal areas can shift fast, and conditions on a ridge at dusk can be very different from conditions in town at noon.
Mistake 5: Forgetting a Bailout Plan
Things go wrong. You get sick. Your bike breaks. The weather turns dangerous. Beginners often plan only for the best-case scenario and have no exit strategy.
Solution: Identify bail-out points along your route — towns with transit, roads with cell service, friends who could pick you up. Write them down. Tell someone at home your route and check-in times. A bailout plan does not mean you will use it, but having one removes the pressure that turns minor setbacks into trip-ending crises.
Mistake 6: Not Cleaning and Lubing the Chain
Dirt and grit from gravel roads chew through chain lube fast. A dry, dirty chain shifts poorly, wears out your drivetrain, and can snap under load. On multi-day trips, daily chain maintenance becomes essential.
Solution: Wipe your chain down with a rag every evening and apply fresh lube. Carry a small bottle of chain lube in your repair kit. It takes two minutes and prevents expensive problems.
Are You Ready? A Pre-Trip Checklist
Before you commit to your first overnight, run through this checklist. If you can answer yes to most of these, you are ready.
Fitness Check
- I have ridden at least 25 miles in a single day in the last month
- I can ride two days in a row without excessive soreness
- I have ridden on the type of terrain my route uses (gravel, dirt, pavement)
- I am comfortable riding with extra weight on my bike
- I can climb the elevation profile my route requires without exhausting myself
Bike and Gear Check
- My bike is in good mechanical condition with fresh tires and chain
- I have tested my bag system on a short ride
- My sleep system and shelter are appropriate for the expected weather
- I have a repair kit and know how to use every item in it
- I have a working light and spare batteries or a power bank
- My brakes work well and my gears shift cleanly under load
Skills Check
- I can fix a flat tire without help
- I can set up my shelter in under 15 minutes
- I know how to load and follow a GPX route on my phone or bike computer
- I can read a paper map as a backup
- I know how to filter water from a natural source if needed
- I can do basic trailside repairs like fixing a broken chain or loose bolt
Logistics Check
- I have shared my route and expected check-in times with someone at home
- I have identified campsites and a backup option for each night
- I know where every reliable water source is on my route
- I have checked the weather forecast and packed accordingly
- I have a bail-out plan if conditions change
- I have checked permit requirements for any areas I will camp in
If you cannot check every box yet, that is okay. Use the gaps as a guide for what to practice or prepare before your trip.
Example Beginner Routes to Study
Looking at real-world beginner routes helps you understand what a good plan looks like in practice. You do not need to ride these specific routes, but studying them will sharpen your eye for what makes a route beginner-friendly.
Rail Trail Overnights
Rail trails are the gold standard for first bikepacking trips. They are flat, well-marked, and often pass through small towns with services. A classic example is a one-night trip on the C&O Canal Towpath in Maryland: roughly 60 miles over two days, with established hiker-biker campsites every 5-7 miles, reliable water sources at each campsite, and easy bail-out points to nearby roads.
The Great Allegheny Passage connects to the C&O and offers a similar experience with slightly better surfaces. Both trails are well-documented online and have active communities that post current conditions.
Gravel Road Overnights
If you want more solitude than a rail trail offers, look for gravel routes on Forest Service or BLM land in your region. Many states have established gravel route networks with published GPX files, elevation profiles, and notes on services along the way.
A typical beginner gravel overnight is 30-40 miles each way with an established campground or dispersed camping area at the halfway point. Plan for slower speeds than pavement and bring extra water if the route has long stretches between towns.
How to Find Routes in Your Region
Start with these resources to discover routes near you:
- Bikepacking.com route database — curated, well-documented routes worldwide
- Adventure Cycling Association maps — long-distance routes with detailed service info
- Local cycling club websites — often publish route libraries
- Strava heatmaps — show where other cyclists ride in your area
- Reddit r/bikepacking — search for your region to find trip reports and recommendations
- Local bike shops — staff often know the best beginner-friendly routes nearby
When you find a route that interests you, read recent trip reports to verify that conditions have not changed. Bridges wash out, gates get locked, and stores close. Current information is your best planning tool.
How do I plan a beginner bikepacking route?
Start by assessing your current fitness, then choose a total distance of 30-50 miles for a single overnight trip. Pick beginner-friendly terrain like rail trails or gravel roads. Use a route-planning app like Komoot or Ride With GPS to map your path, mark water sources and campsites along the way, and export a GPX file. Test-ride the first section before committing to the full route.
What is the best app for planning bikepacking routes?
Komoot is the most popular choice for beginners because of its friendly interface and excellent surface-type detection. Ride With GPS offers more detailed route-building tools and cue sheets. Gaia GPS is best for backcountry routes with limited cell service. Pick one app and learn it thoroughly rather than switching between platforms.
How far should a beginner bikepack per day?
Beginners should plan for 25-45 miles per day on a loaded bike, depending on terrain and fitness. Flat rail trails allow 30-45 miles. Rolling gravel supports 25-40 miles. Hilly terrain limits most beginners to 20-30 miles. Assume an average speed of 8-10 mph on mixed terrain with a loaded bike.
What gear do I need for my first bikepacking trip?
You need a sleep system (sleeping bag, pad, shelter), food and water, a basic repair kit, weather-appropriate clothing, a headlamp, and bike bags to carry it all. Start with a seat pack and a frame bag. Borrow or repurpose gear you already own rather than buying a full kit before your first trip.
How much water should I carry bikepacking?
Carry 2-3 liters of water per person for most beginner routes in moderate weather. Increase to 3-4 liters in hot conditions or on routes with long gaps between sources. Carry a lightweight water filter like a Sawyer Squeeze so you can refill from natural sources such as streams and lakes along the way.
Final Thoughts on Planning Your First Route
Learning how to plan a beginner-friendly bikepacking route is not about memorizing rules — it is about building a process you can repeat and refine. Start small, choose terrain that matches your skill, plan your water and campsites carefully, and bring less than you think you need.
Your first trip is a test run. The goal is not to crush miles or prove anything. The goal is to load your bike, ride to a campsite, sleep under the stars, and ride home excited to plan the next one. Pick a route close to home, keep it to one night, and focus on the experience rather than the distance.
Once you have a successful overnight under your belt, the planning process becomes second nature. Each trip teaches you something new about your gear, your fitness, and the kinds of routes you enjoy most. That is the real reward of bikepacking — the planning gets easier, the routes get more interesting, and every trip builds on the last.