
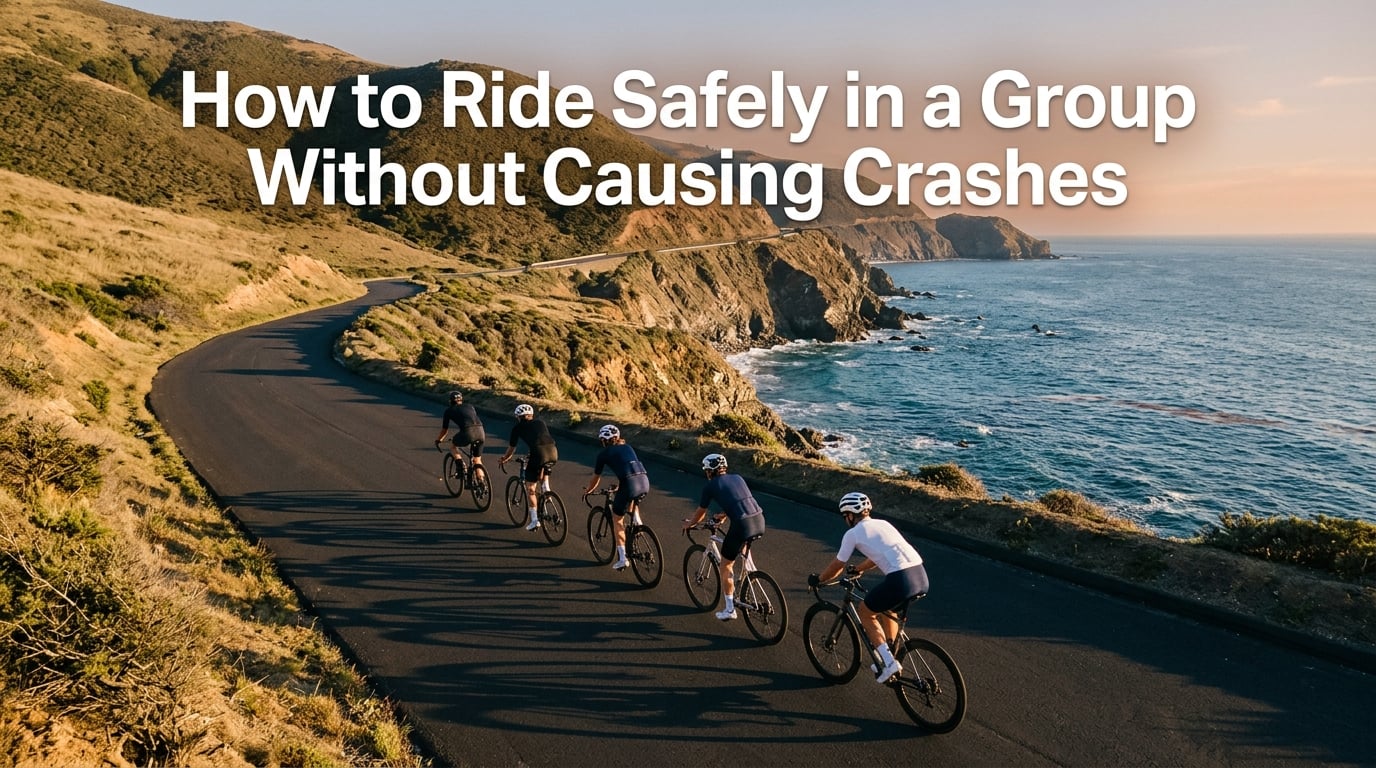
Learning how to ride safely in a group without causing crashes is one of the most important skills any cyclist can develop. Group riding can save you energy, push your fitness, and introduce you to a community that shares your passion for the bike. But it also comes with real risks, and a single unpredictable move can take down half a dozen riders in seconds.
I have ridden in everything from casual coffee shop spins to fast training pacelines, and I have seen firsthand what happens when communication breaks down. The good news is that nearly every group riding crash is preventable when everyone follows the same set of rules. Once you understand the fundamentals, riding in a bunch feels natural and safe.
This guide breaks down everything you need to know, from holding your line and reading hand signals to pulling at the front and responding when something goes wrong. Whether you are preparing for your first club run or you want to tighten up your paceline skills, these techniques will keep you and everyone around you upright. If you are also working on training for long group rides, these safety fundamentals pair perfectly with your fitness plan.
Table of Contents
Quick Answer: The 10 Rules of Group Riding
If you only remember ten things about group ride safety, make it these. Every rule below exists because ignoring it has caused real crashes on real rides. Memorize them before your next group outing.
- Hold your line — ride in a straight, predictable path with zero sudden swerving.
- Never overlap wheels — keep your front wheel behind the rear wheel of the rider ahead of you, not beside it.
- Communicate everything — use hand signals and verbal calls for hazards, stops, and pace changes.
- Do not half-wheel — match the pace of the rider next to you instead of riding a half-wheel ahead.
- Brake gently and early — feather your brakes instead of grabbing them; warn the group before slowing.
- Stay smooth when standing — shift up one gear and keep your cadence steady so you do not kick backward.
- Point out hazards — every pothole, grate, and debris pile should be signaled so the call travels down the line.
- Do not surge — keep the pace consistent when you pull through at the front instead of accelerating.
- Ride within your ability — if the pace is too fast, sit in the back or choose a slower ride next time.
- Obey traffic laws — running stop signs in a group damages the cycling community and endangers everyone.
These rules sound simple, and they are. The challenge is executing all ten simultaneously while fatigued, which is exactly when accidents tend to happen. Let us break each one down in detail.
How to Ride Safely in a Group Without Causing Crashes
The core principle of safe group riding is simple: be predictable. Every rider around you is making split-second decisions based on what they expect you to do next. When you ride smoothly, hold a steady line, and communicate clearly, the whole group moves as one unit. When someone swerves, brakes hard, or surges unexpectedly, the entire bunch is at risk.
At riding speeds of 30 to 45 kph with only 30 to 60 centimeters between wheels, you do not have time to react to sudden changes. The accordion effect means that a small brake tap at the front amplifies as it moves backward through the group, and by the time it reaches the last riders it can be a full stop. Understanding this dynamic is the foundation of every other skill in this guide.
In the sections that follow, I will walk through each rule with practical tips you can apply on your very next ride. Many of these lessons come from experienced club riders on forums like r/cycling and BikeForums, where veterans repeatedly stress that predictability and communication are the two traits they value most in a group partner.
Rule 1: Hold Your Line and Stay Predictable
Holding your line means riding in a straight, consistent path without drifting left or right. In a group, every rider behind you is tracking your wheel and subconsciously matching your trajectory. If you drift sideways unexpectedly, the rider behind has to make an instant correction, which then forces the next rider to correct, and so on down the line.
Predictability is the single most valued trait in group riders, according to experienced cyclists across every major cycling forum. Riders would rather pace-line with someone slow but steady than someone fast but erratic. When you hold your line, the whole group relaxes and everyone rides closer together with confidence.
Here is how to practice holding your line effectively:
- Look ahead, not down. Focus on the road 10 to 20 meters ahead of the rider in front of you, not at their rear wheel. Your bike goes where your eyes go.
- Avoid sudden corrections. If you feel yourself drifting, correct gradually. Jerky micro-adjustments are what cause contact between wheels.
- Commit to your line through corners. Pick your entry, apex, and exit before the turn, then hold it. Do not change your arc mid-corner when someone is on your inside or outside.
- Keep your upper body quiet. Excessive rocking or bar movement telegraphs instability and makes riders behind you nervous.
I learned this lesson the hard way on a early-season club ride when I swerved around a small pothole without warning. Three riders behind me had to take evasive action and one ended up in a ditch. That 10-centimeter pothole was not worth the chaos I caused. Now I ride through small bumps and only deviate for genuine hazards, always with a signal first.
Rule 2: Never Overlap Wheels
Overlapping wheels happens when your front wheel rides alongside or slightly ahead of the rear wheel of the rider in front of you, rather than directly behind it. It feels like you are getting a slightly better draft or preparing to pass, but it is one of the most dangerous habits in group riding. If the rider ahead drifts even a few centimeters toward you, their rear wheel hits your front wheel and you go down instantly.
When your front wheel is touched from the side, you have zero chance of staying upright. The steering is taken from you and the crash happens in a fraction of a second. This is why experienced riders treat wheel overlap as a serious violation of group etiquette, not just a minor faux pas.
Here is what to do instead:
- Ride directly behind the wheel ahead. Keep your front wheel aligned with the centerline of the bike in front of you.
- Maintain a comfortable gap. Most coaches recommend 30 to 60 centimeters for experienced riders, or a full wheel length for beginners. Only ride as close as you feel confident.
- If you find yourself overlapping, back off gently. Soft-pedal until you are safely behind again. Never brake hard when overlapping, because the rider ahead might drift before you clear their wheel.
- Be extra careful when someone stands up. A rider who stands often slows momentarily and their bike can kick backward a few centimeters.
One technique that helps is watching the hips of the rider ahead rather than their wheel. Riders telegraph every move through their body before their bike changes direction. If you see hips shift, you know a line change is coming and you can react early.
Hand Signals: How to Communicate Hazards
Hand signals are the visual language of group riding. They let you warn riders behind you about hazards without shouting over wind and traffic. The key rule is that every signal must travel down the group, from rider to rider, until the last person has seen it. If you see a signal, repeat it.
Here is a numbered reference of the most common hand signals used on group rides:
- Pointing at the ground on the left or right — there is a hazard (pothole, grate, debris, glass) on that side. Point directly at it so riders behind know exactly where to look.
- Waving or sweeping motion toward the hazard — used for larger obstacles like gravel patches or parked car debris across the lane.
- Flat hand held behind and lowered — slowing down. Palm faces down and the hand moves up and down gently.
- Fist held behind the back — stopping. This warns riders behind to prepare for a complete stop.
- Elbow flick or arm waive to the side — the rider at the front is peeling off and rotating. The direction of the flick tells the group which way they will move.
- Left or right arm extended horizontally — the group is turning in that direction. Repeat this signal so every rider and any traffic behind knows the group’s intention.
- Pointing over the shoulder or behind — there is an obstacle approaching from behind (a car backing out, a runner, another cyclist). This is less common but useful in certain situations.
- Hand behind back pointing at drivetrain — mechanical issue. The rider needs to drop back or stop to fix something.
- Two fingers or a V shape held up — two abreast formation, or sometimes used to indicate two hazards ahead depending on the group.
- Arm straight up in the air — used in some regions to signal a full stop, a turn, or that the group is regrouping. Confirm with your local club what this means in your area.
One important caveat: hand signals vary between regions and even between clubs in the same city. Always ask the ride leader about local signals before the ride starts. A quick 30-second briefing at the start prevents miscommunication five miles in.
Verbal Cues: What to Call Out and When
Hand signals work when riders behind you are looking, but verbal cues make sure everyone hears the warning even if their eyes are elsewhere. Most calls are short, loud, and repeated down the line so the message reaches every rider. Volume matters in a group, so speak up.
Here is a checklist of the verbal cues you will hear and use on a typical group ride:
- Car up — a vehicle is approaching from the front, on a narrow road. Riders should be ready to move single file.
- Car back — a vehicle is approaching from behind. This is the most common call and should be repeated immediately so everyone knows to hold their line and let the car pass.
- Hole or holes — there is a pothole ahead. Pair this with a hand signal pointing at the location.
- Slowing — the pace is dropping. Call this before you brake so riders behind are not surprised.
- Stopping — the group is coming to a full stop. This is critical at intersections and traffic lights.
- Rolling or clear — an intersection is safe to proceed through. Only the ride leader or front riders should call this, and every rider is still responsible for confirming it is actually clear.
- On your left — you are passing another rider or cyclist from behind. This prevents them from turning into you unexpectedly. Riders say this so the person ahead does not swerve left without warning.
- Rider up — a cyclist ahead is riding in the same direction and the group will catch them. Call this so the group can plan to pass safely.
- Walker up or runner up — a pedestrian is in the road or on the shoulder ahead.
- Gravel — loose surface ahead. Slow down and avoid hard braking or sharp turns.
- Mechanical — a rider has a flat, dropped chain, or other issue. The group should slow or stop to let them fix it.
- Last rider or sweep — called by the rider at the back to confirm no one has been dropped. This is essential on no-drop rides.
Why do bikers say on your left? It is the universal passing call in cycling and running. Without it, a rider ahead might drift left to avoid a pothole and collide with you mid-pass. Always call it clearly and well before you reach the rider you are overtaking.
A note on volume and tone: shout calls loud enough for the rider directly behind you to hear, but do not scream. A panicked yell can cause riders to brake or swerve unnecessarily. Speak in a firm, calm voice so the group interprets the call as information, not alarm.
Half-Wheeling and Pace Matching
Half-wheeling is when you ride with your front wheel a half-wheel length ahead of the rider beside you, instead of level with their bars. It seems harmless, but it is one of the most common social infractions on group rides. The rider next to you speeds up to match your position, you speed up to maintain your half-wheel advantage, and the pace creeps higher and higher until the group is stretched and frustrated.
Half-wheeling is dangerous because it creates an unstable, surging pace that forces everyone behind to work harder than they should. On forums like r/cycling, experienced riders cite half-wheeling as one of their biggest pet peeves and a leading cause of dropped riders on casual club runs.
Here is how to avoid it:
- Match the rider beside you. When you pull through at the front, look over and align your handlebars with the rider next to you.
- Check your speed constantly. If you notice the rider beside you falling behind, you are half-wheeling. Ease off.
- Let the front rider set the pace. When you rotate to the front, maintain whatever pace was established. Do not treat your pull as a chance to show how strong you are.
- Communicate if the pace feels wrong. If someone is half-wheeling you, say something politely. Most riders do not realize they are doing it.
Pace matching is the opposite of half-wheeling, and it is what good group riders strive for. When everyone at the front rides level and steady, the whole group benefits from a smooth, efficient draft behind.
Cornering and Descending Safely in a Group
Cornering and descending in a group require more skill than doing them solo because your line choices affect everyone around you. The cardinal rule is that you must maintain a predictable arc through every turn so riders behind can follow your wheel without guessing where you will end up.
When the group approaches a corner, the front riders should signal the turn, then enter wide, apex in the middle, and exit wide. Everyone behind follows the same line. Do not cut inside someone mid-corner or take a different line than the rider ahead of you, because contact at speed is extremely dangerous.
Descending is where group rides see some of the most serious crashes. Riders pick up speed quickly, the gaps between wheels shrink, and braking distances increase. Before joining a group descent, make sure you understand proper braking technique and correct descending position so you are not learning these skills in a bunch for the first time.
Key tips for group descending:
- Increase your following distance. Give the rider ahead more room on descents because you will travel further before you can stop.
- Feather your brakes, do not grab them. Sudden hard braking destabilizes your bike and the riders behind you. Modulate speed smoothly.
- Pick your line before the corner and hold it. Do not change direction mid-turn when riders are stacked behind you.
- Warn the group about sharp corners. Call out decreasing-radius turns or blind corners so everyone is ready.
On climbs, the opposite dynamic applies. The group naturally stretches out as riders climb at different paces. This is actually safer than descending because the accordion effect works in slow motion. Just remember that when you stand up to climb, shift up one gear first so your bike does not kick backward into the rider behind you. Mastering shifting gears correctly prevents this common mistake.
Pulling and Rotating at the Front (Pacelines Explained)
A paceline is a formation where riders take turns at the front breaking the wind while others draft behind. Drafting can reduce your wind resistance by up to 50 percent, which is why group riding is so much faster and easier than riding solo at the same speed. But for a paceline to work safely, every rider needs to know how to pull, peel off, and rotate smoothly.
The most common rotation method is called through-and-off, also known as a rotating paceline. Here is how it works, step by step:
- The front rider (the puller) checks for traffic behind. A quick shoulder check confirms it is safe to peel off.
- The puller flicks an elbow or waves. This signal tells the group they are about to rotate.
- The puller moves to the side and soft-pedals. They drift back alongside the line of riders, recovering while the next rider takes over.
- The second rider accelerates smoothly to maintain pace. They do not surge. The goal is a seamless handoff with zero change in speed.
- The rotating rider drops to the back of the group. They rejoin the drafting line behind the last rider.
- Repeat. The new front rider does their turn, then rotates off in the same manner.
The duration of each pull depends on the ride type and the fitness of the group. On a casual club ride, pulls might last 1 to 3 minutes. On a fast training ride, they could be 30 seconds to 1 minute. If you are tired, take a shorter pull. There is no shame in a 15-second turn at the front followed by a clean rotation.
One thing to watch for is the accordion effect. When the front rider accelerates as they pull through, the riders behind have to sprint to close the gap. Then when the puller peels off and soft-pedals, everyone brakes. This surge-and-slow pattern fatigues the group quickly and increases crash risk. The fix is simple: maintain the exact same speed from the moment you reach the front to the moment you rotate off.
If the group encounters a crosswind, riders form an echelon, a diagonal line angled away from the wind direction. Each rider shelters behind and slightly to the side of the rider ahead. Echelons require practice and excellent communication because the road width limits how many riders can fit in the formation. Riders who do not fit must form a second echelon behind.
No-Drop vs Drop Rides: Understanding the Format
Not all group rides operate the same way, and knowing the format before you show up prevents a lot of stress. The two main categories are no-drop rides and drop rides, and they cater to very different rider types.
No-drop rides are designed so that no rider gets left behind. The group waits at the top of climbs, at intersections, and after mechanical stops. If someone is struggling, the pace adjusts or a stronger rider drops back to help. These rides are ideal for beginners and for riders who want a social, supportive experience. The ride leader or a designated sweep rider stays at the back to make sure everyone finishes together.
Drop rides are faster and more competitive. If you cannot hold the pace, the group will leave you behind. There is no shame in this, it is simply the nature of the ride. Drop rides are for experienced riders who are confident in their fitness and their group handling skills. If you are unsure whether you belong in a drop ride, start with a no-drop ride at a similar distance and see how you fare.
How do you know if a ride is right for your fitness level? Check the ride description for average speed, distance, and elevation. If the posted average speed is within 2 to 3 kph of your solo average for the same distance, you should be fine. If it is 5 kph or more faster, you will likely get dropped, especially on a drop ride. Being honest about your fitness is one of the most respected traits in group cycling.
If you are building toward longer rides, training for long group rides with a structured plan will help you develop both the fitness and the confidence to keep up.
Equipment and Preparation Checklist
Showing up unprepared is a quick way to make yourself a liability in a group. A mechanical failure in the middle of a paceline forces everyone to stop and can create a dangerous situation if riders behind are not ready. Use this checklist before every group ride.
What to bring on every group ride:
- Two spare tubes and a patch kit — flats happen, and having two tubes covers you for double punctures.
- A working pump or CO2 inflator — test your pump before the ride so you know it functions.
- Tire levers and a multi-tool — basic mechanical skills are expected in most groups.
- Full water bottles and nutrition — bonking in a group leads to unpredictable behavior and can cause crashes. Learn about avoiding bonking on group rides before you attempt a long one.
- Front and rear lights — even on daytime rides, lights make the group more visible to drivers.
- Your phone and ID — in case of emergency.
Check your bike before rolling out:
- Tires are properly inflated and free of cuts or glass.
- Brakes are responsive and not rubbing the rims or rotors.
- Gears shift cleanly through the full range.
- Quick releases or thru-axles are fully closed.
- Bar tape is secure and nothing is loose on the cockpit.
Arrive 10 to 15 minutes early so you have time to fix any last-minute issues. Introduce yourself to the ride leader and mention if it is your first time with the group. This simple courtesy goes a long way and experienced riders will happily help you integrate.
Common Mistakes New Riders Make
Every experienced group rider was a nervous beginner once. The mistakes below are the ones that show up most frequently in forum discussions and post-ride debriefs. Avoiding them will instantly make you a more welcome addition to any group.
Mistake 1: Braking hard instead of soft-pedaling. When the rider ahead slows, your first instinct is to grab the brakes. Instead, sit up to catch more wind or soft-pedal. Hard braking sends a shockwave through the group.
Mistake 2: Looking at the wheel ahead instead of the road. Staring at the rear wheel in front of you is a natural impulse, but it means you are not seeing hazards until the last second. Look past the rider ahead to the road and the riders two or three positions up.
Mistake 3: Surging when you pull through. The thrill of reaching the front often makes new riders accelerate. Maintain the established pace and your pull will be smoother and more effective.
Mistake 4: Not communicating. Silence in a group is dangerous. If you see something, call it. If you are slowing, say so. Over-communicating is always better than under-communicating.
Mistake 5: Riding beyond your fitness. Joining a ride that is too fast leads to erratic behavior as you fatigue. You start missing signals, weaving, and making poor decisions. Choose a ride that matches your current ability, not the ability you wish you had.
Mistake 6: Standing without warning. When you stand, your bike slows for a split second and kicks backward. Riders behind you read this as a sudden deceleration. Shift up one gear before standing to maintain your momentum and prevent the bike from moving backward.
Mistake 7: Running stop signs. Group pressure can push you to roll through intersections that you would stop at on a solo ride. This endangers the group and damages the reputation of cyclists in your community. Stop when the law requires it.
What to Do If a Crash Happens
Even with perfect technique, crashes happen. Knowing what to do in the moment and afterward can reduce injuries and prevent the situation from getting worse. This is an area that very few group riding guides cover, which is exactly why it matters.
If a crash happens in front of you:
- Do not brake hard. Hard braking causes the riders behind you to pile into your back. Instead, steer around the crash if you have a clear line.
- Call it out. Shout crash or down so riders behind know to slow and avoid the pile.
- Look for an escape route, not at the crash. Your bike goes where your eyes go, so focus on the gap, not the bodies.
- If you cannot avoid it, go straight. Trying to swerve at the last second often causes more crashes than riding straight through the gap.
After the crash, follow this emergency procedure:
- Get everyone off the road. Move injured riders to the shoulder if they can be moved safely. Do not move anyone with a suspected spinal injury.
- Call emergency services if anyone is seriously hurt. Do not assume someone else is calling. Confirm it has been done.
- Check for concussion symptoms. Ask the downed rider simple questions. Confusion, nausea, or vision issues mean they should not get back on the bike.
- Assess bike damage. Check for bent derailleur hangers, damaged wheels, and compromised brake function before anyone remounts.
- Document the scene. Take photos, note the time and location, and exchange contact information with witnesses. This matters for insurance and any potential liability.
On the question of legal liability, group ride crashes are a gray area in most jurisdictions. In general, the rider who caused the crash (through sudden swerving, overlapping wheels, or reckless behavior) could bear responsibility. Some cycling clubs carry liability insurance for sanctioned rides, but informal group rides usually do not. Forum discussions on Slowtwitch and BikeForums have documented cases where riders sued each other after group ride incidents. The best protection is riding safely and predictably at all times.
FAQ’s
What is the 75% rule in cycling?
The 75% rule in cycling refers to the idea that for a group ride to be enjoyable and safe, you should be able to ride at approximately 75% of the group’s average pace comfortably on your own. If you can sustain 75% of the target speed solo without struggling, you are fit enough to draft in the group and keep up. Riding beyond your 75% threshold leads to fatigue, unpredictable handling, and increased crash risk.
What is the 80% rule in cycling?
The 80% rule states that on a group ride, you should be able to hold about 80% of the ride’s target pace on your own. This ensures you have enough fitness reserve to handle surges, hills, and changes in pace without getting dropped or riding dangerously. If the posted average speed is more than 20% above your solo cruising speed, choose a slower ride.
What is the 105% rule in cycling?
The 105% rule is a training guideline suggesting that you should be able to sustain 105% of your functional threshold power (FTP) for short periods to participate effectively in faster group rides. It means you need a small power reserve above your steady-state threshold to handle accelerations, pull through at the front, and close gaps when the pace surges.
What is cyclists’ syndrome?
Cyclists’ syndrome, more formally known as pudendal neuralgia, is nerve pain caused by prolonged pressure on the perineum from a narrow bicycle saddle. Symptoms include numbness, tingling, or pain in the genital and pelvic region. While not directly related to crash safety, it can cause a rider to shift position frequently and ride unpredictably, which increases risk in a group. Proper saddle fit and shorts with quality chamois padding help prevent it.
Why do bikers say on your left?
Bikers say on your left to warn a rider or pedestrian ahead that they are about to be passed on the left side. Without this call, the person ahead might suddenly move left to avoid a hazard and collide with the passing cyclist. It is the standard passing call in cycling and should be made clearly and well before the pass occurs.
Is overlapping wheels in cycling dangerous?
Yes, overlapping wheels is one of the most dangerous things you can do in a group ride. When your front wheel is beside the rear wheel of the rider ahead, any sideways movement from them will knock your front wheel and cause an instant crash. You have no control once contact is made. Always ride directly behind the wheel in front of you.
What does car up mean in cycling?
Car up means a vehicle is approaching from the front of the group, typically on a narrow road where the group may need to move single file to let it pass. The call is repeated down the line so every rider is aware. The companion call is car back, which warns of a vehicle approaching from behind.
Conclusion
Mastering how to ride safely in a group without causing crashes comes down to two words: predictability and communication. Hold your line, never overlap wheels, signal every hazard, and match the pace of riders around you. These habits keep you and everyone in your bunch safe, no matter how fast or large the group gets.
Start with a no-drop ride if you are new, introduce yourself to the ride leader, and do not be afraid to ask questions before you roll out. Every experienced group rider was once in your shoes, and the cycling community is overwhelmingly welcoming to those who show up prepared and willing to learn. The skills in this guide will serve you on every group ride for the rest of your cycling life, so bookmark this page and revisit it before your next outing.