
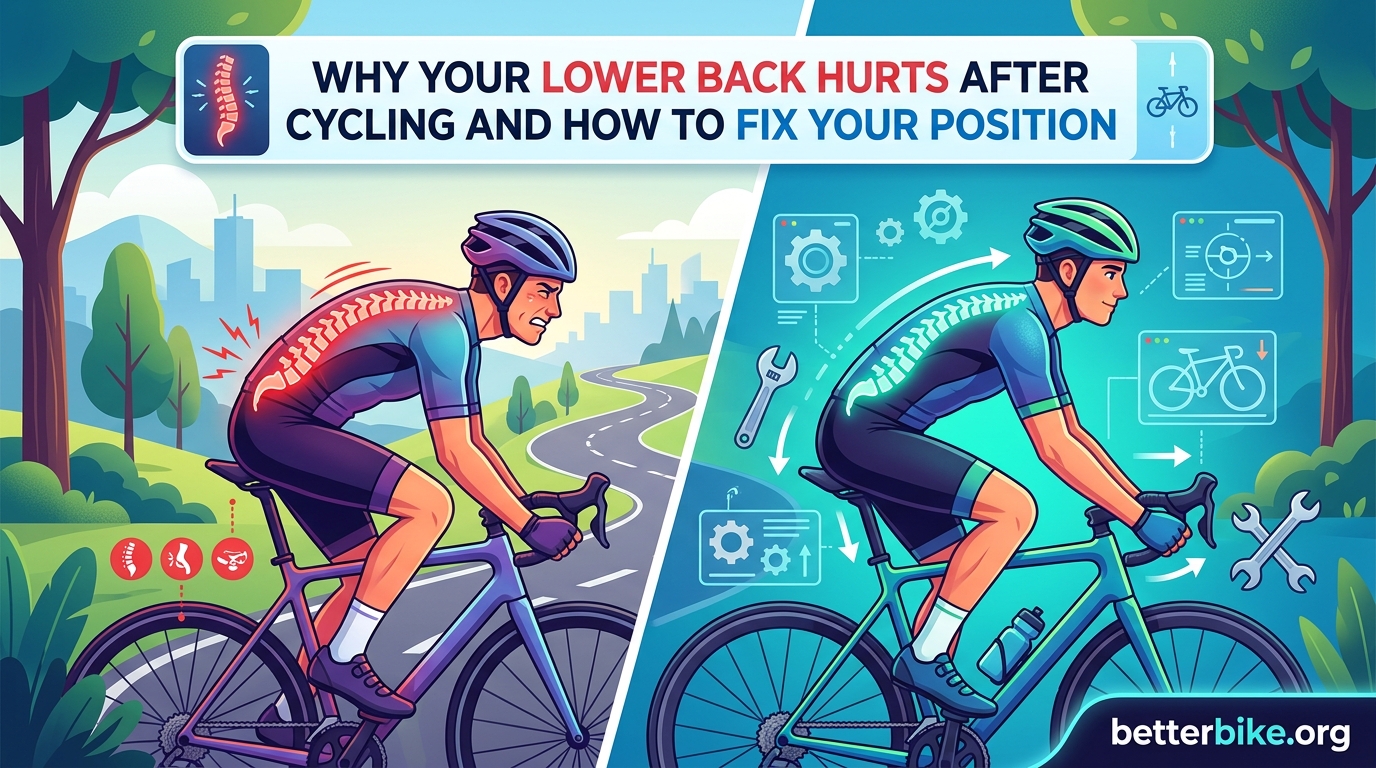
If you have ever climbed off your bike and felt a dull ache settle into your lower back, you are in good company. Lower back pain is one of the most common complaints among cyclists, affecting everyone from weekend riders to seasoned racers. The frustration of loving a sport that leaves you stiff and sore is real, and I have been there myself after long rides that should have felt rewarding.
The good news is that most cycling-related lower back pain is fixable. It usually comes down to a combination of bike position, core strength, and how you manage your body off the bike. Once you understand why the pain happens, the fixes make logical sense and you can start making changes today. If you are getting back into cycling shape after a break, these adjustments matter even more because your body is re-adapting to the riding position.
In this guide, we will walk through the root causes of lower back pain cycling injuries, the specific bike position adjustments that make the biggest difference, and a practical routine of exercises and stretches you can start immediately. I will also cover some overlooked factors like crank length and morning disc vulnerability that most articles miss entirely.
Table of Contents
Why Your Lower Back Hurts After Cycling
Lower back pain from cycling happens because your spine is held in a static, flexed position for extended periods. Unlike running or swimming, cycling locks your body into a forward-bent posture where your lumbar spine rounds forward and stays there. This position is called spinal flexion, and it places continuous load on the discs, ligaments, and small stabilizing muscles of your lower back.
When you ride, those deep spinal muscles have to work constantly to keep you stable on the saddle. Your larger muscle groups like the glutes and quadriceps handle the pedaling, but the small paraspinal muscles and core stabilizers handle the job of keeping your spine from collapsing forward. If your core is weak, those small muscles fatigue long before your legs do.
This is the core mechanism behind most cycling back pain: your legs still feel fresh, but your back has been working overtime and starts to ache. The pain is your body telling you the stabilizing muscles are exhausted.
The Pelvic Rocking Problem
Another major factor is how your pelvis sits on the saddle. Ideally, your pelvis should be stable and relatively neutral, allowing your spine to maintain a gentle curve. But if your saddle is too high, too tilted, or the wrong shape, your pelvis rocks side to side with each pedal stroke.
This rocking forces your lumbar spine to compensate with repetitive micro-movements. Over thousands of pedal strokes, those tiny movements add up to significant strain. Many riders on forums describe this exact sensation, a feeling of instability that gradually turns into a deep ache.
Why Morning Rides Hurt More
Here is something most cycling articles never mention: your spinal discs are more vulnerable in the morning. When you sleep, your discs rehydrate and swell slightly, making them up to 25% more pressurized when you first wake up. If you jump on your bike within an hour of waking, you are putting flexion load on discs that are at maximum pressure.
Studies show that disc herniation risk is significantly higher with morning flexion activities. If you are an early morning cyclist and your back hurts more during those rides, this is likely why. Give yourself at least 60 to 90 minutes after waking before riding, and do some gentle extension movements like standing backbends to reduce disc pressure first.
What Causes Lower Back Pain From Cycling
Understanding the specific causes of lower back pain cycling issues helps you identify which fix applies to you. Most cases trace back to one or more of these six factors.
1. Saddle Height Issues
A saddle that is too high is probably the single most common cause of cycling-related back pain. When your saddle is too high, your hips rock side to side with every pedal stroke as you reach for the bottom of the stroke. That lateral pelvic movement forces your lower back to stabilize against repetitive shifting.
Conversely, a saddle that is too low pushes your spine into excessive flexion because you are compressed into a tighter position. You may also feel knee pain with this setup. The ideal saddle height allows a slight bend in your knee at the bottom of the pedal stroke, around 25 to 35 degrees of knee flexion.
Signs your saddle is too high: hip rocking visible to observers, reaching for pedals at the bottom of the stroke, Achilles or hamstring tightness, and one-sided lower back pain.
Signs your saddle is too low: knee pain at the front of the knee, feeling cramped on the bike, excessive lower back rounding, and lack of power.
2. Handlebar Reach and Drop
If your handlebars are too far away or too low, your spine has to flex more deeply to reach them. This increased flexion angle puts more compressive force on your lumbar discs. A long stem, wrong frame size, or handlebars mounted too far below the saddle all contribute.
Riders with tight hamstrings and hip flexors are especially vulnerable here. When the posterior chain is tight, reaching forward pulls the pelvis into a posterior tilt, flattening the lower back against its natural curve. This creates the perfect storm for disc irritation.
3. Frame Size Problems
A frame that is too large forces you into an overextended position where you constantly reach for the handlebars. A frame that is too small compresses you into excessive spinal flexion. Both scenarios overload the lower back muscles.
Stack height and reach are the two key frame geometry numbers to understand. The stack is the vertical height from the bottom bracket to the top of the head tube, and the reach is the horizontal distance. If your stack is too low or your reach too long for your flexibility level, back pain will follow.
4. Crank Length Impact
This is one of the most overlooked causes of cycling back pain. Standard cranks are typically 170mm to 175mm, but many riders would benefit from shorter cranks. Long cranks force your hips and knees into deeper flexion at the top of each pedal stroke.
When your hip flexion exceeds your available flexibility, your pelvis tilts posteriorly to compensate. This posterior pelvic tilt flattens your lumbar spine and loads the discs. Shorter cranks, such as 165mm or even 160mm, reduce the hip flexion angle at the top of the stroke and help maintain a more neutral pelvic position.
Many professional bike fitters now recommend shorter cranks as a quick win for back pain sufferers. The power difference is minimal, but the comfort improvement can be dramatic.
5. The Desk Sitting Connection
If you sit at a desk for eight hours and then ride your bike, you are stacking two activities that both promote hip flexion and spinal flexion. Your hip flexors shorten from sitting all day, your hamstrings tighten, and your glutes become inactive.
Then you get on your bike and ask those same tight, shortened muscles to support you in an even deeper flexed position. It is no wonder your back complains. Cyclists who have desk jobs need to be especially proactive about hip mobility and core strength to counteract the effects of prolonged sitting.
6. Whole Body Vibration From Road Surfaces
Road vibration travels through your frame and into your spine with every bump and crack in the road. British Cycling has recommended wider tires, at least 25mm and preferably 28mm or wider, to absorb more of this vibration before it reaches your body.
Running lower tire pressures also helps. The vibration from rough roads creates low-frequency oscillations that your spinal muscles have to absorb continuously. Over a two-hour ride, this constant micro-shocking fatigues the stabilizing muscles and contributes to that end-of-ride ache.
How to Fix Lower Back Pain From Cycling
Now for the part you came here for. Here are the specific bike position adjustments that will reduce or eliminate your lower back pain. I recommend making one change at a time so you can tell which adjustment made the difference.
Saddle Height Adjustment
Start here because it is the most common culprit. Here is a simple method to check your saddle height:
Step 1: Put on your cycling shoes and clip into the pedals or rest your feet on them as you would when riding.
Step 2: Rotate the pedals to the 6 o’clock position (bottom of the stroke) with your right foot.
Step 3: Your knee should have a slight bend of about 25 to 35 degrees. If your leg is fully locked, lower the saddle. If your knee is bent more than 35 degrees, raise it.
Step 4: Have someone watch you from behind while you pedal. Your hips should not rock side to side. If they do, lower the saddle by 3 to 5mm and test again.
Step 5: Make small adjustments, 2 to 3mm at a time, and ride for 15 to 20 minutes before changing anything else. Your body needs time to adapt to each change.
Saddle Setback and Tilt
Your saddle fore-aft position affects how your weight is distributed between the saddle and handlebars. A saddle too far forward increases reach to the bars and deepens spinal flexion. A saddle too far back may relieve back strain but can overload the knees.
Use a plumb line from the front of your kneecap with the crank at the 3 o’clock position. The line should pass near the pedal axle for a general starting point. For back pain sufferers, moving the saddle slightly forward can reduce reach and ease spinal load.
Saddle tilt matters too. A nose-down tilt of 1 to 2 degrees can relieve perineal pressure and allow a more neutral pelvic position. Never tilt the nose up, as this pushes you backward and forces you to reach further for the handlebars.
Handlebar Reach and Height
If your saddle position is dialed but back pain persists, look at your handlebars. Raising the bars by 5 to 10mm can make an immediate difference. You can do this by adding spacers under the stem if your fork has room, or by flipping the stem to a positive rise.
Shortening the stem by 10mm reduces reach and helps you maintain a more upright spine angle. If you are running a 110mm stem, try a 90mm or 100mm. The handling will change slightly, but the back relief is usually worth it.
For riders with significant back pain, consider switching to a riser bar or a bike with a higher stack geometry. Endurance road bikes and gravel bikes typically have more relaxed geometry that is kinder to the lower back.
Cleat Position Check
Your cleat position affects everything upstream. If your cleats are positioned so that your foot is angled incorrectly, your knee tracks improperly, which changes your pedaling mechanics and can create asymmetrical load on your back.
A common issue is a leg length discrepancy that goes uncorrected. Even a 5mm difference can cause one-sided back pain over thousands of pedal strokes. A professional bike fitter can measure this and add a shim to your cleat if needed.
If you notice back pain consistently on one side, have your leg length and cleat alignment checked. This single adjustment has resolved back pain for many cyclists who tried everything else first.
Quick Fixes You Can Make Today
Here are five adjustments you can make before your next ride that may provide immediate relief:
1. Lower your saddle by 3 to 5mm. It is the most common fix and takes 30 seconds.
2. Raise your handlebars by adding a spacer or flipping your stem.
3. Reduce your tire pressure by 10 to 15 PSI if you are running 25mm or wider tires.
4. Tilt your saddle nose down by 1 to 2 degrees.
5. Stand up and pedal out of the saddle every 10 to 15 minutes during your ride to break up static flexion.
These changes are completely free and reversible. Try them one at a time so you know which one helped. If you are planning to tackle longer distances, building up gradually through a structured century ride training plan will also help your body adapt without overloading your back.
Best Bike Position for Lower Back Pain
The best bike position for lower back pain minimizes spinal flexion while maintaining efficient power transfer. Here is what that looks like across different cycling disciplines.
Road Cycling Position
For road cyclists, aim for a saddle-to-bar drop of no more than 4 to 6cm if you have back pain. Competitive riders often run 8 to 12cm drops, but that requires excellent flexibility and core strength. Prioritize a position where you can ride for two hours without your back aching.
Your back should have a gentle curve, not a sharp hinge at the lumbar spine. If you look at your profile in a mirror or photo, the angle from your hip to your shoulder should be around 30 to 45 degrees from horizontal for a back-friendly road position.
Gravel and Mountain Biking
Gravel and mountain bikes typically have more upright geometry already, which helps. However, the rougher terrain means more vibration and impact loading on your spine. Run the widest tires your frame allows and keep pressures moderate.
For mountain biking, a dropper post helps you get your weight back on descents, which can reduce lower back strain from bracing. Make sure your suspension is properly tuned, as harsh suspension transfers impact directly to your spine.
Is a Professional Bike Fit Worth It?
Forum data and user testimonials consistently show that a professional bike fit is the single most effective intervention for cycling back pain. Many riders report that a single fitting session resolved months or even years of chronic pain.
A good bike fitter uses motion capture technology to analyze your pedaling dynamics, pelvic stability, and spinal position in real time. They can identify issues you would never find on your own, like a subtle leg length discrepancy or a cleat rotation problem.
Expect to pay between $150 and $350 for a professional fit. If you have tried self-adjustments for a few weeks without improvement, this investment pays for itself in comfort and injury prevention.
Core Strengthening Exercises for Cyclists
A strong core is your best defense against cycling back pain. Your core includes the abdominals, obliques, lower back muscles, and deep stabilizers like the transverse abdominis. When these muscles are strong, they share the load with your spine instead of letting it do all the work.
Consistency matters more than intensity. Ten minutes of core work three times a week will do more than one intense session. Here is a progression from beginner to advanced.
Beginner Exercises
Plank: Start on your forearms and toes, body in a straight line from head to heels. Hold for 30 seconds, building to 60 seconds. Keep your glutes squeezed and avoid letting your hips sag. Do 3 sets.
Glute Bridge: Lie on your back with knees bent and feet flat. Squeeze your glutes and lift your hips until your body forms a straight line from knees to shoulders. Hold for 2 seconds at the top. Do 3 sets of 12 reps.
Dead Bug: Lie on your back with arms extended toward the ceiling and knees bent at 90 degrees. Slowly lower your right arm and left leg toward the floor while keeping your lower back pressed flat. Return and switch sides. Do 3 sets of 10 reps per side.
Intermediate Exercises
Bird Dog: Start on hands and knees. Extend your right arm forward and left leg backward simultaneously, keeping your spine neutral. Hold for 2 seconds, then switch. This exercise trains anti-rotation stability, which is exactly what your spine needs on the bike. Do 3 sets of 10 reps per side.
Romanian Deadlift: Hold a dumbbell or kettlebell with both hands. Hinge at the hips, keeping your back straight and a slight knee bend. Lower the weight until you feel a hamstring stretch, then drive back up using your glutes. This strengthens the entire posterior chain. Do 3 sets of 10 reps.
Side Plank: Lie on your side with your forearm on the floor. Lift your hips so your body forms a straight line. Hold for 20 to 30 seconds per side. This targets the obliques and quadratus lumborum, muscles that stabilize your spine against lateral movement. Do 3 sets per side.
Advanced Progression
Once you can hold a plank for 60 seconds and do 3 sets of bird dogs with perfect form, progress to weighted carries, Pallof presses, and Swiss ball exercises. The key principle is to train your core to resist movement rather than create it, because that is exactly what your core does on the bike.
Remember that deadlifts and squats are excellent compound exercises that build total-body strength including the posterior chain. Many cyclists focus only on legs and cardio, but adding two strength sessions per week transforms back health.
Stretching Routine for Lower Back Prevention
Tight muscles pull on your pelvis and spine, creating the imbalances that lead to pain. A regular stretching routine addresses the three tightest muscle groups in cyclists: hamstrings, hip flexors, and lower back.
Hamstring Stretches
Tight hamstrings pull the pelvis into a posterior tilt, flattening the lumbar curve and increasing disc pressure. Stretch them daily, especially after rides.
Standing Hamstring Stretch: Place one foot on a low step or curb. Keep the leg straight and lean forward from the hips, not the waist. Hold for 30 seconds per side. You should feel a stretch along the back of your thigh, not behind your knee.
Lying Hamstring Stretch: Lie on your back and loop a towel or strap around one foot. Extend the leg toward the ceiling and gently pull until you feel a stretch. Hold for 30 seconds per side.
Hip Flexor Stretches
Tight hip flexors from desk sitting and cycling pull your pelvis into an anterior tilt, increasing the arch in your lower back. This is one of the most important stretches for cyclists.
Kneeling Hip Flexor Stretch: Kneel on one knee with the other foot in front, both knees at 90 degrees. Tuck your tailbone under and squeeze the glute of the kneeling side. Lean forward slightly without arching your back. Hold for 30 seconds per side.
Lower Back Mobility
Cat-Cow: On hands and knees, alternate between arching your back toward the ceiling (cat) and letting it sag toward the floor (cow). Move slowly through 10 cycles. This mobilizes the entire spine and relieves tension built up from the static riding position.
Child’s Pose: Kneel and sit back on your heels, then reach your arms forward on the floor. Hold for 30 to 60 seconds. This gently decompresses the lower back and stretches the lats.
Standing Extension: Stand with feet shoulder-width apart and place your hands on your lower back. Gently lean backward as far as is comfortable. Hold for 2 seconds and return. Do 10 reps. This is the antidote to the flexed cycling position and is especially helpful right after a ride.
Post-Ride Routine
Spend 5 to 10 minutes after every ride doing the standing extension, cat-cow, and a hip flexor stretch. This counteracts the flexed position your body just held for hours. If you are preparing for multi-day adventures, this routine becomes even more important. Good bikepacking trip preparation includes a consistent mobility practice to handle consecutive days in the saddle.
Training Load and Back Pain Management
How you ride matters just as much as how your bike is set up. Sudden increases in volume or intensity are a common trigger for back pain episodes.
Build Gradually
Follow the 10% rule: increase your weekly riding time or distance by no more than 10% per week. If you rode 5 hours last week, aim for 5.5 hours this week, not 8. Your cardiovascular system adapts faster than your musculoskeletal system, so your heart and lungs may feel ready while your back is still catching up.
Cadence and Gear Selection
Pushing heavy gears at low cadence places more load on your spine because each pedal stroke requires more force and more muscular stabilization. Aim for a cadence of 80 to 100 rpm on flat roads. Spinning lighter gears spreads the load across more pedal strokes and reduces peak force on your spine.
If you find yourself grinding below 70 rpm, shift to an easier gear. This is especially important on climbs, where the combination of high force and seated position puts maximum stress on your lower back.
When Pain Means Stop
Some discomfort during hard efforts is normal. But if your back pain forces you to change position constantly, makes you cut a ride short, or persists for more than 24 hours after riding, you need to stop and address the root cause. Riding through pain reinforces compensatory movement patterns and makes the problem worse.
When to Seek Professional Help
Most cycling-related back pain improves within 2 to 4 weeks of making the adjustments above. But some situations call for professional intervention.
Red Flag Symptoms
See a doctor or physiotherapist immediately if you experience any of the following:
Numbness or tingling in your legs, groin, or saddle area. Sharp, shooting pain down one leg (possible sciatic nerve involvement). Loss of bowel or bladder control. Pain that wakes you from sleep. Back pain following a crash or fall.
These symptoms could indicate nerve compression or disc injury that needs medical evaluation, not a saddle adjustment.
What to Expect From a Physiotherapist
A sports physiotherapist can assess your movement patterns, identify muscle imbalances, and create a targeted rehabilitation plan. They will check your hip mobility, core strength, leg length, and movement quality. They can also tell you whether your back pain is genuinely a cycling problem or a symptom of something else.
Many cyclists waste months trying self-diagnosed fixes when a single physio session would have identified the issue. If you have been dealing with back pain for more than a few weeks despite making bike adjustments, book an appointment.
Real Cyclist Example
Consider the case of a rider we will call Mark, a 42-year-old cyclist who developed lower back pain after increasing his weekly mileage from 80 to 140 miles over six weeks. His pain was worst on the right side and flared up after about 90 minutes of riding.
Mark tried raising his handlebars and lowering his saddle with no improvement. A professional bike fit revealed that his right leg was 6mm shorter than his left, causing his pelvis to drop on the right side with every pedal stroke. A 5mm shim under his right cleat completely resolved the pain within two rides.
This example shows why self-diagnosis has limits. Sometimes the fix is something you cannot see yourself. If you are stuck, get professional eyes on your position.
FAQ’s
How to fix lower back pain from cycling?
To fix lower back pain from cycling, start by checking your saddle height. A saddle that is too high causes pelvic rocking that strains the lower back. Lower it 3 to 5mm so your knee has a 25 to 35 degree bend at the bottom of the pedal stroke. Next, raise your handlebars slightly to reduce spinal flexion. Add core strengthening exercises like planks and glute bridges three times per week. Finally, stretch your hamstrings and hip flexors daily, especially after rides.
What is the best bike position for lower back pain?
The best bike position for lower back pain minimizes spinal flexion while maintaining efficient pedaling. Keep your saddle-to-handlebar drop under 4 to 6cm, ensure a slight knee bend of 25 to 35 degrees at the bottom of the pedal stroke, and set your saddle with a 1 to 2 degree nose-down tilt. Your back should maintain a gentle curve rather than a sharp hinge at the lumbar spine.
What stretches help lower back pain from cycling?
The most effective stretches for cycling-related lower back pain target three areas: hamstrings (standing or lying stretches for 30 seconds per side), hip flexors (kneeling stretch with tailbone tucked for 30 seconds per side), and lower back mobility (cat-cow for 10 cycles and standing back extensions for 10 reps). Do these daily and especially after every ride to counteract the flexed cycling position.
Can cycling aggravate back pain?
Yes, cycling can aggravate existing back pain because it holds your spine in a static, flexed position for extended periods. If your bike fit is poor, your core is weak, or you have pre-existing disc issues, cycling increases the load on your lower back. However, with proper bike position adjustments, core strengthening, and stretching, most cyclists can ride without aggravating back problems.
How do I know if my saddle is too high?
Your saddle is likely too high if your hips rock side to side when viewed from behind, you feel like you are reaching for the pedals at the bottom of the stroke, or you experience lower back pain that is worse on one side. Other signs include hamstring or Achilles tightness and numbness in the saddle area. Try lowering your saddle 3 to 5mm and see if the symptoms improve.
Conclusion: Ride Pain-Free Again
Lower back pain from cycling is common, but it is not something you have to live with. The root causes are well understood: static spinal flexion, core fatigue, poor bike fit, and muscle imbalances from daily sitting. By addressing each of these areas systematically, most cyclists can eliminate back pain within a few weeks.
Start with the quick fixes: check your saddle height, raise your handlebars, and begin a basic core routine. Give each change a few rides before moving to the next adjustment. If self-correction does not resolve the issue after a month, invest in a professional bike fit or see a physiotherapist.
Your lower back does not have to be the price you pay for loving cycling. With the right position, a consistent strengthening routine, and attention to your body off the bike, you can ride longer, faster, and pain-free for years to come.