
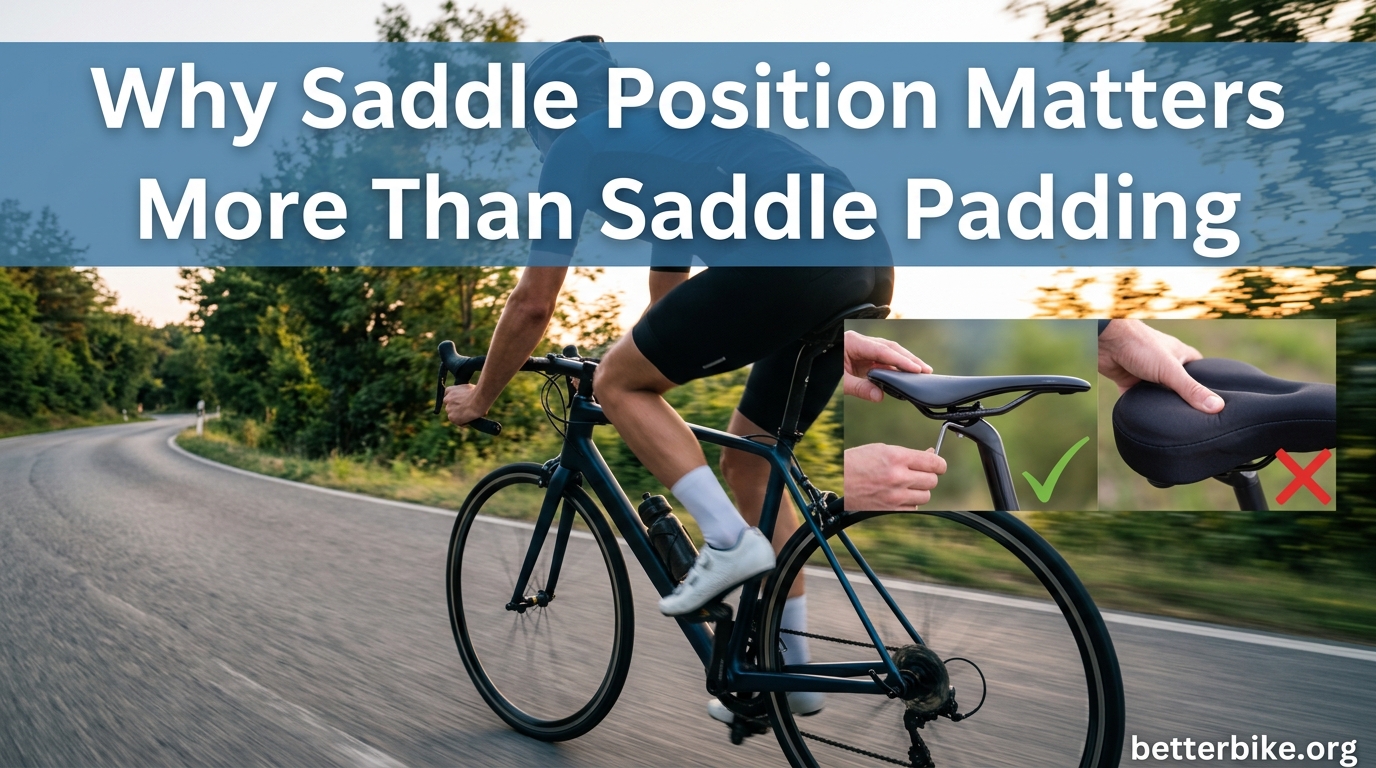
Most cyclists respond to saddle discomfort the same way: they buy a softer seat. I did it too. My first instinct when my sit bones ached after 30 miles was to grab the thickest, gel-filled, cushioned saddle I could find. It felt great for the first ten minutes. By mile 20, I was in more pain than before.
If you have cycled for any length of time, you already know where this is heading. The cycling community has a saying that gets repeated on every forum from r/bicycling to BikeRadar: saddle position matters more than saddle padding. It sounds counterintuitive, but the science and thousands of rider experiences back it up completely.
In this guide, I will break down exactly why a properly positioned firm saddle beats a poorly positioned cushioned one every time. You will learn how your sit bones are designed to carry weight, how to diagnose what your pain is telling you, and how to set up your saddle across all three dimensions of adjustment. Whether you are preparing for your first century with proper bike fit and saddle height adjustment or just trying to ride to work without numbness, understanding position over padding changes everything.
Table of Contents
The Padding Trap: Why More Cushioning Often Means More Pain
Here is the part that confuses everyone. A soft saddle feels comfortable in the bike shop. You press your thumb into it, it yields, and your brain says “this will be gentle on my body.” That instinct works for mattresses and sofas. It fails for cycling.
When you sit on a thickly padded saddle, your sit bones press into the cushion and sink. The padding compresses under those bony points and then bulges upward and inward around them. That bulging material pushes directly into the soft tissue between and around your sit bones, the exact areas that should bear zero weight. The harder you pedal, the more your body weight drives into that displaced padding, and the more soft tissue pressure you create.
This is why riders on Reddit and cycling forums consistently report the same experience. They buy a plush gel saddle, feel relief for the first ride, then return to pain within a week. The padding did not solve the problem. It moved the pressure from the bones, which are built to handle load, to the soft tissue, which is not.
Thick padding also traps heat and moisture. Your body produces significant sweat during cycling, and gel or foam padding acts like an insulator. This trapped moisture softens the skin, increases friction with every pedal stroke, and accelerates saddle sore formation. Firm saddles, by contrast, allow air circulation and do not hold moisture against your skin.
Then there is the power transfer issue. When you push down on the pedals, a firm saddle provides a stable platform. A soft saddle absorbs some of that force like a marshmallow, meaning you work harder to produce the same wattage. Professional cyclists ride firm, narrow saddles not because they enjoy pain, but because their positions are dialed in precisely. When your position is correct, you do not need cushioning.
I have talked with riders who cycled through four or five saddles chasing comfort, each time spending more money on more padding. Not one of them found relief until they addressed position. Some even went backward, trading expensive gel saddles for firm leather or plastic-shell models, and finally rode pain-free.
Understanding Pressure: Sit Bones vs. Soft Tissue
To understand why position beats padding, you need to understand what your body is actually doing on a saddle. The two bony points you feel when you sit on a hard surface are your ischial tuberosities, commonly called sit bones. These are the structures your body evolved to bear weight in a seated position.
Between and in front of those sit bones lies soft tissue: nerves, blood vessels, and sensitive skin. This tissue is not designed to carry sustained load. When it does, you get numbness, pain, and eventually nerve damage or saddle sores. The entire goal of saddle setup is to load the sit bones and unload the soft tissue.
Proper saddle position achieves this by aligning your pelvis so the sit bones rest squarely on the saddle’s widest section. The saddle’s shape supports the bones while a cutout channel or relief zone keeps pressure off the perineal area. Your body weight distributes across roughly two square centimeters per sit bone, which is plenty of surface area when the alignment is correct.
Padding cannot redirect this pressure. It can only compress and displace it. If your position is wrong and soft tissue is loading, adding padding makes that tissue bear even more distributed weight, not less. It is like putting a thicker carpet over a nail. The nail still pierces through; it just takes a few extra seconds. Position is the only thing that moves the nail entirely.
The Three Dimensions of Saddle Position
Saddle position has three independent axes of adjustment. Each one affects your body differently, and each one can create or solve specific pain patterns. Understanding all three is the key to solving saddle discomfort without spending money on new equipment.
The three dimensions are height (how far the saddle sits above the bottom bracket), angle (the forward or backward tilt of the saddle nose), and fore-aft position (how far forward or backward the saddle sits on the rails, also called setback). Get all three right and a firm saddle feels like a custom chair. Get any one wrong and no amount of padding will save you.
Saddle Height: The Foundation of Comfort
Height is the adjustment most cyclists know about, yet still get wrong. If your saddle is too high, your pelvis rocks side to side with every pedal stroke looking for stability. That rocking creates friction on the saddle, strains your hamstrings, and loads soft tissue as your body tries to compensate. You also risk knee pain from overextension at the bottom of the stroke.
If your saddle is too low, you never fully extend your legs. This compresses your knee joint through the entire pedal stroke and can cause front-of-knee pain (patellar tendon strain). You also lose significant power because you cannot recruit your glutes and hamstrings effectively.
The gold standard starting point is a knee angle of 25 to 35 degrees at the bottom of your pedal stroke, measured when your crank is at the 6 o’clock position. A simpler field test: with your heel on the pedal at the bottom of the stroke, your leg should be fully straight. When you clip in, the slight bend in your knee puts you in the right range.
The 109% rule is another popular method: your saddle height (from the center of the bottom bracket to the top of the saddle, measured along the seat tube) should equal your inseam measurement multiplied by 1.09. This gives you a mathematically derived starting point that works well for most riders.
Saddle Angle (Tilt): The Most Overlooked Adjustment
Saddle tilt is the dimension cyclists ignore most often. Many riders never touch it after unboxing their bike, assuming the factory setting is correct. It usually is not, or at least it is not optimal for your specific body.
Start with your saddle perfectly level. Use a bubble level across the saddle’s center section, not the nose or tail, which can be shaped differently. A level saddle provides a neutral platform that works for the majority of riders.
If you experience perineal numbness or soft tissue pressure, tilting the nose down 1 to 2 degrees can shift your weight backward onto the sit bones. Go too far, though, and you will constantly slide forward, loading your hands and shoulders as you fight to stay in position. Downward tilt beyond 3 degrees almost always causes hand numbness and shoulder pain.
Tilting the nose up is almost never the answer. Even a degree or two of upward tilt drives pressure directly into the perineum and can cause significant numbness after just a few miles. If you feel like you need the nose tilted up to stay on the saddle, the real problem is usually fore-aft position or saddle shape, not angle.
Fore-Aft Position (Setback): Balance and Knee Tracking
The fore-aft position determines where your knee sits relative to the pedal axle and how open your hip angle is at the top of the stroke. It affects both comfort and power output.
The traditional starting point is the Knee-Over-Pedal-Spindle (KOPS) method. With your crank arm at the 3 o’clock position (horizontal and forward), a plumb line dropped from the front of your kneecap should pass directly through the center of the pedal axle. This positions your knee over the pedal for efficient power transfer.
Moving the saddle forward opens your hip angle at the top of the stroke, which helps riders with limited flexibility and those in aggressive, aero positions. Triathletes and time trial riders often run saddles significantly forward to maintain a flat back while in aero bars.
Moving the saddle backward closes the hip angle but recruits more glute and hamstring power, which is why endurance road cyclists tend toward more setback. Too far back, though, and you strain your lower back and reduce your effective reach to the handlebars, causing you to ride with a rounded spine.
How to Tell If Your Saddle Position Is Wrong
One of the biggest gaps in most saddle comfort articles is the lack of a self-diagnosis guide. Riders know something hurts, but they do not know which adjustment to change. Here is the pain-to-problem mapping I have built from bike fit resources, medical explanations, and years of forum reading. Use it to narrow down your issue before you touch an Allen key.
Numbness in the groin or perineum: This is almost always a saddle angle issue. The nose is too high, or the saddle itself lacks a relief channel for your anatomy. Check tilt first, then consider whether your saddle width matches your sit bone measurement. This is the symptom that padding most commonly masks without solving.
Front of knee pain (below kneecap): Your saddle is too low. You are never reaching full leg extension, which keeps the patellar tendon under constant tension. Raise the saddle in 3mm increments until the pain resolves.
Back of knee pain (hamstring area): Your saddle is too high. You are overextending at the bottom of the stroke, straining the hamstrings where they attach behind the knee. Lower the saddle in small increments.
Hand numbness or shoulder pain: Two likely causes. Your saddle nose is tilted too far down, causing you to slide forward and catch yourself with your hands. Or your saddle is too far forward, putting too much weight on your arms instead of your sit bones. Check angle first, then fore-aft position.
Lower back pain: Often a saddle that is too high, causing your hips to rock with each pedal stroke. It can also indicate too much setback, forcing you to overreach and round your spine. If you are getting back into riding after time off, these saddle adjustments for better comfort become especially important.
Saddle sores or chafing: Usually a combination of friction and position. Your saddle may be too wide, causing inner thigh rub, or your fore-aft position may be off, causing you to shift around. Check that your saddle width matches your sit bone width and that your position is stable enough that you are not constantly repositioning.
Work through one adjustment at a time. Change height, ride for several days, then evaluate. Changing everything at once makes it impossible to know what actually fixed the problem.
Why Padded Shorts Work But Padded Saddles Do Not
This is one of the most common questions on cycling forums, and the answer reveals something important about how padding and position interact. The chamois in cycling shorts works because it moves with your body. The padding in a saddle does not.
When you pedal, your body shifts subtly on the saddle with every stroke. The chamois is strapped to your skin and moves exactly with those shifts, maintaining a consistent layer between your sit bones and the saddle surface. It wicks moisture, reduces skin-to-saddle friction, and provides just enough cushioning to smooth out road vibration without allowing your sit bones to sink.
Saddle padding, on the other hand, is stationary. As your body shifts, the padding stays put, creating friction against your skin and compressing unevenly. The thicker the padding, the more it compresses unevenly and the more friction it generates. This is why a firm saddle with a good chamois is the standard setup for distance cycling, while a heavily padded saddle with street clothes is a recipe for pain after an hour.
The chamois also solves a problem the saddle cannot: moisture management. Quality cycling shorts use antibacterial, moisture-wicking pads that keep the skin dry and reduce the bacterial growth that leads to saddle sores. Saddle padding holds moisture against your skin, doing the exact opposite.
Quick Reference: Starting Points for Your Saddle Position
If you want to set up your saddle from scratch or troubleshoot a current issue, follow this sequence. These are starting points, not final answers, but they will get most riders into a comfortable, efficient position without a professional fitting.
Step 1: Set saddle height. Use the heel method. In cycling shoes, place your heel on the pedal at the bottom of the stroke. Your leg should be fully extended without your hip rocking. When you clip in normally, you will have the ideal slight knee bend.
Step 2: Set saddle angle. Use a bubble level across the flat center section of the saddle. Start perfectly level. Only tilt down 1-2 degrees if you experience perineal pressure after riding.
Step 3: Set fore-aft position. With your crank at 3 o’clock, drop a plumb line from your kneecap. It should pass through the pedal axle. Adjust forward or backward in small increments.
Step 4: Ride and evaluate. Give each position at least three rides before changing anything. Minor discomfort in the first ride often disappears as your body adapts.
Step 5: Adjust one variable at a time. Never change height, angle, and fore-aft simultaneously. You will not know which adjustment helped or hurt.
For riders who ride varied terrain, remember that your dynamic position changes constantly. Standing on descents, shifting weight for technical sections, and adjusting for climbing all affect how your saddle supports you. Understanding weight distribution and saddle position in different scenarios helps you appreciate why a solid, correctly positioned saddle beats a soft one across all riding conditions.
If you have worked through all three dimensions and still cannot find comfort after several weeks, see a professional fitter. A good fitter uses pressure mapping and motion capture to identify issues you cannot diagnose alone. This is an investment in your riding future, not a luxury, especially if you ride more than 100 miles per week.
FAQ’s
What is the 75% rule in cycling?
The 75% rule refers to spending at least 75% of your training time at or below 75% of your maximum heart rate (Zone 1 and Zone 2). This builds aerobic endurance, your base fitness foundation. It is unrelated to saddle setup, but the same principle of patience applies: gradual, correct fundamentals beat quick fixes.
Why do cyclists wear padded bibs instead of padded seats?
Chamois padding in shorts moves with your body, maintaining consistent cushioning and wicking moisture. Saddle padding is stationary, creating friction and trapping heat as you shift during pedaling. The chamois solves the friction and moisture problems that saddle padding actually makes worse.
What is the 109 rule for saddle height?
Multiply your inseam measurement in millimeters by 1.09 to get your saddle height from the center of the bottom bracket to the top of the saddle along the seat tube. For example, an 800mm inseam gives a saddle height of roughly 872mm. This is a starting point, not an absolute, so fine-tune from there.
How to get a perfect saddle position?
Set height first using the heel-to-pedal method for full leg extension at the bottom of the stroke. Then level the saddle angle using a bubble level across the center. Finally, set fore-aft position using the knee-over-pedal-spindle method with the crank horizontal. Ride for several days per adjustment and change one variable at a time.
Why aren’t saddles heavily padded?
Thick padding lets sit bones sink, which pushes compressed padding into soft tissue that cannot bear weight. It also traps heat and moisture, increases friction, and absorbs pedaling power. Firm saddles with correct position load the sit bones properly, which is why professional cyclists and experienced riders use minimal padding.
Conclusion
Saddle position matters more than saddle padding because comfort comes from loading the right structures (your sit bones) and unloading the wrong ones (soft tissue). No amount of gel, foam, or cushioning can achieve that. Only correct height, angle, and fore-aft position can. Start with the fundamentals, adjust one variable at a time, and trust the process. Your body will tell you when the position is right.