
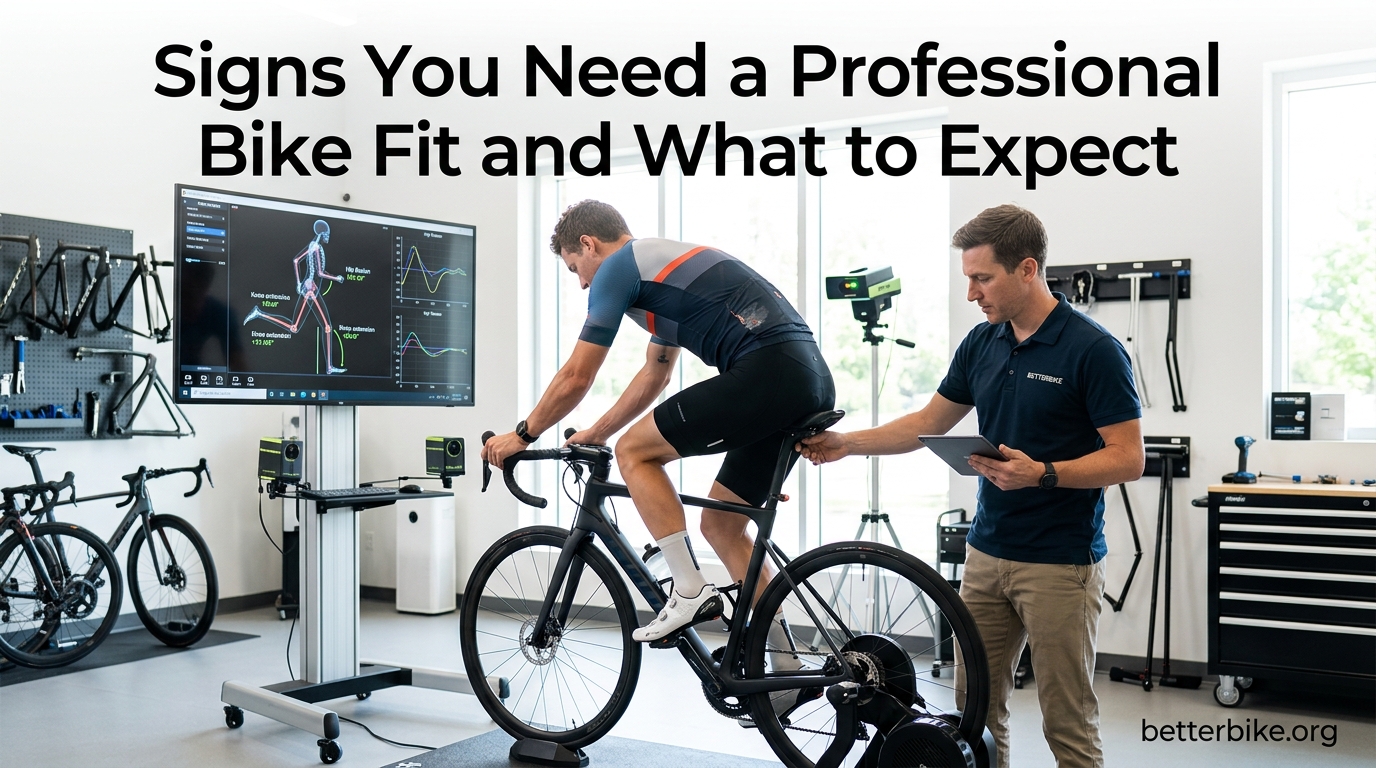
You bought a nice bike. You ride regularly. But something feels off, and you cannot quite put your finger on it. Maybe your knees ache after thirty miles. Maybe your hands go numb halfway through every ride. Or maybe you just feel like you are wrestling the bike instead of riding it.
A professional bike fit is the process of adjusting your bicycle to match your unique body dimensions, flexibility, and riding goals. A trained fitter dials in saddle height, cleat position, handlebar reach, and every other variable that connects your body to the bike. The goal is simple: maximize comfort, prevent injury, and improve efficiency without changing your fitness level.
Recognizing the signs you need a professional bike fit can save you from months of unnecessary pain and frustration. Many cyclists push through discomfort for years, assuming it is just part of the sport. It is not. If you are planning to get a professional bike fit before a big event like a century ride, you are already on the right track.
In this guide, I will walk you through every major sign that your bike does not fit you properly, what happens during a fitting session, how much it costs, and how to find a qualified fitter who will actually help.
Table of Contents
10 Signs You Need a Professional Bike Fit
Your body sends signals when something is wrong with your position on the bike. The problem is that most cyclists ignore these signals or chalk them up to being out of shape. Here are the ten most common signs you need a professional bike fit, based on what fitters and physical therapists see every day.
1. Persistent Knee Pain During or After Rides
Knee pain is the number one reason cyclists seek a bike fit. If your saddle is too low, you will feel pain in the front of your knee. If it is too high, the pain typically shows up behind or below the kneecap.
Cleat position also plays a huge role. If your cleats are misaligned, your foot twists slightly with every pedal stroke. Over thousands of rotations, that tiny misalignment creates significant strain on the knee joint. A professional fitter can adjust saddle height, saddle setback, and cleat angle to resolve knee pain in a single session.
2. Numbness in Your Hands, Feet, or Groin
Numbness is never normal. If your hands go numb during rides, your handlebar position may be forcing too much weight onto your palms. This usually means your reach is too long, your stem is too low, or your brake levers are angled incorrectly.
Foot numbness or hot spots typically point to a cleat position problem or a lack of arch support in your shoes. Groin numbness is almost always a saddle issue, whether that means the saddle is too wide, too narrow, tilted incorrectly, or positioned at the wrong height.
If you want to understand how bike fit can address numbness issues, a professional fitting is the most direct path to a solution.
3. Saddle Discomfort That Never Improves
Some saddle discomfort is normal when you start cycling seriously. But if you have been riding for months and still cannot get comfortable, something is wrong with your fit. The saddle might be the wrong shape for your sit bones. Or the saddle height, setback, or tilt might be placing pressure on soft tissue instead of bone.
A good fitter will measure your sit bone width, assess your pelvic rotation while pedaling, and recommend a saddle that actually matches your anatomy. They will also adjust the saddle position so you are bearing weight on the right parts of your body.
4. Lower Back Pain While Riding
Lower back pain on the bike usually means your reach is too long or your saddle is too far back. Both force you to overreach and round your spine for hours at a time. The result is a sore, stiff lower back that gets worse on longer rides.
Sometimes the fix is as simple as a shorter stem or moving the saddle forward a few millimeters. Other times, the issue is a lack of hip flexibility that causes your lower back to compensate. A fitter will assess your flexibility off the bike and adjust your position to work within your actual range of motion.
5. Neck Pain or Shoulder Tension
If your neck aches after rides or your shoulders feel locked up, your handlebar position is likely the culprit. A saddle that is too far back combined with a low handlebar forces you to crane your neck upward to see the road. That sustained extension creates tension that builds over every ride.
Raising the handlebar, shortening the stem, or adjusting the saddle position can all relieve neck strain. A fitter will look at your upper body angle and head position to find the root cause.
6. Uneven Wear on Your Gear
Look at the bottom of your cycling shoes. Is one cleat more worn than the other? Check your saddle. Is it twisted to one side? Look at your handlebar tape or gloves. Does one side show more wear?
These are all signs of asymmetry. No human body is perfectly symmetrical, but significant differences in wear patterns mean your body is compensating for a fit problem. A professional fitter is trained to spot these asymmetries and adjust the bike to accommodate your body rather than forcing your body to adapt to the bike.
7. You Feel Like You Are Fighting the Bike
When your bike fits properly, it should feel like an extension of your body. You should feel stable, balanced, and powerful. If you constantly shift around on the saddle, struggle to find a comfortable hand position, or feel like you are wresting the bike on descents, the fit is wrong.
This is one of the most overlooked signs because there is no specific pain to point to. It is a general sense that something is not working. Trust that feeling. Cyclists who get fit after years of riding often say they wish they had done it sooner because the bike just disappears underneath them.
8. Hot Spots on the Bottom of Your Feet
Hot spots are localized burning sensations on the sole of your foot, usually near the ball. They happen when pressure is concentrated in one area instead of distributed evenly across the foot. The cause is almost always cleat position, shoe fit, or a lack of arch support.
A fitter will check your cleat fore and aft position, assess your foot arch, and may recommend insoles or wedges to distribute pressure. Many cyclists are shocked at how much difference a small cleat adjustment makes.
9. You Changed Bikes, Shoes, or Had an Injury
Any significant change to your equipment or body warrants a new fit. A new bike might have a different geometry than your old one, even if it is the same size. New shoes can change your cleat stack height. New pedals can alter your foot position.
Injuries are especially important. If you have had a crash, surgery, or developed a chronic condition, your body has changed. Your flexibility may be different. Your range of motion may be limited. A fit ensures your bike accommodates your current body, not the body you had three years ago.
10. It Has Been More Than 2 to 3 Years Since Your Last Fit
Bodies change over time. Flexibility decreases as we age. Weight fluctuations change how you sit on the saddle. Even your fitness level affects your position on the bike. As you get stronger, you can hold a more aggressive position comfortably.
Most fitters recommend a checkup every two to three years, even if nothing feels wrong. Small adjustments keep you comfortable and efficient as your body evolves.
When Should You Get a Bike Fit
Beyond the signs above, there are specific life events and milestones that call for a professional fitting. Here is when you should book an appointment regardless of whether you are in pain.
When You Buy a New Bike
A new bike is the most obvious time to get fit. Even if the shop did a basic sizing when you bought it, that is not the same as a full fit. Sizing determines what frame size you need. Fitting adjusts that frame to your specific body. If you are spending good money on a bike, spend a little more to make sure it actually fits.
After an Injury or Surgery
If you have recovered from an injury, your body may have compensated in ways that affect your riding. A hip injury can change your pedal stroke. A shoulder injury can alter your reach. A fitter will assess your current range of motion and adjust the bike to work with your body as it is now.
After Significant Fitness or Body Changes
If you have lost or gained twenty pounds, your position on the bike has changed. If you have been training hard and your flexibility has improved, you may be able to ride in a more aerodynamic position. Significant fitness changes are a good reason to reassess your fit.
As You Get Older
This is one of the most under-discussed topics in cycling. Flexibility naturally decreases with age. Your hips get tighter. Your hamstrings shorten. Your lower back stiffens. A fit that worked perfectly at age 35 may cause pain at age 50.
Age-related changes are gradual, so you may not notice them until something hurts. A fitter who understands aging bodies can raise your handlebar, adjust your saddle position, and make other changes that keep you riding comfortably for decades.
When You Switch Cycling Disciplines
Switching from road cycling to triathlon, or from mountain biking to gravel, means a completely different position on the bike. Triathlon fits are much more aggressive with a forward saddle position and aero bars. Mountain bike fits prioritize stability and control over aerodynamics. Each discipline requires its own fitting approach.
What to Expect During a Professional Bike Fit
If you have never had a bike fit, the process can feel intimidating. You might picture someone measuring your inseam and sending you on your way. In reality, a professional fit is a thorough, multi-step process that takes anywhere from ninety minutes to three hours.
Here is exactly what happens, step by step.
Step 1: The Pre-Fit Interview
Every fit starts with a conversation. The fitter will ask about your riding habits, your goals, and any pain or discomfort you experience. They will want to know how many miles you ride per week, what type of cycling you do, and whether you are training for a specific event.
Be honest and specific here. If your knee hurts after forty miles, say so. If your hands go numb on descents, mention it. The more information you give, the better the fitter can tailor the fit to your needs.
Step 2: Off-Bike Physical Assessment
Before you get on the bike, the fitter will assess your body off the bike. This typically includes measuring your flexibility, checking your leg length, assessing your foot arch, and evaluating your hip and shoulder mobility.
This step is critical because it reveals limitations the fitter needs to work around. If you have tight hamstrings, the fitter knows not to set your saddle too high. If one leg is shorter than the other, they can add a shim to your cleat. This off-bike assessment is what separates a professional fit from a basic bike shop sizing.
Step 3: On-Bike Assessment With Motion Capture
Next, you will get on your bike mounted to a stationary trainer. The fitter will ask you to pedal while they observe your body in motion. Many fitters use motion capture systems that track your joint angles in real time, recording data on knee extension, hip angle, and ankle position throughout your pedal stroke.
Some use 3D systems like Retul, while others use 2D video analysis. Both approaches are valid. What matters is that the fitter is using data rather than guesswork to evaluate your position.
Step 4: Contact Point Adjustments
The core of the fit is adjusting the three contact points where your body meets the bike. The fitter will start with your feet and cleats, then move to the saddle, and finish with the handlebar. Each adjustment is made incrementally, with you pedaling between changes to feel the difference.
This is also when the fitter may recommend new components. If your saddle is the wrong width, they will suggest a replacement. If your stem is too long, they may swap it for a shorter one. If your shoes lack arch support, they may recommend insoles.
Step 5: Testing and Fine-Tuning
Once the major adjustments are made, the fitter will have you ride at different intensities. They want to see how your position holds up when you are pedaling hard, not just spinning easily. They may ask you to sprint, climb, and ride in the drops to make sure the fit works across all riding scenarios.
Expect small tweaks during this phase. A millimeter of saddle height or a degree of cleat rotation can make a noticeable difference. The fitter will keep adjusting until everything looks and feels right.
Step 6: Report and Follow-Up
At the end of the session, the fitter will give you a report with all your measurements. This includes saddle height, saddle setback, cleat position, stem length, handlebar width, and reach. Keep this document. If you ever get a new bike, these numbers are your starting point.
Most reputable fitters include a follow-up appointment in the initial price. Your body needs time to adapt to the new position, so it is common to need minor adjustments after a few weeks of riding. Take advantage of the follow-up. It is included for a reason.
The Three Contact Points Explained
Every bike fit revolves around the three contact points where your body meets the bike: your feet on the pedals, your pelvis on the saddle, and your hands on the handlebar. Understanding these helps you appreciate what a fitter is actually doing.
Feet and Pedals
Your feet are the only place where power transfers from your body to the bike. Cleat position determines how that power is delivered. The fitter adjusts cleat fore and aft position, cleat angle or float, and may add wedges or shims to correct foot tilt or leg length differences.
Arch support is also addressed here. Many cycling shoes come with flat insoles that do not support your arch. A fitter may recommend custom insoles that distribute pressure evenly and improve power transfer.
Pelvis and Saddle
The saddle supports the majority of your body weight. Saddle height, saddle setback (fore and aft position), and saddle tilt all affect comfort and power. Too high and you rock side to side. Too low and you lose power and risk knee pain. The wrong tilt puts pressure on soft tissue instead of sit bones.
Saddle choice itself is highly individual. Your sit bone width determines the ideal saddle width. A fitter will measure this and recommend a saddle that provides support without causing pressure points.
Hands and Handlebar
Your hands should bear minimal weight on the bike. If you feel like you are constantly supporting your upper body through your hands, the handlebar position is wrong. The fitter adjusts stem length, stem angle, handlebar width, and brake lever position to achieve a balanced upper body.
Handlebar width should roughly match your shoulder width. Brake levers should be angled so your wrists are neutral when you are in the drops or on the hoods. Grip diameter and bar tape thickness also play a role in hand comfort.
Bike Fit Cost and How to Choose a Fitter
One of the biggest gaps in cycling content is honest information about bike fit pricing and how to find a good fitter. Forum discussions on Reddit and cycling groups reveal that this is a major source of confusion and frustration for riders.
How Much Does a Professional Bike Fit Cost
Based on what cyclists report paying across the United States, expect to spend between $150 and $550 for a professional bike fit. Basic fits at local bike shops typically run $150 to $250 and include saddle height, cleat position, and basic reach adjustments.
Premium fits with motion capture, 3D analysis, and detailed reporting cost $300 to $550 or more. These fits take two to three hours and often include a follow-up session. For triathlon or time trial fits with aero analysis, expect the higher end of that range.
Is it worth it? Most cyclists who get a proper fit say absolutely yes. The relief from chronic pain alone justifies the cost for many riders. When you factor in potential power gains and injury prevention, it is one of the best investments you can make in your cycling.
What Separates a Good Fitter From a Bad One
Not all fitters are created equal. Forum users frequently share stories about paying for a fit that did not help or even made things worse. Here is how to tell the difference before you spend your money.
Look for certifications from recognized programs. Retul, F.I.S.T., Serotta, Trek Precision Fit, and IBFI are all respected certifications. A certified fitter has completed formal training and demonstrated competence.
Ask about experience with your specific discipline. A fitter who specializes in road cycling may not be the best choice for a triathlon fit, and vice versa. Experience matters as much as certification.
Questions to Ask Before Booking
Before you schedule an appointment, ask the fitter these questions. Their answers will tell you a lot about their approach and professionalism.
Ask what certification they hold and how long they have been fitting. Ask what tools or technology they use for motion capture. Ask whether the price includes a follow-up adjustment. Ask how long the session will last. Ask whether they carry saddles, stems, and insoles for testing or if you need to purchase components separately.
A good fitter will welcome these questions. If they seem dismissive or impatient, that is a red flag. You are paying for a service, and you deserve to know what you are getting.
Red Flags to Watch For
Avoid fitters who promise dramatic power increases or guarantee they can fix any problem. Avoid anyone who spends less than an hour with you or who does not ask about your riding goals and pain history. Avoid fitters who refuse to explain what they are changing or why.
Also be cautious of fitters who insist on selling you expensive components without explaining why your current setup will not work. Good fitters recommend changes based on evidence from your fit data, not upselling.
DIY Bike Fit vs Professional Fit
Can you fit yourself? Yes, to a degree. There are excellent online resources, calculators, and guides that can get you in the ballpark. For a casual rider doing ten miles on weekends, a self-guided fit using a plumb line and a measuring tape may be perfectly adequate.
But for anyone riding regularly, training for events, or experiencing pain, a professional fit is in a different league entirely. The reason is that you cannot observe yourself in motion. You cannot see your knee angle at the bottom of your pedal stroke. You cannot measure your hip flexion at the top. You cannot detect the subtle asymmetries that a trained eye catches immediately.
Forum users who tried DIY fits and then got professional fits almost universally say the same thing: the professional found problems they never knew existed. The DIY approach got them close, but the professional fit got them dialed in.
If budget is a concern, consider starting with a basic shop fit and upgrading to a premium fit later. Something is better than nothing, and even a basic fit can resolve major issues.
Benefits of a Professional Bike Fit
By now you have a clear picture of when to get a fit and what happens during one. Here is what you stand to gain from the investment.
Injury Prevention
Most cycling injuries are overuse injuries caused by repetitive strain in a poor position. Knee pain, back pain, neck pain, and saddle sores are all preventable with a proper fit. By correcting your position before pain develops, you avoid the chronic injuries that plague many cyclists.
Comfort on Long Rides
A bike that fits lets you ride longer with less fatigue. When your weight is distributed correctly across the three contact points, no single area bears too much load. You stop shifting around on the saddle. Your hands stop going numb. You finish a four-hour ride feeling like you could do another hour.
Power and Efficiency Gains
A better position means better power transfer. Reddit users have reported gaining 10 to 20 watts of power from bike fit changes alone, without any change in fitness. When your saddle height and cleat position are dialed in, you recruit muscles more efficiently and waste less energy.
Improved aerodynamics also plays a role. A fit that lowers your frontal area without sacrificing comfort or power output reduces drag. On flat roads, aerodynamic savings translate directly to free speed.
Better Bike Handling and Confidence
When your bike fits, your weight is balanced between the wheels. This improves handling on descents, through corners, and in technical terrain. You feel more connected to the bike and more confident pushing your limits.
If you have been dealing with numbness or discomfort on descents specifically, a proper bike fit can address those numbness issues by rebalancing your weight distribution and hand position.
FAQ’s
What is the 75% rule in cycling?
The 75% rule in cycling states that you should spend no more than 75% of your training time at high intensity. The remaining 25% should be easy, aerobic riding. This balance prevents burnout and overtraining while still allowing for hard interval work that builds fitness.
Is a professional bike fit worth it?
Yes, for most regular cyclists a professional bike fit is worth the cost. It can resolve chronic pain, prevent overuse injuries, improve power output by 10 to 20 watts, and make long rides significantly more comfortable. If you ride more than 50 miles per week or are experiencing any pain while cycling, a professional fit is a smart investment.
Is cycling ok for hip pain?
Cycling can be safe with hip pain, but only if your bike fits properly. A saddle that is too high or too far back forces the hip into extreme flexion with every pedal stroke, aggravating hip pain. A professional fitter can adjust saddle height and setback to reduce hip strain and may also recommend stretches to improve hip mobility.
What is the 80% rule in cycling?
The 80% rule in cycling refers to the idea that 80% of your training should be done at low intensity (easy, conversational pace) and only 20% at high intensity. This polarized training approach is used by professional cyclists to build a strong aerobic base while still developing speed and power through targeted hard efforts.
How often should you get a professional bike fit?
Most fitters recommend a full bike fit every 2 to 3 years, with minor checkups annually. You should also get a fit whenever you buy a new bike, change shoes or pedals, recover from an injury, or experience significant body changes such as weight loss or decreased flexibility. Your body changes over time, and your fit should change with it.
How long does a professional bike fit take?
A professional bike fit typically takes 90 minutes to 3 hours depending on the level of service. Basic fits at a local bike shop may take 60 to 90 minutes, while premium fits with 3D motion capture and detailed analysis take 2 to 3 hours. Plan for a full morning or afternoon for a comprehensive fitting session.
Final Thoughts on Bike Fit Signs and What to Expect
The signs you need a professional bike fit are not subtle once you know what to look for. Knee pain, numbness, saddle discomfort, back pain, neck tension, uneven wear patterns, and that nagging feeling of fighting the bike are all signals that your position needs attention. These issues do not go away on their own. They get worse over time.
A professional bike fit is a structured process that starts with an interview, includes an off-bike physical assessment, and involves detailed on-bike adjustments using motion capture technology. The fitter dials in your three contact points, provides a report with all your measurements, and includes a follow-up to fine-tune everything after your body adapts.
If you have been putting it off, stop waiting. The relief from chronic pain, the improvement in comfort on long rides, and the potential power gains make a professional fit one of the best investments you can make in your cycling. Your body and your bike will thank you.
Find a certified fitter in your area, ask the right questions before booking, and go in with an open mind. You may be surprised at how much better cycling feels when your bike actually fits.