
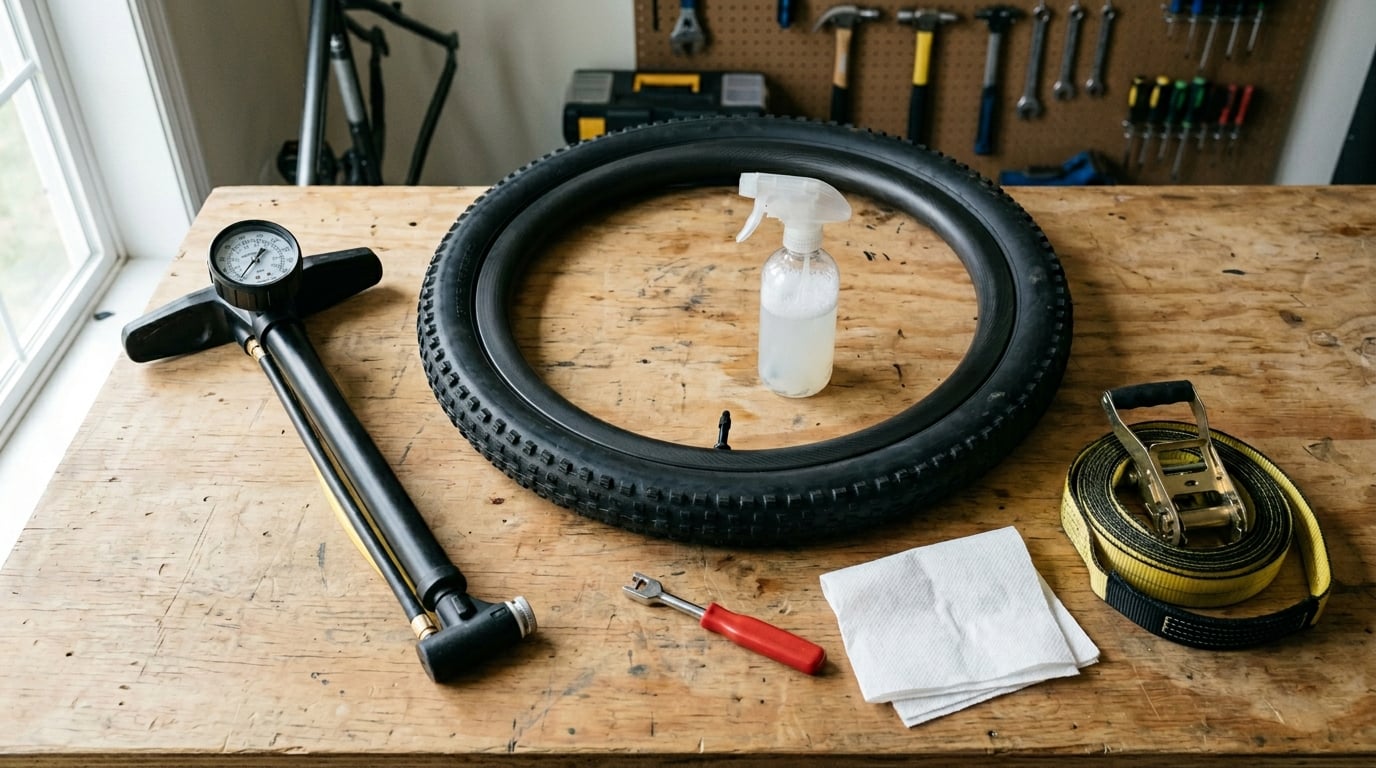
You do not need an air compressor to seat a stubborn tubeless bead. A standard floor pump, plus the valve core trick and a few extra techniques, will get almost any tubeless tire seated in your home workshop. I have mounted dozens of tubeless road, gravel, and mountain bike tires this way, and the success rate is high once you understand the small details that make the bead pop into place.
This guide walks through exactly how to seat a stubborn tubeless bead without an air compressor. You will get the primary floor pump method, alternatives when air flow is the problem, and the troubleshooting moves that save you when a tire absolutely refuses to cooperate.
Table of Contents
Why Stubborn Tubeless Beads Refuse to Seat
The tire bead is the stiff wire ring inside each tire edge that locks into the rim channel. To seat, it has to slide up and over the rim shoulder and drop into the central groove. When air pushes it outward, the bead pops into place with an audible snap.
A stubborn bead gets stuck in one of three spots. First, it may be pinched in the rim center channel and the tire is sitting too low. Second, the bead and rim fit may be too tight, often with new tire and rim combinations that have not broken in. Third, your pump cannot move enough air fast enough to create the burst the bead needs.
Other common causes include dry or old sealant leaving residue on the bead, mismatched tire and rim widths, and cold tires that have stiffened overnight in a garage. Knowing which one is your problem makes the right fix obvious.
Tools You’ll Need
Before you start, gather the basics so you are not running back and forth to the toolbox mid-pump. Here is what I keep within arm’s reach for any tubeless install at home.
- A floor pump with a pressure gauge (a small hand pump can work but is much harder).
- A valve core remover tool, often built into the back of a quality floor pump.
- Soapy water in a spray bottle or a small dish soap bottle.
- Paper towels or a clean rag.
- Your tubeless sealant, ready to pour.
- Optional but helpful: a ratchet strap or a nylon tie-down, tire levers, and a bead jack tool.
If you ride long distances or commute by bike, packing a small subset of these items is worth thinking about. Our guide on emergency repair supplies for long rides covers what should live in your saddle bag for trail-side fixes.
How to Seat a Stubborn Tubeless Bead With a Floor Pump: Step-by-Step
This is the method I use first on every tubeless install. It works on road, gravel, and mountain bike tires. The trick is removing the valve core so the pump can deliver a high-volume burst instead of fighting through a tiny valve opening.
- Mount the tire onto the rim with one bead already seated. Push the second bead onto the rim by hand as far as you can. Leave the last few inches unseated.
- Install the tubeless valve in the rim, but do not tighten the lock nut yet. Leave it loose so you can center the valve.
- Unscrew the valve core from the top of the valve stem using your valve core remover. Set the core in a safe spot so you do not lose it.
- Spray soapy water around both tire beads where they meet the rim. The soap acts as a lubricant and helps the bead slide into the rim channel.
- Check that the tire is centered. Look at the gap between the tire and the rim on both sides. If one side sits higher, push it down into the rim well before inflating.
- Push the pump head firmly onto the valve stem and start pumping. Pump as fast and as hard as you can. The goal is maximum airflow, not maximum pressure.
- Listen and watch. Within a few strokes you should hear popping sounds as the bead seats against the rim shoulders. If both sides pop into the channel together, you have won.
- Keep pumping until the tire feels firm and the gauge reads around 40 PSI for road tires, 30 PSI for gravel, or 25 PSI for mountain bike tires.
- Disconnect the pump, quickly reinstall the valve core, and tighten the valve lock nut. Spin the wheel to check that the tire is seated evenly all the way around.
- Deflate the tire through the valve core, pour in your sealant amount through the valve stem using a sealant injector or by removing the core again, then reinflate to your riding pressure.
This works on roughly 8 out of 10 stubborn beads. The valve core removal is the secret that most riders miss. Without it, a floor pump cannot push enough air per stroke to overcome the small valve opening, and the bead never gets the burst it needs.
Alternative Methods When the Floor Pump Isn’t Enough
Some tire and rim combos fight back harder than others. Tight carbon road rims, new tires fresh out of the box, and overbuilt mountain bike casings all create extra friction. When the floor pump method fails, try one of these alternatives.
CO2 Cartridge Inflation
A 25 gram CO2 cartridge delivers a huge burst of air very fast. Thread the inflator head onto the valve with the core still removed and release the full cartridge in one go. The bead will pop on most setups.
The catch is that CO2 changes the pH of latex-based sealants and can cause them to clump or dry out faster. If you use CO2, deflate the tire and add fresh sealant as soon as you can. Carry a spare cartridge and inflator if you ride in remote areas.
Tubeless Booster Canister
A tubeless booster canister, like the SILCA Eolo or similar designs, is a pressurized tank you charge with a floor pump. Once charged, it releases a high-volume burst through the valve with the core removed. This gives you compressor-like flow without owning a compressor.
This is the cleanest method if you set up tubeless frequently. It is more expensive up front, but the sealant stays the right pH and you can reuse the canister hundreds of times.
The Inner Tube Trick
If a bead simply will not pop with air alone, mount an inner tube inside the tire and inflate it. The tube expands the tire evenly and forces both beads into the rim channel. Once seated, deflate the tube, break one bead, pull the tube out, add sealant, and remount.
This is messy and uses a tube, but it solves the most stubborn setups. Save it as a last resort at home.
Troubleshooting: When the Bead Still Won’t Pop Into Place
Sometimes you have done everything right and the bead still sits just proud of the rim shoulder. These next moves are the ones I reach for when the basic method runs out of steam.
Use a ratchet strap around the tread. Wrap a nylon ratchet strap around the circumference of the tire and tighten it until the tire compresses slightly inward. This forces the bead into the rim well, giving the air a clear path to push it outward. I learned this trick from a mechanic who handles problems far from any bike shop, and it works wonders on tight road tubeless setups.
Spray more soapy water, not less. A wet bead slips over the rim shoulder much more easily than a dry one. Reapply soap right before each inflation attempt.
Warm the tire. A cold garage stiffens the rubber and makes the bead harder to flex. Bring the tire inside for an hour or set it in the sun before mounting. SILCA mentions this in their tubeless guide and it really does help on cold mornings.
Use a bead jack tool. A bead jack, like the Kool Stop model, is a clamp that pushes the tire bead downward into the rim well near the valve. This concentrates the seating force where it matters most. It is a specialty tool, but if you mount lots of tubeless tires it pays for itself fast.
Check tire and rim compatibility. Some tire and rim combinations just do not work together. A tire designed for a 25 mm internal rim may not snap onto a 19 mm rim without serious effort. If you have tried every trick and the bead still will not seat, the rim may be too narrow for the tire, or the tire may be the wrong size for the rim.
Try a bench vise for removal. When the tire is already on but you need to reseat it, squeezing one sidewall in a bench vise can break the bead loose. Use a wide vise jaw protector to avoid damaging the rim or tire. This is a heavy-handed approach, so save it for when nothing else has worked.
Tips for Different Tire Types (Road, Gravel, and MTB)
Road tubeless tires are the fussiest because their thin casings flex less and the rims are usually deeper and tighter. Use the ratchet strap method and a generous amount of soapy water. Inflate to at least 50 PSI before defloating for sealant so the sealant spreads evenly.
Gravel tires sit in the middle. Standard floor pump method usually works, and these tires tend to seat on the first or second try. If you ride gravel often, our piece on tubeless tire benefits for gravel riding explains why setting them up tubeless is worth the effort.
Mountain bike tires are usually the easiest to seat. Their large air volume and flexible casings seat with a floor pump most of the time. If you have a tough one, the CO2 method is the fastest trail-side fix.
Frequently Asked Questions
Do you need an air compressor to seat tubeless tires?
No. A standard floor pump with the valve core removed will seat most road, gravel, and mountain bike tubeless tires. An air compressor just delivers a faster burst of air, but it is not required for home setups.
How do you get a tubeless tire to seat without a compressor?
Remove the valve core, spray both beads with soapy water, center the tire in the rim well, then pump as fast and hard as you can with a floor pump. The high-volume burst through the open valve seat pops the bead into the rim channel.
What do I do when a tire bead will not seat?
First try the valve core trick. If that fails, wrap a ratchet strap around the tread to push the bead into the rim well, add more soapy water, and warm the tire if it is cold. A bead jack tool can also push the bead downward near the valve.
Can you seat a tubeless tire without sealant?
Yes, the bead seats based on air pressure alone, and you can inflate without sealant to check the fit. You should add sealant before riding, since the sealant is what seals small punctures at riding pressure.
Why will my tubeless bead not seat?
The most common causes are a stuck bead in the rim center channel, a pump that cannot move air fast enough through the valve core, dry beads without soap, cold tires, or a tire and rim width mismatch. Removing the valve core and using soapy water solves the majority of stubborn cases.
Final Thoughts
Learning how to seat a stubborn tubeless bead without an air compressor saves you shop fees and lets you change tires at home. The valve core removal trick is the single biggest unlock, and once you pair it with soapy water and a centered tire, most stubborn beads give up in seconds. Keep a ratchet strap in your toolbox for the tough ones, and remember that warming a cold tire often makes the difference.
If you want to round out your home mechanic skills, our guide to handling mechanical problems far from any bike shop covers the trail-side repairs every tubeless rider should know.