
I have replaced brake pads on my own bikes for nearly a decade, and I can tell you with confidence: learning to replace worn disc brake pads at home is one of the most satisfying maintenance jobs a cyclist can do. It costs a fraction of a shop visit, takes 20 to 40 minutes per wheel, and gives you a real feel for how your bike actually stops.
This guide is written for home mechanics. You do not need a professional repair stand, a hydraulic brake bleed kit, or years of experience. I will walk you through exactly what tools to grab, how to tell when your pads are actually worn, and the exact sequence of steps to swap them out cleanly.
One safety note before we start: if you have hydraulic disc brakes, never let brake fluid touch the pad surface or the rotor. Contaminated pads will squeal, grab badly, or fail entirely. I will flag this step again later, because it is the single most common mistake I see from first-timers.
By the end of this article, you will know how to replace worn disc brake pads at home on both mechanical and hydraulic systems, how to choose the right pad material for your riding, and how to bed them in so they perform like new from the first stop.
Table of Contents
Tools and Materials You Will Need
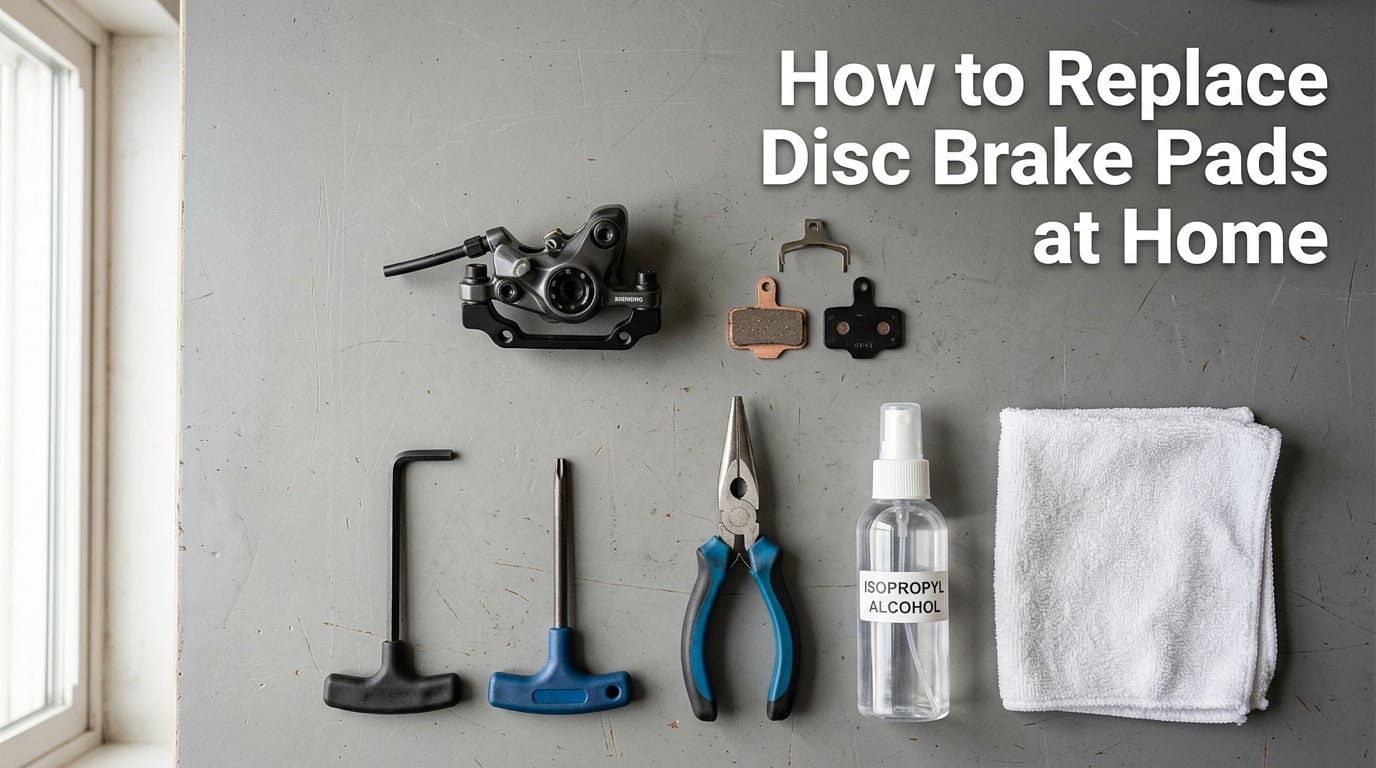
You can replace worn disc brake pads at home with a fairly minimal toolkit. Here is what I keep in a small tray next to my bike whenever I am doing brake work.
Essential tools:
- 2mm, 3mm, 4mm, and 5mm Allen keys (most modern calipers use 4mm or 5mm for the pad retention bolt)
- T25 Torx wrench (some Shimano and SRAM calipers use a Torx bolt instead of an Allen)
- Needle nose pliers (for removing cotter pins or wire retainers)
- Flat head screwdriver or a dedicated pad spreader tool
- Clean lint-free rags
- Isopropyl alcohol (90 percent or higher)
- New brake pads (matched to your brake model, more on this later)
Nice to have:
- A bike repair stand, although a leaned-against-the-wall bike or an upside-down bike on the ground works fine for pad swaps
- A small flashlight to peek inside the caliper
- Nitrile gloves to keep oil off the rotor and pads
- A second set of hands to help align the caliper
For home mechanics, I recommend keeping a small dedicated kit in a zip-top bag. The first time I forgot my pad spreader, I made the mistake of using a flat head screwdriver. It worked, but it slipped and scored a piston. I now own three spreaders because I never want to do that again.
If you ride long distances, you should also know the emergency brake pad replacement essentials to keep in your saddle bag. A roadside pad swap is rare, but knowing the procedure helps you spot problems early.
Signs Your Disc Brake Pads Need Replacing
Most riders replace pads either too early or far too late. Here is how to actually diagnose worn disc brake pads at home without guesswork.
Visual wear indicators:
Most disc brake pads have a wear line stamped or molded into the pad surface. Once the friction material wears down to that line, the pad is at its minimum safe thickness and should be replaced. On Shimano pads, look for a small groove; on SRAM, look for a stamped line; on many aftermarket pads, the indicator is a different color layer visible through the friction material.
Total pad thickness:
If there is no visible indicator, the rule of thumb is this: new pads are usually about 3 to 4mm thick of friction material. Replace them when they reach 1.5mm. You can use a small caliper or even a coin for comparison if needed.
Audible and performance changes:
A healthy disc brake should be quiet under normal braking. If you hear a high-pitched squeal, grinding, or a metal-on-metal scraping noise, your pads are likely worn out. Performance-wise, you will notice the lever pulls farther than usual, the bike takes longer to slow down, or the brake feels grabby and inconsistent.
Lever pull distance:
Pull the brake lever while the wheel is off the ground. The lever should feel firm and stop the wheel with moderate hand pressure. If the lever bottoms out against the handlebar grip, your pads are either worn, the caliper needs centering, or hydraulic fluid needs attention. A lever that gradually gets longer over weeks is a classic sign of pad wear.
Typical replacement intervals:
For most road and gravel riders, expect 1,500 to 3,000 miles between pad changes. Mountain bikers in wet, muddy conditions often see 500 to 1,000 miles. E-bike riders report pads wearing in as little as 400 to 500 miles because of higher average speeds and added bike weight. Heavy commuters with repeated stops tend to be on the shorter end of those ranges.
Understanding Disc Brake Pad Materials
Choosing the right pad material is just as important as the swap itself. Replace worn disc brake pads at home with the right compound and you will get quieter, more consistent braking. Pick the wrong one and you may fight noise, poor wet performance, or accelerated rotor wear.
Organic (resin) pads:
Organic pads are made from a mixture of fibers, fillers, and resin binders. They bite quickly when cold, run quiet, and are gentle on rotors. The trade-off is faster wear, especially in wet or gritty conditions. They are a popular choice for road cyclists and casual commuters who prioritize modulation and silence.
Semi-metallic pads:
Semi-metallic pads blend organic material with small amounts of metal fibers. They offer a middle ground: better longevity than pure organic, decent wet performance, and predictable modulation. I run semi-metallic pads on my commuter bike because they handle stop-and-go traffic without wearing out every few months.
Metallic (sintered) pads:
Metallic pads are made from metallic particles fused together at high temperature. They last the longest, work well in wet and muddy conditions, and handle heat extremely well. The downsides are they are louder, take longer to warm up, and can be hard on rotors during initial break-in. Mountain bikers and e-bike riders in hilly terrain often prefer metallic pads.
How to choose:
For mostly dry road or gravel riding, organic pads are excellent. For mixed commuting with some hills and rain, semi-metallic is the safest pick. For aggressive mountain biking, e-bikes, or wet conditions, go metallic. Match the pad shape to your caliper model. Shimano, SRAM, and other brands each have specific pad shapes, and pads are not universal across models even from the same brand.
How to Replace Worn Disc Brake Pads at Home: Step-by-Step
This is the core of the guide. Take your time, lay out your parts in order, and follow each step. The full process for one wheel takes 20 to 40 minutes the first time, and under 15 minutes once you have done it a few times.
Step 1: Prepare Your Workspace and Bike
Shift to the smallest chainring and the smallest cog so the chain is out of the way. If you have quick release or thru-axle wheels, deflate the tire slightly so it is easier to remove and refit. Lean the bike against a wall, hang it from a hook, or use a workstand if you have one.
Remove the wheel where you are changing pads. For the rear wheel, you can usually leave the chain on the smallest cog and pull the derailleur back gently to clear the cassette from the dropouts.
Wipe down the caliper and rotor area with a clean rag. You want to see clearly what you are working with, and any oil or dirt on the rotor will end up contaminating your new pads if you are not careful.
Step 2: Remove the Old Brake Pads
Look at the caliper from the chainstay side. You will see a small bolt, pin, or cotter pin holding the pads in place. Shimano uses a single bolt with a cotter pin or wire retainer. SRAM varies by model but typically uses a 4mm bolt. Some Magura, Hope, and Hayes calipers use a small spring-loaded pin.
Remove the retaining hardware first. If there is a cotter pin, straighten the bent end with needle nose pliers and pull it straight out. If there is a wire clip, gently pry it free without bending it out of shape. Then unscrew the pad retention bolt or pin and let the pads slide out.
Pay attention to the orientation. Most pads have an arrow pointing in the direction of rotor rotation. I usually take a quick phone photo before pulling the pads out, so I know which way the new ones go in.
Note any shims, spreader springs, or anti-rattle clips that fall out. Keep them in your parts tray in the exact order they came out. Losing a small spring means another trip to the bike shop.
Step 3: Reset the Caliper Pistons
This is the step that intimidates first-timers, and it is critical. The pistons inside the caliper have moved outward as the old pads wore down, so they need to be pushed back to make room for the thicker new pads.
Insert the old pads back into the caliper, or use a dedicated pad spreader tool. The spreader pushes the pistons evenly back into the caliper body. If you use a flat head screwdriver, brace it against the old pad backing plate and push slowly. Never push directly on a piston with a metal tool, as you can damage the seal.
For hydraulic brakes, you must reset the pistons. Pump the brake lever a few times before pushing the pistons back to confirm the system is firm. If the lever feels spongy or pulls to the bar, you may have air in the system and need a bleed. Pushing pistons back on a hydraulic system can force fluid back up to the reservoir, so remove the reservoir cap or open the bleed port as the manufacturer recommends.
For mechanical disc brakes, the pistons are usually a single moving block or simple push rods. Push them back evenly and make sure nothing is stuck or rusted. If the piston only moves on one side, stop and investigate, since uneven movement usually means contamination or a stuck seal.
Step 4: Clean the Caliper and Inspect the Rotor
Spray a small amount of isopropyl alcohol onto a clean rag and wipe the inside of the caliper, paying special attention to the piston faces. Do not spray directly into the caliper, since overspray can contaminate anything it touches.
Inspect the rotor carefully. Hold it up to a light and look for deep grooves, hot spots (shiny blue or purple discoloration), and significant wear. A rotor should be at least 1.5mm thick. Most rotors have a minimum thickness stamped on them, often 1.5 or 1.8mm. Measure with calipers if you have them.
Clean the rotor thoroughly with isopropyl alcohol and a fresh rag. Even fingerprints can cause squealing under braking. Wipe in one direction, not circular, to avoid leaving residue streaks.
If the rotor is grooved, warped, or thinner than spec, replace it at the same time as the pads. A new pad against a worn rotor will bed in poorly and may glaze over.
Step 5: Install the New Brake Pads
Open your new pad package carefully, handling the pads by the backing plate to avoid touching the friction material with your fingers. Skin oils will contaminate the pad surface.
Insert the new pads into the caliper with the friction material facing the rotor. The pad shape usually only fits one way, but if it seems ambiguous, refer to the photo you took earlier or the arrow on the pad.
Install any anti-rattle shims, spreader springs, or clips that came out with the old pads. These small parts are important for keeping the pads centered in the caliper and preventing noise.
Refit the pad retention hardware. Push the cotter pin or wire clip back into place and bend the end over to lock it. Torque the pad retention bolt to the manufacturer spec, which is usually 2 to 4 Nm. Do not over-tighten, since you can crack the pad backing plate.
Some pads come with a thin cardboard spacer between them. This is to keep the pads from touching during shipping. Remove it before the next step.
Step 6: Reinstall the Wheel and Align the Caliper
Slide the wheel back into the dropouts, making sure the rotor slots cleanly between the new pads. If the rotor does not fit, do not force it. The pads may be misaligned, or the wheel may be crooked in the dropouts.
Tighten the quick release or thru-axle to spec. Spin the wheel and listen for any rubbing. A small amount of light rub is normal, but a consistent scrape means the caliper is not centered.
To center the caliper, loosen the two caliper mounting bolts slightly. Squeeze the brake lever firmly, which will center the caliper over the rotor. While holding the lever, tighten the mounting bolts evenly. Release the lever and confirm the wheel spins freely with no rub.
For mechanical disc brakes, you may also need to adjust the cable tension using the barrel adjuster at the lever or the in-line cable adjuster. Turn it until the lever feels firm and engages about a third to halfway through its travel.
Pump the brake lever several times to seat the pads against the rotor. The lever should feel firm, not spongy. If it feels spongy on a hydraulic system, stop and bleed the brakes before riding.
Hydraulic vs Mechanical Disc Brakes: Key Differences
The pad replacement process is similar for both systems, but there are a few important differences worth knowing before you start.
Mechanical disc brakes use a steel cable to actuate the caliper, similar to a rim brake. They are mechanically simple, which makes them a great first project for home mechanics. You do not need to worry about brake fluid or bleeding the system. The trade-off is less stopping power and more lever maintenance over time.
Hydraulic disc brakes use brake fluid (mineral oil or DOT fluid depending on brand) to actuate the caliper pistons. They offer stronger, more consistent braking with less hand effort. The downside is they are more sensitive to contamination. If you get oil on the rotor or pads, you will have squealing and poor performance. If you push the pistons back, you may need to manage fluid in the reservoir.
For a simple pad swap, you do not need to bleed the brake system on a hydraulic setup. Only bleed if the lever feels spongy after the swap, if you disconnected a hydraulic line, or if you fully removed the caliper from the mount for an extended period.
If you ride a hydraulic e-bike, pay extra attention to pad wear. The combination of higher speeds, more weight, and frequent stop-and-go riding means pads wear much faster than on a regular bike. Check them every 500 miles or so.
Bedding In New Disc Brake Pads
Bedding in new pads is the step most home mechanics skip, and it is the step that makes the biggest difference in real-world performance. Properly bedded pads deliver quieter, stronger, and more consistent braking from the very first ride.
Find a quiet, flat road with no traffic. Accelerate to a moderate speed (around 15 to 20 mph), then brake firmly but not violently down to a walking pace. Repeat this 8 to 10 times, allowing a few minutes between stops for the brakes to cool.
After the cycle, do two or three harder stops from higher speed to bring the pads up to operating temperature. Then leave the bike alone for 10 to 15 minutes to fully cool. The pads are now properly bedded to the rotor surface.
Avoid the temptation to do a single hard stop right after installation. That will glaze the pad surface and the rotor, leading to reduced performance and noisy braking for the life of the pads.
The full bedding-in process takes about 30 minutes of riding. Once done, the brake lever should feel noticeably firmer and the stopping power smoother than before. If you ride mostly on gravel or in variable conditions, the disc brake maintenance for gravel principles become even more important, since dust and grit accelerate pad wear.
Troubleshooting Common Problems
Even with a perfect installation, a few common issues can show up after a pad swap. Here is how to handle the most frequent complaints.
Squealing after replacement:
Most squeal comes from contamination, glazed pads, or improper bedding. Clean the rotor with isopropyl alcohol and re-bed the pads using the procedure above. If the squeal continues, the pads may be contaminated with oil or brake fluid and need to be replaced.
Pistons not retracting:
On hydraulic brakes, a stuck piston usually means corrosion or dried fluid. Do not force it. Apply a small amount of clean brake fluid to the piston face, then press gently with a pad spreader. If the piston still does not move, the caliper likely needs professional service.
Soft lever feel after hydraulic work:
You may have introduced air into the system by pushing pistons back too quickly. Bleed the brakes following the manufacturer’s procedure, or take it to a shop. Do not ride a hydraulic bike with a soft brake lever.
Uneven pad wear:
One pad wears faster than the other when the caliper is misaligned. Loosen the mounting bolts, center the caliper, and re-tighten. If one piston is sticking, that pad will always wear faster.
When to call a professional:
If the rotor is warped, the caliper is damaged, the pistons are seized, or the hydraulic system needs bleeding and you are not comfortable doing it, take the bike to a shop. A shop pad swap typically runs around $20 to $30 for parts and $10 to $20 for labor, depending on your area. It is worth the cost if you are not confident in the diagnosis.
FAQ’s
Can I replace brake discs and pads myself?
Yes. Replacing brake pads and even rotors is a beginner-friendly job for most riders. You only need basic tools, fresh pads matched to your caliper, and isopropyl alcohol. Rotors require a T25 Torx and a clean workspace, but the steps are straightforward.
How often should bike disc brake pads be replaced?
For road and gravel riders, expect 1,500 to 3,000 miles between swaps. Mountain bikers in wet or muddy conditions often see 500 to 1,000 miles. E-bike riders frequently replace pads every 400 to 500 miles because of higher speeds and added weight. Always check the pad thickness visually rather than relying on mileage alone.
Is it easy to change bike disc brake pads?
It is one of the easier home maintenance jobs. The first swap takes 20 to 40 minutes per wheel. After you have done it once, you can usually complete the job in 15 minutes or less per wheel. The trickiest step is pushing the pistons back into the caliper, but a pad spreader tool makes it simple.
Are bicycle disc brake pads universal?
No. Disc brake pads are not universal. Each brake brand and often each model uses a specific pad shape. Shimano, SRAM, Magura, Hope, and Hayes all use different designs. You must match the pad shape to your specific caliper. Universal pads do exist for some systems, but check your brake model before buying.
What is the 30/30/30 rule for brakes?
The 30/30/30 rule is a bedding-in guideline some riders follow. It means doing 30 stops from 30 mph with 30 seconds of cooling between each stop. It is a useful target for getting pads to full performance, but the most important thing is to avoid a single hard stop from speed right after installation, which can glaze the pads.
Conclusion
Learning to replace worn disc brake pads at home is a small investment of time that pays off every ride. You will save money, get faster at routine maintenance, and have a much better feel for what your brakes are doing under you.
Keep a regular eye on pad thickness, especially if you ride in wet or dusty conditions. The first time you do a pad swap on your own, give yourself an unhurried afternoon and lay out all your parts in order. By the second or third time, you will be able to do it in under 15 minutes per wheel and ride away with quieter, stronger, more confident braking.