
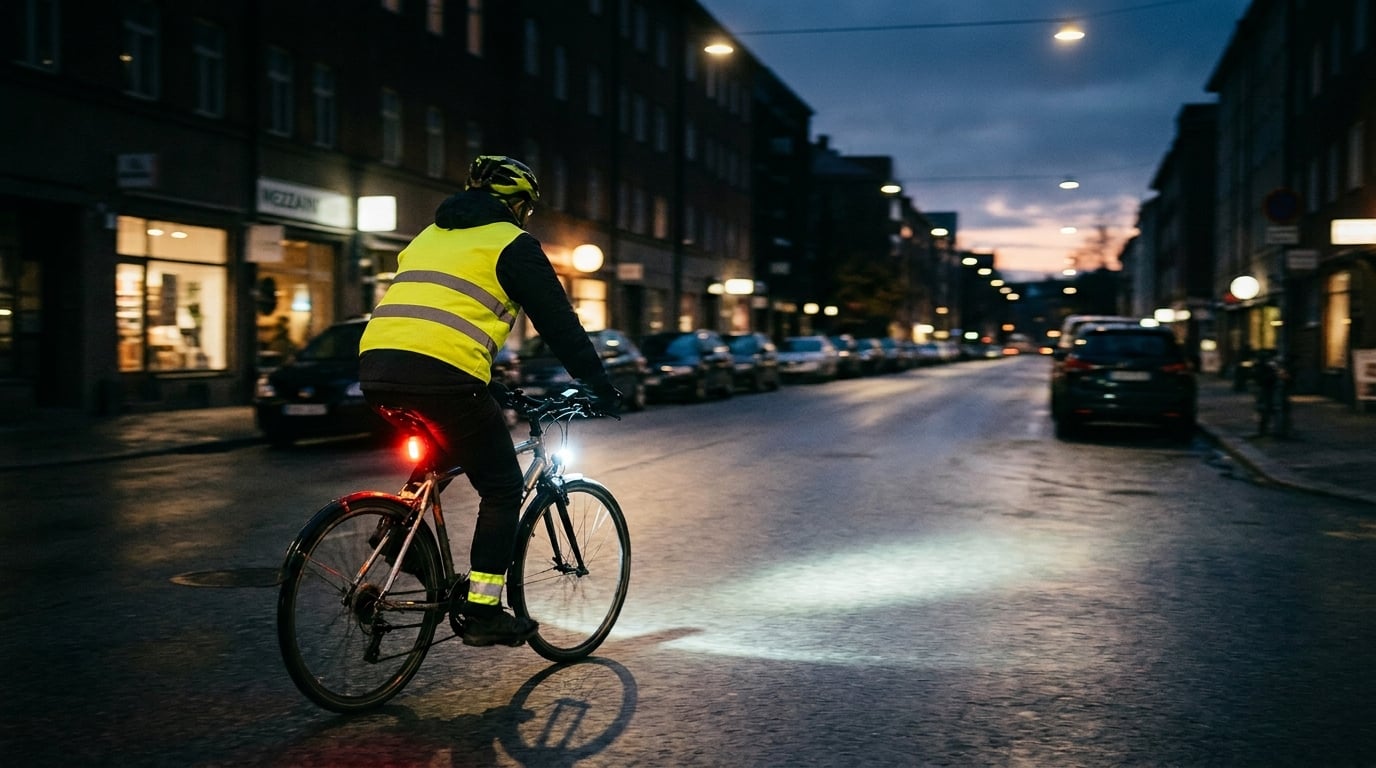
I learned the hard way that bike commuting at night is a different sport than daytime riding. A few winters ago, I rolled through a dark stretch of road I had ridden a hundred times in daylight, and an SUV nearly T-boned me at an unsignalized intersection. The driver genuinely did not see me until I was ten feet from the bumper. I had a light, but it was underpowered, and I had not been paying attention to how I was lit. That moment sent me down a rabbit hole of learning, and this guide is everything I wish I had known before I started commuting after dark.
If you are reading this, you probably already know that the evening rush is exactly when roads get dangerous. NHTSA data shows that bicycle fatalities peak between 6 p.m. and 9 p.m. for a reason: low sun angles, tired drivers, and cyclists in dark clothing. The good news is that with a few deliberate habits, you can dramatically reduce your risk. Below, I will walk you through the exact system I use for every dark commute, organized so you can scan it before your next ride.
Before we dive into the details, here is a scannable version of the full guide. Print it, screenshot it, or pin it to your fridge.
Table of Contents
Night cycling safety checklist (the 60-second version)
- Two lights minimum: a white front light of 400-800 lumens and a red rear light, both with steady plus flash modes.
- Reflective accents on moving parts: ankle bands, pedal reflectors, or reflective tape on your frame.
- Hi-vis layer visible from 360 degrees: vest, jacket, or shell with reflective piping on chest, back, and sleeves.
- Familiar, well-lit route: residential streets over dark cut-throughs, even if it adds three minutes.
- Speed cut by 20-30% compared to your daytime pace on the same route.
- Brake test before leaving: squeeze both levers hard at walking speed to confirm a stop.
- Phone charged, share-my-route sent: a text or live location ping to one person who knows your path.
- Eye prep: two minutes outside in the dark before you clip in, so your pupils adjust.
Now let us break down why each of these matters and how to actually do them well.
How to handle riding in the dark for your evening bike commute
Handling a night commute is less about heroics and more about layering small advantages. You need to see the road, be seen by drivers, and buy yourself time in case something goes wrong. The rest of this guide is organized around those three goals. We will start with the single biggest upgrade you can make, which is also the most misunderstood: bike lights.
Light up with the right front and rear bike lights
Bike lights are the foundation of night riding safety, and most commuters are under-lighting themselves. A flashing little LED clipped to your seat post is not enough. You need enough output to throw a usable beam down the road, plus a rear light that drivers notice from several blocks away.
How many lumens do you need for night commuting?
For a typical urban or suburban commute on lit streets, 400 to 800 lumens is the sweet spot on your front light. Anything below 200 lumens is essentially a “be-seen” light, fine for dusk but inadequate once streetlights thin out. Anything above 1000 lumens starts to be overkill on city streets and can actually blind oncoming riders or drivers unless you aim it carefully.
Beam pattern matters as much as raw output. A wide, even flood is better for commuting because it lights up the entire lane and any potholes at the edges. A tight, throwy spot beam is great for mountain biking at speed but can leave a “black tunnel” effect on city streets where you cannot see hazards to the sides.
Aim your front light so the brightest part of the beam lands about 20 feet in front of your wheel. This is the REI-recommended position because it gives you enough reaction time without blinding oncoming traffic. If you have a helmet light, angle it slightly higher so it points where you are looking, which is incredibly useful at intersections where you want to make eye contact with drivers.
Handlebar light vs helmet light: which is better?
For a commuter, the answer is both, used together. Your handlebar light is your baseline, mounted slightly to the left of your stem so it does not blind oncoming traffic. Your helmet light is your “look where I am looking” beam, which helps at intersections, driveways, and when you want to read a street sign.
I keep my handlebar light on a steady, lower setting for daily commuting and my helmet light on flash or a medium setting. Together they give me redundancy if one runs out of battery, which happens more often than you think. Speaking of which, USB-C charging is now standard on most commuter lights in the 400+ lumen range, and you should get into the habit of topping up every few days even if the indicator says you have charge left.
Rear light positioning and flash mode tips
Mount your rear light as high as you can, ideally on your seat post or a rack. A flashing red light is more attention-grabbing than a steady one, but the pattern matters. Aim for a light that has multiple modes, and use a mix of steady and flash across your rear and side lights. Drivers’ eyes are drawn to change, so varying the pulse pattern is more effective than any single mode.
Do not forget side visibility. Many commuters forget that drivers pulling out of side streets or parking lots are looking across the road, not behind them. Reflective strips on your tires, spoke lights, or pedal reflectors fill this gap. Ankle bands are also surprisingly effective, because the up-and-down motion catches peripheral vision better than a static reflector on your back.
Wear reflective clothing and high-visibility gear
Lights make you visible from the front and back. Reflective gear makes you visible from every angle, including the sides. Together they form a complete visibility system.
Why reflective ankle bands beat static vests for motion detection
There is an old saying among bike commuters: a reflective vest on a moving cyclist is less visible than an ankle band on a moving cyclist. The reason is biomechanics. Drivers’ brains are wired to notice movement, especially vertical up-and-down movement, because it looks like a pedestrian or a two-legged animal. A static reflective patch on your chest only works when headlights hit it at exactly the right angle. A reflective ankle band works almost every time because it is constantly in motion.
I run two ankle bands, a reflective vest, and reflective tape on the back of my helmet. That sounds like overkill until you spend a winter commuting in the rain and realize that no single piece of gear covers every situation. The vest gets soaked and stops being as reflective. The ankle bands stay dry under my pants cuffs. The helmet tape is always visible above the headlight glare of cars behind me.
Building a high-vis layering system
For three-season commuting, a high-visibility shell over a regular jacket is the most flexible setup. Look for a shell that has reflective piping on the chest, back, and sleeves, and that fits over whatever else you are wearing. In winter, a hi-vis insulated jacket with a softshell back is worth the investment.
Gloves with reflective accents are another under-rated item. Your hands are constantly signaling turns, and reflective fingertips turn your hand signals into flashing beacons. The same goes for a reflective strap on your bag or backpack, which is usually visible above the line of car headlights.
Plan your route and stick to familiar streets
At night, route choice can matter as much as equipment. A well-lit residential street is almost always safer than a dark, fast arterial, even if it is a few minutes longer. For more on choosing the right path, our route planning tips cover similar principles that apply to commuter route selection.
Well-lit routes vs dark corridors
Your default daytime route is almost never your best night route. Daytime, you can use a greenway or cut-through that is technically a bike path but is unlit after sunset. At night, those same paths become black tunnels where potholes, branches, and pedestrians appear out of nowhere. If you have to use a greenway at night, scout it during the day first and note the streetlight gaps.
Residential streets with parked cars, street trees, and a steady stream of lit windows are usually your best bet. Drivers on these streets are moving slowly and have more visual context, which means they are more likely to see you. The constant ambient light from windows and streetlights also helps your own eyes adapt, reducing the tunnel effect of a single headlight beam.
Avoiding high-risk urban hazards at night
Three hazards become dramatically more dangerous at night: parked cars, streetcar or train tracks, and wet leaves. Parked cars hide passengers about to open doors, and at night you cannot see a door swinging open until you are on top of it. Ride at least a door’s width away from parked cars whenever possible, and watch for brake lights or exhaust fumes that signal a recently-parked vehicle with a driver still inside.
Tram and streetcar tracks are slippery at the best of times and treacherous when wet. Cross them at as close to a 90-degree angle as you can. Wet leaves are the third classic night hazard, because they hide the road surface and turn painted lines into ice. Slow down for any patch of leaves, especially on corners where cars tend to push them into the bike lane.
Adjust your speed and ride predictably
At night, your reaction time is essentially cut in half because your depth perception is compromised. Even with a perfect headlight, you see the world in a narrower cone of clear vision. The only safe response is to ride slower, signal earlier, and follow the rules of the road more strictly than you do during the day.
Slower speeds in low-visibility conditions
Aim to cut your daytime pace by 20-30% on the same route at night. That sounds like a lot, but it is roughly the difference between having time to spot a pothole and hitting it. A 12 mph commute becomes a 9 mph commute. You will arrive a few minutes later and your bike will be intact.
Cornering speed matters even more. Headlights tend to point straight ahead, so when you lean into a turn, the inside of the corner goes dark. Slow down before the turn, not during it, so you can see the exit clearly. If you ride clipless pedals, unclip your inside foot early so you can put it down if traction gives out.
Signaling and following traffic laws
Predictability is your best defense against drivers who are not expecting you. Signal every turn, every lane change, and every stop. Make eye contact at every intersection, even on small residential streets. Ride in a straight line rather than wobbling between parked cars, and avoid the temptation to “filter” to the front of traffic at red lights, which often puts you in a driver’s blind spot from the cross street.
Stop at stop signs and red lights, full stop, every time. I know this is basic, but night riding is when shortcuts go wrong. Drivers are not expecting a cyclist to blow through an intersection at 20 mph when the rest of traffic is stopped, and a single moment of confusion is all it takes.
Run a pre-ride safety check on your bike
Most of the mechanical issues that ruin a night ride are mechanical issues you would have noticed in daylight. The fix is a two-minute pre-ride check that takes care of the most common failures before they become a problem. If you are planning longer night rides, our bikepacking safety checklist has a deeper version of this list.
Brake test: the locked-wheel check
Walk your bike to a clear area, squeeze each brake lever one at a time, and confirm that the wheel locks up before you reach the bar. This is the standard test that every bike shop uses, and it is the fastest way to know if your brakes are working at all. If a lever bottoms out against the bar, your pads are worn, your cable is stretched, or your hydraulics need bleeding. Do not ride at night with marginal brakes.
Both brakes need to lock the wheel, but the front brake does roughly 70% of your stopping power. If you can only lock the rear, the front lever probably has an issue. Test it on dry pavement rather than relying on feel, because brake feel is unreliable when pads are wet or cold.
Tire, chain, and quick visual inspection
Squeeze your tires with your thumb. They should feel firm, not squishy. A soft tire is more likely to pinch flat on a pothole, and at night you cannot see a small piece of glass in time to avoid it. Check the sidewalls for cuts or bulges, which become failure points at low pressure.
Lift the rear wheel and spin the pedals. The chain should run smoothly without skipping, the wheel should spin freely without rubbing the brakes or frame, and the quick-release or thru-axle should be fully closed. Look at the front wheel the same way. Two minutes here saves an hour of walking home in the dark.
Prepare for weather and low-visibility conditions
Night commutes get weather, and weather gets worse at night. Cold air sinks into low areas, dew forms on everything after sunset, and rain that would have been a minor annoyance in daylight becomes a visibility crisis after dark. Plan for it.
Rain, fog, and dew on glasses
If you wear glasses, anti-fog wipes or a small drop of dish soap rubbed on the lenses and buffed off will keep them clear for an hour or more. Rain on glasses at night is the single most common cause of near-misses among my commuting friends, because one swipe of a glove and you are effectively blind for several seconds.
Fog is a special case. Light reflects off the water droplets, which means your front light makes a wall of glare in front of you rather than lighting up the road. The trick is to switch to a low-output mode and use ambient light from streetlights and car headlights to see. If it is foggy and you do not feel confident, take transit home. No commute is worth the risk.
Glare and being blinded by oncoming headlights
Modern LED headlights are bright, and on high beams they will turn your night into day. When a car approaches with high beams, look down and to the right, focusing on the white fog line or the edge of the road. This protects your night vision and gives you a line to follow. Do not stare at the oncoming lights, because you will be effectively blind for several seconds after the car passes.
If a car follows you with high beams, the situation is even worse, because you have nowhere to look. Slow down, signal, and pull over to let them pass when it is safe. Some commuters carry a small rearview mirror specifically to spot tailgaters early, which is a worthwhile upgrade if you ride a busy route.
Carry an emergency kit and tell someone your plan
Flat tires, snapped chains, and dead lights happen. The question is whether you can fix the small ones on the road and whether someone knows where you are if you cannot. A small saddle bag and a 30-second text solve both problems.
What to pack in your saddle bag
For a typical urban night commute, I carry: one spare tube, a mini pump or CO2 cartridge, a multi-tool with chain breaker, two tire levers, a small patch kit, a spare rear light, a high-visibility reflective strap, and a thin rain shell. That sounds like a lot, but it fits in a half-liter saddle bag and weighs about 400 grams.
The spare rear light is the item I most often see commuters skip, and it is the one that gets you home safely if your primary light dies. A cheap USB-rechargeable rear light weighs 30 grams and turns a tow-home situation into a normal ride. The reflective strap doubles as a hi-vis accessory and as an emergency repair strap for a broken rack or bag.
Sharing your route with a friend or family member
Pick one person who knows your route and your expected arrival time, and text them before you leave. If you are going to be more than 15 minutes late, send a quick update. Most modern phones can share a live location for a fixed duration, which is even better. This is a habit, not a feature, and it is the single cheapest insurance policy you can buy.
If you commute at unusual hours, like very early morning or very late at night, consider varying your route slightly between outbound and return trips. A predictable routine is great for efficiency, but a fully predictable route is also predictable to anyone watching for it. Variation, even by a block or two, breaks the pattern.
Train your eyes and mind for night riding
Most night-riding guides focus on gear. The piece that gets less attention is the visual and mental adaptation that lets you actually see well in the dark. Your eyes are capable, but they need a few minutes to switch modes.
Eye adaptation when moving between light and dark
When you walk out of a brightly-lit office, your pupils are tiny and you cannot see the dark parking lot. After five or ten minutes, your eyes adapt and the world comes into focus. The same thing happens in reverse every time you pass under a streetlight or ride past a lit storefront. You get a moment of near-blindness as your eyes readjust.
The trick is to avoid staring directly at bright lights. Look down and to the right, using your peripheral vision, when passing under streetlights. Peripheral rods recover faster than central cones, so you keep more of your night vision. The same applies to oncoming car headlights, which is why experienced night cyclists do not look at the lights themselves.
Before you clip in for a night ride, stand outside in the dark for two to three minutes. Let your eyes settle. This sounds trivial, but it is the difference between seeing a patch of gravel in time to swerve and hitting it square.
Building confidence through repetition
Night riding feels scary the first few times, and that is normal. The fix is repetition, not bravado. Ride the same route for a week or two, and you will start to anticipate every pothole, every dark spot, every problematic intersection. Confidence is built one commute at a time.
Do not push yourself on night rides. If a situation feels sketchy, walk the bike. There is no shame in getting off and walking through a confusing intersection, and the time cost is usually less than you think. The goal is to arrive home safely, and a 60-second walk is a perfectly good way to do that.
Light categories for commuters: a quick comparison
Not all bike lights are the same, and the category you choose depends on your route, your speed, and how much weight you want to carry. Here is a quick comparison to help you decide.
Handlebar-mounted front lights (400-800 lumens): the workhorse of night commuting. They throw a wide, stable beam that lights up the road and any obstacles. Best for commuters on a mix of lit and unlit streets. Most have USB-C charging and 2-6 hour runtimes on medium mode.
Helmet-mounted front lights (200-500 lumens): a great supplement to a handlebar light, especially for commuters who want to read signs and signal turns with a head nod. Less stable than handlebar lights because they move with your head, which can be disorienting until you get used to it.
Daytime running lights and supplemental flashers: small, lightweight lights designed to grab attention rather than light up the road. Excellent as a second or third light source and great for side visibility. Most commuters should have at least one of these on their bike, on their bag, or on their helmet.
Rear lights (50-100 lumens, flashing): the single most important safety device on your bike at night. A 50-lumen flashing rear light is visible from several blocks away. Mount it as high as possible, on the seat post, a rack, or your bag.
Wheel lights and spoke lights: fun and surprisingly visible, especially from the side. They do not replace a primary rear light, but they add 360-degree visibility at intersections. Battery life varies, so look for USB-rechargeable options.
Frequently asked questions
How can you stay safe while riding a bike in the dark?
Use a 400-800 lumen front light, a flashing red rear light, reflective clothing with ankle bands, a well-lit familiar route, and reduced speed. Add reflective tape to your helmet and pedals, and signal every turn so drivers can predict your movements. Always do a two-minute brake and tire check before leaving.
How many lumens do I need for night bike commuting?
Most urban commuters need 400-800 lumens on the front light and 50-100 lumens on the rear light. Below 200 lumens on the front is not enough once streetlights thin out. Above 1000 lumens is usually overkill and can blind oncoming traffic unless aimed carefully.
Is it safe to ride a bike at night?
Night cycling is statistically riskier than daytime riding, with most bicycle fatalities occurring between 6 p.m. and 9 p.m. It is, however, very manageable with the right gear and habits. Lights, reflective clothing, route planning, and reduced speed make night commuting nearly as safe as daytime for most riders.
What should I wear for visibility when cycling in the dark?
Wear a high-visibility vest or jacket with reflective piping on the chest, back, and sleeves. Add reflective ankle bands, which outperform static patches because the motion catches driver attention. Reflective tape on your helmet, gloves, and bag adds side visibility. Avoid dark colors, especially on pants and shoes.
How do I avoid being blinded by car headlights while cycling?
When a car approaches with high beams, look down and to the right at the road edge rather than at the lights. This protects your night vision and gives you a line to follow. If a car tailgates you with high beams, slow down, signal clearly, and pull over to let them pass when it is safe.
Final thoughts on riding in the dark for your evening bike commute
There is no single trick to bike commuting at night. The real safety comes from stacking small advantages: a bright front light, a flashing rear light, a reflective layer, a familiar route, a slightly slower pace, and a quick pre-ride check. None of these on their own will save you, but together they form a system that handles almost anything the evening commute throws at you.
Start with the lights, because that is the biggest single upgrade. Then add a reflective layer the next week, then a pre-ride brake check the week after. Within a month, you will have built a system that feels automatic, and night rides will stop feeling like a separate activity. They will just feel like riding.
If you are just getting started, do not be intimidated. The fact that you are reading this guide means you are already thinking like a safe cyclist. Now go ride, and let me know how it goes.