
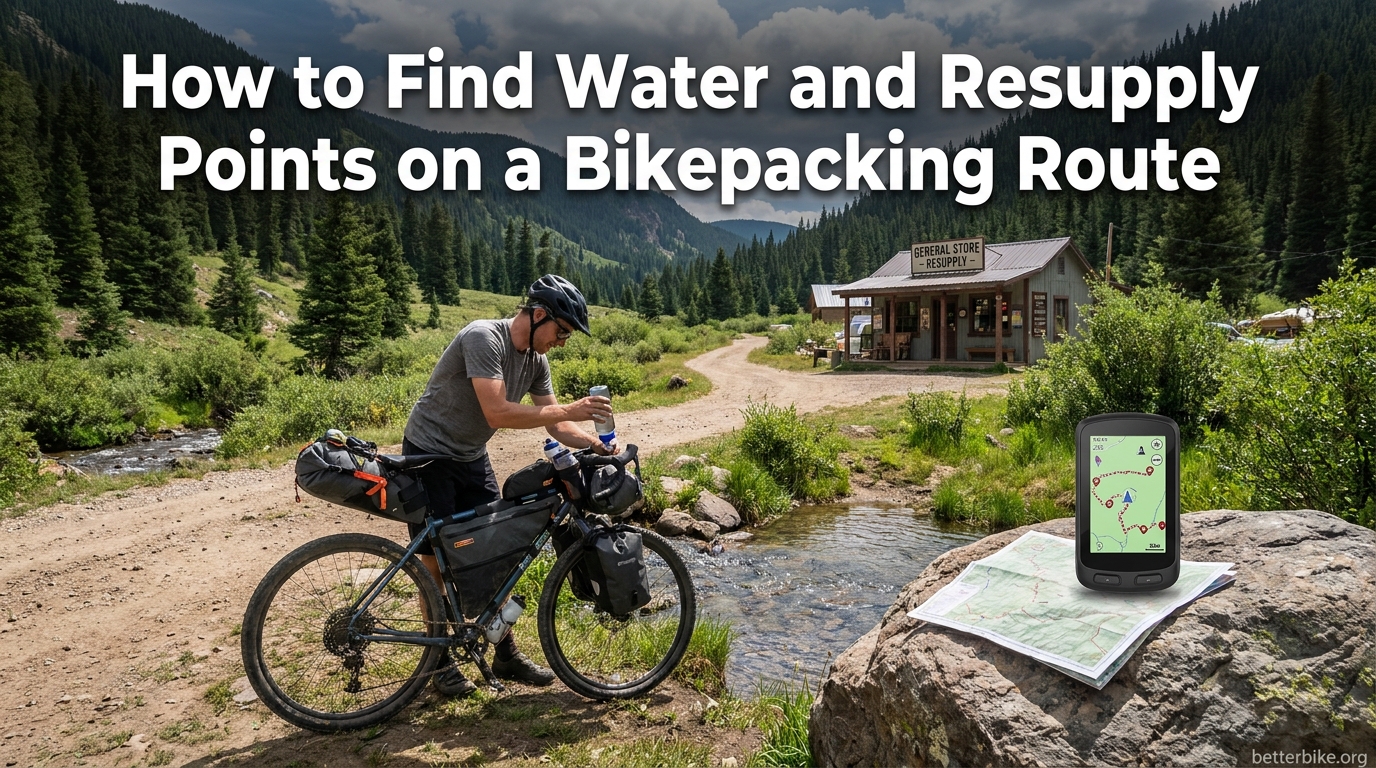
Running out of water 40 miles from the nearest town is the kind of mistake that ends bikepacking trips early. I learned this the hard way on a Utah desert loop when a “seasonal” spring turned out to be a dusty wash and I pedaled the last 90 minutes in the dark with a half-empty bottle.
Finding water and resupply points on a bikepacking route is the single most important planning task you will do before a trip. It determines your daily mileage, your camp locations, the weight on your bike, and whether you finish the route at all. This guide walks through the exact system our team uses to plan water and resupply for routes ranging from overnighters to multi-week tours.
You will learn how to read maps for water sources, which apps show reliable POIs, how to spot water in the field, how much to carry, and how to treat it before drinking. Whether you are planning your first overnight or your fifth long-distance route, this is the framework that keeps you hydrated and moving.
Table of Contents
Why Water Resupply Planning Matters on a Bikepacking Route
Water resupply planning in bikepacking is the process of identifying and locating every place you can refill water along your route, then mapping those points to your daily mileage and carrying capacity. Without it, you are gambling with dehydration, extra weight, or both.
A 150-pound cyclist riding in 80-degree heat can lose more than a liter of water per hour through sweat and breath. On a 6-hour ride day, that is 6 liters gone, and most bikes can only comfortably carry 3 to 4 liters at a time. The math only works if you have a refill point roughly every 2 to 3 hours of riding.
Carrying too much water also has a real cost. Water weighs about 2.2 pounds per liter, and a loaded bikepacking bike already feels heavy on climbs. I have seen riders haul 6 liters into a remote stretch “just in case” and end up walking the uphills. The best strategy is to plan short hops between known water sources, not to load up and hope for the best.
Dehydration symptoms sneak up on you. Headache, slower reaction time, irritability, and muscle cramps all show up before the obvious “I am dying of thirst” feeling. By the time you feel thirsty, you are already 1 to 2% dehydrated, which studies show reduces endurance performance by 10 to 20%. For bikepackers, that is the difference between finishing strong and bonking on a climb.
Proper water planning also unlocks better routes. Once you trust the water map, you can confidently take the more scenic dirt road or the quieter forest track, even if it runs 20 miles between towns. That is when bikepacking stops feeling like a logistics problem and starts feeling like adventure.
Types of Water Sources You’ll Encounter on Bikepacking Routes
Bikepacking water sources fall into two broad categories: natural sources and human-made sources. Knowing the difference, and the reliability of each, is the foundation of good water planning.
Natural Water Sources
Streams, creeks, springs, rivers, and lakes are the most common natural sources. They vary widely in reliability depending on season, elevation, and recent rainfall. In the Pacific Northwest, you can find flowing water almost anywhere on a forested route. In the desert Southwest, you might ride 50 miles without a single reliable creek.
Springs are usually the most reliable natural sources because they tap groundwater rather than depending on surface runoff. Look for them marked on USGS topo maps with a small triangle and dot symbol, and look for the lush green vegetation patch that often surrounds them. Many backcountry springs flow year-round even when creeks go dry.
Creeks and streams are the workhorses of bikepacking water planning. They are easy to spot on maps (drawn as blue lines) and easy to filter from. The catch is seasonal flow. A creek marked on the map in July may be a dry sand channel in September. Always check multiple data sources before counting on one.
Lakes and ponds can be excellent sources but require more caution. Still water harbors more pathogens than moving water, and algae blooms can make the water taste terrible or even toxic. Always filter lake water and avoid green or scummy water when possible.
Human-Made Water Sources
These are often the most reliable options because they do not depend on rainfall. Campground spigots, trailhead faucets, rest area sinks, and even cemetery taps are common in rural America and are usually safe to drink without filtering.
Gas stations, fast food restaurants, and convenience stores are the unsung heroes of resupply planning. Most riders I know plan their daily mileage to end near a town with at least one 24-hour stop. You can refill bottles, grab food, use the bathroom, and top up your phone in 15 minutes.
Public libraries, post offices, city parks, and visitor centers often have water fountains and bottle filling stations. Libraries are particularly good because they have bathrooms, shelter from storms, and free Wi-Fi for re-checking your route.
Churches, fire stations, and community centers in small towns will often fill a water bottle for a tired cyclist if you ask politely. I have filled bottles at fire stations across the West, and the firefighters have always been friendly. Just be respectful, explain what you are doing, and offer to make a small donation to their fund.
Private wells, ranch troughs, and stock tanks are technically sources, but treat them with caution. Always ask the landowner before dipping a bottle, and never drink from a stock tank without filtering. Animals standing in the water introduce bacteria you do not want.
Potable, Filterable, and Treat-In-Place Water
Water sources fall into three safety categories that should drive your planning:
Potable water is safe to drink without treatment. Tap water at campgrounds, restaurants, and most public buildings falls into this category. If you can see a working faucet and the building is on municipal water, you can usually drink straight from it.
Filterable water is water that contains microorganisms (bacteria, protozoa, sometimes viruses) that a filter or treatment can remove. Every natural source falls into this category. Streams, springs, lakes, and even clean-looking puddles all need filtration or treatment before drinking.
Treat-in-place water is water that is not accessible or that cannot be reached with a standard filter. Seeps at the base of cliffs, water in cattle troughs with scum, or stagnant pools might require boiling, UV treatment, or chemical drops. This is your backup plan when filterable sources are not available.
How to Find Water Sources on Maps Before Your Trip
Map reading is the core skill of water planning. Our team plans every route by working through three map layers in this order: base topo, water overlays, and route-specific POIs.
Step 1: Start with a USGS Topo or Equivalent Base Map
Topographic maps show water as blue lines (streams) and blue shapes (lakes, ponds). The lines tell you not only where the water is, but also the direction of flow. Water flows downhill, so a creek that joins a river will always be upstream of that junction. This helps you figure out which side of a ridge will have water.
Look for contour lines (the brown squiggly lines that show elevation). When contour lines form a “V” shape pointing uphill, that V usually indicates a stream channel. Two contour lines coming together at a low point often mark a drainage you can follow to water.
Gaia GPS, Caltopo, and the USGS topoView website all offer free or low-cost topo layers for the United States. For international routes, Mapy.cz and OpenTopoMap are good options that often have more detail than Google Maps in remote areas.
Step 2: Add the OpenStreetMap Water Layer
OpenStreetMap (OSM) has the most detailed water source data in the world, and it is free. The OSM Cycle layer in particular marks drinking water fountains, hand pumps, and even some springs. The data is contributed by a global community of mappers, so quality varies, but in populated areas it is outstanding.
In Gaia GPS, the OSM Cycle layer is a built-in option. In Komoot and RideWithGPS, you can usually toggle “drinking water” as a POI category. Spend 10 minutes panning along your route and clicking every blue dot. Each one is a potential fill-up.
I have found unmarked springs and faucets this way that are not in any guide book. One memorable find was a hand pump behind a roadside produce stand in central Oregon that the owner had installed for cyclists and hikers. The OSM mapper had tagged it as a public water source. Free, cold, delicious water on a 90-degree day.
Step 3: Check Route-Specific Community Sources
For famous long-distance routes, community-maintained resources are gold. The Adventure Cycling Association publishes route notes for every route in their network, including current water availability updates from recent riders. The Pacific Crest Bicycle Trail and the Great Divide Mountain Bike Route both have public Facebook groups where riders post current conditions.
Apps like FarOut (formerly Guthook) cover many long-distance hiking and bikepacking routes with crowd-sourced water comments. Each waypoint has a “water report” section where recent travelers post whether the source is flowing, dry, or contaminated. The information is usually no more than a few weeks old, which is current enough to be useful.
When I planned the Colorado Trail, I went through every water comment for the section I was riding. Three of the springs I had marked from topo maps were reported dry that year, and one unmarked spring at the bottom of a canyon had flowing water thanks to recent rain. The community data saved me from three dry camps and one desperate detour.
Step 4: Mark Distances Between Sources
Once you have your water points identified, measure the distance between them. Most bikepacking routes should have a refill point every 30 miles or less, and even more frequently in hot, dry, or exposed terrain. Use the route planning tool’s measurement feature to drop pins and check the distance.
Look for the longest gap on your route. That is your hardest stretch, and it determines how much water you need to carry. If the longest gap is 25 miles through moderate terrain, plan for 4 liters of carrying capacity. If it is 50 miles through the desert, you need a different strategy: either find an intermediate water source, plan to cache water in advance, or shorten your day to fit the gap.
Digital Tools and Apps for Water Planning
Modern route planning apps do most of the heavy lifting, but each one has strengths and weaknesses for water planning. Our team uses a combination of two or three tools on every route.
RideWithGPS
RideWithGPS is the gold standard for bikepacking route planning. The map view has a built-in POI layer that shows water fountains, campgrounds, convenience stores, and even some springs. You can toggle the layer on and see every water source along your route without leaving the planner.
The route planning tool itself lets you drag your route onto roads or trails that pass close to water sources. If a particular stretch has no water, the planner will highlight it in red (if you have elevation data loaded) and you can adjust the route to hug a creek or pass through a town.
One feature I rely on heavily is the “snap to waypoint” option. When I am planning a route and see a drinking water POI, I can right-click and add it as a waypoint. The planner then recalculates the route to pass through that point, ensuring I roll right past the source.
Komoot
Komoot is popular in Europe and has excellent water source data in countries like Germany, Austria, and the Netherlands. The “drinking water” highlight layer shows fountains, public taps, and even some springs with a high level of accuracy.
The “Highlights” feature lets users tag interesting points along routes, and water sources are a common highlight. You can browse highlights near your planned route and add them as stops. Komoot’s turn-by-turn navigation also works offline once you download a region, which is critical for remote areas with no cell service.
Gaia GPS
Gaia GPS is the premium tool for serious backcountry planning. The app supports dozens of map layers including USGS topos, OSM, and several private layers with detailed water data. The “Water” category in the layer menu shows streams, lakes, and even some springs with higher accuracy than the default maps.
You can drop custom waypoints, label them, and organize them into folders. I create a “Water” folder for every route, then drop a pin at every source I plan to use. When I am riding, the waypoints show up as icons on the offline map, and I can tap them to see my notes.
Gaia GPS requires a subscription for full features, but the offline map downloads and detailed water data are worth the cost for anyone doing regular remote riding. The app also handles GPX imports cleanly, so you can bring routes from other planners.
FarOut and Route-Specific Apps
For long-distance routes like the Great Divide, the Arizona Trail, and the Tour Divide, FarOut is almost mandatory. The app is essentially a digital guidebook with embedded GPS waypoints for water, camping, food, and resupply. Each waypoint has community comments that are usually current within a few weeks.
The downside is that FarOut is route-specific, so it only works for routes that have been added to the platform. For a custom route or a less-trafficked area, you will need a more general tool like Gaia GPS.
How to Find Water Sources in the Field
Maps and apps are great for planning, but real-world conditions are never quite what the map shows. Our team has a few go-to techniques for finding water when the data is incomplete or outdated.
Read the Landscape for Water Signs
Vegetation is the easiest water indicator. In dry country, look for cottonwoods, willows, and any other green trees. Their roots tap into groundwater that is often within a few feet of the surface. If you see a healthy cottonwood in a canyon, dig down a foot or two at its base and you will often hit damp sand or even water.
Animal trails often lead to water. In the desert, deer, bighorn sheep, and javelina follow established paths between water sources. If you see a heavy game trail in dry country, follow it downhill. The trail will usually lead to a spring, seep, or tinaja (rock water pocket) within a mile or two.
Look for green lines in a brown landscape. A line of darker vegetation snaking down a hillside is almost always a drainage with subsurface flow. Even if the surface is dry, digging in the drainage bottom will often produce water. The Navajos and other desert peoples have used this trick for centuries.
Identify Dry Creek Beds (and Their Water Potential)
Dry creek beds are not useless. Many flow reliably for a few hours after rain, and some have permanent seeps in the gravel bed. The trick is to look for the deepest, shadiest part of the wash and dig down. Even when the surface is dusty, the water table may be only a few feet below.
If you do find a seep in a dry creek, expect the water to be heavily mineralized. It will taste like iron or sulfur, and filtering does not remove those minerals. A few drops of lemon juice or a charcoal filter can help with the taste, but most riders prefer to filter and then add an electrolyte mix to mask the flavor.
Ask Locals
People who live along your route know the water better than any map or app. Stop at a cafe, a hardware store, or a gas station and ask where the closest reliable water is. Specify that you are on a bicycle and that you are looking for drinking water, not for a swimming hole.
Locals will often point you to springs that are not on any map, faucets behind buildings that you would never have found, and seasonal sources that they know are flowing right now. A two-minute conversation can save you from a 10-mile detour or a dry camp.
I have had ranchers in Montana, firefighters in New Mexico, and shop owners in Appalachia all help me find water. The rule I follow is to ask politely, listen carefully, and never be too proud to accept a bottle of cold water offered from a refrigerator.
Check Seasonal Conditions
Water availability changes dramatically with the seasons. A spring that flows 5 gallons per minute in May might be a damp patch by August. A creek that is knee-deep in spring might be bone dry by fall. Always check the time of year you are riding and assume the worst-case water levels.
Call the local ranger district or land management office in the weeks before your trip. They have current conditions reports and will tell you which campgrounds have spigots shut off for the season, which springs are dry, and which areas have had recent contamination advisories. This 10-minute phone call has saved me multiple times.
Water Carrying Capacity and Storage Solutions
How much water to carry depends on the longest gap between reliable sources, the temperature, and your bike’s storage capacity. Most experienced bikepackers aim for 3 to 5 liters of carrying capacity, plus the ability to filter and refill quickly along the route.
Standard Bottles in Frame Cages
Two 24 to 32 ounce bottles in standard frame cages are the baseline. They are cheap, easy to refill, and you can see at a glance how much water is left. On road or mixed-surface routes, this setup is enough for most riders in moderate conditions.
The downside is that standard cages can only hold so much. On a long stretch with no water, you need more capacity than two bottles provide. That is where frame bags and hydration bladders come in.
Frame Bags and Hydration Bladders
A full-frame bag with a hydration bladder can add 2 to 3 liters of water capacity in the main triangle of your frame. The bladder sits inside the bag, the hose runs out the top, and you can drink while riding. The downside is that you cannot see how much water is left, and refilling requires removing the bag and bladder.
Some riders use a hydration bladder in the frame bag as their “emergency reserve” and standard bottles as their “drinking supply.” You sip from the bottles as you ride, and refill them whenever you find a source. The bladder stays full until you hit a long dry stretch.
Stem and Handlebar Feed Bags
Stem-mounted feed bags (also called “bento bags”) are popular in the bikepacking world for snacks, but they also work for an extra 16 to 24 ounces of water. The bag is right in front of you on the stem, and you can grab a quick drink without taking your hands off the bars.
Handlebar roll bags can also hold a soft flask or two. The bags add weight to the bars, which can affect steering, but the convenience of having water literally at your mouth is hard to beat on a hot climb.
MSR Dromedary and Similar Bladder Bags
For remote routes, dedicated water bags like the MSR Dromedary are popular. These are heavy-duty, food-grade bladders in 2, 4, and 6 liter sizes. They fold flat when empty, fit easily in a frame bag or seat pack, and can be filled from any source including a shallow puddle.
On my Great Divide ride, I carried a 4-liter and a 6-liter Dromedary plus two bottles on the frame. That gave me 10 liters of capacity, which was overkill for most days but essential for the long stretches through Wyoming and Montana where town water was 60 to 80 miles apart.
How Much Should You Actually Carry?
The rule of thumb is to carry one liter per hour of riding in moderate conditions, and 1.5 liters per hour in hot or dry conditions. Multiply by the number of hours you expect to ride between water sources, then add a 1-liter safety buffer.
For example, if you have a 4-hour gap between sources in 85-degree heat, you should plan to carry 6 to 7 liters (4 hours times 1.5 liters, plus 1 liter buffer). If you cannot carry that much, the answer is to break the day into shorter segments with refill stops in the middle, not to skip water.
Treating and Filtering Water While Bikepacking
If you are drinking from any natural source, you need to treat the water. The four main treatment methods are filters, UV light, chemical treatment, and boiling. Each has pros and cons, and many bikepackers carry a primary method plus a backup.
Filters: Sawyer Squeeze, Katadyn BeFree, and Platypus QuickDraw
Filters are the most popular option for bikepacking because they are fast, easy, and do not change the taste of the water. The Sawyer Squeeze is the industry standard. It is a hollow fiber filter that screws onto a standard water bottle. You squeeze the bottle, the water passes through the filter, and you drink. The flow rate is good, the filter lasts for thousands of gallons, and replacement is cheap.
The Katadyn BeFree is a soft flask with a built-in filter. It is even simpler to use than the Sawyer because there is no extra bottle or hose. You fill the flask, squeeze, and drink. The filter is slightly faster but has a shorter lifespan.
The Platypus QuickDraw is a similar soft flask system. It is popular for its wide mouth (easy to fill) and its cleanable filter element. All three filters handle bacteria and protozoa, which covers the vast majority of waterborne pathogens in North America.
One downside of all filters is that they do not remove viruses. In most of the United States and Canada, viruses are not a major concern in backcountry water. But in popular camping areas near towns, or in developing countries, you may want to add chemical treatment or UV as a backup.
UV Treatment: SteriPen and SteriPen Ultra
UV light pens like the SteriPen kill bacteria, protozoa, and viruses by disrupting their DNA. You stir the pen in your water bottle for 60 to 90 seconds, and the water is safe to drink. The pens are fast and do not leave any chemical taste.
The downside is that UV pens require batteries, and the batteries die in cold weather. They also do not work in cloudy or silty water because the particles block the UV light. A UV pen is best as a backup to a primary filter, not as a standalone solution.
Chemical Treatment: Aquatabs, Iodine, and Bleach
Chemical treatment is the lightest, cheapest option. Aquatabs (chlorine dioxide tablets) are easy to carry, easy to use, and effective against all pathogens. You drop a tablet in your bottle, wait 30 minutes, and the water is safe.
Chlorine dioxide is preferred over iodine because it does not affect thyroid function and it is more effective against viruses. The downside is the 30-minute wait time, and the slight chemical taste that some people find unpleasant. Iodine is still used in some circles but is falling out of favor for long-term use.
Household bleach (plain, unscented) can be used in a pinch: 2 drops per quart of clear water, 4 drops per quart of cloudy water, wait 30 minutes. This is a true emergency backup, not a daily method.
Boiling
Boiling is the most reliable method but the most fuel-intensive. Bringing water to a rolling boil for 1 minute (3 minutes above 6500 feet) kills all pathogens. The downside is that you need a stove, fuel, a pot, and 5 to 10 minutes per liter. It is impractical as a primary method but useful as a backup when your filter fails.
On bikepacking trips with a hot meal every night, boiling is essentially free. You are already heating water for dinner, so you can set aside a liter to boil for the next morning. Many riders do this on routes with questionable water sources.
Which Method Is Best for Bikepacking?
For most North American bikepacking routes, a Sawyer Squeeze plus Aquatabs as a backup is the gold standard. The Sawyer handles 95% of your water, the Aquatabs handle the rest, and together they weigh about 4 ounces total. This is the setup I have used on every multi-day route for the last 5 years.
For desert routes where water sources may be silty or for international trips where viruses are a concern, add a SteriPen. For routes where you will be camping near a town sewage outflow (rare, but it happens), rely on chemical treatment only.
Planning Resupply Distances and Mail Drops
Resupply is not just about water. Food, snacks, electrolytes, and any consumables you cannot easily buy in small towns need to be planned too. The two main strategies are town stops and mail drops.
How to Space Water Stops on a Multi-Day Route
On a multi-day route, water sources are the constraint that determines your mileage. Most riders plan a 50 to 70 mile day with one or two refills, then camp near the next reliable source. The exact pattern depends on terrain, weather, and resupply availability.
Start by listing every known water source along your route in order, with the distance between them. Then add town stops, campgrounds, and any other potential refill points. The result is a chain of refills that you string together into days.
Look for the longest gap in the chain. That is your hardest day, and it deserves extra planning. Consider shortening it, finding an intermediate source, or planning a water cache.
Gas Station and Convenience Store Strategy
Small-town gas stations are the unsung heroes of bikepacking resupply. You can refill water, buy snacks, charge your phone, and get out of the weather in 20 minutes. Most stations have a sink or hose outside for filling bottles.
When I plan a route, I try to end each day within 10 miles of a town with at least one 24-hour gas station. The camp spot is usually a public park, a church yard, or a dispersed camping area just outside town. This gives me a reliable resupply every day and a backup if conditions turn bad.
The downside of relying on gas stations is that they are not always bikepacker-friendly. Some have signs saying “no loitering” or “customers only.” Be respectful, buy something, refill your bottles, and move on. A $2 Gatorade and a friendly attitude go a long way.
Mail Drops for Remote Routes
For routes with long gaps between towns, mail drops can be a lifesaver. You package food, water filter cartridges, spare tubes, and any other supplies in a box, ship it to a post office or general store along your route, and pick it up a few days later.
The Adventure Cycling Association and many route-specific communities maintain lists of mail drop friendly businesses. General stores in tiny towns often hold boxes for a small fee, and post offices in even the smallest hamlets will hold general delivery packages for 30 days.
Mail drops are most useful for the longest, most remote sections of a route. On the Great Divide, riders ship food and supplies to towns like Lincoln, Montana, and Salida, Colorado, where the next reliable resupply is 80 to 100 miles away. The drops break the route into manageable chunks and let you carry less weight.
Water Caching for Desert Routes
Water caching is the practice of dropping off water in advance at a known point along your route. It is only practical for routes that you can drive to with supplies, but for repeat desert routes it is essential. Riders doing the Baja Divide, for example, often cache 5 to 10 gallons of water at springs that dry up by the time they reach them.
Caching is not just for desert routes. In the Northeast during summer drought, I have cached water at road crossings where I knew the streams would be dry. The caches were nothing fancy, just a couple of gallon jugs hidden in the woods with a note and a GPS pin.
If you do cache water, mark the location precisely, use food-grade containers, and check the legality. Many public lands prohibit leaving caches longer than a few days. National Park Service lands, wilderness areas, and some state parks do not allow caching at all.
How to Read the Landscape: A Quick-Reference Checklist
Use this checklist when you are scouting a new route or when your water plan needs adjustment mid-trip.
- Check the topo map for blue lines (streams) and blue shapes (lakes/ponds) within 5 miles of your route
- Toggle the OSM Cycle layer in your mapping app and click every drinking water icon
- Look for the “V” pattern in contour lines, which often marks a stream channel
- Identify green vegetation patches in dry country, which usually indicate groundwater
- Note animal trails in dry country and follow them downhill toward water
- Mark every gas station, campground, and small town along your route as a potential refill
- Calculate the longest gap between known sources and confirm you can carry enough water for that stretch
- Call the local ranger district for current conditions on springs, faucets, and seasonal closures
- Check FarOut or route-specific Facebook groups for recent rider reports
- Always carry a backup treatment method (Aquatabs or SteriPen) in case your filter fails or sources are silty
Common Mistakes to Avoid in Water Resupply Planning
Most bikepacking water problems come from a handful of recurring mistakes. Our team has made all of them at some point, and we still see new riders fall into the same traps.
Trusting the Map Blindly
Maps show where water was, not where water is. Streams dry up, springs get contaminated, campground spigots get shut off for the season. Always cross-reference at least two sources of information before counting on a water point.
Underestimating Heat and Climbing
Your water consumption doubles or triples in heat and on sustained climbs. A route that looks fine at 65 degrees can be brutal at 90. Always plan for the worst-case temperature on your trip dates, not the average.
Forgetting to Filter
You will eventually be tempted to drink from a “clearly clean” stream without filtering. Do not do it. The water may look pristine and still carry giardia, cryptosporidium, or other pathogens. The one time you skip filtering will be the one time you get sick.
Not Carrying a Backup Treatment
Filters clog. UV pens lose battery. Chemical tablets get left at home. Always carry at least one backup method, and ideally two. The day your filter freezes or clogs is the day you will be glad you have Aquatabs in your frame bag.
Refusing to Ask for Help
Asking a local for water is not a sign of weakness. It is good planning. Most people are happy to help a cyclist, and the worst that can happen is they say no. The downside of not asking can be a long, hot, dehydrated ride to the next planned source.
Frequently Asked Questions About Bikepacking Water and Resupply
How do I find water if my bikepacking route is not in towns?
Finding water outside of towns on a bikepacking route requires three main strategies. First, use topo maps and the OpenStreetMap water layer in apps like Gaia GPS or RideWithGPS to mark every stream, spring, and lake within a few miles of your route. Second, look for human-made sources like campground spigots, trailhead faucets, and gas station hose bibs. Third, ask locals at cafes, gas stations, and small stores for the closest reliable water. Carry enough capacity to bridge the longest gap between sources, and always have a backup treatment method.
How much water should I carry on a bikepacking trip?
Most experienced bikepackers aim for 3 to 5 liters of carrying capacity for a normal day, and up to 10 liters for long remote stretches. The exact amount depends on the longest gap between sources, the temperature, and your bike setup. A good rule is 1 liter per hour of riding in moderate conditions and 1.5 liters per hour in hot or dry weather. Always add a 1 liter safety buffer in case a planned source is dry.
What is the best water filter for bikepacking?
The Sawyer Squeeze is the most popular bikepacking water filter because it is reliable, fast, and easy to use. The Katadyn BeFree and Platypus QuickDraw are also excellent and slightly faster, though their filters have shorter lifespans. All three handle bacteria and protozoa, which covers most North American waterborne pathogens. For international trips or routes with potential viral contamination, pair your filter with Aquatabs or a SteriPen as a backup.
What is the best route planner for bikepacking water planning?
RideWithGPS is the best overall route planner for bikepacking because it has a built-in water POI layer, easy GPX export, and offline navigation. Gaia GPS is the best tool for serious backcountry water planning with detailed OSM, USGS, and satellite layers. For long-distance routes like the Great Divide or the Arizona Trail, FarOut provides crowd-sourced water comments that are usually no more than a few weeks old. Most experienced riders use two or three of these tools together.
How do I plan bikepacking routes around water sources?
Start by mapping every known water source along your intended route using topo maps and the OSM water layer. Then calculate the distance between sources and look for the longest gap. Plan your daily mileage to end at or near a reliable source, and adjust the route to pass through gas stations, campgrounds, or small towns that offer refill opportunities. For gaps longer than you can comfortably carry, plan to camp at one end of the gap and start the next day with full bottles, or consider a water cache or mail drop.
What should I not forget when bikepacking for water and resupply?
Do not forget a backup water treatment method (Aquatabs, SteriPen, or bleach), a reliable water filter, bottles and storage bags to match your bike setup, electrolyte tablets or mix, a way to dry wet gear, and a small towel for drying bottles before refilling. Also pack a printed or downloaded map of your route with water sources marked, and a phone charger or power bank so you can re-check conditions if your plans change mid-trip.
Final Thoughts on Planning Water and Resupply Points on a Bikepacking Route
Learning how to find water and resupply points on a bikepacking route is the difference between a trip that flows and one that grinds to a halt. The system is straightforward once you build the habit: map every source in advance, carry enough capacity to bridge the longest gap, treat the water before drinking, and stay flexible when conditions change.
Start with your next route, even if it is just an overnighter. Pull up RideWithGPS or Gaia GPS, toggle the water layer, and mark every source within 10 miles of your planned line. Measure the longest gap. Check the weather forecast. Plan your daily mileage around the refill points. You will be surprised how much easier the ride becomes once water is no longer a question mark.
Every bikepacker I know has a story about a water mistake. The good ones are funny in retrospect. The bad ones end trips or send people to the hospital. Take the time to plan now, and your only surprise on the route will be how good the water tastes at the top of that climb.
1 thought on “How to Find Water and Resupply Points on a Bikepacking Route (September 2026) Guide”