
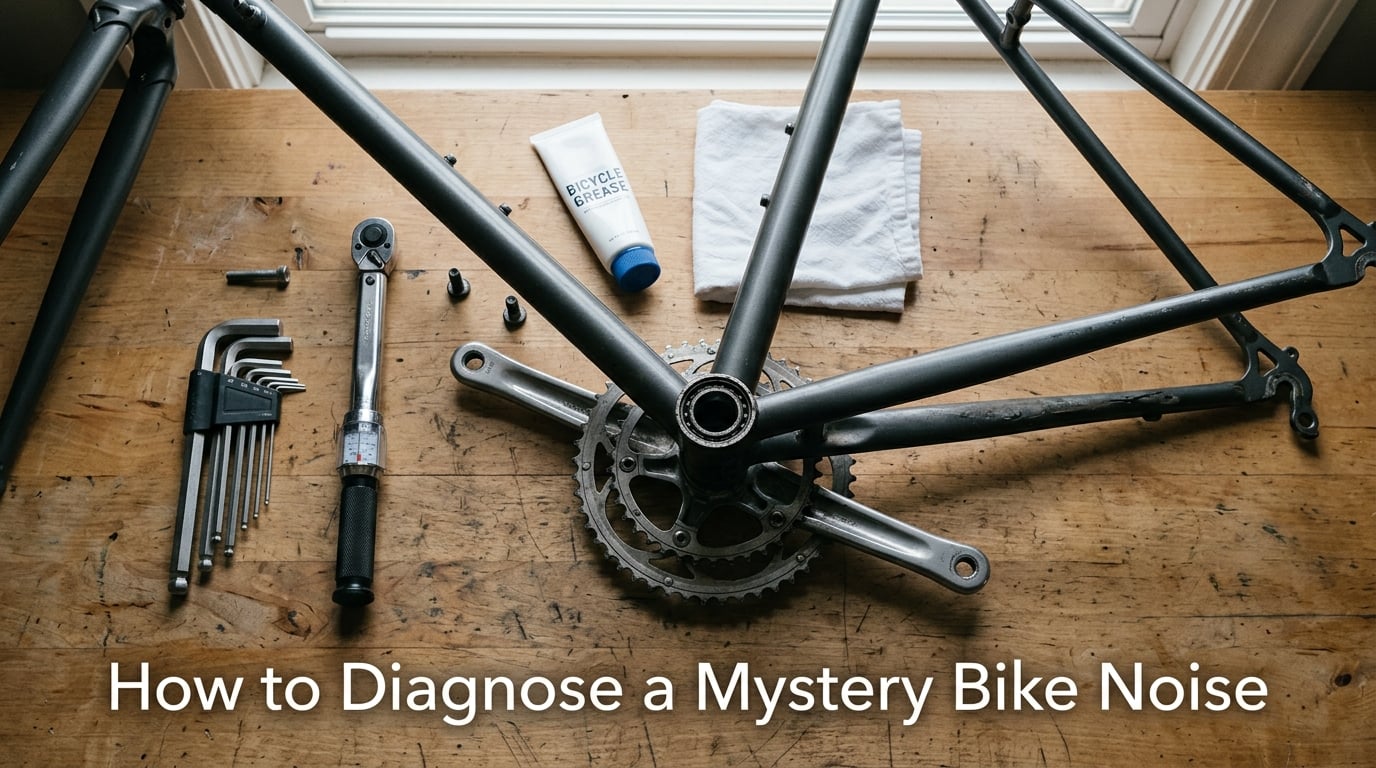
Every cyclist has been there. You’re pedaling along, minding your own business, and a strange new sound shows up. A creak. A click. A pop that wasn’t there yesterday. Before you start pulling the bike apart piece by piece, take a breath. There is a smarter way to figure out what’s going on.
Learning how to diagnose a mystery bike noise comes down to two questions: when does it happen, and where on the bike does it seem to come from. Answer those two, and you’ll narrow down the culprit faster than most home mechanics ever managed. I’ve spent more evenings chasing phantom creaks than I care to admit, and the timing method is the only one that has consistently worked for me.
In this guide, I’ll walk you through the same diagnostic framework professional mechanics use. You’ll learn how to listen for the pattern of a noise, match it to a specific bike component, and fix the most common offenders. We will also cover the warning signs that mean you should stop riding and head straight to a shop.
Table of Contents
Why Mystery Bike Noises Matter (Beyond the Annoyance)
A new noise on your bike is rarely just a quirk. It is information. It might be a cheap fix like a loose bottle cage bolt, but it can also be the early warning of a worn bearing, a stretched chain, or even a hairline crack in your frame.
I learned this the hard way on a long climb a few summers back. My road bike started ticking once per pedal stroke, and I assumed it was a chain issue. After three months of ignoring it, the noise turned into a rhythmic thump and my bottom bracket failed mid-ride. The cartridge bearing had been dry for thousands of miles. A $15 replacement earlier would have saved me a long walk home.
Most bike noises follow a pattern. That pattern is your biggest clue. If you can identify whether the noise happens once per wheel revolution, once per pedal revolution, or only when you stand up and push hard, you have just eliminated about 80% of the bike as a suspect.
The other reason to take noise diagnosis seriously: safety. A creaking bottom bracket is annoying. A creaking head tube is a structural concern. Knowing the difference can prevent a crash.
The Core Diagnostic Method: Timing is Everything
Before you touch a single tool, ride the bike. Find a quiet street or empty parking lot, and pay attention to the noise as it happens. The single most useful question you can ask is: does this noise happen at a regular interval, and if so, how does that interval line up with the bike’s moving parts?
Your bike has three main rotating systems: the wheels, the pedals and crankset, and the chain. Most noises will repeat at a rate that ties directly to one of these.
The Three Timing Patterns to Listen For
Once per wheel revolution means the noise happens every time a particular point on your wheel comes around. This points to wheel-related issues: hub bearings, spokes, tire, valve stem, rim tape, or something stuck to the tire.
Once per pedal revolution means the noise lines up with one specific spot in your pedaling stroke. This almost always points to the crankset, bottom bracket, pedals, or cleats.
Once per chain revolution means the noise happens as the chain travels through a particular part of its loop. This points to a stiff chain link, a chainring tooth issue, derailleur pulleys, or cassette.
If the noise is not rhythmic at all, you are dealing with something else. It could be a loose accessory, a seatpost, the saddle, the handlebar, or even a frame issue. We will cover those cases too.
Test Rides: Your Best Diagnostic Tool
Do at least three short test rides. Try one at slow speed on a flat road, one at higher speed on a flat, and one on a climb while standing. Different noises appear under different conditions. A bottom bracket creak often only shows up under load. A spoke rub might vanish when you stand.
Write down what you observe. Note the cadence, the terrain, and whether you are seated or standing. I keep a small notes app entry for every new noise on my bikes. The pattern usually emerges within a few rides.
Noises Grouped by Timing: What to Check First
Once you know the pattern, you can start checking components. Below is the order I follow when working through a mystery noise. Start at the top of the list for your timing pattern and work down.
Noise Once Per Wheel Revolution
If the noise repeats as the wheel goes around, the problem is on the wheel itself. Lift the bike and spin each wheel by hand. Listen for grinding, rubbing, or ticking. A noisy hub bearing will feel rough or gritty, not smooth.
Check the following in order:
- Spokes rubbing. A loose spoke can rub against an adjacent spoke. This often only happens when your weight is on the bike, not when you spin the wheel in the air. Squeeze pairs of spokes together with your hand and listen for a change.
- Valve stem ticking. Sometimes the valve or a reflector hits the rim tape. Wrap a small piece of tape around the contact point.
- Tire debris. A small stone or piece of glass embedded in the tread will click as it meets the road. Inspect and remove.
- Rim tape and rim joint. If you have a tubeless or hookless setup, the rim tape can shift and expose a spoke hole. Listen for an air hiss combined with the ticking.
- Hub bearings. Hold the axle and try to rock the wheel side to side. Any movement means the bearings need service or replacement.
One reddit user on r/bikewrench chased a wheel-related ticking for weeks. It turned out to be a stray piece of metal from a tubeless repair kit stuck under the rim tape. Sometimes the answer is embarrassingly simple.
Noise Once Per Pedal Revolution
Pedal-revolution noises are the most common type of mystery creak. The sound usually points to the bottom bracket, crankset, or pedals, but here is the catch: the human ear is bad at locating low-frequency sounds, and a creak in your bottom bracket might actually be coming from your seatpost, handlebar, or even a bottle cage.
Start by isolating the noise:
- Remove the pedals and ride the bike. If the noise disappears, it was a pedal or cleat issue. If not, continue.
- Pull the chain off the chainring and pedal by hand. If the noise happens with no chain involved, it is the bottom bracket or crank.
- Stand vs sit. If the noise only happens when you stand, suspect the seatpost, saddle rails, or the bottom bracket under high load.
Common causes for pedal-revolution noises include dry bottom bracket bearings, loose crank bolts, a worn pedal spindle, a contaminated cleat interface, or a creaking saddle. We will work through each in the component section below.
Noise Once Per Chain Revolution
A noise that happens as a specific chain link passes through the drivetrain is rare but very satisfying to find. Stand beside the bike, shift into a middle gear, and watch the chain while turning the cranks slowly. Look for a link that does not flex smoothly.
Stiff chain links can be flexed by hand to free them up, but if the chain is old, the entire chain likely needs replacement. A chain that has stretched beyond 0.5% should be replaced immediately to avoid wearing out the cassette and chainrings.
Other chain-revolution culprits include a damaged cassette tooth, a bent derailleur hanger, or worn derailleur jockey wheel bearings. The latter is a common cause of high-pitched squealing on mountain bikes.
Noise Only When Pedaling Hard or Under Load
This is the trickiest category. Many noises only appear when you stand up and push hard on the pedals, especially on climbs. Under load, the frame and components flex slightly, and that flex can reveal creaks that are silent at lower power.
Top suspects in this case:
- Bottom bracket. The number one cause of load-induced creaks. Press-fit BBs are notorious for developing creaks as the cups move slightly in the frame shell.
- Seatpost. A seatpost that is not greased (for metal posts) or not properly clamped can creak loudly under load.
- Derailleur hanger. A loose or improperly tightened hanger can creak under load, and the sound travels through the frame to sound like a bottom bracket issue.
- Crank spindle interface. Some cranks need a specific preload setting on the bottom bracket. Too loose, and they creak. Too tight, and they bind.
One mountain biker on Reddit chased a load-only creak for over a year. His local shop rebuilt the bottom bracket twice. The actual culprit turned out to be a loose bottle cage bolt on the down tube. Sound travels through aluminum frames in surprising ways.
Component-by-Component Troubleshooting Guide
Once you have identified the timing pattern, the next step is to inspect the suspect components. This section walks through each common noise source with specific checks you can run at home.
Bottom Bracket and Crankset Noises
The bottom bracket is the most common source of creaking on modern bikes, especially press-fit designs. Symptoms include creaking under load, creaking when pedaling out of the saddle, and a rough or gritty feeling when spinning the cranks with the chain removed.
To diagnose a bottom bracket issue, remove the chain from the chainring and turn the cranks by hand. If you feel any roughness, catching, or play in the bearings, the BB needs service. With a press-fit BB, you can often silence a creak by removing the cups, cleaning the frame shell, applying a thin layer of carbon assembly paste (or grease for metal interfaces), and reinstalling with proper torque.
For threaded bottom brackets, check that the cups are tight. Most require a bottom bracket tool and 35-50 Nm of torque. Do not over-tighten, as this accelerates bearing wear.
Crank bolts are another common culprit. The bolts that hold the crank arms to the spindle should be torqued to manufacturer spec. Common values are 35-50 Nm. Re-check them every few months.
Pedal and Cleat Noises
Pedals can creak from a worn bearing, a dry spindle interface, or a contaminated cleat engagement system. To isolate pedal noise, simply remove the pedals, swap them side to side, and ride. If the noise moves to the other leg, you have confirmed it is the pedal.
Clipless pedals can also creak at the cleat-to-pedal interface. Clean the cleats with a dry brush, then apply a small amount of dry lubricant to the engagement mechanism. Avoid wet lubes here, as they attract dirt.
If you ride flat pedals, check the platform pins. Loose pins can rattle annoyingly. Most pedal pins thread in with a small hex key and a drop of thread locker.
Saddle and Seatpost Noises
A creaking saddle is one of the most distracting noises on a bike. The source is almost always one of three places: the saddle rails to clamp interface, the seatpost to frame interface, or the saddle shell to rail junction.
To diagnose, remove the seatpost, clean it thoroughly, apply a thin layer of grease (for metal posts) or carbon paste (for carbon posts in metal or carbon frames), and reinstall with proper torque. Most seatpost clamps need 5-7 Nm.
If the noise persists, drop the saddle lower in the seatpost and ride. If the noise disappears, it is the saddle rail interface. A small amount of grease or carbon paste at the saddle clamp will usually silence it.
Headset Noises
Headset noises usually present as clicks or clunks when you pull on the front brake and rock the bike forward and back. To check, stand over the bike, squeeze the front brake, and rock the bike forward and back. Any clunking means the headset has play.
To fix, loosen the stem bolts, snug the top cap to remove play (but not so tight that steering binds), then re-torque the stem bolts. Most headsets need 4-6 Nm on the stem and 2-3 Nm on the top cap.
Creaking that happens only when turning the handlebars, especially when stationary and weighting the bars, is also a headset symptom. The crown race or compression ring may need grease. Service intervals for headsets are long, but the bearings do wear out.
Wheel, Hub, and Spoke Noises
Wheel-related noises can be tricky because they often only happen under load. Lifting the bike and spinning the wheel tells you about the free-spinning condition, but it does not replicate rider weight on the rear triangle.
Common wheel-related noises include:
- Hub bearing grinding. Lift the wheel and spin it. Smooth and silent is good. Any roughness or grinding means service. Cup-and-cone hubs can be adjusted with cone wrenches. Sealed bearing hubs need new bearings or a new hub.
- Spoke rub. Loose spokes can rub against adjacent ones. Squeeze pairs of spokes together and listen for a change. Use a spoke wrench to true the wheel and bring all spokes to even tension.
- Through-axle noise. Many modern bikes use through-axles, and the axle seats in the frame can develop creaks. Remove the axle, clean the contact surfaces, apply a thin layer of grease, and reinstall to factory torque.
- Freehub body. Pawls inside the freehub can click, but a failing freehub often ratchets roughly or skips under load.
Brake-Related Noises
Brake noises are usually easy to diagnose because they happen only when you apply the brakes. Squealing disc brakes often indicate contaminated pads or rotors. Cleaning with isopropyl alcohol and a clean rag will fix this in many cases. If not, the pads may need replacement.
Hydraulic disc brakes that feel spongy or that have the lever bottoming out need a bleed. This is a job most home mechanics can do with a basic bleed kit.
Rim brakes can squeal if the pads are glazed, misaligned, or contaminated. Lightly sand the pads with fine sandpaper and toe them in so the leading edge contacts the rim slightly ahead of the trailing edge.
If the noise only happens when braking and feels like a creak rather than a squeal, check the mounting bolts. Loose caliper bolts can creak as the caliper flexes under braking force.
Handlebar and Stem Noises
Handlebar and stem noises often present as creaks when you push hard on the bars, such as when climbing out of the saddle. To diagnose, loosen and re-torque the stem faceplate bolts, the stem to steerer clamp, and the handlebar to stem clamp.
Most stems need 4-6 Nm on the faceplate and 5-7 Nm on the steerer clamp. Carbon bars and stems often have lower torque values, so check the manufacturer’s spec.
Bar tape wrap can also creak. Re-wrap with fresh tape, paying attention to the direction of wrap (always wrap from the bar ends toward the stem for road bars).
Suspension fork stanchions can also transmit creaks. A dry or dirty upper tube will creak as it flexes. Clean and apply a thin layer of fork lube to the upper tubes and dust wipers.
The Pre-Ride Inspection: A 60-Second Noise Audit
Once you have identified and fixed your noise, a quick pre-ride habit can catch new noises early. I do this audit before every ride, and it takes about 60 seconds.
- Lift the front wheel and rock it side to side. No play means headset is good.
- Squeeze the front brake and rock the bike forward and back. No clunking means headset preload is correct.
- Lift the rear wheel and check for play in the rear axle. No play means hub bearings are good.
- Push the crank arms sideways toward the frame and away. No play means cranks are tight.
- Bounce the bike on the ground and listen for rattles. Any rattle needs investigation.
- Squeeze both brake levers. Firm feel means brakes are good. Spongy means bleed needed.
If you want a deeper walkthrough of what to bring on a ride for emergency repairs, see our guide on emergency repair kit essentials for cyclists. It pairs well with the diagnostic method above.
Safety First: When to Stop Riding and See a Pro
Some noises are warnings that demand immediate attention. Never ride a bike that is making any of the following sounds:
- A loud cracking or popping sound under load, especially from the frame, fork, or handlebar. This can indicate a frame crack, a broken handlebar, or a fork failure. Stop riding immediately.
- A sudden, sharp clunk from the rear triangle, especially if it happens once and then gets worse. This can be a broken spoke, a loose axle, or a derailleur hanger failure.
- Grinding or rumbling from a wheel that gets louder under load. A seizing hub bearing can lock the wheel suddenly.
- Steering that feels loose, notchy, or has play. This is a headset or fork issue that can cause a crash.
If you have chased a creak through every component on this list and still cannot find it, take the bike to a shop. A good mechanic will spend 30 minutes on a test ride and usually find the source. There is no shame in asking for help, especially when the alternative is a crash or a long walk home.
Putting It All Together: Your Diagnostic Workflow
To summarize, here is the workflow I follow whenever a new noise shows up on one of my bikes. Print this out and tape it to your work stand if you need to.
Step 1: Identify the timing pattern. Ride the bike, listen, and determine if the noise is per wheel revolution, per pedal revolution, per chain revolution, or non-rhythmic.
Step 2: Locate the source. Use the timing pattern to narrow down the suspect components. Section by section, work through the most likely causes.
Step 3: Check the simple stuff first. Loose bolts, dry bearings, and missing lubrication cause most mystery noises. Pull out the torque wrench and the grease before you start replacing parts.
Step 4: Isolate by elimination. Remove the chain, remove the pedals, remove the seatpost. Whatever the noise survives, that is your suspect system.
Step 5: Document and re-test. Make notes, fix one thing at a time, and re-ride after each change. A noise diary sounds obsessive, but it is the fastest path to a quiet bike.
With these tools and a systematic approach, you can diagnose nearly any mystery bike noise at home. Start with the timing pattern, work through the components in order, and don’t be afraid to ask for help when the noise is elusive. Your bike will thank you, your rides will be quieter, and you will spend less time chasing ghosts and more time riding.
FAQ’s
How do I tell if my bicycle crank bearings are bad?
Lift the bike so the cranks can spin freely. Turn the cranks backward and feel for roughness, grinding, or play. A healthy crank spins smoothly with no resistance. If the bottom bracket bearings are worn, you will feel a gritty or notchy sensation. You may also see play when you pull the crank arm side to side away from the frame. Either symptom means the bottom bracket needs service or replacement.
Why does my bike creak when I pedal hard?
A creak that only appears under load is almost always one of three things: the bottom bracket bearings, the seatpost, or the derailleur hanger. Press-fit bottom brackets are the most common source. To confirm, remove the chain from the chainring and pedal hard. If the creak happens with no chain load, the bottom bracket is the suspect. If not, suspect the seatpost or hanger. Apply grease or carbon paste at the interfaces and re-torque to spec.
How can I tell if my bicycle wheel bearings are bad?
Lift the wheel off the ground and spin it. A healthy hub spins smoothly and quietly for many seconds before stopping. Worn bearings feel rough, gritty, or notchy. Also grab the rim and try to rock it side to side against the axle. Any movement means the bearings have play. Cup-and-cone hubs can be adjusted; sealed bearing hubs usually need new bearings or a complete hub replacement.
Why is my bike making weird sounds even when I am not pedaling?
Noises that happen while coasting usually come from the wheels, tires, or accessories. The most common causes are: a tire clicking on the rim, a spoke rubbing an adjacent spoke, a loose bottle cage bolt, a fender rubbing the tire, or a chain slapping the chainstay. Check each item methodically. Lifting the bike and spinning the wheel usually reveals wheel-related causes. Noises that only happen under rider weight often point to the seatpost or through-axle interfaces.
What makes a groaning noise on a bike?
A low groaning noise that gets louder under load often points to a bearing issue. Bottom bracket, headset, hub, or pedal bearings can all produce a groaning sound as they wear. A groaning noise that happens when you turn the handlebars, especially while stationary, usually means the headset bearings need service. A groaning noise that happens only under hard pedaling is most often a dry or worn bottom bracket. Inspect each bearing system in turn and service or replace as needed.