
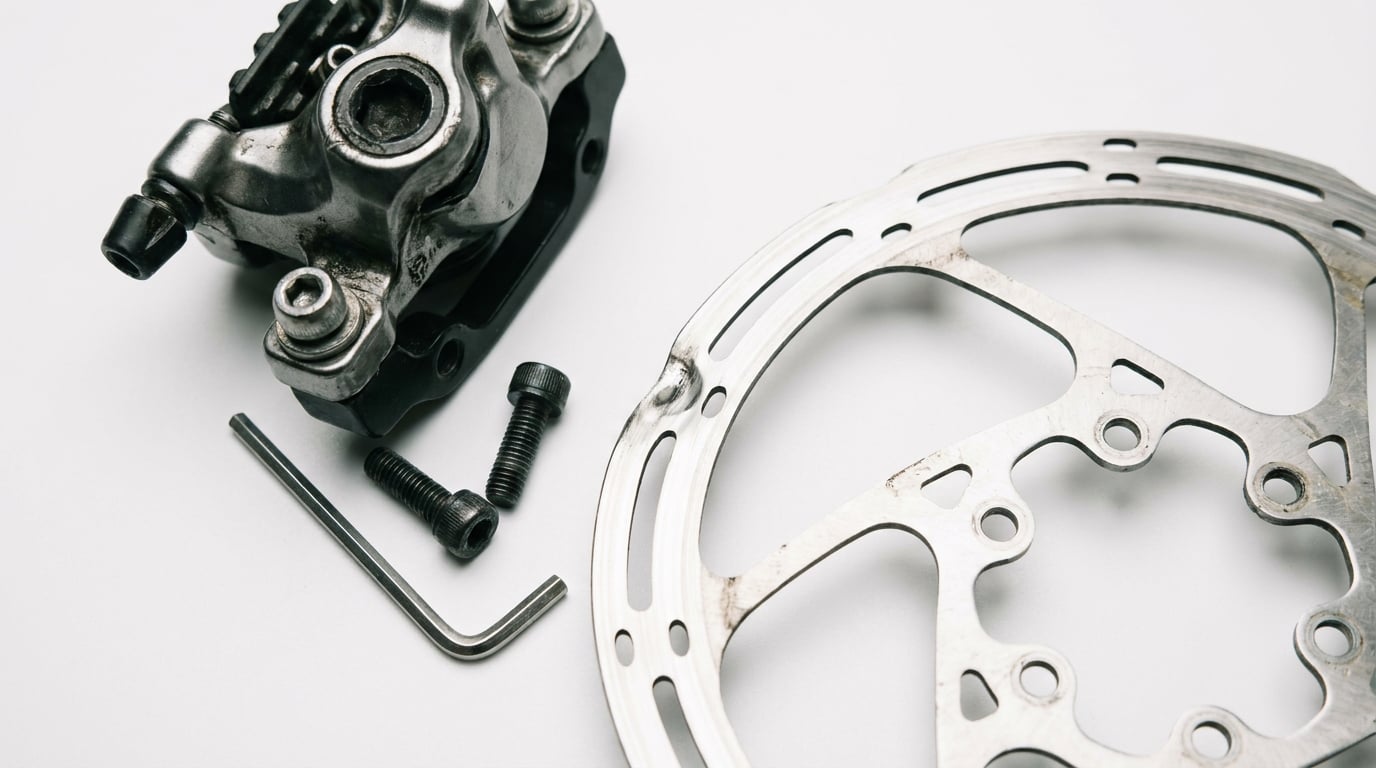
If your brake rubs at one specific point per wheel rotation, the rotor is bent. If it rubs constantly throughout the entire rotation, the caliper is misaligned. That single distinction answers the question “bent rotor or misaligned caliper: how to tell the difference” for most riders in under a minute, and it tells you exactly which component to fix first.
I learned this the hard way on a 2022 GT Aggressor years ago. I realigned the caliper three times before realizing the rub was tied to a single spot on the rotor, not the whole disc. Once I switched to diagnosing the symptom before touching the bolts, the fix took about ten minutes. This guide walks through the same approach our team uses on every bike we service.
Below you’ll find a quick diagnosis table, a detailed spin test, step-by-step fixes for both the caliper and the rotor, and answers to the most common follow-up questions riders ask in forums and on r/bikewrench.
Table of Contents
Quick Diagnosis: Bent Rotor vs Misaligned Caliper
The fastest way to tell the difference between a bent rotor and a misaligned caliper is to spin the wheel slowly and watch the gap between the rotor and each pad. A bent rotor creates a rhythm – the gap opens, closes, then repeats once per revolution. A misaligned caliper creates a constant uneven gap on one side that does not change as the wheel turns.
| Symptom | Likely Cause | First Fix to Try |
|---|---|---|
| Rub at one spot per rotation, rhythmic thump-thump | Bent rotor (rotor runout at one point) | Truing fork or adjustable wrench on the bent spot |
| Constant rub throughout rotation, gap visibly tighter on one side | Misaligned caliper (off-center over the rotor) | Lever-squeeze centering method |
| Rub appeared right after wheel removal or install | Wheel not seated in dropouts, or caliper bolts loose | Re-seat wheel, re-tension caliper bolts |
| Rub recurs weeks after straightening | Hub bearing play, misaligned dropouts, or sticky piston | Check hub bearings and dropout alignment |
| Squealing under braking but no rub at rest | Contaminated or glazed pads, not a rotor/caliper issue | Clean or replace pads |
If the symptom is rhythmic, the answer is “bent rotor.” If the symptom is constant and sided, the answer is “misaligned caliper.” If the symptom is something else on the table, jump to the section that matches it. Most riders who think they have a bent rotor or misaligned caliper are actually dealing with one of those secondary issues.
Why Disc Brakes Rub: The Basic Physics
A disc brake works because the rotor passes between two brake pads with a small, even gap on each side, usually 0.2 to 0.4 mm per side. When the lever is pulled, hydraulic fluid or cable tension pushes the pads inward until they clamp the rotor. Any situation that brings the rotor closer to one pad than the other will cause rubbing, drag, or noise.
A bent rotor changes the distance between the rotor and the pads once per rotation, because the bent section swings through the caliper opening. A misaligned caliper changes the distance for the entire rotation, because the caliper body sits too close to one side of the rotor.
Both conditions can look and sound similar at first. The pattern of the rub – rhythmic versus constant – is what separates them.
How to Tell If Your Rotor Is Bent
A bent rotor causes an intermittent rub at one specific point per wheel rotation. Spin the wheel and listen for a rhythmic scrape that comes around once each revolution, like a clock tick. The bent section is the part of the rotor that swings through the caliper opening too closely on each turn.
The Spinning Test
- Loosen the caliper mounting bolts just enough that the caliper can slide side-to-side.
- Loosen the brake lever so there is zero cable tension or hydraulic pressure.
- Spin the wheel slowly and watch the gap between the rotor and each pad.
- Mark the spot where the gap visibly closes by sighting from above the caliper.
- Rotate the wheel and confirm the gap closes at the same spot every full turn.
If the close point moves with the wheel, the rotor is bent. If the close point stays in the same position relative to the frame regardless of wheel position, the caliper is the problem.
The Cable Tie Trick
If you cannot see the wobble by eye, slide a plastic cable tie or a thin business card between the rotor and one pad. Spin the wheel. A bent section will push the tie or card aside as it passes through. This is the same diagnostic method Park Tool and r/bikewrench users recommend when the bend is too small to see clearly.
Visual Signs on the Rotor
Look at the rotor edge against a straight reference like the fork or a ruler. A bent rotor will show a visible high spot where the disc deviates from a flat plane. Hold the rotor up to a light source and look for shadow gaps along the braking surface. A true rotor shows an even shadow line all the way around.
How to Tell If Your Caliper Is Misaligned
A misaligned caliper causes constant rub throughout the entire wheel rotation because the caliper body sits too close to one side of the rotor. Spin the wheel and the rub does not stop at any point – it just keeps going. The pad gap on one side of the rotor is visibly smaller than the other.
Visual Pad Gap Check
Squat next to the bike and look straight down through the caliper opening. You should see an even sliver of daylight on each side of the rotor. If the daylight is wider on the left than the right, the caliper is shifted off-center. The pads are still centered, but the caliper body is not, and that misalignment is what’s causing the rub.
When the Rub Appeared Matters
Calipers drift out of alignment most often right after wheel removal, transport in a car, or a crash. If the rub started the moment you reinstalled the wheel, the caliper is almost certainly the problem. Loosen the caliper bolts, recenter, and the rub should disappear before you touch the rotor.
Other Causes That Mimic a Bent Rotor or Misaligned Caliper
About 30% of bikes that come in with “brake rub” actually have a different problem. Ruling these out first saves you from truing a rotor that did not need it.
Wheel Not Seated in the Dropouts
A wheel that is even 2 mm out of position will throw off the rotor’s path through the caliper. Lift the bike, squeeze the rear derailleur hanger or axle, and make sure the wheel is fully seated in the dropouts. Tighten quick-release skewers or thru-axles to spec. Recheck the rub before touching the caliper.
Hub Bearing Play
Grab the wheel at the rim and try to rock it side-to-side. Any looseness or clicking from the hub means the bearings have play, and the rotor will wobble through the caliper as a result. A bent rotor is rigid and predictable. Hub play is sloppy and gets worse over time.
Sticky Pistons
On hydraulic disc brakes, a piston that does not retract fully will keep one pad pushed against the rotor. The rub is constant, the symptom looks like a misaligned caliper, but the fix is bleeding or rebuilding the caliper, not centering it. Press the brake lever several times with the wheel out and watch whether the pistons retract equally.
Contaminated or Glazed Pads
Pads contaminated with oil, chain lube, or brake fluid will squeal and drag even when everything else is aligned. Sand the pad surface lightly with 120-grit sandpaper or replace the pads. This is a separate problem from rotor or caliper alignment.
Two-Piece Rotor Warning
If your bike has a two-piece rotor (an alloy carrier with a steel braking surface riveted on), do not try to true it. Bending the carrier will crack the rivets. Replace the rotor instead. Most entry-level and mid-range bikes use one-piece rotors, which is what the truing instructions below cover.
Mechanical vs Hydraulic Disc Brakes: How Symptoms Differ
The diagnostic rules above apply to both systems, but the underlying behavior is slightly different. With mechanical disc brakes, the cable pulls a moving pad toward the rotor while a fixed pad stays still. Misalignment usually shows up as a constant rub on one side, and the lever-squeeze centering method works very well.
With hydraulic disc brakes, fluid pressure pushes both pads inward at the same time. A misaligned caliper will show the same constant rub, but the realignment process is identical – loosen the bolts, squeeze the lever, retighten. Hydraulic calipers self-center more reliably because the fluid equalizes pressure across both pistons.
Sticky pistons are far more common on hydraulic systems. Mechanical brakes almost never have sticky pistons, but they can have cable drag, housing compression, or a bent actuation arm that mimics the same symptom.
How to Realign a Misaligned Caliper
The lever-squeeze method is the most reliable way to center a disc brake caliper on any bike. Our team has used this on hundreds of bikes and it works on both mechanical and hydraulic systems.
- Loosen both caliper mounting bolts until the caliper can slide side-to-side freely. Do not remove them.
- Make sure the wheel is fully seated in the dropouts and the quick-release or thru-axle is closed to spec.
- Squeeze the brake lever firmly and hold it. For mechanical brakes, you may need a zip tie around the lever to keep it pinned.
- While holding the lever, retighten the caliper bolts evenly to manufacturer torque (usually 6 to 8 Nm).
- Release the lever and spin the wheel. The rub should be gone or dramatically reduced.
- Repeat once if needed. If the rub is still there, the rotor is bent.
For mechanical disc brakes, you can fine-tune pad position with the cable barrel adjuster at the lever or caliper. Turn it quarter-turns until the lever feels firm and the rotor spins freely.
For a permanent trail fix, our emergency brake repair tools and supplies guide covers what to carry so you can do this roadside.
How to Straighten a Bent Rotor
Once you have confirmed the rotor is the problem, you can true it in place with a simple tool. A rotor truing fork is the cleanest option, but an adjustable crescent wrench or a clean pair of adjustable pliers also works for small bends.
- Remove the wheel from the bike for the cleanest access, though in-bike truing is possible.
- Spin the wheel and identify the high spot where the rotor deviates from a flat plane.
- Place the truing fork or wrench on the bent section, between the rotor and the caliper opening.
- Apply gentle, steady pressure in the direction that will move the bent section back into line. Do not over-bend – small corrections are easier to undo than large ones.
- Spin again, check, repeat. Most small bends take two to three passes to correct.
- Reinstall the wheel and spin. The rhythmic rub should be gone.
Park Tool recommends a dial indicator like the DT-3 for precision truing, which measures rotor runout to within 0.1 mm. For most home mechanics, a truing fork and a careful eye are good enough. The Park Tool business card test – slipping a business card between the pad and rotor, then bending until the card just fits – is a quick visual reference.
When to Replace the Rotor Instead of Truing
A rotor can be trued several times, but there is a hard limit. Most mountain bike rotors start at 2.0 mm thick and have a minimum thickness of 1.5 mm. Road rotors start at 1.8 mm and have a minimum of 1.5 mm. Measure with calipers before and after truing. If a bend is severe enough that straightening would put the rotor below the minimum thickness mark, replace it.
Other signs it is time to replace the rotor rather than true it:
- Visible cracks, especially near the spoke arms or braking surface
- Blue or purple heat discoloration covering more than a third of the braking surface
- Deep grooves worn into the braking surface from contaminated pads
- The same spot keeps bending back within a few rides
If the rotor keeps bending, the problem is not the rotor. Check the dropout alignment, hub bearings, and caliper mount. A misaligned frame mount or worn hub bearing will bend even a brand-new rotor within a few weeks.
Safety Warnings Before You Start
Rotors are sharp enough to cut skin and stay hot for several minutes after heavy braking. Wear gloves when handling a rotor, especially right after a descent. Never touch the braking surface with bare fingers – skin oils contaminate the pads and cause squealing.
Do not spray chain lube anywhere near the rotor or pads. Even a small amount of aerosol drift will contaminate the braking surface and you will be chasing squeal for weeks. Cover the rotor with a rag whenever you are lubing the chain nearby.
When squeezing the lever during caliper centering, point the bike away from your face and body. A stuck piston or air bubble can push the lever with surprising force, and a caliper that shifts unexpectedly can pinch fingers.
Frequently Asked Questions
How to tell if a caliper is misaligned?
Spin the wheel and watch the gap between the rotor and each pad from above. If one side has a consistently smaller gap than the other, and the rub continues throughout the entire rotation without stopping, the caliper is misaligned. Loosen the mounting bolts, squeeze the lever to center the caliper, and retighten while holding the lever.
How to tell if a rotor is bent?
Spin the wheel slowly. A bent rotor creates a rhythmic rub that comes around once per revolution, with the gap visibly opening and closing at one specific point. If you can see or hear the rub moving with the wheel, the rotor is bent. A cable tie slid between the rotor and pad will get pushed aside as the bent section passes.
What is the 30 30 30 rule for brakes?
The 30/30/30 rule refers to a bedding-in process used on automotive disc brakes, not bicycles. It involves 30 stops from 30 mph with 30 seconds of cooling between each stop. For bike disc brakes, follow the pad and rotor manufacturer bedding procedure, which usually involves 10 to 20 progressively harder stops from moderate speed.
How to realign disc brake calipers?
Loosen the caliper mounting bolts until the caliper can slide side-to-side. Squeeze and hold the brake lever to center the caliper over the rotor. While holding the lever, retighten the bolts to manufacturer torque, usually 6 to 8 Nm. Release the lever and spin the wheel – the rub should be gone. This works on both mechanical and hydraulic disc brakes.
How to straighten a bent bike brake rotor?
Use a rotor truing fork, an adjustable wrench, or clean adjustable pliers. Identify the high spot by spinning the wheel, then apply gentle, steady pressure to bend the rotor back into line. Make small corrections – a quarter-bend at a time. Check the rotor thickness with calipers; if straightening would take it below the manufacturer minimum (usually 1.5 mm), replace the rotor instead.
Conclusion
The bent rotor or misaligned caliper question comes down to the rhythm of the rub. Rhythmic once per rotation means a bent rotor – true it with a truing fork or replace it. Constant throughout the rotation means a misaligned caliper – center it with the lever-squeeze method. Anything else on the diagnosis table, like wheel seating, hub play, sticky pistons, or contaminated pads, is a different repair entirely.
Run the spin test first, then fix only the component the test points to. Our team has never needed more than ten minutes and a 4 mm Allen key to clear brake rub once the diagnosis is right. If the rotor keeps bending or the caliper will not stay centered, the underlying cause is usually a worn hub bearing or a misaligned dropout – worth checking before the next ride.