
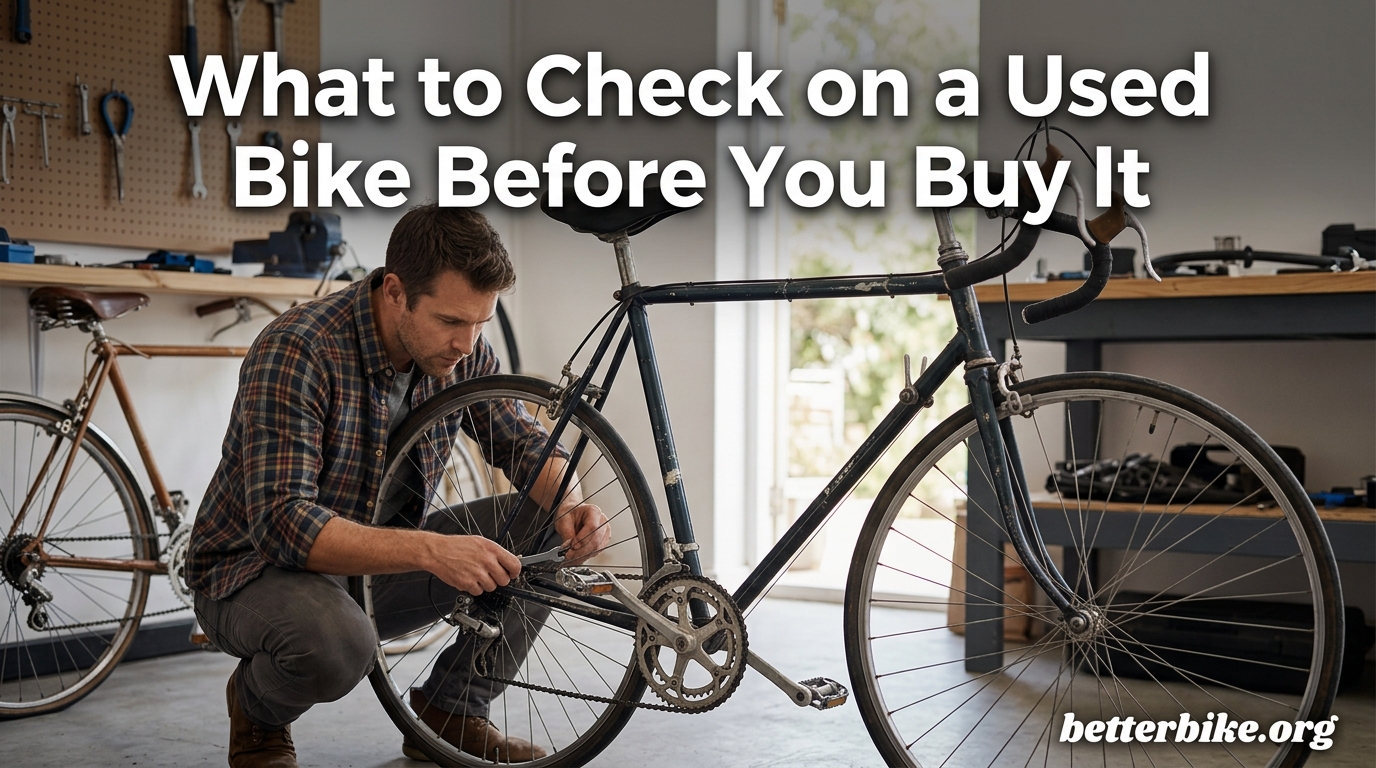
Here’s what to check on a used bike before you buy it: the frame for cracks and dents, the wheels for true alignment and spoke tension, the tyres for wear and age, the drivetrain for chain stretch and shark-tooth cassettes, the brakes for pad life and lever feel, and the headset and bottom bracket bearings for play. You also want to verify the frame number against theft databases, confirm the bike fits your body, and run a real test ride before handing over any money.
I bought my first used road bike for what I thought was a steal, only to find the bottom bracket was shot and the headset had a notch you could feel on every climb. That single mistake cost me a few hundred in parts and a season of frustrating rides. Since then, our team has walked through dozens of private sales and shop second-hand floors. This guide is the checklist we wish we had on day one.
Buying used can save you real money compared to new, but only if you spot the problems before the seller does. In the next 3,700 words I’ll walk you through every component to inspect, the questions that reveal crash history, the tests that take under a minute each, and the negotiation tactics that turn inspection findings into actual price drops.
Table of Contents
Quick Red Flags: Walk Away If You See Any of These
If you spot any of these signs during a quick lookover, walk away and find another bike. They’re cheap to spot and expensive to ignore.
- Seller won’t let you inspect the bike in daylight or at their home address
- Frame number has been filed off, scratched over, or covered with a sticker
- Visible cracks anywhere on the frame, fork, or handlebars
- Suspension fork stanchions scratched, dented, or leaking oil
- Chain skips under pedal pressure, or shifts fail under load
- Brake levers pull all the way to the bar without stopping the wheel
- Wheels rub the frame, fork, or brake pads during a slow spin
- Rust on the inside of the rims or on the seat tube
- Listing photos are clearly stock images or copied from a brand website
- Price is dramatically below market for the model and year
Any one of these is reason enough to keep looking. Two or more and you’re almost certainly looking at a stolen, crashed, or neglected bike. The rest of this guide shows you how to spot the subtler issues that turn a “good deal” into an expensive lesson.
Start With the Frame: How to Check a Used Bike for Cracks and Damage
The frame is the most expensive single component on the bike, and frame damage is the number-one reason to walk away from a used sale. A cracked frame cannot be safely repaired in most cases, and replacing a frame usually means buying a whole new bike.
What to look for on the frame itself
Start by giving the frame a thorough visual inspection in good light. Run your fingers slowly along every tube, paying attention to the welds where tubes meet. You’re looking for cracks, deep dents, paint chips over fresh metal, and any sign of repair or repainting.
Pay special attention to the head tube (where the front of the bike meets the steering), the bottom bracket shell (where the cranks pass through), the dropouts (where the wheels attach), and any suspension pivots on a mountain bike. These are the highest-stress areas and the most likely places for fatigue cracks to appear.
Frame material matters
Steel frames can often survive small dents and even some rust, though they will eventually fail. Aluminium frames don’t rust but show fatigue as cracks rather than dents, and once they crack they fail suddenly. Carbon frames can hide catastrophic damage beneath perfect-looking paint, so any impact on a carbon bike is a serious concern.
How to actually find hidden damage
Use a strong flashlight and sight down the tubes from each end, the same way a wheel is checked for true. Look for any ripple in the paint, any step you can feel with your fingernail, or any sign of buckling. On carbon frames, tap the tubes gently with a coin and listen for a dull thud instead of a clear ring. A dull thud usually means delamination.
Check that the frame is symmetrical. Stand behind the bike and look at the rear triangle from the back. The two seatstays should mirror each other, and the wheel should sit centered in the dropouts. A frame that’s been bent in a crash will often show subtle asymmetry you can spot with practice.
Tip: Bring a small magnifying glass and a strong phone flashlight. They cost nothing and catch hairline cracks your eyes will miss.
Inspect the Wheels: Spokes, Rims, and Truing
Wheels take the brunt of curb strikes, potholes, and crashes, and they’re also the second most expensive component group on the bike after the frame. A bad wheel will make even a perfect bike feel sketchy.
Spin test for trueness
Lift the bike and spin each wheel slowly while watching the rim pass the brake pads (or the frame on a disc brake bike). The rim should pass without rubbing or wobbling side to side. A small amount of movement is normal, but any visible hop or wobble means the wheel needs truing at minimum.
If you can feel a pronounced wobble through the rim while spinning, the wheel is significantly out of true. That’s either a cheap fix (a 15-minute spoke adjustment) or a sign of a more serious impact damage, depending on the cause.
Spoke tension check
Squeeze pairs of spokes between your thumb and forefinger with moderate pressure. They should all feel similar in tension. If any spoke feels notably looser than its neighbours, that spoke has stretched or the nipple has slipped, and the wheel may need rebuilding.
Listen to the wheel too. Pluck a spoke like a guitar string and listen for a clear “ting.” A dull thud means a loose spoke. Repeat this at four or five points around the wheel.
Rim wear on rim brake bikes
If the bike has rim brakes, look at the braking surface of the rim where the pads contact. You’re looking for a smooth concave wear channel. If the brake track is worn past the indicator line or shows deep grooves, the rims need replacing. Worn rims are a safety hazard, especially in wet conditions.
Check the Tyres for Tread Wear, Cracks, and Age
Tyres are consumables, so some wear is normal, but you need to know what you’re inheriting. A new set of quality tyres costs a real chunk of a used bike’s value, so factor that into your offer.
Look at the tread pattern. If it’s nearly gone, plan for replacement. Look at the sidewalls for cracks, bulges, or cuts. Sidewall damage can lead to sudden blowouts, especially under load.
Check the tyre age. Every tyre has a date code stamped on the sidewall, usually a four-digit number like “2624” meaning the 26th week of 2024. Rubber hardens and loses grip after about five years even if the tread looks fine, so old tyres should be replaced.
Spin each wheel and watch for a wobble in the tyre itself. A tyre that hops as it rolls means the wheel is out of true or the tyre is unevenly seated on the rim.
Tip: Press a thumbnail into the tread. If the rubber feels hard and doesn’t compress, the tyres are aged out and need replacement regardless of tread depth.
Test the Drivetrain: Chain, Cassette, and Chainrings
The drivetrain is the wear part most often hidden by a clean-looking bike. A worn chain can chew through a new cassette in a few hundred miles, and a full drivetrain replacement can cost more than a budget used bike.
Chain stretch check
A new chain is exactly 12 inches across 12 full links, including the pins. A worn chain stretches as the pins and rollers wear. Most chain check tools cost a few pounds and give you a 0.5% and 0.75% reading. Past 0.75% the chain needs replacement.
If you don’t have a chain checker, lift the chain off the front chainring at the front of the bike and pull it forward. If you can see daylight through more than half the tooth on the chainring, the chain is stretched and the rings are likely worn too.
The shark tooth test
Shift the chain onto the largest chainring and look at the teeth from the side. New chainring teeth are symmetrical, like shark fins. Worn teeth become pointed and asymmetric, sometimes called “shark teeth” or “shark fins.” This shape accelerates chain wear and causes the chain to slip under load.
Check the cassette (the rear gears) the same way. Look at the narrowest cogs first, which wear fastest. Asymmetric, hooked, or pointed teeth mean the cassette needs replacement.
Shifting test under load
Shift through every gear combination while pedalling under moderate pressure. The chain should move smoothly to the next gear without hesitation, noise, or skipping. Any skip means a stretched chain, a worn cassette, or a derailleur that needs adjustment.
Look at the derailleur hanger, the small metal piece that holds the rear derailleur to the frame. If it’s bent, shifting will be unreliable even after adjustment. Replacement hangers are model-specific and sometimes hard to find, so a bent hanger is a negotiating point.
Check the Brakes: Pads, Cables, and Lever Feel
Brakes are safety equipment, full stop. A used bike with bad brakes is genuinely dangerous, and brake repairs can run from a cheap pad swap to a full hydraulic system bleed.
Pad inspection
Squeeze the brake lever and look at how far it travels. Then look at the pads themselves. On rim brakes, the pads should have at least 3mm of friction material left. On disc brakes, the pads should have at least 1.5mm of material visible above the backing plate.
Look at pad alignment. The pad surface should contact the rim or rotor squarely, not at an angle or only on one edge. Misaligned pads wear unevenly and reduce braking power.
Rotor and rim condition
On disc brake bikes, look at the rotor surface. It should be smooth, flat, and free of deep grooves or scoring. A bent rotor will rub against the pads continuously and reduce braking power.
On rim brake bikes, look at the rim braking surface again, this time with the brake in mind. Any deep groove or worn indicator means the rim is at end of life.
Lever feel
Squeeze each brake lever firmly. On cable brakes, the lever should feel firm and stop well before the bar. On hydraulic disc brakes, the lever should feel solid with no sponginess. A spongy hydraulic lever means air in the system, which requires a bleed or new seals.
Listen for any grinding or scraping noise when you apply the brakes. Any noise means something is rubbing that shouldn’t be, and you’ll want to know what before riding.
Test the Headset and Bottom Bracket Bearings
Headset and bottom bracket bearings are the components most buyers forget to check and most sellers forget to mention. They’re also among the more expensive repairs, often running well into the three-figure range for parts and labour.
The headset rock test
Stand over the bike with both hands on the hoods or tops of the handlebars. Apply the front brake firmly. Rock the bike forward and backward with the brakes held. If you feel a knocking, clicking, or ratcheting sensation through the bars, the headset bearings are worn or poorly adjusted.
Now lift the front of the bike off the ground so the wheel hangs free. Turn the handlebars from full left to full right. The motion should be smooth with no notchiness, grinding, or binding. A notchy headset is past adjustment and needs new bearings.
The bottom bracket wiggle test
Stand on one side of the bike. Grip the end of one crank arm and try to wiggle it toward and away from the frame. There should be zero play. Any rocking or clicking means the bottom bracket bearings are worn.
Now pedal the bike slowly and listen for creaking. A creaking bottom bracket often means dried-out bearings or a loose shell. Either way, it’s a job.
Wheel bearings
Lift each wheel off the ground and spin it. The wheel should spin freely for several seconds and stop smoothly. If it stops abruptly, grinds, or feels rough, the wheel bearings are worn.
Wiggle each wheel side to side while holding the bike still. Any clicking or play means loose or worn bearings. This is a normal service item but worth factoring into the price.
Suspension Check: Forks, Shocks, and Seals (If Applicable)
If the bike has any suspension, you need to inspect it carefully. Suspension service is expensive and frequently deferred by previous owners, leaving you with a fork or shock that needs hundreds of pounds of work.
Stanchion condition
Look at the shiny upper tubes (stanchions) of the front fork where the lowers slide up and down. They should be smooth, clean, and free of any scratches, nicks, or oil residue. Even small scratches can damage the seals and let oil leak past.
Look at the area around the seals at the top of the lowers. Wipe with a clean cloth. If oil appears, the seals are leaking and the fork or shock needs service.
Bushings and play
Apply the front brake and rock the bike forward and backward, just like the headset test, but watch the fork lowers specifically. Any knocking or clicking between the stanchions and the lowers means worn bushings, which is a moderate repair cost.
For full-suspension mountain bikes, repeat this test at every pivot point: the swingarm, the linkage, and the rear shock mount. Each pivot should be tight with no play.
Air spring and rebound
If the fork or shock has an air valve, the seller should be able to tell you the air pressure they run. If they don’t know or the valve hisses when you press it, the seal is leaking.
Push down on the bars to compress the fork. It should compress smoothly and rebound at a controlled rate. A fork that bounces back too fast or sinks slowly under your weight needs service.
What to Ask the Seller Before You Buy
The right questions will reveal more about a used bike than any inspection. A seller who answers openly is usually trustworthy. A seller who evades or rushes you is usually hiding something.
1. Why are you selling? The honest answers are usually upgrades, lack of use, or change in riding style. Be cautious of vague answers, recent life changes, or anything that sounds rehearsed.
2. Has the bike been in a crash? Most sellers will admit to a minor tip-over. Listen for hesitation or a careful “no” that sounds too quick. A bike that’s been crashed hard often shows paint touch-ups, replaced components, or fresh bar tape covering bent bars.
3. Do you have service records? Receipts from a bike shop show when the bike was last serviced, what was done, and whether it’s been looked after. Even one or two recent receipts are a good sign.
4. How long have you owned it? A long ownership period with consistent riding is usually safer than a bike that’s changed hands three times in two years.
5. Can I see your ID or proof of purchase? This is the most important question for avoiding stolen bikes. A legitimate seller will have a receipt or at minimum not be offended by the question.
6. Are the tyres, chain, and brake pads original? If consumables have been replaced recently, that’s a sign of care. If everything is original and worn, plan for several hundred in immediate service costs.
Confirm the Bike Fits Before You Inspect Anything Else
A bike in perfect mechanical condition is still a bad buy if it doesn’t fit. Fit problems cause pain, injury, and the kind of discomfort that puts a bike in the garage forever.
Stand over the top tube with both feet flat on the ground. For road bikes you want about an inch of clearance. For mountain bikes you want two to three inches. If you can’t stand flat with at least some clearance, the frame is too big.
Saddle the bike and grip the hoods. Your arms should have a slight bend, your back should be at a comfortable angle, and your feet should just reach the pedals at the bottom of the stroke with a slight knee bend.
If you’re between sizes, the smaller frame with a longer stem is usually the better choice. Larger frames are harder to make fit right.
For more on choosing the right style of bike for your riding, our guide to choosing a bike that fits your needs walks through the use cases by bike type.
Verify the Frame Number and Check for Stolen Status
Every legitimate bike has a frame number, usually stamped under the bottom bracket, on the head tube, or on the rear dropouts. Some bikes also have a serial number on a sticker inside the frame triangle.
Find the frame number and write it down or photograph it clearly. Run it through BikeIndex.org, the largest free bike registration database, which lets you check if a bike has been reported stolen. BikeRegister in the UK and 529 Garage in North America serve similar purposes.
If the frame number has been filed off, scratched over, or covered with paint, walk away. There’s no legitimate reason to obscure a frame number, and bikes with removed numbers are very often stolen.
Ask the seller to bring proof of purchase or some form of ID matching the bike’s documentation. If they refuse, that’s another red flag. A stolen bike in your possession is a serious legal problem and a complete loss of your money.
Spot Red Flags in Marketplace Listings Before You Travel
Most used bike problems can be spotted in the listing photos if you know what to look for. Skipping this step wastes hours of travel and dozens of awkward conversations.
Stock photos: If the listing photos look like professional marketing shots rather than phone snaps in someone’s garage, the seller is probably using a manufacturer’s image and the actual bike may not match. Ask for a photo with today’s newspaper or a handwritten note including the date.
Single photo or limited angles: Sellers hiding damage limit the views they share. A trustworthy seller shows every angle, including close-ups of wear items and the frame number.
Suspiciously low price: If a bike is listed at half the going rate for that model and year, ask yourself why. Common reasons are: stolen, damaged, scam listing, or bait-and-switch on a different model at the meeting.
Pressure to commit quickly: “First to see it buys it” or “moving abroad next week” scripts are common scam tactics. A genuine seller will let you take your time.
Refusal to share the frame number: Some scammers won’t show the frame number until you’ve already paid a deposit. A real seller has nothing to hide.
Out-of-area location: A bike listed two hours from a major city with no explanation may be a relocation scam.
The Test Ride: What to Listen and Feel For
No inspection replaces a proper test ride. Even with everything looking perfect on the stand, the bike needs to ride right. Ask the seller for a real test ride of at least 15 minutes covering varied terrain.
Listen: A healthy bike is mostly quiet. New noises to watch for are clicking (bearings or chain), creaking (bottom bracket or seatpost), grinding (brakes or bearings), and rattling (fenders or accessories).
Feel for play: Any wobble, knock, or skip during the ride points to a component issue. Specifically, the bars shouldn’t have a notch in the steering, the cranks shouldn’t rock, and the pedals shouldn’t click or bind.
Test the brakes hard: From a moderate speed, brake firmly. The bike should stop straight without pulling to one side and the levers shouldn’t hit the bar.
Climb a hill: A hill puts the most stress on the drivetrain and brakes. Shift down and stand on the pedals. Any chain skip, derailleur hesitation, or frame flex under load is worth noting.
Brake from speed: Descend a moderate hill and brake hard from speed. Any fade, vibration through the levers, or pulling to one side is a sign of brake trouble.
Once you have the bike home, our guide to washing a bike without ruining the bearings is a useful next read for keeping everything you just inspected running smoothly.
How to Use Inspection Findings to Negotiate the Price
Most buyers negotiate badly because they treat inspection findings as small talk. They’re not. Every worn component is a known cost you can price and use to lower the offer.
Build a repair estimate first. Before you make an offer, list everything that needs work with a realistic cost: a new chain ($30 to $80), a cassette ($50 to $150), brake pads ($20 to $60), tyres ($40 to $100 per pair), bottom bracket service ($50 to $150), headset service ($40 to $120). These add up fast and a seller who knows bikes won’t argue with realistic numbers.
Lead with the most expensive issue. If the frame is bent or the suspension is shot, that’s your biggest lever. If everything else is fine but the tyres are old, the negotiation will be smaller. Match your tone to the size of the problem.
Use “I noticed” rather than “you should.” Sellers respond much better to objective observations than accusations. “I noticed the chain skips under load” lands better than “your bike has a bad chain.”
Have a walk-away number in mind. Before you meet, decide the highest price you’ll pay given what you’ve seen. If the seller won’t meet it, leave. There will always be another bike.
Cash in hand closes deals. If you’re ready to buy at a fair price, having cash ready moves things along. Many sellers will accept slightly less for an immediate, guaranteed sale.
What to Avoid When Buying a Used Bike
Just as important as knowing what to check is knowing what to avoid. These common mistakes catch even experienced buyers.
Avoid impulse buys. If a bike feels “right” in the first five minutes, sleep on it. Most buyer’s remorse comes from purchases made in a single viewing.
Avoid skipping the test ride. “It shifts fine on the stand” is meaningless if it skips under load. Always insist on a real ride.
Avoid bikes without service history. An unknown history is a risky history. A few receipts from a real shop are worth more than the seller’s word.
Avoid deals that feel too good. A bike that’s $500 below market is either stolen, broken, or being sold by someone who made an error. Either way, you lose.
Avoid meeting sellers in private, after dark, or in unusual locations. Public, daylight, busy places only. Bring a friend if possible.
Avoid paying before you’ve inspected everything. Deposits before inspection are how scammers lock you in. Inspect first, pay on the spot if you decide to buy.
Avoid ignoring fit. A perfectly maintained bike that’s the wrong size is still a bad purchase. Size first, condition second.
The N+1 Rule, Explained
You may have seen the “N+1 rule” mentioned in cycling forums. It’s a joke with a grain of truth. The rule states that the correct number of bikes you should own is N+1, where N is the number you already have. In other words, you can always justify one more.
Why does this matter when buying used? Because the rule is often quoted by sellers rationalising a hasty purchase, and it can pressure buyers into accepting a bike that doesn’t quite fit their needs. Treat N+1 as a fun bit of cycling culture, not a buying strategy.
Frequently Asked Questions
What should you check when buying a used bike?
Check the frame for cracks and dents, the wheels for trueness and spoke tension, the tyres for wear and age, the drivetrain for chain stretch and shark-tooth cassettes, the brakes for pad life and lever feel, and the headset and bottom bracket for play. Verify the frame number against theft databases and confirm the bike fits your body before paying.
What are the biggest red flags when buying a used bike?
The biggest red flags are a filed-off or missing frame number, visible cracks on the frame or fork, suspension stanchions that are scratched or leaking oil, a chain that skips under load, brake levers that pull to the bar, and a price that’s dramatically below market value. Sellers who refuse to meet in daylight, allow a test ride, or share service records are also major warning signs.
How do I know if a used bike has been in a crash?
Look for paint touch-ups on the frame, fresh bar tape covering bent handlebars, scratches on the fork stanchions, a bent derailleur hanger, replaced components that don’t match the rest of the bike, and asymmetry in the frame or wheels. Ask the seller directly and watch for hesitation or a too-quick answer.
How do I check if a used bike is stolen?
Find the frame number, usually stamped under the bottom bracket or on the head tube, and run it through BikeIndex.org, BikeRegister, or 529 Garage. Ask the seller for proof of purchase or ID matching the bike. If the frame number has been filed off, scratched, or covered, walk away.
What should I budget for repairs on a used bike?
For a typical used bike in decent condition, budget $100 to $300 for immediate consumables like tyres, chain, brake pads, and a cable or two. For a neglected bike with worn bearings and aged components, budget $400 to $800 for a full service including bottom bracket, headset, and possibly wheels. Always get a professional quote before committing to buy.
Final Thoughts: A Patient Buyer Gets the Best Used Bike
The difference between a smart used bike purchase and an expensive mistake almost always comes down to patience and preparation. Walk in with the checklist from this guide, spend at least 30 minutes on inspection, run the bearing tests, take a real test ride, and never let a seller rush you. The good bikes sell themselves, and the bad ones reveal themselves under inspection.
Once you’ve found the right used bike, you’ll want to invest in a quality bike lock on day one and ease back into riding if you’ve had time off the saddle. Both are covered in detail on our site.
Now you know what to check on a used bike before you buy it, including the frame, wheels, tyres, drivetrain, brakes, bearings, and the questions that reveal crash history. Use this guide on every viewing, and you’ll walk away from bad deals and ride away from good ones.