
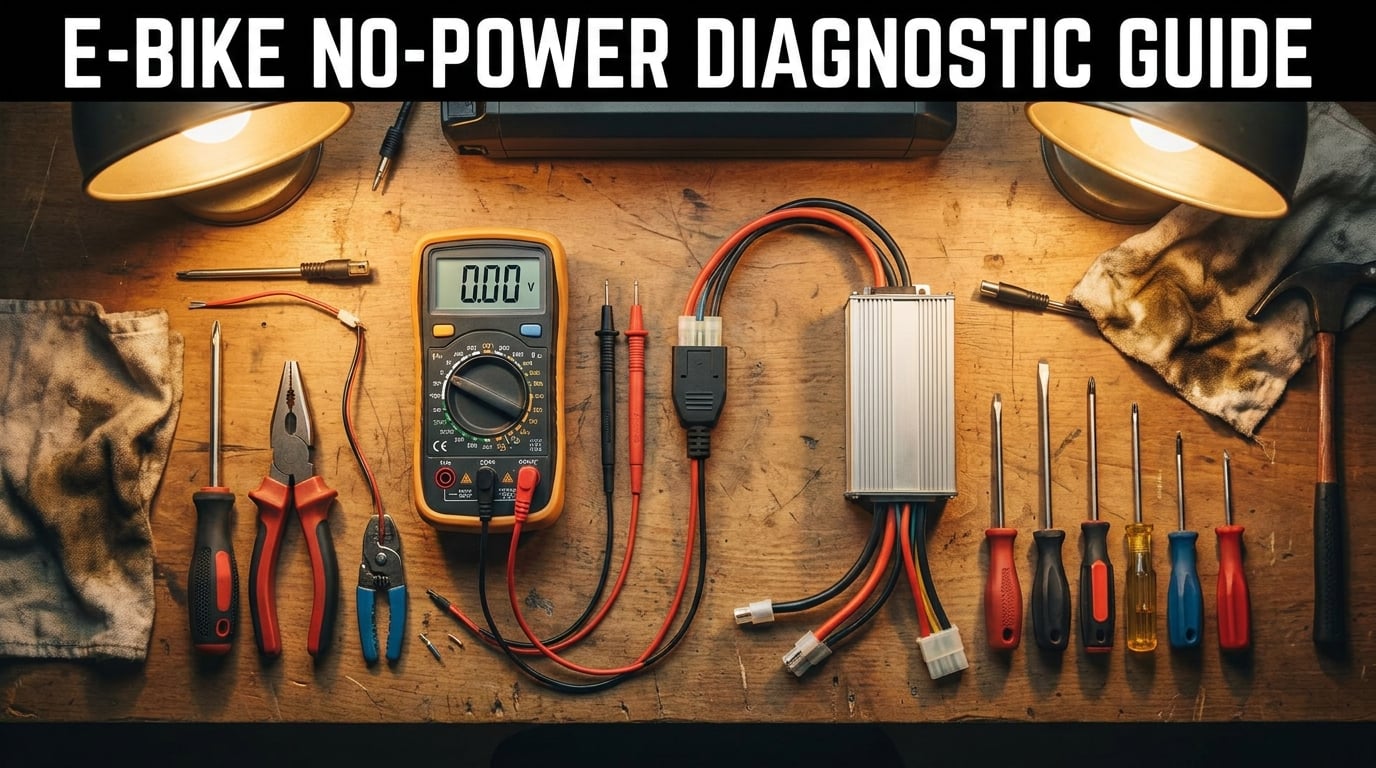
You press the power button on your e-bike and nothing happens. No lights, no display, no motor engagement. If you are staring at a completely dead e-bike right now, you are not alone. This is one of the most common problems e-bike owners face, and the good news is that most no-power issues are fixable without specialized tools or a trip to the bike shop.
When an e-bike won’t turn on, the cause almost always traces back to one of five systems: the battery, the controller, the display unit, the wiring harness, or the safety sensors. Our team has diagnosed hundreds of no-power complaints across Rad Power, Trek, Specialized, Ride1Up, Aventon, and custom builds. The same diagnostic sequence works for nearly every brand and motor system.
This guide walks you through a systematic diagnostic process that starts with the simplest, most common fixes and works toward more complex issues. You will learn how to check your battery charge state, inspect connections, reset the Battery Management System, test voltage with a multimeter, read error codes, and identify when a component needs professional attention. Most riders resolve their no-power problem within the first three steps.
Whether your e-bike died suddenly mid-ride, refuses to wake up after winter storage, or has been giving you intermittent power issues for weeks, the troubleshooting steps below will help you pinpoint the problem and get back on the road.
Table of Contents
Quick Diagnostic Flowchart: Start Here
When your e-bike won’t turn on, work through these seven steps in order. Each step takes 30 seconds to 2 minutes, and you can complete the entire basic diagnostic in under 15 minutes. Start at step one and stop when you find the issue.
Step 1: Check the battery charge. Press the battery indicator button on the battery itself. If no LEDs light up, the battery is dead or in sleep mode. Connect the charger and confirm the charging LED turns on. Wait 30 minutes and recheck.
Step 2: Verify the battery is seated correctly. Remove the battery and reinstall it firmly. Listen for a click or feel it lock into place. A partially seated battery is one of the most common reasons an e-bike won’t turn on.
Step 3: Check the keyport position. If your e-bike has a keyed ignition, make sure the key is turned to the ON position. Some bikes require the key to be turned and held for 2 to 3 seconds before the system powers up.
Step 4: Inspect the main power connector. Follow the thick power cable from the battery to the controller. Disconnect it, check for bent or corroded pins, and reconnect it firmly. This XT60 or Anderson connector is a frequent failure point.
Step 5: Check both brake levers. Squeeze and release each brake lever several times. E-bikes have safety cutoff switches in the brake levers that prevent motor engagement. A stuck or misaligned cutoff switch can prevent the bike from powering on at all.
Step 6: Inspect the display connection. Follow the cable from the display head unit to the controller. Disconnect and reconnect it, making sure the pins are aligned and the connector is fully seated.
Step 7: Perform a hard reset. Remove the battery, press and hold the power button for 30 seconds to drain residual charge, then reinstall the battery and try again. This resets the Battery Management System and clears minor electronic faults.
If none of these steps resolve the issue, move on to the detailed component checks below. The problem likely involves a failed component or hidden connection issue that requires closer inspection.
Step 1: Battery Check – Charge, Connections, and Sleep Mode
Battery problems account for roughly 60% of all e-bike no-power complaints. Before you touch the controller, wiring, or sensors, eliminate the battery as the cause. This section covers charge verification, physical connections, sleep mode recovery, BMS resets, fuses, and multimeter testing.
Checking Battery Charge State
Start with the obvious. Every e-bike battery has a charge indicator, usually a small button on the battery case that lights up a row of LEDs. Press this button while the battery is off the bike. If no LEDs illuminate, the battery is completely depleted or has entered sleep mode.
Connect the charger to the battery and plug it into the wall. The charger LED should change color (typically red while charging, green when full). If the charger LED does not change at all, either the charger is dead or the battery charge port has a problem. Test with a known-good charger if you have access to one.
Leave the battery on the charger for at least 30 minutes before retesting. Lithium batteries that have been deeply discharged need time to reach a minimum voltage before the BMS allows them to power the bike. A battery showing 0V on a multimeter may need several hours on the charger before it responds.
Inspecting Battery Connections and Terminals
Remove the battery from the bike and inspect the contact points. Look for dirt, grease, oxidation, or greenish corrosion on the metal terminals. Clean the contacts with a dry cloth or isopropyl alcohol on a cotton swab. Even a thin film of oxidation can prevent current from flowing.
Examine the pins in the battery cradle or mount. A bent pin is a common issue that can cause intermittent or complete power loss. If you find a bent pin, straighten it carefully with needle-nose pliers. If a pin is broken or pushed inside the housing, the cradle needs replacement.
Check the XT60 or Anderson power connector that links the battery to the controller. Forum users on Electric Bike Review frequently report this connector as a top failure point. Disconnect it, inspect both halves for damage, and reconnect it with a firm push until it clicks.
Battery Sleep Mode Recovery
Many e-bike batteries enter sleep mode when the charge drops below a critical threshold or after extended periods of inactivity. A sleeping battery appears completely dead. No LEDs, no response, no power output. The Battery Management System has shut down to protect the cells from damage.
To wake a sleeping e-bike battery, first connect it to the original charger and leave it for 2 to 4 hours. The BMS slowly trickle-charges the cells back to a safe voltage. After this initial period, the charger LED should change from standby to active charging.
If the battery still shows no response after 4 hours on the charger, try this BMS wake-up procedure. Remove the battery from the bike. Press and hold the power button on the battery (if equipped) for 10 seconds. Reconnect the charger and wait another hour. This forces the BMS to reset and can bring deeply sleeping batteries back online.
For batteries that have been in storage for months, full recovery may take 6 to 12 hours on the charger. If the battery shows zero response after an overnight charge, the cells may have degraded beyond recovery and the battery needs replacement.
Performing a BMS Reset
The Battery Management System monitors cell voltages, temperature, and current flow. Sometimes the BMS trips a protection circuit and refuses to release power, even when the battery is fully charged. A BMS reset clears these protection flags and restores normal operation.
To reset the BMS, remove the battery from the bike completely. Disconnect any cables attached to it. Let the battery sit for 10 to 15 minutes with no connections. This allows the BMS internal capacitors to fully discharge and clears any latched fault states.
After the waiting period, press and hold the battery power button for 30 seconds. If your battery has no power button, short the positive and negative terminals of the charge port briefly using a jumper wire (advanced users only). Reinstall the battery and attempt to power on the bike.
A successful BMS reset should restore power immediately. If the bike turns on but shuts off again quickly, the BMS is detecting a real fault such as a cell imbalance or short circuit somewhere in the system. Do not ignore repeated BMS trips. They indicate an underlying problem that needs diagnosis.
Checking Fuses and Circuit Breakers
Most e-bikes have at least one fuse between the battery and the controller. This fuse protects the system from short circuits and overcurrent events. A blown fuse will cause a complete no-power condition with no warning.
Locate the fuse by checking your e-bike manual. Common locations include inside the battery case, inline on the main power cable, or on the controller board. Visually inspect the fuse. A blown fuse has a broken filament or visible scorch marks inside the glass or ceramic body.
Replace a blown fuse with the same amperage rating. Using a higher amperage fuse is dangerous and can damage the controller or cause a fire. If the replacement fuse blows immediately, you have a short circuit somewhere in the system that requires further diagnosis before replacing the fuse again.
Some e-bikes use a resettable circuit breaker instead of a fuse. Look for a small button on the controller housing or near the battery mount. Press the reset button and try powering on the bike again.
Testing Battery Voltage with a Multimeter
A multimeter is the single most useful diagnostic tool for e-bike electrical problems. You can buy a basic digital multimeter for under $20, and it will tell you definitively whether your battery is delivering power.
Set the multimeter to DC voltage mode with a range above your battery nominal voltage. For a 36V battery, set the range to 60V or higher. Touch the red probe to the positive terminal and the black probe to the negative terminal on the battery output connector.
A healthy 36V battery should read between 39V and 42V when fully charged. A 48V battery should read between 52V and 54.6V. A 52V battery should read between 56V and 58.8V. If your reading is more than 2V below the expected range, the battery is undercharged. If the reading is zero or near zero, the battery or its BMS is not outputting power.
One forum user on Electric Bike Review reported a puzzling case where their battery showed 53V on a multimeter but the bike still would not turn on. This points to a problem downstream. The battery is fine, so the issue lies in the controller, display, or wiring. Voltage testing helps you isolate the problem area quickly.
Step 2: Controller Inspection – The Brain of Your E-Bike
The controller is the electronic brain of your e-bike. It receives input from the display, throttle, pedal assist sensor, and brake cutoff switches, then sends power to the motor accordingly. When the controller fails, the bike may not turn on at all, or it may turn on but refuse to move.
Recognizing Controller Failure Symptoms
Controller problems produce several distinct symptom patterns. A complete no-power condition where the display stays dark often indicates a controller that has failed electrically. The display gets its power through the controller, so a dead controller means a dead display.
Intermittent power loss, where the bike shuts off randomly while riding and may restart after sitting for a few minutes, typically points to a controller overheating or a failing internal connection. A burning smell or visible discoloration near the controller is an immediate red flag.
If the display turns on but the motor does not respond to throttle or pedal assist, the controller may be alive but unable to drive the motor. This can be caused by failed MOSFETs (the switching transistors inside the controller), Hall sensor communication failure, or a software lockout triggered by an error condition.
Visual Controller Inspection
Locate your controller. On most e-bikes it is a rectangular metal box mounted under the battery, behind the seat tube, or integrated into the motor housing on mid-drive systems. Some folding and budget e-bikes have a controller hidden inside the frame.
Disconnect the battery before inspecting the controller. Remove the controller cover if accessible. Look for signs of water intrusion, including moisture droplets, mineral deposits, or rust on the circuit board. Water damage is a leading cause of controller failure, especially on bikes ridden in rain or washed with high-pressure water.
Check for swollen or bulging capacitors on the circuit board. A failed capacitor has a domed or swollen top instead of a flat surface. Burn marks on the board indicate a component that overheated and failed. A burning smell coming from the controller, even without visible damage, means internal components have burned out.
Inspect the controller connectors carefully. The harness plugs into the controller through multiple multi-pin connectors. Any connector that is loose, corroded, or damaged can prevent the system from powering on. Unplug each connector, inspect the pins, and reconnect firmly.
Testing Controller Connections
With the battery reconnected and the e-bike powered on (if possible), wiggle each controller connector gently. If the display flickers or the system powers on intermittently, you have found a loose or damaged connection. Zip-tie or tape the connector securely to prevent movement.
If your bike has a separate controller-to-battery power connector (commonly XT60), this is the most critical connection. A poor contact here means zero power reaches the controller. Disconnect, clean both sides with contact cleaner or isopropyl alcohol, and reconnect.
The thin communication cable between the display and controller can also cause no-power symptoms. If this cable is damaged, the display cannot send the wake-up signal to the controller. Try disconnecting and reconnecting this cable, checking for bent pins inside the connector housing.
Controller Overheating
Controllers generate significant heat during operation. If the controller overheats, it shuts down to protect itself. This typically manifests as the bike working fine for the first 10 to 20 minutes of a ride, then suddenly dying.
Check that the controller is properly ventilated. If you have added bags, fenders, or accessories that block airflow to the controller, remove them. Controllers on mid-drive motors are usually mounted inside the motor housing and rely on thermal paste for heat transfer. If the thermal paste has dried out, the controller will overheat.
If your controller repeatedly overheats even with good ventilation, it may be undersized for your riding style or motor power. Upgrading to a higher-amperage controller can resolve chronic overheating issues on modified or heavily loaded e-bikes.
When the Controller Needs Replacement
If you have verified the battery is good, all connections are solid, and the controller shows signs of internal damage (burn marks, swollen capacitors, water damage), it needs replacement. Controllers typically cost between $40 and $200 depending on the motor system and features.
Before buying a replacement, note your motor type (hub or mid-drive), motor connector type, battery voltage, and display connector type. Generic controllers work with many hub motor systems, but proprietary systems like Bosch, Shimano STEPS, and Brose require brand-specific replacements.
Step 3: Display and Firmware Issues
The display unit is your primary interface with the e-bike’s electronics. On many systems, the power button is located on the display itself. If the display fails, you cannot send the wake-up signal to the controller, and the bike appears completely dead.
Display Power Button Problems
The power button on e-bike displays takes a lot of abuse from weather, vibration, and repeated pressing. Over time, the tactile switch behind the button can fail or become unresponsive. Press the button firmly and hold it for 3 to 5 seconds. Some systems require a long press rather than a quick tap.
If the button feels mushy or clicks without resistance, the internal switch may have detached from the circuit board. This requires display repair or replacement. As a temporary diagnostic, try connecting a different display if you have one available or can borrow one from another identical bike.
Some e-bikes have the power button on the battery or a separate ignition button rather than the display. Check all power buttons on the bike. A single failed button can prevent startup even if everything else works perfectly.
Display-to-Controller Connection
The display communicates with the controller through a multi-pin cable, typically using a JST, Higo, or brand-specific connector. Follow this cable from the display to the controller. Disconnect it at both ends, inspect the pins for bending or corrosion, and reconnect firmly.
This cable carries both data and power lines. If the power wire inside the cable breaks (common at stress points where the cable enters the display or controller), the display will not turn on. Gently flex the cable along its length while watching the display. Any flickering indicates a broken internal wire.
Firmware Update Failures
If your e-bike stopped working after a firmware update, the update may have failed partway through, leaving the controller or display in a non-functional state. This is more common with Bluetooth-connected updates on systems like Bosch eBike Connect, Shimano E-TUBE, and Bafang mobile apps.
To recover from a failed firmware update, try re-running the update with a full battery charge and the phone positioned close to the bike. Some systems have a recovery mode accessible through the app. Check the manufacturer’s support documentation for specific recovery procedures.
Never attempt a firmware update on a low battery. If the battery dies during the update process, the controller can be permanently bricked. Always charge to 100% before starting any firmware work.
Using Display Replacement as a Diagnostic
If you suspect the display is the problem but cannot confirm it, a display swap is the definitive test. Borrow a compatible display from another bike or order an inexpensive replacement. If the bike powers on with the new display, the old display was the culprit.
Generic displays like the KT-LCD3, Bafang DP-series, and SW900 work with many budget and mid-range e-bikes. They cost $20 to $50 and are worth keeping as a spare diagnostic tool if you own multiple e-bikes or ride frequently.
Step 4: Wiring and Connector Inspection
Wiring problems are the most frustrating to diagnose because they can cause intermittent issues that disappear when you look for them. A thorough wiring inspection should take 15 to 20 minutes and covers every connection from battery to motor.
Common Connector Types
E-bikes use several standard connector types, and knowing what to look for speeds up diagnosis. XT60 connectors handle the main battery-to-controller power connection. They are yellow, round, and rated for 60 amps. A loose XT60 connection can cause voltage drops and complete power loss.
Higo connectors (also called Julet or Z-series) are used for motor, display, and sensor connections. They have a screw-on locking collar and rubber seals for water resistance. The tiny pins inside these connectors can bend, corrode, or pull out of the housing with repeated use.
JST connectors are small white plastic connectors used for internal controller wiring. They are not water-resistant and can corrode if exposed to moisture. Inline bullet connectors (red and black) appear on some older or budget e-bikes and are prone to loosening from vibration.
Wire Chafing and Pinch Points
Follow every visible wire on the bike and look for chafed insulation. Common pinch points include where wires enter the frame near the headset, where they pass through the bottom bracket area, and where they route past suspension pivots. A chafed wire that touches the frame creates a short circuit that can blow fuses or trip the BMS.
Pay special attention to the motor cable on hub motor bikes. This cable flexes with every bump and turn. Over time, the internal wires can fatigue and break inside the insulation, leaving no visible damage outside. If you suspect a broken motor wire, continuity testing with a multimeter will confirm it.
Wrap any chafed wires with electrical tape or heat-shrink tubing as a temporary fix. For a permanent repair, splice in a new section of wire and solder the connection. Avoid wire nuts for e-bike repairs because they loosen with vibration.
Connector Corrosion and Water Damage
Connectors exposed to rain, puddle spray, or wash water can corrode internally. The greenish or white powder on corroded metal acts as an insulator, preventing current flow. Even sealed connectors can trap moisture inside, especially if the rubber seal has degraded.
Disconnect each connector and inspect the pins. Clean corrosion with contact cleaner spray and a small brush. For stubborn corrosion, use a cotton swab dipped in white vinegar, then rinse with isopropyl alcohol. Apply dielectric grease to the pins before reconnecting to prevent future corrosion.
One Reddit user on r/ebikes reported that their bike stopped working after riding through heavy rain. The cause was water inside a connector that short-circuited the signal lines. Drying the connector with a hair dryer and applying dielectric grease solved the problem permanently.
Pin Inspection Technique
When inspecting multi-pin connectors, use a bright flashlight and look inside both halves. A pin pushed back into the housing (recessed further than the others) indicates the locking tab has broken. This pin no longer makes contact with its mate, creating an open circuit.
You can sometimes reseat a pushed-back pin by carefully pulling it forward with small needle-nose pliers or a pick tool. If the pin keeps retreating, the connector housing needs replacement. In an emergency, you can bypass the damaged pin by soldering a jumper wire directly between the two connector halves.
Step 5: Safety Sensor Checks – Brake Cutoffs and PAS
E-bikes include safety sensors that can prevent the system from starting. These sensors are designed to cut motor power when you brake, but a malfunctioning sensor can block startup entirely. Many riders overlook this category because the sensors seem unrelated to the power button.
Brake Lever Cutoff Switches
Most e-bikes have a cutoff switch built into each brake lever. When you squeeze the brake, the switch opens the motor circuit. If a switch gets stuck in the open position, the controller thinks the brake is constantly applied and refuses to start the motor.
To test the brake cutoff switches, squeeze and release each lever firmly five or six times. Listen for a click from the switch. If a lever feels different than normal (stiffer or softer), the internal switch may be failing. Some e-bikes show an error code when a brake switch is stuck.
For a definitive test, disconnect both brake lever switches from the controller. Try powering on the bike. If it starts up, one or both switches are faulty. Reconnect them one at a time to identify which switch is causing the problem. A faulty brake switch typically costs $10 to $20 to replace.
Pedal Assist Sensor Testing
The Pedal Assist Sensor (PAS) detects when you are pedaling and tells the controller to provide motor assistance. On most e-bikes, a bad PAS will not prevent the bike from turning on, but it will prevent the motor from engaging when you pedal. The bike may start but feel like a regular bicycle.
Check the PAS disc on the crank. This magnetic ring sits near the bottom bracket and must be properly aligned with the sensor. If the disc has slipped or rotated, the sensor cannot detect pedal rotation. Reposition the disc so the magnets pass within 2 to 3 millimeters of the sensor face.
Test the PAS by putting the bike in pedal assist mode and pedaling slowly. Watch the display. If the assist level indicator does not change or the motor does not engage, the PAS may be faulty. Swap the sensor with a known-good one to confirm.
Hall Sensor Basics
Hall sensors inside the motor detect rotor position and speed. The controller uses this data to drive the motor correctly. If a Hall sensor fails, the controller may refuse to start or may throw an error code related to motor communication.
Hall sensor failures are more common on hub motors than mid-drive systems. Testing Hall sensors requires a multimeter and knowledge of the sensor wiring. Most riders cannot repair Hall sensors without disassembling the motor, so this diagnosis typically leads to professional service or motor replacement.
How Stuck Sensors Prevent Startup
The controller checks all safety inputs before allowing startup. If it detects an active brake signal, a shorted sensor, or an open circuit on a critical sensor line, it refuses to power on the motor for safety reasons. The display may or may not show an error code depending on the system.
This is why disconnecting all sensors and brake switches is a valid diagnostic step. If the bike starts with all sensors disconnected, you can reconnect them one at a time to find the culprit. This methodical approach isolates the problem without guessing.
E-Bike Error Codes Quick Reference
Many e-bike systems display error codes when a component fails. Reading these codes can save you hours of diagnostic time. Here are the most common error codes across major e-bike systems.
Generic and Bafang Display Codes: Error 01 means abnormal motor communication, typically a Hall sensor or motor wire issue. Error 02 means controller communication failure, pointing to the controller or its wiring. Error 03 means throttle fault, usually a stuck or shorted throttle. Error 04 means Hall sensor failure in the motor. Error 05 means brake signal active, indicating a stuck brake cutoff switch. Error 06 means battery undervoltage or BMS shutdown. Error 07 means motor overcurrent or stalled. Error 08 means PAS sensor fault. Error 09 means controller internal fault. Error 10 means communication timeout between display and controller.
Shimano STEPS Codes: E010001 is walk assist error. E013004 is battery voltage abnormal. E020001 is drive unit (motor) communication error. E022001 is speed sensor signal error. E061001 is Bluetooth communication error. E090001 is system voltage drop during operation.
Bosch eBike Systems: Error 410 is internal motor electronics fault. Error 500 is controller error. Error 502 is motor position sensor error. Error 503 is software error requiring update. Error 510 is battery communication error. Error 520 is display communication error. Error 550 is overtemperature shutdown. Error 600 is battery undervoltage.
Not all codes appear on every system, and some manufacturers use custom numbering. Always check your specific manual for a definitive code list. When a code appears, note it and search for the specific meaning before attempting repairs.
Special Scenarios: Water Damage, Winter Storage, and Intermittent Power
Some no-power situations fall outside the standard diagnostic flow. These special scenarios require specific approaches and are worth addressing individually.
Water Damage Assessment
If your e-bike won’t turn on after riding in the rain or after being washed, water intrusion is the likely cause. Water inside connectors, the controller, or the display causes short circuits that can mimic almost any electrical fault. No competitor currently covers water damage assessment, so this is an important gap.
First, do not attempt to power on the bike. Applying power to wet electronics can cause permanent damage. Remove the battery immediately. Open every accessible connector and look for moisture. Use compressed air or a hair dryer on the lowest setting to blow water out of connectors.
Let the bike dry in a warm, well-ventilated area for 24 to 48 hours. Silica gel packets placed inside the controller housing can accelerate drying. After the drying period, inspect connectors for corrosion before reconnecting. Apply dielectric grease to all connections before reassembly.
If the controller or display was submerged, they may need replacement even after drying. Water leaves mineral deposits on circuit boards that cause ongoing corrosion. If you see white or greenish residue on internal components, the part is compromised.
Post-Winter Storage Recovery
E-bikes that have been stored for months without use often refuse to turn on. The battery has self-discharged to a level where the BMS enters sleep mode. This is normal and usually fixable with patient charging.
Ideally, store e-bike batteries at 50 to 70% charge over winter. If this was not done, connect the charger and leave it for 6 to 12 hours. The BMS will slowly wake and begin charging. Monitor the charger LED for a change from standby to active charging.
If the battery shows no signs of life after 12 hours on the charger, perform the BMS reset procedure described earlier. For batteries stored at near-zero charge for extended periods, cell degradation may be irreversible. A battery that was at 0V for several months may never recover full capacity.
Check all connections and cables after storage. Temperature changes cause materials to expand and contract, potentially loosening connectors. Inspect for rodent damage to wires if the bike was stored in a garage or shed. Mice and squirrels sometimes chew wire insulation.
Intermittent Power Loss
Intermittent issues are the hardest to diagnose because the problem disappears when you look for it. If your e-bike sometimes works and sometimes does not, focus on connections and wiring first.
Ride the bike with a passenger watching the display. Note exactly what happens when power cuts out. Does the display go dark, or does it stay on while the motor stops? A dark display suggests a power connection issue. A lit display with no motor points to a sensor or controller problem.
Try to reproduce the issue by riding over bumps, making tight turns, or squeezing the brake levers. If the problem correlates with a specific action, you have narrowed the search. Intermittent issues are usually caused by loose connectors, broken wires inside insulation, or failing switches that work inconsistently.
When to Seek Professional Help
Most e-bike no-power issues are fixable at home with basic tools and patience. However, some problems require professional expertise, specialized diagnostic equipment, or warranty service. Knowing when to stop and call a professional saves time and prevents further damage.
Clear Indicators for Professional Repair
Seek professional help if you smell burning from the controller or motor, see visible smoke or sparks, or notice a swollen or deformed battery case. These indicate serious electrical faults that can cause fire. Stop using the bike immediately and do not attempt to charge a swollen battery.
If you have completed all diagnostic steps in this guide and still cannot identify the problem, a professional can test components you cannot easily access. Motor internals, embedded controllers on mid-drive systems, and proprietary electronics on major-brand systems require manufacturer-specific tools.
Any issue involving a battery that shows physical damage, gets hot during charging, or emits a chemical smell needs immediate professional attention. Lithium battery fires are extremely dangerous and cannot be extinguished with normal methods.
What a Shop Diagnostic Includes
A professional e-bike diagnostic typically costs $75 to $150. The shop will test your battery with a load tester (more thorough than a simple voltage check), scan the controller for error codes using manufacturer software, test motor Hall sensors and phase wires, and inspect all connections and wiring.
Most shops apply the diagnostic fee toward the repair cost if you proceed with the fix. Ask about this policy before booking. Some shops offer free diagnostics if you commit to repairs through them.
Warranty Considerations
If your e-bike is under warranty, contact the manufacturer or dealer before attempting any repairs. Opening the controller, modifying wiring, or replacing components may void the warranty. Manufacturer support teams can often diagnose the problem over the phone or by email and ship replacement parts directly.
Brands like Rad Power, Trek, Specialized, and Aventon have dedicated support lines and extensive troubleshooting resources. Bosch, Shimano, and Brose motor systems have dealer networks for warranty service. Keep your purchase receipt and warranty documentation handy when contacting support.
Preventative Maintenance to Avoid Future No-Power Issues
Preventing no-power problems is far easier than diagnosing them. A few simple maintenance habits will keep your e-bike reliable and extend the life of its electrical components.
Battery Storage Best Practices
Never store your e-bike battery fully charged or fully depleted. Both extremes stress the lithium cells and accelerate degradation. For storage lasting more than two weeks, charge or discharge the battery to approximately 60% capacity.
Store batteries in a cool, dry place between 50 and 70 degrees Fahrenheit. Avoid freezing temperatures and extreme heat. Hot garages and car trunks are particularly damaging to lithium batteries. Check the battery charge every 2 to 3 months during long-term storage and top off to 60% if it has dropped.
Connection Maintenance Schedule
Every 3 months, disconnect and reconnect every accessible connector on your e-bike. This wipes the contacts clean and prevents oxidation from building up. Apply dielectric grease to power connectors once per year, especially if you ride in wet conditions.
Inspect wire routing every 6 months for chafing or pinching. Zip-tie loose wires to the frame to prevent vibration damage. Replace any wire with damaged insulation immediately before moisture gets inside and causes a short.
Riding in Wet Conditions
Most e-bikes are rated for light rain but not for submersion. Avoid riding through deep puddles or streams. After riding in rain, dry the connectors and let the bike air dry completely before charging or storing. Remove the battery and store it separately.
If you frequently ride in wet weather, apply dielectric grease to all connectors before each rainy season. Consider adding fenders to reduce water spray onto electrical components. Some riders wrap exposed connectors in self-fusing silicone tape for extra protection.
Firmware and Software Updates
Check for firmware updates from your e-bike system manufacturer every 6 months. Updates can fix bugs that cause unexpected shutdowns, improve motor performance, and add features. Always update with a fully charged battery and your phone near the bike.
Subscribe to manufacturer newsletters or check their support pages periodically for recall notices. E-bike recalls related to electrical components do happen, and staying informed keeps you safe.
FAQ’s
How to fix an e-bike with no power?
To fix an e-bike with no power, start by checking the battery charge level using the indicator button on the battery. If it shows no charge, connect it to the charger for at least 30 minutes. Next, remove and reseat the battery firmly, check the keyport position, inspect the main power connector between battery and controller, and test both brake cutoff switches. If none of these work, perform a hard reset by removing the battery and holding the power button for 30 seconds.
Where is the reset button on an electric bike?
Most e-bikes do not have a dedicated reset button. Instead, you reset the system by removing the battery, holding the power button for 30 seconds to drain residual charge, and reinstalling the battery. Some batteries have a small recessed reset button near the charge port or power button. Check your specific model’s manual for exact location. On systems with a display, navigating to the settings menu may also offer a factory reset option.
How to fix an ebike that doesn’t turn on?
To fix an e-bike that doesn’t turn on, follow this sequence: check battery charge and recharge if needed, remove and firmly reinstall the battery, verify the key or power switch is in the ON position, inspect and clean all power connections, check for blown fuses, test brake lever cutoff switches, and try a hard BMS reset. If the battery reads correct voltage on a multimeter but the bike still does not turn on, the problem is likely in the controller, display, or wiring harness.
Is there a fuse on an electric bike?
Yes, most electric bikes have at least one fuse between the battery and controller to protect against short circuits and overcurrent. The fuse is typically located inline on the main power cable, inside the battery case, or on the controller circuit board. Some e-bikes use a resettable circuit breaker instead of a replaceable fuse. Always replace a blown fuse with the same amperage rating to avoid fire risk.
What to do when your e-bike won’t turn on?
When your e-bike won’t turn on, start with the simplest checks: verify the battery is charged by pressing its indicator button, ensure the battery is fully seated in its mount, confirm the key is in the ON position if equipped, inspect the main power connector for corrosion or bent pins, squeeze and release both brake levers to clear stuck cutoff switches, and try a hard reset by removing the battery for 10 minutes. If these steps do not work, use a multimeter to test battery voltage and proceed to controller and wiring inspection.
How to get an ebike battery out of sleep mode?
To get an e-bike battery out of sleep mode, connect it to the original charger and leave it for 2 to 4 hours. The Battery Management System slowly trickle-charges the cells back to a safe voltage. If there is no response after 4 hours, remove the battery, press and hold the power button for 10 seconds, reconnect the charger, and wait another hour. For deeply sleeping batteries, full recovery can take 6 to 12 hours of continuous charging.
Wrapping Up: Get Back on the Road
A no-power e-bike is stressful, but as this guide shows, most cases trace back to a simple battery, connection, or sensor issue. The key is following the diagnostic sequence in order rather than jumping to conclusions. Start with the battery, then work through connections, controller, display, wiring, and sensors.
When your e-bike won’t turn on, the fastest path to a solution is methodical testing, not guessing. A $20 multimeter and 15 minutes of patience will identify the problem in the majority of cases. Keep this guide bookmarked for future reference, as no-power issues can recur over the life of your e-bike.
If you have worked through every step and your e-bike still refuses to wake up, do not hesitate to contact a professional. A diagnostic fee of $75 to $150 is a small price to pay for expert troubleshooting and the peace of mind that comes with knowing your e-bike is safe to ride. Get back out there and enjoy the ride.