
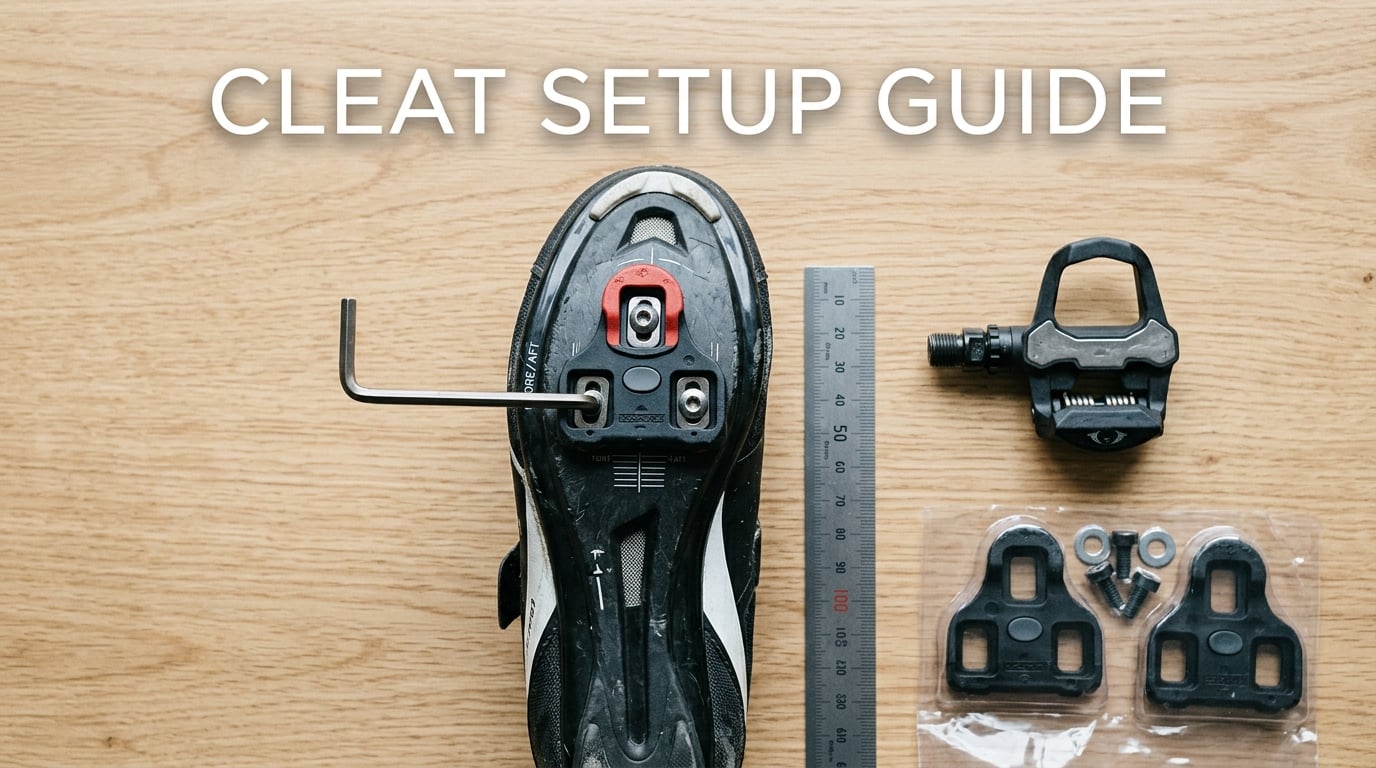
Knee pain is the most common overuse injury in cycling, and if you ride with clipless pedals, your cleat position is the single most important variable you can control. Learning how to set up cleats to avoid knee pain with clipless pedals can be the difference between years of comfortable riding and chronic discomfort that forces you off the bike.
Over 85% of cycling-related knee pain traces back to saddle height and cleat positioning, according to sports physical therapists who treat cyclists daily. The good news is that cleat position is the one bike-fit variable you can check and adjust yourself in about twenty minutes with nothing more than a 4mm Allen key and a marker.
I have gone through the frustrating cycle of knee pain from clipless pedals myself. After three failed attempts at finding the right cleat position, I finally dialed it in using the systematic approach I am about to share. This guide walks you through identifying your pain pattern, understanding why millimeters matter, and making precise adjustments that protect your knees on every ride.
By the end of this article, you will know exactly which cleat adjustment to make based on where your knee hurts, how to set up your cleats from scratch, and when to stop tweaking and book a professional bike fit.
Table of Contents
Quick Pain-Location Reference Guide
Before diving into the full setup process, use this quick reference to match your knee pain location to the most likely cleat issue. This is the same diagnostic approach professional bike fitters use during their first assessment.
If your pain is at the front of the knee (anterior knee pain, around or below the kneecap), your cleats are likely positioned too far forward. Moving them 2 to 3 millimeters rearward reduces patellar tendon load on every pedal stroke. This is the most common cleat-related knee complaint by a wide margin.
If your pain is at the back of the knee (posterior knee pain), your cleats may be too far back, or your saddle may be too high. Move the cleats slightly forward and check saddle height. Posterior pain is less common but often indicates overextension.
If your pain is on the outside of the knee (lateral knee pain, often IT band syndrome), your stance width may be too narrow. Move the cleats inward on the shoes to effectively widen your stance, or consider pedals with longer axles. Excessive internal rotation of the cleat can also cause this.
If your pain is on the inside of the knee (medial knee pain), your stance may be too wide, or the cleat may be rotated improperly. Move the cleats outward on the shoes or adjust rotation so your heel tracks naturally without forcing it inward. Valgus stress, the inward collapse of the knee joint, is the culprit here.
If you feel a twisting or wringing sensation in the knee during the pedal stroke, your cleat rotation does not match your natural foot angle. You likely need more float, or your cleat angle needs to be adjusted to match how your foot naturally wants to sit.
If you experience forefoot numbness, burning, or excessive calf fatigue, your cleats are probably too far forward, concentrating pressure on the metatarsophalangeal joint (the MTP joint, or the ball of your foot). Sliding the cleats back reduces this pressure dramatically.
Why Millimeters Matter: The Biomechanics of Cleat Position
Understanding why a 2-millimeter adjustment can eliminate knee pain requires a quick look at what happens during the pedal stroke. At a cadence of 85 revolutions per minute, you complete roughly 5,100 pedal strokes in a single hour-long ride. That is 5,100 times your knee flexes, extends, and absorbs force from the pedal.
Now imagine your cleat is misaligned by just 2 to 3 millimeters. On every single one of those 5,100 pedal strokes, the angle of force traveling through your knee joint changes slightly from its natural path. The soft tissue around the knee, including the patellar tendon, the IT band, the ligaments, and the menisci, absorbs that misalignment. Over an hour, that is thousands of repetitive micro-stresses on tissue that was not designed to handle them.
This is why cycling knee pain is classified as an overuse injury rather than an acute injury. No single pedal stroke causes the pain. Instead, it builds gradually as cumulative tissue stress exceeds your body’s ability to recover. Most riders report knee pain appearing after the third or fourth ride on a new cleat setup, not immediately, which makes it harder to connect the cause and effect.
A 2023 study by Chartogne and colleagues examined rearward cleat positioning and found that moving the cleat behind the MTP joint significantly reduced patellar tendon load without sacrificing power output. Earlier research by Clarsen et al. (2010) established that even small changes in bike fit parameters, including cleat position, produced measurable changes in knee joint loading patterns. These studies confirm what experienced cyclists have known for decades: precise cleat positioning is not vanity, it is injury prevention.
Here are a few key terms that will help you understand the rest of this guide:
MTP joint (metatarsophalangeal joint): The bony bump where your big toe meets the rest of the foot. This is the traditional reference point for fore-aft cleat positioning.
Float: The degree of rotational freedom your foot has while clipped into the pedal. More float allows more natural heel movement; less float locks your foot into a fixed angle.
Q-factor: The distance between the pedal attachment points on the crank arms, measured side to side. This affects your effective stance width.
Stack height: The vertical distance from the pedal spindle to the sole of your shoe. Different pedal systems have different stack heights, which is why switching systems can cause knee pain.
Valgus stress: The inward collapse of the knee joint, often caused by a stance that is too wide or improper cleat rotation. This stresses the medial knee structures.
Understanding Cleat Systems: 3-Bolt vs 2-Bolt
Before adjusting your cleats, you need to know which system you are using. The two dominant clipless pedal systems, 3-bolt and 2-bolt, have different characteristics that affect how you set up and fine-tune your position.
3-bolt cleat systems include Look Keo and Shimano SPD-SL. These are the standard for road cycling. The larger cleat platform provides excellent power transfer and stability, but the three-bolt mounting pattern offers less lateral adjustability than two-bolt systems. Look Keo cleats come in three float options: zero float (black), 4.5 degrees of float (grey), and 9 degrees of float (red). Shimano SPD-SL cleats come in yellow (6 degrees of float), blue (2 degrees), and red (zero float).
2-bolt cleat systems include Shimano SPD and Crank Brothers. These are standard for mountain biking, gravel riding, and commuting because the recessed cleat allows walking. The two-bolt pattern generally allows more fore-aft adjustability since there are fewer mounting points constraining the position. Shimano SPD cleats typically offer a fixed float of about 4 degrees built into the cleat-pedal interface.
Speedplay pedals deserve a special mention. Unlike Look and Shimano systems where the cleat mechanism is on the shoe and the spring is on the pedal, Speedplay reverses this. The result is up to 15 degrees of float with adjustable resistance, plus independent adjustability of fore-aft and lateral position without the constraints of the cleat body. Many riders who cannot find comfort with standard systems switch to Speedplay and resolve their knee pain.
For riders new to clipless pedals, I recommend starting with a cleat that offers moderate float (4.5 to 6 degrees). This gives your knee some freedom to find its natural path while still providing a secure feel. Zero-float cleats are unforgiving and should only be used by riders who have already dialed in their position through a professional fit or extensive personal experimentation.
How to Set Up Cleats to Avoid Knee Pain with Clipless Pedals: Step-by-Step Guide
This section covers the complete cleat setup process from scratch. If you already have cleats mounted but are experiencing pain, follow the same steps to verify each axis of adjustment. The entire process takes about 20 to 30 minutes once you have your tools ready.
Tools and preparation: You will need a 4mm Allen key (also called an Allen wrench or hex key), a permanent marker or correction fluid (white-out), a tape measure or ruler marked in millimeters, and your cycling shoes. If you have an older pair of shoes with existing cleats, remove them and clean the bolt holes and shoe sole before starting.
Step 1: Locate and Mark the MTP Joint
Put on your cycling shoes and stand on a flat surface. Feel for the bony bump on the inside of each foot where your big toe meets the main body of the foot. This is the first metatarsophalangeal joint, and it is the traditional reference point for cleat fore-aft positioning.
Mark this spot on the outside of each shoe sole with your marker or a dab of correction fluid. Most cycling shoes also have alignment lines molded into the sole that you can use as a secondary reference. Measure from the heel to your mark on both shoes to confirm they are symmetrical. If your feet are different sizes or your MTP joints are in slightly different positions, that is normal. Mark each foot independently.
Step 2: Set the Fore-Aft Position
Loosen the cleat bolts just enough so the cleat slides with slight resistance. Position the cleat so the center of the pedal spindle (the axis the pedal rotates around) will sit directly under your MTP joint mark when you are clipped in. For most cleats, the center line of the cleat body should align with your mark.
If you are experiencing anterior knee pain, or if you want to run a more knee-friendly setup from the start, slide the cleat 2 to 3 millimeters further back (toward the heel) than the MTP joint alignment. Research from Chartogne et al. (2023) supports this rearward positioning for reducing patellar tendon load. Some riders benefit from going even further back, but start with 2 to 3mm and test.
For SPD and other 2-bolt cleats, the fore-aft range is typically wider because the two-bolt slot allows more sliding room. For 3-bolt systems like Look Keo and SPD-SL, you may need to use the numbered holes on the shoe sole or add washers if you need to go beyond the slot range.
Step 3: Set the Rotational Angle
Rotational alignment is about matching the cleat angle to your natural foot position. Sit on a table or chair with your legs hanging freely and relaxed. Let your feet hang naturally without forcing them. Observe whether your toes point straight ahead, slightly inward (pigeon-toed), or slightly outward (duck-footed).
Most people’s feet naturally sit with the toes pointing slightly outward, roughly 3 to 7 degrees. Set your cleat rotation to match this natural angle. If you walk with your toes pointed out, your cleats should allow the same toe-out position when clipped in. Forcing your foot into an unnatural angle with zero-float cleats is a fast track to knee pain.
If you have moderate or high float cleats (4.5 degrees or more), the cleat rotation is less critical because float allows your foot to find its natural angle within the float range. However, with zero-float cleats, getting the rotation exactly right is essential because your foot has no freedom to compensate.
Step 4: Set the Lateral Position (Stance Width)
Lateral adjustment controls your stance width, which is the effective distance between your feet on the pedals. Moving the cleat inward on the shoe effectively widens your stance, because your foot sits further from the crank arm. Moving the cleat outward narrows your stance.
For lateral knee pain (outside of the knee, IT band area), try moving the cleats inward to widen your stance. For medial knee pain (inside of the knee), try moving the cleats outward to narrow your stance. Make small adjustments, 1 to 2 millimeters at a time.
If you have wide hips, you may naturally need a wider stance, which means positioning the cleats further inward. Some pedal systems offer longer axles as an accessory for riders who need more width than the cleat slots allow. Speedplay pedals are particularly good for this because their design allows for a wider range of lateral adjustment.
Step 5: Torque and Secure the Bolts
Once you have set all three axes of adjustment (fore-aft, rotation, lateral), tighten the cleat bolts. Use a torque wrench if you have one, following the manufacturer’s specification, which is typically 4 to 5 Nm for most road cleats and 5 to 6 Nm for SPD cleats. If you do not have a torque wrench, tighten firmly but do not over-tighten, which can strip the threads or crack the cleat body.
Before fully tightening, take a photo of the cleat position from above and from the side. This gives you a reference point if you need to revert to this position later. Also mark the outline of the cleat on the shoe sole with your marker so you can see if the cleat has shifted during riding.
Step 6: Test Ride Protocol
Clip in and ride at an easy pace for 10 to 15 minutes on flat terrain. Focus on how your feet feel in the pedals. Do you feel any twisting sensation? Is your heel drifting toward or away from the crank arm? Does your knee feel like it is tracking straight or being pulled to one side?
During the test ride, pay attention to the first few pedal strokes. If something feels immediately wrong, stop and readjust. Do not try to ride through discomfort, hoping it will resolve. Your body is giving you real-time feedback, and ignoring it leads to the cycle of pain that brought you to this article.
Step 7: Evaluate After 3 to 4 Rides
Cleat adjustments need time to settle. Ride for 3 to 4 sessions before deciding whether the new position is working. Your body needs time to adapt to the changed biomechanics, and minor aches during the first ride or two can be normal as your muscles adjust to a new movement pattern.
After 3 to 4 rides, assess honestly. If the pain is improving, give it another few rides. If it is unchanged or worsening, make a small adjustment (1 to 2mm in one axis at a time) and repeat the evaluation. The golden rule of cleat adjustment: change one variable at a time so you know what is helping.
Tip: Keep a simple log of your rides noting what you adjusted and how your knee felt. This prevents the common mistake of making changes and losing track of what actually worked.
Warning: If you experience sharp, sudden pain during any ride, stop immediately. Sharp pain is not something to ride through. It signals tissue damage that will worsen with continued riding, regardless of how perfect your cleat position becomes.
Symptom-Specific Fixes: Matching Your Pain to the Right Adjustment
Now let us look at each type of knee pain in detail. For each, I will explain what is happening mechanically, which cleat adjustment to make, and how much of a change to try first.
Anterior Knee Pain (Front of the Knee)
Anterior knee pain is felt around or below the kneecap (patella) and is by far the most common cleat-related knee complaint. It often involves the patellar tendon, which connects the kneecap to the shinbone, and is sometimes called patellofemoral pain syndrome.
The most common cause is a cleat positioned too far forward. When the pedal spindle sits ahead of the MTP joint, the effective lever arm of the foot increases, which increases the load on the quadriceps and patellar tendon on every downstroke. Moving the cleats 2 to 3mm rearward reduces this load significantly.
If moving the cleats back does not fully resolve anterior pain after 3 to 4 rides, also check your saddle height. A saddle that is too low forces the knee to bend more deeply at the bottom of the pedal stroke, increasing patellofemoral compression. Cleat position and saddle height interact, so changes to one may require small adjustments to the other.
Multiple riders on Reddit’s cycling forums report that a 2 to 3mm rearward cleat movement completely resolved anterior knee pain that had plagued them for weeks. One user described moving cleats back as the single most effective DIY fix they ever made.
Posterior Knee Pain (Back of the Knee)
Posterior knee pain is felt behind the knee joint and is less common than anterior pain. It typically involves the hamstring attachments or the popliteus muscle, a small muscle at the back of the knee that helps with rotation.
The most frequent cause is a saddle that is too high, which overextends the knee at the bottom of the pedal stroke. However, if your saddle height is correct, cleats positioned too far back can contribute by changing the effective leg length and altering hamstring engagement.
To address posterior knee pain, first check saddle height. If it is correct, try moving the cleats 1 to 2mm forward. Also verify that your cleat rotation is not forcing excessive tibial rotation, which can strain posterior knee structures.
Lateral Knee Pain (Outside of the Knee)
Lateral knee pain is felt on the outside of the knee joint and is frequently associated with IT band syndrome. The IT band (iliotibial tract) is a thick band of tissue running from the hip to the outside of the knee, and it can become inflamed from repetitive friction over the lateral epicondyle of the femur.
The most common cleat-related cause is a stance width that is too narrow, which increases lateral knee loading. Move the cleats inward on the shoes to effectively widen your stance. If you have wide hips or naturally walk with a wide stance, you may need more width than the standard cleat slots allow. In that case, consider pedals with longer axles or switch to a system like Speedplay that offers more lateral adjustability.
Excessive internal rotation of the cleat (toes pointing too far inward) can also contribute to lateral knee pain by increasing valgus stress on the joint. Check that your cleat rotation matches your natural foot angle.
Medial Knee Pain (Inside of the Knee)
Medial knee pain is felt on the inside of the knee joint and involves the medial collateral ligament, the medial meniscus, or the adductor tendons. It is less common than lateral pain but can be equally debilitating.
The most frequent cause is a stance width that is too wide, which stresses the medial knee structures. Move the cleats outward on the shoes to narrow your stance. Excessive external rotation of the cleat (toes pointing too far outward) can also contribute by altering the angle of force through the knee.
If adjusting stance width and rotation does not help, consider whether your natural knee tracking involves some valgus collapse (knees caving inward). This is a strength and movement pattern issue that may benefit from targeted exercises in addition to cleat adjustments.
Twisting or Wringing Sensation
If you feel a twisting sensation in your knee during the pedal stroke, as if something is wringing or torquing the joint, your cleat rotation is fighting your natural foot angle. This is especially common with zero-float cleats or with cleats that have too little float for your natural range of motion.
The fix is to either adjust the cleat rotation to better match your natural foot angle or switch to a cleat with more float. If you are using Look Keo black cleats (zero float) or Shimano SPD-SL red cleats (zero float) and experiencing this sensation, switching to the grey or yellow versions with float may resolve it immediately.
Riders on the bikeforums.net and trainerroad.com forums frequently report that switching from zero-float to moderate-float cleats eliminated a twisting knee sensation they had been experiencing for months. The added float allows the foot to micro-adjust during the pedal stroke instead of being locked into a position that fights the knee’s natural tracking.
Forefoot Numbness, Burning, and Excessive Calf Fatigue
While not strictly knee pain, forefoot numbness and burning are closely related to cleat position and often accompany knee issues. These symptoms indicate that too much pressure is concentrated on the MTP joint, usually because the cleat is positioned too far forward.
Moving the cleats back spreads the pressure across a larger area of the foot sole and reduces calf muscle engagement. This is the same rearward adjustment that helps with anterior knee pain, which is why the two issues often resolve together. Many riders find that a slightly rearward cleat position improves both foot comfort and knee health simultaneously.
Excessive calf fatigue follows the same logic. When the cleat is too far forward, the calf muscle works harder to stabilize the foot and ankle on every pedal stroke. Moving the cleat back shifts some of that load to the larger, more fatigue-resistant quadriceps and gluteal muscles.
Asymmetric Pain: When One Knee Hurts and the Other Does Not
It is perfectly normal for one knee to hurt while the other feels fine. Bodies are not symmetrical. Your left and right legs may have different natural foot angles, different leg lengths, or different ranges of motion. This means your left and right cleats do not need to be in identical positions.
If one knee hurts, adjust only that side. Do not feel compelled to match both cleats to the same position. Many riders end up with slightly different fore-aft, lateral, or rotational settings on each foot, and that is completely normal. Forcing symmetry where your body does not want it is a common cause of stubborn one-sided pain.
Common Mistakes Beginners Make (and How to Avoid Them)
After reading hundreds of forum posts from riders struggling with clipless pedal knee pain, I have identified the most common mistakes. Avoiding these will save you weeks of frustration.
Mistake 1: Leaving cleats in the factory-default forward position. Many new clipless riders install cleats straight out of the package without adjusting them. Factory position is almost always too far forward for knee comfort. Always set the fore-aft position deliberately using the MTP joint as your reference, then consider going 2 to 3mm further back.
Mistake 2: Starting with zero-float cleats. Zero-float cleats (Look Keo black, Shimano SPD-SL red) lock your foot into a single position with no rotational freedom. Unless you have a professionally fitted position that has been validated over hundreds of miles, zero float is asking for knee trouble. Start with moderate float and only reduce it if you have a specific reason.
Mistake 3: Not marking the old position before adjusting. When you loosen the cleat bolts, the cleat moves freely. If the new position is worse, you need to be able to return to the old one. Always trace the cleat outline on your shoe sole with a marker before loosening the bolts.
Mistake 4: Ignoring cleat wear. Cleats wear down gradually over thousands of pedal strokes. A worn cleat develops play, effectively changing your position without you realizing it. If your knee pain has crept back after months of comfort, check your cleats for wear before anything else.
Mistake 5: Expecting instant results. Cleat adjustments need 3 to 4 rides to fully evaluate. Your muscles and joints need time to adapt to the new position. Making a change, riding once, deciding it did not work, and changing something else is a recipe for endless frustration. Be patient and methodical.
Cleat Wear and Replacement Timeline
Cleats are consumable parts. They wear down over time, and worn cleats change your effective foot position on the pedal. This is a frequently overlooked cause of recurring knee pain that develops after months of riding in comfort.
For 3-bolt road cleats (Look Keo, Shimano SPD-SL), the wear indicator is typically a colored pad on the cleat body that wears down to reveal a different color underneath. Look Keo cleats have a Teflon surface that wears away to expose the harder plastic body underneath. Shimano SPD-SL cleats have a similar wear indicator. Once the indicator is gone, replace the cleat.
For 2-bolt SPD cleats, the wear is less visually obvious. Look at the leading and trailing edges of the cleat where it engages the pedal. If these edges are rounded or noticeably thinner than a new cleat, it is time to replace. SPD cleats are steel and last longer than plastic road cleats, but they still wear.
As a general rule, road cleats last 3,000 to 5,000 miles of riding, while SPD cleats can last 5,000 to 10,000 miles. Your actual mileage will vary based on how much you walk in the shoes, pedal tension, and riding conditions. If you ride regularly, plan on checking your cleats every 3 to 4 months and replacing them at least once per year.
When you replace cleats, mark the old cleat position on your shoe sole before removing the old cleats. Install the new cleats in the exact same position. This prevents the common problem of installing fresh cleats in a slightly different spot and reintroducing knee pain.
When to See a Professional Bike Fitter
DIY cleat adjustment resolves most cycling knee pain, but there are situations where professional help is the right call. Here are the specific triggers that should prompt you to book a bike fit rather than continuing to experiment on your own.
Trigger 1: Pain persists after 3 adjustment attempts. If you have made 3 separate, methodical adjustments (one variable at a time, 3 to 4 rides between each) and your knee pain has not improved, a professional fitter has tools and experience you do not. They can identify issues that are invisible to self-adjustment, such as leg length discrepancies or hip alignment problems.
Trigger 2: Sharp or severe pain. Sharp pain, swelling, or pain that forces you to stop riding is not a fit issue to solve through trial and error. See a sports physician or physical therapist first to rule out tissue damage, then work with a fitter to address the underlying cause.
Trigger 3: Pre-existing knee conditions. If you have a history of knee surgery, ACL reconstruction, meniscus repair, arthritis, or chronic patellofemoral issues, do not experiment with cleat position on your own. Work with a fitter who has experience with your specific condition. The wrong adjustment can aggravate an existing condition significantly.
Trigger 4: You have changed multiple variables and lost track. If you have been adjusting cleats, saddle height, saddle fore-aft, and handlebar position simultaneously, you no longer know which change is helping and which is hurting. A professional fitter resets all variables systematically and gives you a clean baseline.
A professional bike fit typically costs between $150 and $350 depending on your location and the level of service. This includes dynamic motion capture, cleat alignment using specialized tools, and adjustments to saddle height, saddle fore-aft, and handlebar position. Many fitters also offer cleat-specific sessions for less than a full fit if cleat position is your only concern.
If cost is a barrier, look for fitters who offer group fitting days at local bike shops or cycling clubs. These are often available at a reduced rate. Some shops also include a basic cleat alignment with the purchase of new shoes and pedals, so ask when buying.
There is no shame in seeking professional help. Many experienced cyclists, including racers who have been riding for decades, use professional fitters. The goal is pain-free riding, not proving you can solve everything yourself.
FAQ’s
How do you position a cleat to avoid knee pain?
Position the cleat so the center of the pedal spindle sits directly under or slightly behind the metatarsophalangeal joint (the ball of your foot). For most riders, starting 2 to 3mm behind the MTP joint reduces patellar tendon load. Match the cleat rotation to your natural foot angle, set stance width so your knees track straight, and use moderate float (4.5 to 6 degrees) unless you have a specific reason for zero float. Test the position over 3 to 4 rides before making further changes.
Do clipless pedals cause knee pain?
Clipless pedals themselves do not cause knee pain, but improper cleat positioning with clipless pedals does. Over 85% of cycling knee pain is related to saddle and cleat positioning. When cleats are set up correctly, clipless pedals are no worse for your knees than flat pedals. The key is precise fore-aft, rotational, and lateral alignment that matches your individual biomechanics.
Can cleats cause knee pain?
Yes, incorrectly positioned cleats are one of the leading causes of cycling knee pain. A cleat that is too far forward causes anterior knee pain by increasing patellar tendon load. Wrong rotation creates a twisting sensation. Improper stance width stresses the medial or lateral knee structures. Even a 2 to 3mm misalignment repeated over thousands of pedal strokes can cause significant overuse pain.
How to properly align SPD cleats?
To align SPD (2-bolt) cleats, first mark the MTP joint on each shoe sole. Position the cleat so the pedal spindle aligns with or sits 2 to 3mm behind this mark. Set the cleat rotation to match your natural foot angle by observing how your feet hang when relaxed. Adjust the lateral position to achieve a comfortable stance width. Tighten both bolts to 5 to 6 Nm of torque and test ride for 3 to 4 sessions before evaluating.
How to adjust cleats for knee pain?
Match the adjustment to your pain location. For front-of-knee pain, move cleats 2 to 3mm back. For outside knee pain, move cleats inward to widen stance. For inside knee pain, move cleats outward to narrow stance. For a twisting sensation, increase float or adjust rotation to match your natural foot angle. For posterior knee pain, check saddle height first, then move cleats slightly forward. Change one variable at a time and test over 3 to 4 rides.
Can cleat position cause knee pain?
Yes, cleat position is one of the most common causes of knee pain in cyclists using clipless pedals. At 85 rpm, you complete about 5,100 pedal strokes per hour. A cleat misaligned by just 2 to 3mm changes the angle of force through your knee on every single stroke, and the repetitive stress accumulates into overuse pain in the patellar tendon, IT band, ligaments, or menisci.
Conclusion
Learning how to set up cleats to avoid knee pain with clipless pedals is one of the most valuable skills any cyclist can develop. The process is straightforward once you understand the three axes of adjustment: fore-aft position for patellar tendon load, rotation for natural tracking, and lateral position for stance width. Match your adjustments to your specific pain location, change one variable at a time, and give each change 3 to 4 rides to settle.
Start with moderate float cleats, position the pedal spindle at or just behind your MTP joint, and match the rotation to how your feet naturally hang. Mark your positions before adjusting so you can always return to a known baseline. Replace worn cleats before they silently shift your position and reintroduce pain.
If three methodical adjustment attempts do not resolve your pain, or if you have pre-existing knee conditions, invest in a professional bike fit. The cost is modest compared to months of discomfort and missed rides. Your knees carry you through every pedal stroke, and they deserve the few minutes of attention it takes to get your cleat position right.