
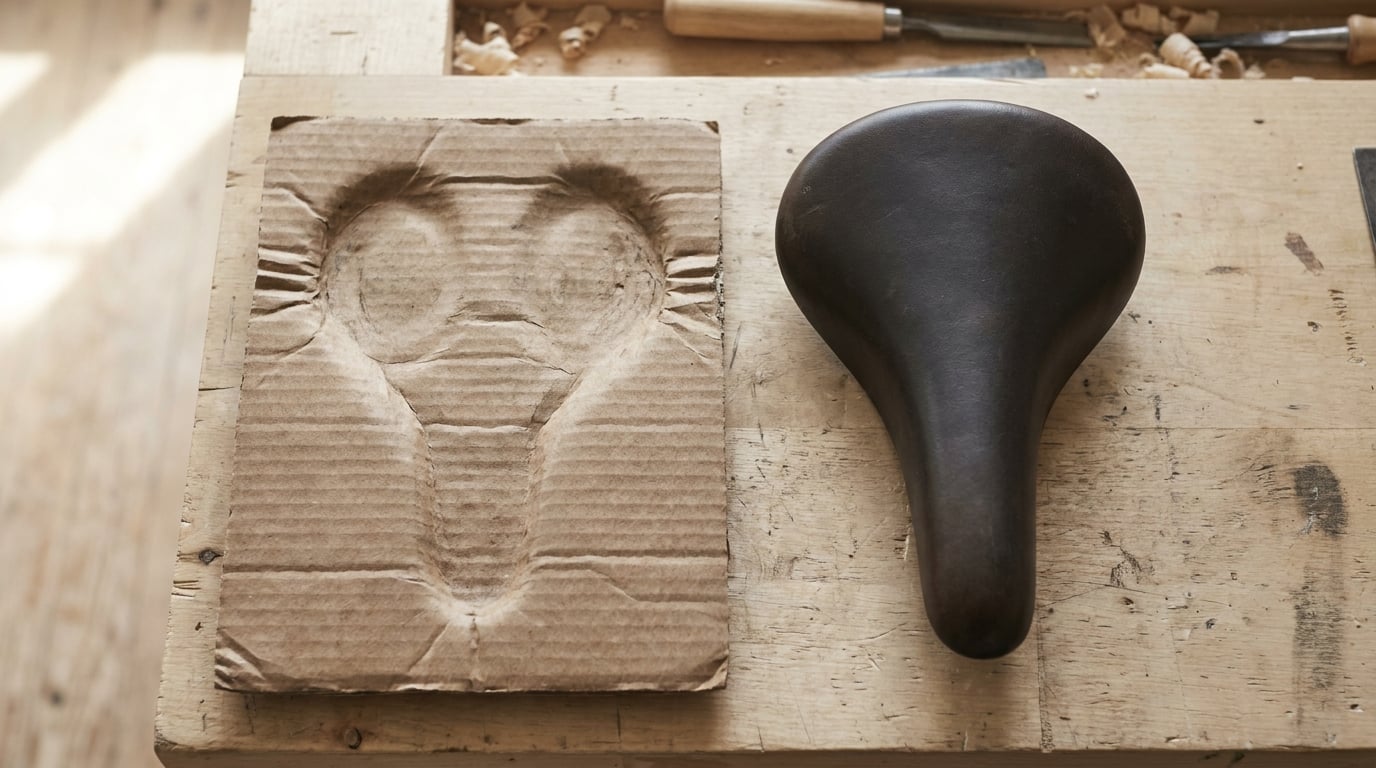
If you have ever finished a ride with numbness, chafing, or sharp pain in your sit bones, the saddle on your bike is almost certainly the wrong width. Most cyclists blame padding, shorts, or saddle shape first, but the actual root cause in most cases is a mismatch between your ischial tuberosities and the saddle’s effective seat surface.
Learning how to measure your sit bones is the single most important step toward a comfortable bike saddle. The measurement takes about 10 minutes at home with a piece of corrugated cardboard, and once you have the number, saddle shopping becomes dramatically simpler.
In this guide, our team walks you through three ways to measure sit bone width, how to convert that number into a saddle width, what to do when the measurement lands between sizes, and how to troubleshoot the common mistakes that leave cyclists frustrated with sore results.
Table of Contents
What Are Sit Bones (and Why Width Matters)
Your sit bones, technically called the ischial tuberosities, are the two bony points at the bottom of your pelvis. When you sit upright in a chair, those two points bear most of your body weight. The same is supposed to happen on a bike saddle, where those bones anchor you and protect the soft tissue between them.
If your saddle is too narrow, your sit bones hang off the edges and your soft tissue, nerves, and blood vessels take the pressure instead. That is what causes the numbness, tingling, and pain so many riders assume is normal. If the saddle is too wide, the edges press into the inside of your thighs with every pedal stroke, causing chafing and friction sores.
The correct saddle width lets both sit bones rest on the firm part of the saddle surface, with a small margin of support around each bone. That is why sit bone width, not saddle length or padding thickness, is the starting point for proper saddle fit.
Three Ways to Measure Your Sit Bones
There are three reliable ways to get your sit bone width, and they vary in cost and accuracy:
1. The DIY cardboard method. Free, takes 10 minutes, and gives a usable measurement for most riders. This is the method we cover in detail below.
2. An impression pad or gel kit. Affordable sit bone measurement kits (from brands like SQlab and Ergon) use a gel pad that captures a more precise impression than cardboard. Expect more consistent results.
3. A professional measurement at a bike shop or fitter. The most accurate option. Dealers use tools like the Ergon TS1 measuring stool or SQlab’s contoured measuring seat to capture your width in your actual riding position.
For most riders, the cardboard method is a perfectly good starting point. If your DIY result feels off, or if you ride a lot, a professional measurement is worth the cost.
How to Measure Sit Bones at Home: The Cardboard Method
The cardboard method works because corrugated cardboard holds an impression when you press into it. Your sit bones leave two clear dents, and the distance between the centers of those dents is your sit bone width. Here is the full step-by-step.
What You Need
You only need four things, and most cyclists already have all of them at home:
A piece of corrugated cardboard roughly the size of a saddle (about 30cm by 25cm). A flat bench, chair, or hard seat. A tape measure or ruler marked in millimeters. A marker or pen.
Avoid thin cardboard like cereal boxes, since it does not hold a clear impression. Use proper corrugated shipping cardboard, with the flutes running in one direction.
Step-by-Step Measurement Process
Step 1: Place the cardboard on a hard, flat surface. A wooden bench or hard chair works. Do not use a sofa or padded seat, since the give underneath will distort the impression.
Step 2: Sit on the cardboard in your riding position. This is the part most guides skip and most cyclists get wrong. Sit the way you actually ride, not the way you sit at a desk. If you ride a road bike in an aggressive position, lean forward. If you ride a cruiser upright, sit upright.
Step 3: Plant your feet and rock gently. With your feet flat on the floor, rock your pelvis slightly forward and back to press your sit bones firmly into the cardboard. Hold for about 30 seconds. Lift yourself off carefully without dragging.
Step 4: Find the two deepest indentations. Turn the cardboard over and look for the two clearest dents. They will be roughly 100 to 160mm apart. These are your sit bone impressions.
Step 5: Mark the center of each impression. Use your marker to dot the deepest point of each dent. Do not measure from the edges of the dents, since the impression is wider than the actual bone contact point.
Step 6: Measure between the two marked centers. Lay your ruler between the two dots and read the distance in millimeters. That number is your sit bone width.
Tip: Repeat the measurement two or three times and average the results. If your measurements vary by more than 5mm, your position is inconsistent or your cardboard is too soft. Try again with a fresh piece and a more deliberate posture.
Warning: Do not measure in soft clothing like sweatpants, since the fabric bunches and distorts the impression. Lightweight shorts or cycling bibs give the cleanest result. Do not pad the cardboard or sit on a towel over it.
How to Read the Impressions
If the impressions are clear, you are done. If they look faint or smeared, the cardboard was too thin, your position was wrong, or you shifted during the measurement. Faint impressions are the most common reason forum users call the cardboard method unreliable, and it almost always traces back to technique rather than the method itself.
Look for two distinct dents spaced roughly symmetrically from the center of the cardboard. If you only see one dent, or if the dents are off-center, you were probably leaning to one side. Start over and sit centered.
Converting Sit Bone Width to Saddle Width
This is where most cyclists get confused, because the number you measured is not the saddle width you need. You have to add clearance to the sit bone width to account for the saddle shape, your pedaling motion, and the way your pelvis moves on the saddle.
The most widely accepted rule is to add 20mm to 25mm to your sit bone measurement for road and fitness riding. For upright, comfortable riding like commuting or cruiser bikes, add closer to 30mm. For very aggressive time trial or triathlon positions, some fitters recommend adding only 15mm to 20mm, since a forward pelvic tilt narrows the effective bone contact spacing.
For example, if you measured 120mm sit bones for a road bike, add 20mm to land at a recommended saddle width of about 140mm. If you measured 130mm sit bones for an upright commuter bike, add 30mm to land at about 160mm.
Forum data backs this up. Cyclists report adding anywhere from 20mm to 40mm depending on bike type and personal preference. The 20mm baseline is a safe starting point, but some riders with wider pelvic rotation or who shift a lot on the saddle benefit from going up a size.
Women generally have wider sit bones than men relative to height, and saddles marketed as women’s-specific tend to start at 155mm or wider. That said, sit bone width varies more between individuals than between genders, so always measure rather than assume based on gendered marketing.
Sit Bone Width to Saddle Width Quick Reference
Here is a quick reference table to help you translate your measurement into a starting saddle width. These are guidelines, not absolute rules, so treat them as a starting point for test riding.
| Sit Bone Width | Recommended Saddle Width (Road) | Recommended Saddle Width (Upright) |
|---|---|---|
| 90 to 100mm | 130mm | 135mm |
| 100 to 110mm | 135mm | 140mm |
| 110 to 120mm | 140mm | 145mm |
| 120 to 130mm | 145mm | 150mm |
| 130 to 140mm | 155mm | 160mm |
| 140mm and up | 160mm+ | 165mm+ |
Note that some brands use a different sizing system. SQlab, for example, measures effective saddle width rather than total width, and their numbering differs from the raw millimeter measurement. Always check the brand’s own size guide before buying.
Riding Position Changes Everything
Your spine angle and pelvic rotation change which parts of your pelvis actually contact the saddle. This is why two riders with the same sit bone width can need different saddle widths depending on how they ride.
In an upright position, like on a cruiser or city bike, you sit relatively flat on your sit bones. The bone contact points are at their widest spacing. That is why upright bikes tend to need wider saddles with more padding.
In an aggressive road or triathlon position, your pelvis rotates forward. The contact points effectively narrow because you are no longer sitting directly on the flat bottom of the bones. You are rolling forward onto the pubic rami, which sit closer together. That is why road saddles tend to be narrower than cruiser saddles, even for riders with the same sit bone measurement.
This is also why sit bone measurement alone is not a perfect predictor of saddle comfort. A static measurement on a flat bench does not capture how your pelvis moves on a real saddle under load. The measurement gets you in the right range, but actual riding position should refine the choice.
Troubleshooting Common Measurement Problems
The cardboard method has a reputation for being unreliable, but in our experience most failed measurements trace back to technique. Here are the most common problems we see, and how to fix them.
Problem: The impressions are too faint to read. Cause: cardboard was too thin, position was too soft, or you did not press hard enough. Fix: use thicker corrugated cardboard, sit on a hard surface, and rock forward and back to press the bones in.
Problem: The impressions are uneven or off-center. Cause: you leaned to one side or shifted during the measurement. Fix: start over, plant both feet evenly, and keep your weight centered.
Problem: Your measurement falls between two saddle sizes. Cause: you are between standard sizes. Fix: round up for upright riding and round down for aggressive riding. If you are between 140mm and 145mm saddles, go 145mm for commuting and 140mm for road.
Problem: Your sit bones measure 135mm or wider and you cannot find saddles. This is a real frustration. Many mainstream brands cap out at 155mm saddles. Look at SQlab, Selle SMP, and Ergon, which offer wider models. Do not settle for a too-narrow saddle just because it is what the shop has in stock.
Problem: Your saddle still hurts even with the correct width. Width is only one variable. Saddle shape (flat vs curved), cutout design, padding density, and your fore-aft position all matter. A professional bike fit can isolate the actual cause.
When to Get a Professional Measurement
If you have tried the cardboard method, followed the conversion math, and you are still uncomfortable, it is time for a professional measurement. A good bike fitter will measure you dynamically in your actual riding position, not statically on a flat bench.
Many bike shops offer a free or low-cost sit bone measurement using tools like the Ergon TS1 measuring stool or SQlab measuring seat. These tools contour to your pelvis and produce a much clearer measurement than cardboard.
A full professional bike fit costs more, but it also covers saddle fore-aft position, saddle tilt, handlebar reach, and cleat placement. If you ride more than a few hours a week, a bike fit pays for itself in comfort and injury prevention within a season.
Look for fitters certified through RETUL, BikeFit, or IBFI. Ask if they include saddle pressure mapping, which uses a sensor mat on the saddle to show exactly where your weight is concentrated while you pedal.
Signs Your Saddle Width Is Wrong
Even without measuring, your body will tell you if the saddle is the wrong width. Here is what to look for.
Saddle is too narrow. You feel pressure on the soft tissue between your sit bones, not the bones themselves. You experience numbness in the groin or genitals during or after rides. You shift constantly trying to find a comfortable spot. You feel like you are perching on the saddle rather than sitting on it.
Saddle is too wide. You feel friction or chafing on the inside of your thighs. You feel the saddle edges pressing against your legs with each pedal stroke. You have saddle sores on the inner thigh rather than the sit bone area. You feel like you are wading through the saddle instead of spinning freely.
Saddle is the right width. You feel your weight on the sit bones themselves. You can ride for an hour or more without numbness. You stop noticing the saddle after the first few minutes of a ride. If that does not describe your current setup, measure your sit bones and start from there.
FAQ’s
What width saddle do I need for 120mm sit bones?
For 120mm sit bones, most riders need a saddle width of about 140mm for road cycling (add 20mm) or 145mm to 150mm for more upright riding (add 25 to 30mm). Always check the brand’s own size guide, since some brands like SQlab use effective width rather than total width.
How accurate is the cardboard sit bone measurement method?
The cardboard method gives a usable measurement within about 5mm for most riders, but accuracy depends heavily on technique. Use thick corrugated cardboard on a hard surface, sit in your actual riding position, and repeat the measurement two or three times. If results vary widely, a professional measurement is more reliable.
Where should my sit bones rest on the bike saddle?
Your sit bones should rest on the widest, firmest part of the saddle, usually just behind the midpoint. If your sit bones hang off the edges, the saddle is too narrow. If you feel pressure on the soft tissue between them rather than the bones, the saddle is either too narrow or tilted nose-down. The bones should bear the load, not the tissue.
Where can I get my sit bones measured professionally?
Many bike shops offer sit bone measurement using tools like the Ergon TS1 measuring stool or SQlab measuring seat. Look for dealers who carry Ergon, SQlab, Specialized, or WTB saddles, since these brands push sit bone measurement as part of the saddle fitting process. A full professional bike fitter can also measure you dynamically in your riding position.
Do bike shops measure sit bones for free?
Some bike shops offer free sit bone measurement as part of saddle sales. Others charge a small fee or include it in a paid bike fit. Call ahead and ask. Brands like Ergon and SQlab encourage their dealers to offer measurement as a service, so shops that carry those brands are most likely to have the right tools.
Conclusion: Measure Twice, Ride Comfortably
Knowing how to measure your sit bones takes the guesswork out of saddle shopping. The cardboard method is free, takes 10 minutes, and gets you into the right width range for most riding. From there, test the saddle on real rides, pay attention to where you feel pressure, and adjust based on your actual experience rather than a single static number.
If your measurement lands between sizes, round up for upright riding and down for aggressive riding. If you have unusually wide sit bones or your saddle still hurts after a few weeks of testing, a professional bike fitter can isolate the cause and save you months of trial and error. The right saddle width is out there, and now you have the tools to find it.