
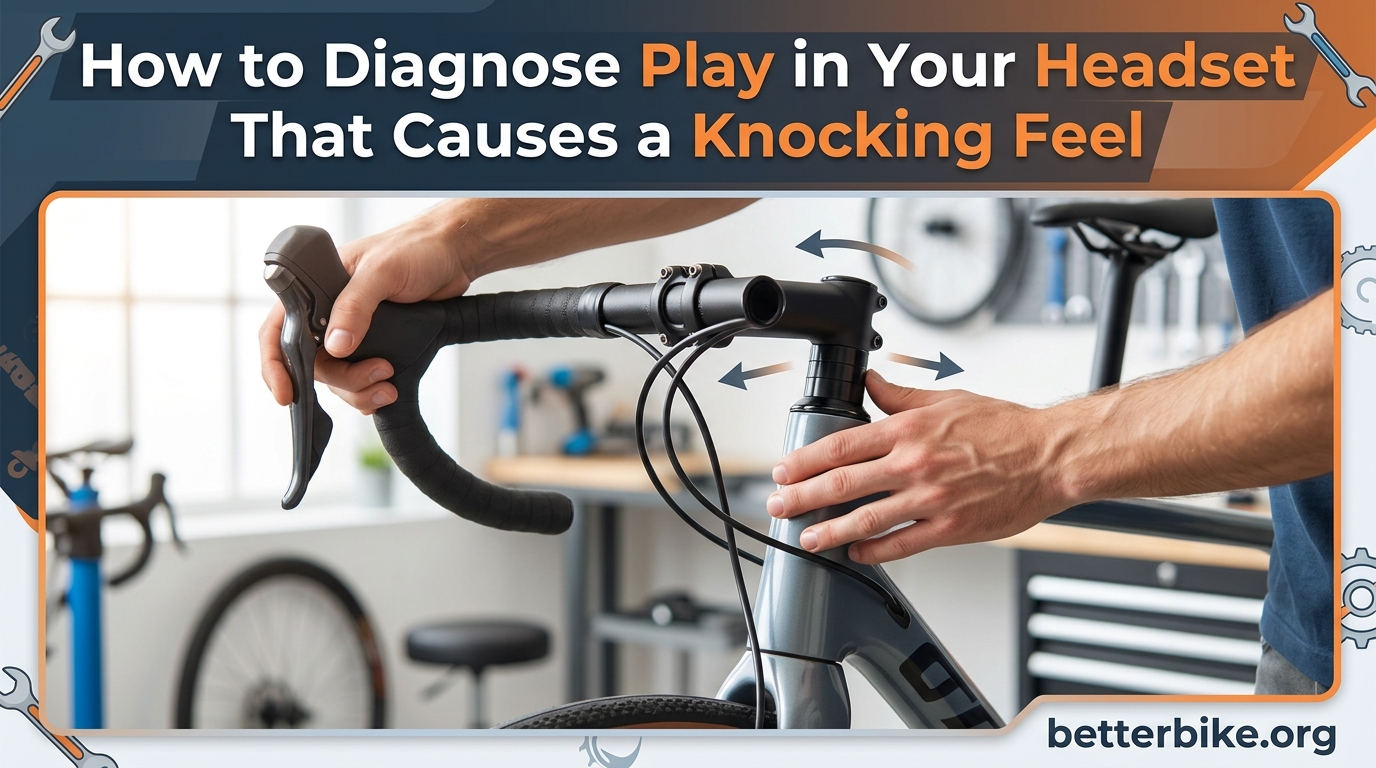
If you’ve ever grabbed your front brake, rocked the bike forward and back, and felt a knock or clunk coming from the front end, you already know the frustration. This guide walks you through how to diagnose play in your headset that causes a knocking feel so you can find the exact source and fix it before it ruins your bearings.
Over the past few seasons, I’ve worked on dozens of bikes in our shop that came in with this exact complaint. The good news: most headset play is fixable in under an hour with basic tools. The bad news: if you ignore it, you’ll wear out your bearing races in a few hundred miles.
Table of Contents
Quick Answer: Diagnose Headset Play in 60 Seconds
To diagnose play in your headset that causes a knocking feel, apply the front brake, rock the bike forward and back, and place your fingers on the head tube where the stem clamps. If you feel a click, knock, or lag between the fork and frame, your headset has play. Next, lift the front wheel off the ground and turn the bars side to side. Smooth, free movement confirms the bearings themselves are okay and you only need to adjust preload. Stiff or notchy movement means the bearings are worn.
What Is Headset Play and Why Does It Cause a Knocking Feel?
Headset play is excess movement inside the bearing assembly that connects your fork to the frame. Your headset lets the fork rotate smoothly inside the head tube. When the bearings lose preload or wear out, the fork can shift slightly relative to the frame. That small shift is the knocking feel riders describe.
Every headset has two opposing bearing races with ball bearings or a cartridge between them. A top cap and bolt control the preload, which is the squeeze that keeps the bearings seated. When preload is too loose, the bearings rattle. When preload is too tight, the steering binds.
I see this problem most often after a fork swap, a stem change, or when someone tightens the stem bolts before loosening the top cap. Both mistakes leave the bearings under-loaded or over-loaded.
Headset Knocking vs Other Bike Noises: How to Tell the Difference
One of the biggest pain points our readers report is not knowing if the noise is really the headset. A fork, hub, or even a loose stem faceplate can sound similar in motion. Here’s how to separate them.
Test the headset while standing still: Stand over the frame, squeeze the front brake, and rock the bike forward and back. A headset knock will feel like a discrete click as the fork shifts in the head tube. A hub knock usually only shows up while pedaling or freewheeling. A fork knock changes when you cycle the suspension.
Test it with the wheel perpendicular: A clever test from the BikeForums community: turn the front wheel 90 degrees so it’s perpendicular to the bike and rock again. If the knock disappears, the issue is rotational and most likely in the headset bearings, hub, or stem. If the knock stays, the fork itself may be the culprit.
Threaded vs Threadless Headsets: Know Your Type Before Diagnosing
Before you start adjusting anything, identify which headset style your bike uses. The diagnosis steps are nearly identical, but the adjustment differs.
Threaded headsets are common on older steel bikes, touring rigs, and some commuters. The steerer has threads, and a locknut holds adjustment in place. You adjust with two wrenches: one on the locknut, one on the adjustable race above it.
Threadless headsets are standard on every modern mountain, road, and hybrid bike. The steerer is smooth, the stem clamps directly onto it, and a star-fangled nut or expansion plug sits inside the steerer to anchor the top cap. This is what most riders will have.
Look down at your stem. If you see two pinch bolts and a small cap with a single bolt on top, you have a threadless headset. If you see threads and a locknut on the steerer above the headset, you have threaded.
How to Diagnose Play in Your Headset Step by Step
This numbered procedure is the fastest path to a confident diagnosis. I’ve used it on every headset knock that comes through our shop.
Step 1 – Set up the bike safely. Place the bike on level ground or in a stand. Make sure the front wheel can move freely. Confirm the front brake works so you can use it for the rocking test.
Step 2 – Perform the rocking test. Squeeze the front brake lever firmly. With your other hand on the top of the head tube, push the bike forward and pull it back. Repeat the motion three or four times.
Step 3 – Locate the knock. Place two fingers on the lower headset cup, just above where the fork crown meets the head tube. Repeat the rocking motion. If you feel a click or lag between the frame and fork, headset play is present.
Step 4 – Check steering smoothness. Lift the front wheel an inch off the ground. Turn the bars slowly from full left to full right. Smooth, free movement means the bearings are healthy. A gritty, notchy, or rough feel means the bearings are worn or contaminated.
Step 5 – Test with the wheel perpendicular. Turn the handlebars 90 degrees so the front wheel points sideways. Rock the bike again. If the knocking vanishes, the source is rotational (headset, hub, or stem). If it remains, the fork is the more likely culprit.
Step 6 – Loosen the stem and re-check. Loosen the two stem bolts (or the threaded locknut) just enough that the stem can spin. Now perform the rocking test again. If the knock goes away, the issue is misalignment between the stem and top cap, not the bearings.
Step 7 – Determine the cause. If steps 2 and 3 confirm play, and step 4 shows smooth bearings, you need a simple preload adjustment. If step 4 shows roughness, the bearings or races need service or replacement.
Tools You Need to Diagnose and Adjust Headset Play
Most headset diagnosis takes only what you already own. Here is the basic kit our team uses.
- Hex keys (typically 4mm, 5mm, and 6mm) for stem and top cap bolts
- A torque wrench for proper final tightening
- Work gloves to protect your fingers during the rocking test
- A clean rag and degreaser if you need to inspect bearings
- A bike repair stand (helpful but not required)
For rides away from home, pack a multi-tool so you can adjust on the trail. Our guide on emergency bike repair tools covers what fits in a saddle bag.
Troubleshooting: When Headset Play Persists After Adjustment
This is where the real-world forum pain points come in. Several riders on r/bikewrench overhauled the entire headset, cleaned and re-greased the bearings, and still felt a knock. If that sounds familiar, work through these checks before assuming the worst.
Check the spacer stack. A missing or incorrectly placed spacer is the most common cause of persistent play. The spacers must sit between the top of the headset and the stem. If you have too few spacers, the top cap cannot generate preload.
Check the star-fangled nut. On threadless setups, the top cap bolt threads into a star nut inside the steerer. If that star nut slips or sits too low, the top cap cannot pull the steerer upward to set preload.
Check the stem. A loose stem faceplate, a cracked stem, or a stem with insufficient clamp surface can mimic headset play. Tighten faceplate bolts evenly to manufacturer torque.
Check the fork. Turn the bars 90 degrees and rock again. If the knock only appears with the wheel forward, it may be the headset. If it appears in both positions, check the fork crown race, dropouts, and axle.
Check bearing damage. Even bearings that spin freely can have pitted races. Pull the fork and inspect the upper and lower bearing surfaces for dents, brinelling, or rust.
Keeping water and grit out of the bearings prevents most of these issues. Our piece on proper bike washing techniques explains how to clean the front end safely.
When to Replace Headset Components vs Just Adjust Them
Adjustment alone solves about 70 percent of headset knocking issues. Replacement becomes necessary when you find visible damage during inspection.
Replace the bearings if you see pitting, rust, flat spots, or rough rotation after cleaning. Replace the races if the bearing surfaces have grooves or dents. Replace the cartridge headset entirely if it is sealed, more than a few years old, and shows any roughness.
If the fork steerer has been cut too short, the star nut cannot sit low enough. This is a common issue after a fork travel change. The only real fix is a new fork or a new steerer tube.
Common Mistakes to Avoid When Diagnosing Headset Play
I’ve made most of these mistakes at some point. Avoid them and you’ll save an hour.
Tightening the stem bolts first. The top cap sets preload. The stem clamps the steerer. If you clamp the stem before setting preload, no amount of stem tightening will remove the play.
Over-tightening the top cap. Cranking the top cap binds the bearings and ruins steering feel. Snug plus a quarter turn is usually correct.
Skipping the perpendicular test. Without turning the wheel sideways, you cannot rule out fork or hub noise. The 90-degree test takes five seconds.
Assuming a clean headset is a good headset. Even fresh-looking bearings can have damaged races. Always inspect the cup surfaces directly.
Frequently Asked Questions
How do I tell if my headset bearings are bad?
Lift the front wheel and turn the bars slowly. Smooth, free movement means the bearings are fine. Gritty, notchy, or rough rotation means the bearings are worn and need service or replacement. You can also pull the fork and inspect the bearing surfaces for pitting, rust, or flat spots.
How do I tighten headset bearings?
Loosen the stem bolts so the stem can move freely on the steerer. Turn the top cap bolt clockwise in small increments, then re-check steering and play. When the play disappears and the bars still turn smoothly, hold the top cap steady and torque the stem bolts to spec. Always tighten the stem before riding.
Why is my headset rattling even after tightening?
Persistent rattling usually points to a missing spacer, a slipped star nut, a loose stem, or worn bearings. Loosen the stem and recheck for play. If the play returns immediately, the bearings or races may be damaged and need replacement.
Can a fork change cause headset knocking?
Yes. A new fork may have a different steerer diameter, crown race profile, or stack height. Any of these can disturb the headset preload and create play. After a fork change, always re-check the rocking test and reset the top cap preload.
Final Thoughts on Diagnosing Headset Play
Learning how to diagnose play in your headset that causes a knocking feel is one of the highest-value skills a cyclist can build. The diagnosis itself takes less than five minutes, the tools are basic, and catching the problem early protects your frame, fork, and bearings from expensive wear.
Run the rocking test before your next ride. If you feel play, follow the seven-step procedure, check the spacers and star nut, and confirm the bearings are smooth. Most knocks clear up with a careful preload adjustment and a properly torqued stem. Anything beyond that is a sign to inspect for damage or book a service.