
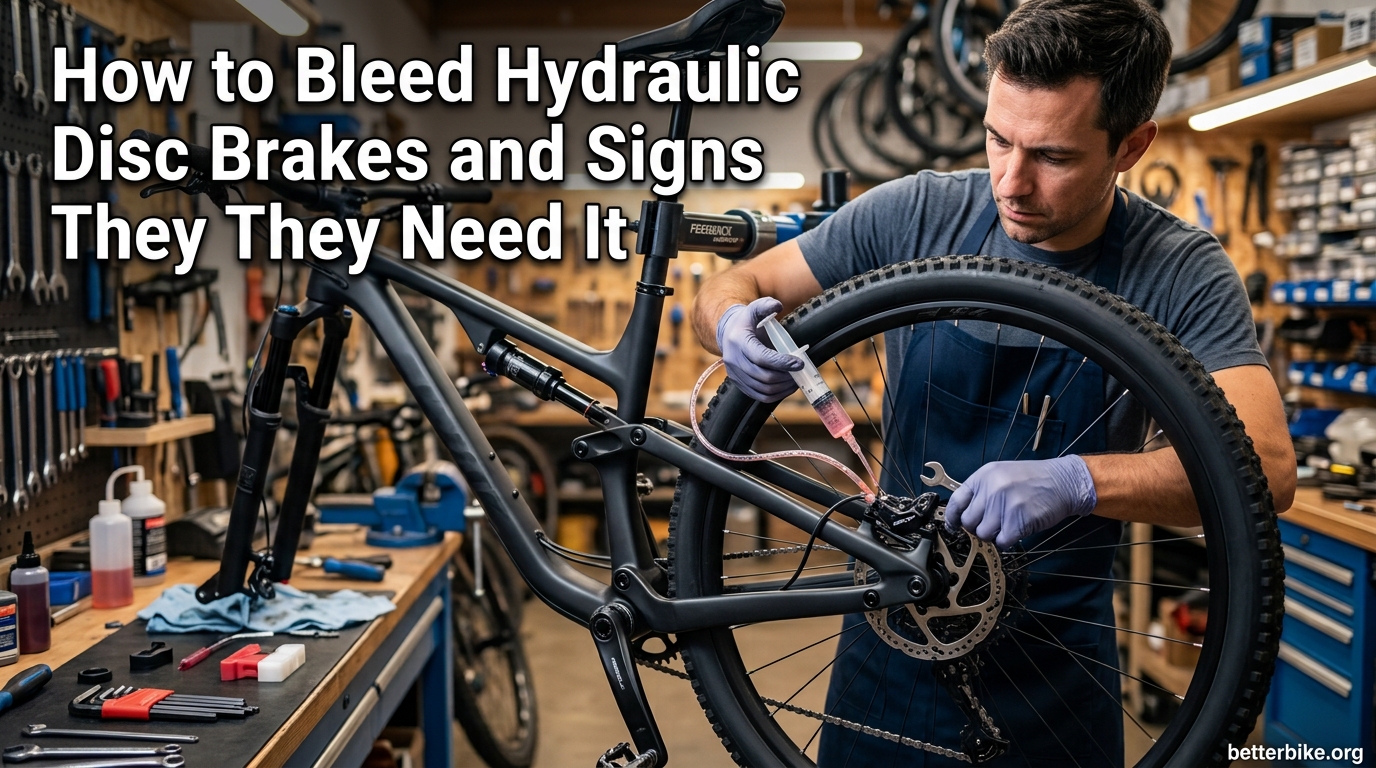
Learning how to bleed hydraulic disc brakes is one of the most useful maintenance skills a rider can develop. Bleeding removes trapped air from the brake system and replaces old fluid with fresh fluid, restoring the firm, predictable lever feel that keeps you safe on every descent. I have bled my own brakes for years, and I can tell you with confidence that the process is far less intimidating than most beginners think.
This guide walks you through everything you need to know. I will cover the warning signs that your brakes need bleeding, explain why air is the enemy of hydraulic systems, list every tool you will need, and give you a clear step-by-step procedure you can follow at home. Whether you ride a road bike, mountain bike, gravel bike, or e-bike, the principles apply.
Table of Contents
What Does It Mean to Bleed Hydraulic Disc Brakes?
Bleeding hydraulic disc brakes is the process of removing trapped air from the brake system and replacing old fluid with fresh fluid to restore firm, responsive lever feel. Hydraulic brakes rely on a sealed system filled with incompressible fluid that transmits force from your hand on the lever to the caliper pistons, which then clamp the rotor and slow your bike.
The whole system works because the fluid cannot be compressed. When you squeeze the lever, the master cylinder pushes fluid through the hose to the caliper, and the caliper pistons push the brake pads against the rotor. Because the fluid is incompressible, every bit of force you apply at the lever arrives at the rotor almost instantly.
Air breaks this principle. Air compresses under pressure, which means some of your lever effort goes into squeezing air bubbles instead of moving the pads. The result is a soft, spongy lever that travels further than it should before the brakes bite. Bleeding forces fresh fluid through the entire system, pushing air bubbles out through the bleed port at the lever and leaving nothing but clean, bubble-free fluid behind.
When done correctly, bleeding restores the firm bite point you had when the brakes were new. It also flushes out contaminated or degraded fluid, which is critical because old fluid can overheat and cause brake fade on long descents.
Signs Your Hydraulic Disc Brakes Need Bleeding
There is one classic sign of air inside any hydraulic brake, and that is excess lever travel, sometimes called a spongy or loose brake lever. But that is not the only warning. I have compiled the six most common indicators I look for in my own bikes and in the bikes of friends who bring them over to the garage.
Spongy or soft lever feel. When you pull the lever, it feels mushy instead of firm. The lever compresses easily at first before you feel the brakes engage. This is the most common symptom and the clearest sign that air has entered the system.
Excess lever travel. You have to pull the lever further toward the handlebar than usual before the brakes bite. On a properly bled system, the bite point should be within the first third of lever travel. If your lever is hitting the bar before you get full braking force, the system almost certainly has air.
Wandering bite point. The point where the brakes engage changes from one pull to the next. Sometimes it bites early, sometimes late. This inconsistency means air is moving around inside the hose and caliper as fluid flows past it.
Reduced braking power. Even when you squeeze the lever hard, the bike takes longer to slow down. You find yourself braking earlier for corners or descents because you do not trust the lever response.
Brake lever not returning fully. After you release the lever, it stays slightly compressed instead of springing back to its resting position. Air or contamination can prevent the master cylinder from fully resetting.
Visible air bubbles in the fluid. If your brake system uses a clear reservoir or has a transparent bleed port, you may see bubbles floating in the fluid. This is a direct confirmation that air is present.
If any of these symptoms sound familiar, your brakes need attention. The good news is that bleeding is a fixable problem you can address at home with a basic kit and about an hour of time. If you have ever dealt with troubleshooting disc brake problems on a long ride, you already know how good it feels to fix the issue yourself.
Why Bleeding Hydraulic Brakes Matters for Safety
Air in your brake system does not just feel bad. It is a genuine safety issue. Compressible air absorbs braking force, which means your stopping distance increases, sometimes dramatically, on long mountain descents where you rely on firm, repeatable braking.
Reddit users in r/MTB and r/bikewrench have shared stories of brakes stopping completely mid-descent when the system was neglected. Contaminated or old fluid can also boil under heavy braking, creating vapor bubbles that lead to complete brake failure. This is the dreaded brake fade that hospitalizes riders every year.
Regular bleeding keeps fluid fresh, the system sealed, and the lever feel predictable. It is one of those maintenance tasks that pays for itself the first time you need your brakes to work perfectly on a wet root or steep gravel corner.
Tools and Materials You Will Need
You can buy a complete bleed kit for most brake systems, or you can purchase the individual components. Here is what I keep in my toolbox for brake bleeds.
Bleed kit with syringes. Most kits include two syringes, tubing, and the appropriate fittings for your brake brand. Shimano, SRAM, Magura, Tektro, and Hayes all use slightly different fittings, so make sure the kit matches your brakes.
Correct brake fluid. This is the most important item on the list. Using the wrong fluid can ruin your brakes. We will cover the mineral oil versus DOT distinction in the next section.
Bleed block. A plastic spacer that fits between the brake pads in the caliper. It prevents the pistons from extending too far when you push fluid through the system without pads in place.
Allen keys. Typically 2.5 mm, 3 mm, and 4 mm to remove pads, caliper bolts, and lever bleed port screws.
Clean rags and nitrile gloves. Brake fluid is messy and can damage paint and finishes. Mineral oil is easier to clean, but DOT fluid is hygroscopic and absorbs water, so cleanliness matters for both types.
A work stand or stable surface. You need the bike level and stable. A repair stand is ideal, but flipping the bike upside down on the handlebars and saddle works too, as long as the brake levers remain accessible.
Zip ties or a strong rubber band. Used to strap the syringe to the handlebar and let gravity do some of the work.
Mineral Oil vs DOT Fluid: Know Your System
This is the single most important thing to get right. Hydraulic disc brakes use one of two types of fluid, and they are not interchangeable. Using the wrong fluid will damage seals and can cause complete brake failure.
Mineral oil systems include Shimano, Magura, Campagnolo, and some older Tektro models. Mineral oil is not hygroscopic, meaning it does not absorb water from the atmosphere. This makes mineral oil systems lower maintenance and more forgiving if you accidentally leave a bleed port open briefly.
DOT fluid systems include SRAM, Hayes, and most Tektro brakes. DOT 4 and DOT 5.1 are glycol-based fluids that absorb water over time, which is why they need more frequent bleeding. The advantage of DOT fluid is a higher boiling point under hard use, which is why most downhill and aggressive trail brakes use DOT fluid.
Never, ever mix them. DOT fluid will damage mineral oil seals, and mineral oil will compromise DOT fluid braking performance. Check your brake manufacturer manual before you start, and only use the fluid your brakes were designed for.
How to Bleed Hydraulic Disc Brakes: Step by Step
This is the core procedure. I will describe it for a standard two-syringe gravity bleed, which is the most beginner-friendly method. Brand-specific tweaks may apply, so consult your brake manual for Shimano, SRAM, or other brand instructions.
Step 1: Prepare your workspace. Set up your bike in a stand or flip it upside down. Remove the wheel from the brake you are bleeding. Lay down rags to catch any spilled fluid, especially if you use DOT fluid.
Step 2: Remove the brake pads and install the bleed block. Open the caliper, remove the pads, and slide the bleed block into the caliper where the pads sit. This stops the pistons from overextending when no pads are present.
Step 3: Prepare your syringes. Fill one syringe halfway with fresh fluid. Tap the syringe to release any air bubbles, then push the plunger until fluid flows out the tip with no air gaps. Attach the syringe to the caliper bleed port.
Step 4: Open the caliper bleed nipple. Using the correct wrench, loosen the bleed nipple about a quarter turn so fluid can flow.
Step 5: Connect the lever syringe. Attach an empty syringe to the lever bleed port. Open the lever bleed port screw and pull the lever syringe plunger back slightly to draw out old fluid and any trapped air.
Step 6: Push fluid through the system. Slowly depress the plunger on the caliper syringe. Fresh fluid will flow up through the hose, pushing old fluid and air bubbles out into the lever syringe. Watch for bubbles passing through the tubing.
Step 7: Tap and tap again. While pushing fluid, gently tap the hose, caliper, and lever body with a wrench handle. Vibration helps dislodge stubborn air bubbles clinging to internal surfaces.
Step 8: Continue until no bubbles appear. Keep pushing fluid until the fluid exiting into the lever syringe is completely bubble-free. This usually takes 30 to 60 mL of fluid.
Step 9: Close the bleed ports. With the caliper syringe still under slight pressure, close the caliper bleed nipple. Then close the lever bleed port screw while holding the lever syringe in place.
Step 10: Remove syringes and clean up. Disconnect both syringes. Wipe up any spilled fluid immediately. Mineral oil is gentle on paint but DOT fluid will strip finishes quickly.
Step 11: Reinstall pads and wheel. Remove the bleed block, reinstall the brake pads, and refit the wheel. Spin the wheel to confirm the rotor is centered and the pads are not dragging excessively.
Step 12: Test the lever. Squeeze the lever multiple times. The first few pulls may feel slightly soft as the pads reset. After three to five squeezes, the lever should feel firm with a clear bite point near the start of travel.
Quick Bleed vs Full Bleed: Which Do You Need?
Not every brake service requires a full system overhaul. Knowing the difference saves time and fluid.
A quick bleed is a small amount of fluid pushed through the system to remove fresh air contamination. This is what you do if you just opened a brake line to swap a hose or shortened a cable. It typically uses 20 to 30 mL of fluid and takes about 20 minutes.
A full bleed replaces all the fluid in the system. This is what you do for annual maintenance, after contamination, or when the fluid looks dark and degraded. A full bleed uses 50 to 80 mL of fluid and takes 45 minutes to an hour.
If your brakes feel slightly soft but the fluid still looks clean, try a quick bleed first. If the fluid is dark, smells burnt, or the brakes have not been serviced in over a year, do a full bleed.
Common Mistakes to Avoid When Bleeding Brakes
I have made several of these mistakes myself over the years, so do not feel bad if any sound familiar. Avoiding them is the best way to get a clean bleed on the first try.
Using the wrong fluid. The number one mistake, full stop. Always verify mineral oil or DOT before you begin. Cross-contamination ruins seals.
Running the lever reservoir dry. If the reservoir empties while you are pulling the lever, you pull air directly into the master cylinder. This creates new air pockets you then have to bleed out. Always keep the reservoir topped up.
Squeezing the lever with no syringe attached. This draws air into the lever master cylinder. If you accidentally do this, you will need to bleed from the top down as well as from the caliper up.
Dirty work environment. Dust, hair, and debris that enter an open brake system can clog the narrow port in the caliper. Work in a clean area and keep the bleed ports capped when not in use.
Not pushing enough fluid through. Stopping too early leaves old fluid and tiny bubbles in the system. Always push through at least 30 mL even for a quick bleed, and watch carefully for the last bubble to exit.
Over-tightening bleed nipples. These are small brass parts that strip easily. Snug is enough. Check your brake manual for the correct torque, usually around 4 to 6 Nm.
How Often Should You Bleed Your Brakes?
Most brake manufacturers recommend bleeding at least once per year for casual riders. If you ride aggressively, in wet conditions, or live in a humid climate, bleed every six months.
DOT fluid systems need bleeding more often than mineral oil systems because DOT absorbs water over time. SRAM, for example, recommends bleeding Avid and Code brakes every six months for riders who use their bikes hard.
The best guide, though, is lever feel. If your brakes feel firm and the bite point is consistent, you do not need to bleed. The moment you notice softness or wandering bite, it is time.
Bedding In and Final Checks After a Bleed
Once you finish the bleed, take a few minutes to confirm everything is working before your next ride. Squeeze the lever firmly about ten times to seat the pads against the rotor. The lever should feel progressively firmer as fluid redistributes.
Check that the rotor is centered between the pads and does not rub. Spin the wheel and listen for any scraping. A slight rub is normal right after a bleed and usually settles within a few minutes of riding.
Before any big descent, do a short test ride in a flat area and practice hard braking from moderate speeds. Confirm both front and rear brakes engage firmly with a clear bite point. Only then are you ready for technical terrain.
Frequently Asked Questions
How often do hydraulic disc brakes need to be bled?
Most hydraulic disc brakes should be bled at least once a year for casual riding, every six months for aggressive riders, and immediately if you notice spongy lever feel or wandering bite point. DOT fluid systems need bleeding more often than mineral oil systems because DOT fluid absorbs water over time.
What are the common mistakes when bleeding hydraulic disc brakes?
The most common mistakes are using the wrong fluid type, running the lever reservoir dry, squeezing the lever without a syringe attached, working in a dirty environment, and stopping the bleed before all bubbles have exited. Over-tightening the small brass bleed nipples is also a frequent error that strips the threads.
Can I bleed my own hydraulic disc brakes at home?
Yes, bleeding hydraulic disc brakes at home is a beginner-friendly task with the right bleed kit, the correct brake fluid, and a clean workspace. Most riders complete their first successful bleed in under an hour. Brand-specific bleed kits make the process straightforward, and YouTube tutorials from the manufacturers walk through each step.
Why is my brake lever still spongy after bleeding?
If your brake lever still feels spongy after bleeding, the most likely causes are air that was not fully removed, fluid leaking past a seal, or a contaminated caliper port. Try bleeding again with more fluid pushed through, tap the hose and caliper firmly to dislodge stubborn bubbles, and inspect all connections for leaks. If the problem persists, take the bike to a professional mechanic.
Is DOT brake fluid the same as mineral oil?
No, DOT brake fluid and mineral oil are completely different and cannot be used interchangeably. Shimano, Magura, and Campagnolo brakes use mineral oil, while SRAM, Hayes, and most Tektro brakes use DOT 4 or DOT 5.1 fluid. Mixing them damages seals and can cause brake failure, so always check your brake manufacturer manual before bleeding.
Final Thoughts
Knowing how to bleed hydraulic disc brakes is one of the most rewarding maintenance skills in cycling. It saves you shop fees, keeps your brakes performing at their best, and gives you confidence that your stopping power will be there when you need it most.
If your brakes are showing any of the warning signs we covered, do not wait. Buy the correct bleed kit for your brake brand, set aside an hour on a weekend morning, and work through the step-by-step procedure. The first time is the hardest, and after that it becomes routine maintenance you can do anywhere from your kitchen table to a hotel room on a cycling trip.
Keep your fluid fresh, your bleed ports clean, and your lever firm. Your brakes will thank you on the next big descent.