
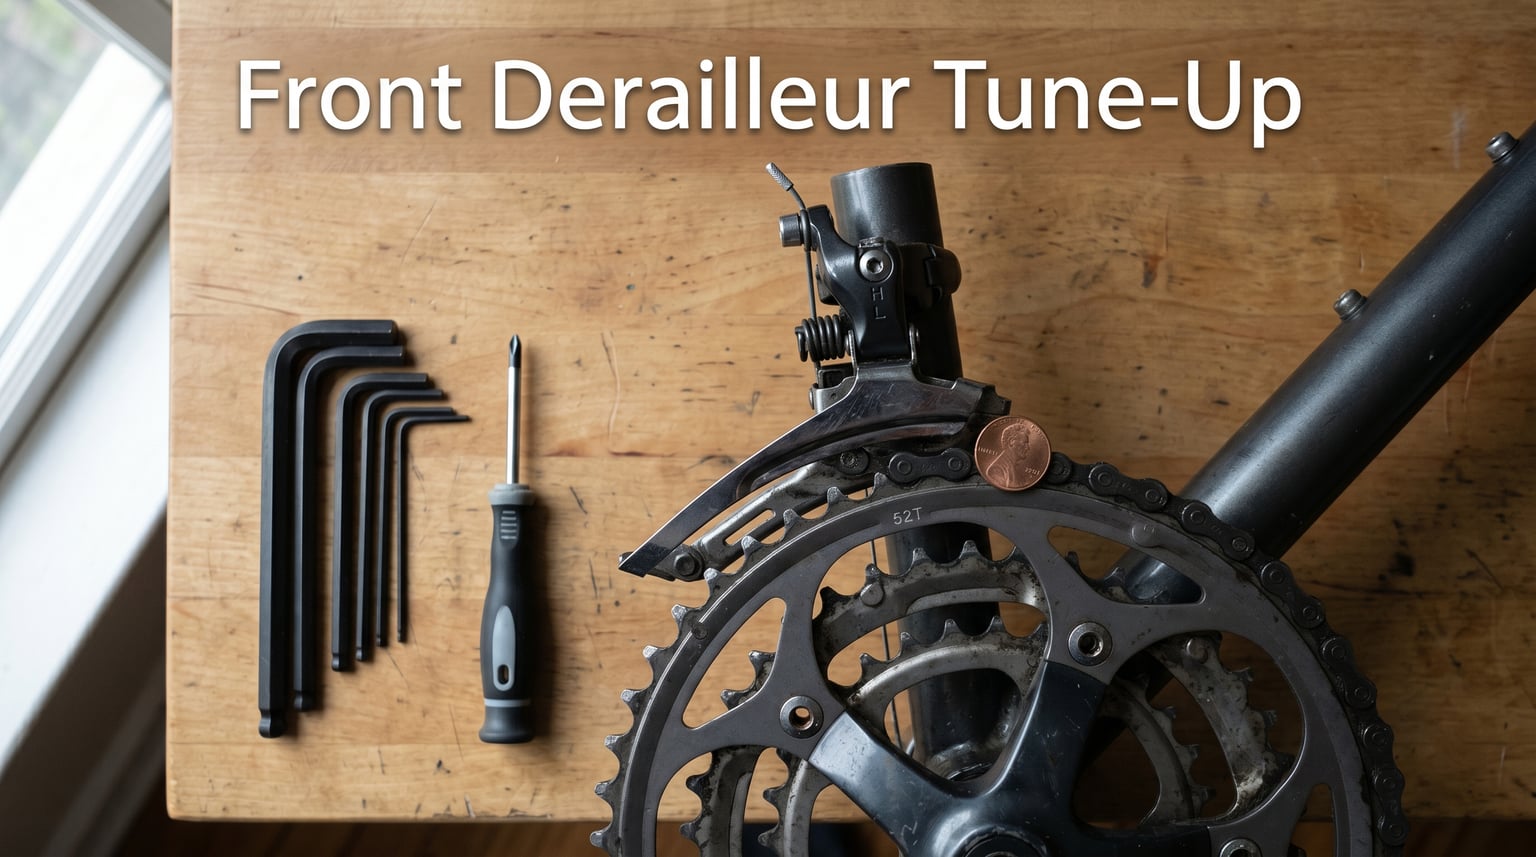
If your front derailleur rubs the chain in certain gears, the fix usually takes about 20 minutes with a 4mm hex wrench and a Phillips screwdriver. I’ve spent more than a decade tuning derailleurs in bike shops and on my own bikes, and 90% of chain rub complaints come down to three things: limit screws, cable tension, and cross-chaining. This guide walks you through each one in order so you stop wasting time guessing.
Chain rub isn’t just annoying. It accelerates chain and cage wear, hurts your cadence efficiency, and signals that shifting performance is about to get worse. The good news is that fine-tuning a front derailleur is one of the most accessible maintenance tasks on a bike. You don’t need special tools, and you can verify your work immediately by spinning the cranks.
Table of Contents
How a Front Derailleur Creates Chain Rub in Certain Gears
A front derailleur is a cage that pushes the chain sideways between two or three chainrings. The cage is pulled by an inner wire connected to your left shift lever. When the cage sits too close to the chain, the chain grazes the inside or outside plate as it runs, creating that familiar ticking or grinding sound.
Rub in certain gears usually means your cage clearance is uneven across the rear cassette. The chain travels at a steeper angle when paired with the outermost rear cog and the largest chainring, or with the innermost sprocket and the smallest chainring. Those extreme combinations leave very little room for error, so a derailleur that’s slightly misaligned will only complain in those specific gears.
Cross-chaining is the most common cause of rub in those extreme combinations. Cross-chaining happens when you ride in the big chainring paired with the biggest rear cog, or in the small chainring with the smallest rear cog. Both positions force the chain to run diagonally across the drivetrain, increasing the chance of contact with the cage. If you only hear rub in those two positions, the fix might be as simple as shifting to a more efficient gear combination. We’ve covered proper proper gear shifting techniques in another guide that explains how to plan your chainring and cog pairings before climbs.
Frame flex is another factor riders overlook. When you stand and hammer on the pedals, your frame deflects slightly, which moves the front derailleur cage closer to the chain. A light rub that’s only present under load but disappears when you soft-pedal seated is often just frame flex. It’s annoying but largely cosmetic. We get into how to tell the difference later in this article.
Tools You’ll Need to Fine-Tune a Front Derailleur
You can complete this entire job with three tools and a flat work surface. Park Tool recommends the same basic kit, and I keep these in my home workshop:
- 4mm hex wrench (for the derailleur mounting bolt and cable pinch bolt)
- Phillips screwdriver (for the limit screws on most derailleurs)
- A penny or a 2mm Allen key (used as a feeler gauge to check cage-to-chain clearance)
- A bike stand or a way to lift the rear wheel off the ground
- A clean rag and a small amount of degreaser
Start by wiping down the derailleur cage and the chainrings. Old grease and dirt make it hard to judge clearance, and they throw off your sense of what’s rubbing. If you notice your chain has stretched past 0.75% wear, replace it before adjusting. A worn chain shifts poorly and no amount of tuning will fix the underlying problem.
Step 1: Check Front Derailleur Height and Rotation
Before touching any limit screws, verify that the derailleur is mounted correctly. The bottom edge of the outer cage plate should sit 1 to 3mm above the largest chainring’s teeth. Park Tool uses a penny as a feeler gauge, and that visual trick works well at home.
Loosen the 4mm clamp bolt on the seat tube, slide the derailleur up or down until the gap is correct, and re-tighten the bolt to about 30 to 40 inch-pounds of torque. Snug is enough; overtightening can crack carbon frames. If you ride a carbon bike, check the manufacturer’s torque spec first.
Next, check the rotational angle. Looking down from above, the cage should be parallel to the chainrings. The front tip of the cage often points slightly outward, but the rear tip should line up so the chain can move cleanly between rings. If the cage is twisted, the inner plate will rub on the small chainring or the outer plate will rub on the big ring. Loosen the clamp bolt, rotate the derailleur by hand until it’s parallel, and re-tighten.
Step 2: Set the L-Limit Screw
The L-limit screw controls how far the cage moves toward the frame when you shift to the smallest chainring. This is the most important limit screw for stopping rub in the small ring. Here’s the order I use every time:
- Shift the chain onto the smallest chainring and the largest rear cog. This puts the rear derailleur in its most extended position and gives you the most clearance to work with.
- Loosen the cable pinch bolt with your 4mm hex wrench and unhook the cable from the derailleur. The cage should spring inward to its resting position, which is the L-limit position.
- Look at the gap between the inner cage plate and the chain. Turn the L-limit screw clockwise (in most designs) to move the cage away from the frame, and counter-clockwise to bring it closer.
- Set the gap to 1 to 2mm. A penny is roughly 1.5mm thick, so use it as a quick reference. The chain should not touch the cage at this point.
- Re-tighten the pinch bolt to the manufacturer’s spec (usually 4 to 5 Nm on Shimano, 5 to 6 Nm on SRAM).
If you can’t get the gap small enough, the L-limit screw may be maxed out. That usually means the derailleur is mounted too low, the cable is too tight, or the hanger is bent. Check the mounting height first and revisit the height adjustment if needed.
Step 3: Set the H-Limit Screw
The H-limit screw controls how far the cage moves outward when shifting to the biggest chainring. Rub on the big ring is the second most common complaint I hear, and it’s almost always an H-screw issue. The H-screw is usually marked on the derailleur body, but if it isn’t, the screw that affects outward cage movement is the H screw.
- Shift to the largest chainring and the smallest rear cog. Pedal briefly to confirm the chain is fully on the big ring.
- Loosen the cable pinch bolt and remove tension from the cable so the cage can move freely outward.
- Set the gap between the outer cage plate and the chain to 1 to 2mm using the same penny trick.
- Re-attach the cable with just enough tension to remove slack, then re-tighten the pinch bolt.
Be careful with the H-screw. If you turn it out too far, the cage will throw the chain off the outside of the big chainring and onto the frame. This is a quick way to damage a frame, especially on a carbon bike. Test shifts with light pedaling pressure first and keep a hand near the brake to stop the cranks if the chain overshoots.
Step 4: Adjust Cable Tension and Index the Front Derailleur
Once the limits are set, the indexing controls how precisely the cage moves when you click the shifter. A small in-line barrel adjuster on the derailleur or shifter lets you fine-tune cable tension without tools. This is the step that fixes rub in certain gears but not others.
- Shift to the middle chainring (on a triple) or the small chainring (on a double) and the middle of the cassette.
- Click the front shifter once to start shifting to the next chainring. If the chain hesitates, doesn’t move at all, or overshoots and falls to the next ring, the cable tension needs adjustment.
- If shifting is slow, turn the barrel adjuster counter-clockwise (away from the cable) to add tension. If shifting is fast and the chain overshoots, turn the barrel adjuster clockwise to reduce tension.
- Make quarter-turn adjustments and click the shifter between each one until the chain moves cleanly to the next chainring with one firm click.
- Test every gear combination: big ring to small ring, small ring to big ring, and a few cross-chain pairs. Any rub you still hear in specific gear combinations is now a fine-tuning issue, not a setup issue.
On a 1x drivetrain you can skip this section entirely. A 1x setup uses a narrow-wide chainring and a rear derailleur clutch to manage chain retention, so there’s no front derailleur to adjust. If you’re running 1x and still hear rub, the issue is likely a bent derailleur hanger or a worn chainring.
Step 5: Use the Trim Feature to Stop Rub in Specific Gears
Most modern shifters have a trim position that moves the front derailleur cage slightly without shifting the chain to a new ring. The trim feature is designed specifically to eliminate rub in certain gears without forcing a full shift. It’s the single most useful feature for solving the problem this article is about.
On a triple crankset, you can trim the small and large chainrings in one direction. On a double, you can only trim the large chainring (and the small chainring on some electronic groups). When you click the shifter lightly, you’ll feel a soft detent. That’s the trim position. The cage moves just enough to clear the chain in the extreme cross-chain gears, and it doesn’t actually change which chainring you’re using.
If you hear rub on the big ring when paired with the biggest rear cog, click the front shifter once to trim the cage outward. The rub should disappear immediately. The same trick works in reverse for rub on the small ring when paired with the smallest rear cog. The trim feature is why experienced riders seem to ride in silence even on rough terrain. They use trim every time they reach for a big gear change.
Step 6: Test the Front Derailleur Across All Gears
After completing steps 1 through 5, do a full test ride on a stand or in a parking lot. Shift through every gear combination. The goal is silence, or as close to silence as you can get on your specific drivetrain. Here’s my checklist:
- Big ring, smallest cog: should be silent. If not, trim or adjust the H-screw.
- Big ring, biggest cog: should be silent or barely audible. Rub here is normal under load but not while soft-pedaling.
- Small ring, smallest cog: should be silent. If not, trim or adjust the L-screw.
- Small ring, biggest cog: should be silent. Cross-chain only briefly.
- Middle ring, all cogs: should be silent on a triple.
Pay attention to whether rub shows up under load but not at rest. That’s frame flex, and it’s largely unavoidable. A small amount of rub on the big-big and small-small combinations while standing and sprinting is normal on most aluminum and carbon frames. Shimano and SRAM both design their front derailleurs with this in mind. If the rub is constant and obvious in every gear, re-check your cable tension and limit screws before assuming the problem is frame flex.
Troubleshooting: When the Front Derailleur Still Rubs
If you’ve completed every step and the chain still rubs in certain gears, walk through this list. Each item is something I’ve fixed on customer bikes in the last year, and they’re listed from most to least common.
Bent derailleur hanger. A bent hanger pulls the cage out of alignment even when the derailleur itself is straight. Hold the hanger against a reference edge or use a hanger alignment tool. Most shops will check this for free. This is the number one cause of persistent rub after a fresh tune.
Stiff cable or housing. Old housing compresses and creates drag, which throws off indexing. Replace the inner wire and the housing if either is more than two years old. Front derailleur housing is shorter than rear, so it’s an inexpensive repair.
Worn chainring teeth. A shark-fin profile on the chainring teeth causes slow shifting and rub. Hold the chainring up to a light and look at the tooth profile. New teeth look symmetric; worn teeth curve to one side. Replace the chainring if it’s worn.
Frame flex under load. If rub only appears when you stand and sprint, you’re feeling frame flex. A small amount is normal. If you want to minimize it, switch to a stiffer crankset or accept that some noise is part of the bike’s character. We’ve covered this in our general bike maintenance guide along with other sources of noise you might be chasing.
Electronic front derailleur trim. Electronic groupsets (Shimano Di2, SRAM eTap, Campagnolo EPS) use a button-based trim function accessed through the shifter or a phone app. Refer to your manufacturer’s manual for the exact procedure. Most electronic derailleurs also need their firmware updated once a year to keep the trim positions accurate.
When to Take Your Bike to a Shop
Take your bike to a shop if the derailleur hanger is bent, if the chain is stretched past 0.75% wear, or if you’ve tried every adjustment and rub persists in more than two gear combinations. A mechanic with a hanger alignment tool and a work stand can usually diagnose the issue in 15 minutes. Front derailleur adjustments are typically inexpensive because the parts are simple, but the labor to chase a misalignment can add up if you keep guessing at home.
Also head to a shop if you ride a GRX or other gravel-specific front derailleur. These have wider cages and tighter clearances than road derailleurs, and small mistakes in setup show up as rub in specific gears. A mechanic who works on gravel bikes regularly will tune it in a few minutes.
FAQ: Front Derailleur Rub in Certain Gears
How do I stop my front derailleur from rubbing the chain?
Start by checking cross-chaining first. If you only hear rub in the big-big or small-small gear combinations, shift to a more efficient pairing. If rub appears in multiple gears, set the L-limit screw with a 1-2mm gap to the chain, then set the H-limit screw the same way, then fine-tune cable tension with the barrel adjuster.
Why does my chain rub only in certain gears?
Chain rub in certain gears usually comes from cross-chaining, misadjusted limit screws, or a bent derailleur hanger. The chain runs at extreme angles in cross-chain positions, leaving very little clearance between the chain and the derailleur cage. A small misalignment that doesn’t cause rub in middle gears becomes obvious at the extremes.
How do I fine-tune a front derailleur?
After setting the limit screws with a 1-2mm gap to the chain, shift to the middle of the cassette and click the front shifter to start a shift. If the chain hesitates, turn the barrel adjuster counter-clockwise in quarter-turns until the chain moves cleanly. If it overshoots, turn the barrel adjuster clockwise. Test every gear combination to confirm silence.
Should I adjust the barrel adjuster or limit screws first?
Set the limit screws first. The L-screw sets the cage’s innermost position and the H-screw sets its outermost position. These define how far the cage can travel. After limits are correct, use the barrel adjuster to fine-tune cable tension so each shift lands precisely on the next chainring.
Can cross-chaining damage my front derailleur?
Cross-chaining itself doesn’t damage the derailleur, but it does accelerate chain and cassette wear because the chain runs at a steep angle. It also increases the chance of the chain dropping off the inside or outside of the chainrings. Avoid extreme cross-chain combinations and use your shifter’s trim function to clear the cage in borderline positions.
Final Thoughts on Fine-Tuning a Front Derailleur
Front derailleur rub in certain gears is one of the most common complaints on road and gravel bikes, and it’s almost always fixable at home with a 4mm hex wrench and about 20 minutes of patience. Start with cross-chaining, then work through height, rotation, limit screws, and cable tension in that order. Use the trim feature to clean up the last bit of noise in the extreme gear combinations, and accept that a small amount of rub under full sprinting load is just frame flex. With these steps, your front derailleur should shift cleanly and quietly across the entire cassette.