
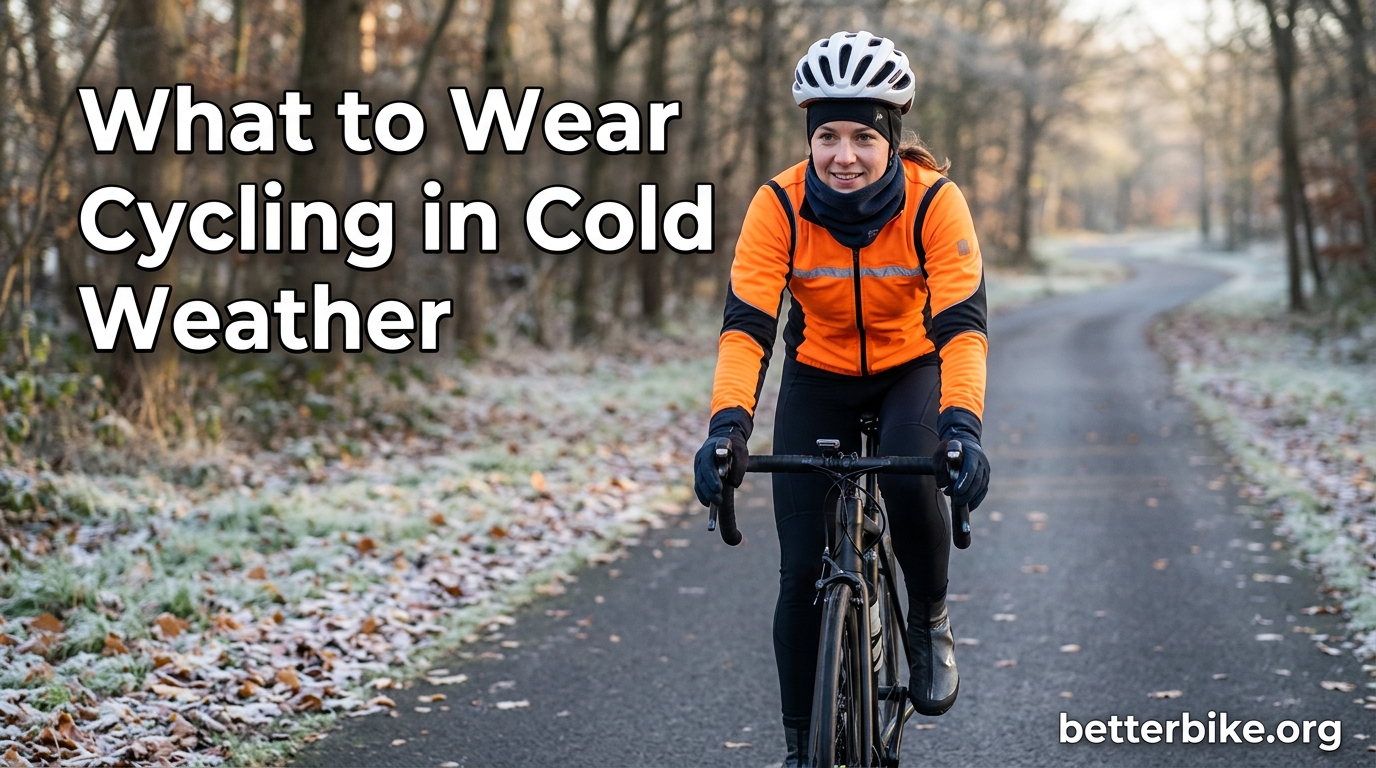
The first cold ride of the season always goes the same way. You pull on a heavy jacket, a thick base layer, and full-length tights, walk out the door shivering, and feel perfectly warm for the first three minutes. Then you hit the first climb and start sweating through every layer. By the time you reach the descent, your soaked kit turns into an ice box and you spend the rest of the ride chilled to the bone. If that sounds familiar, the problem is not your wardrobe. It is your strategy.
Cycling generates three to five times more body heat than standing still, which means the goal of cold weather clothing is not keeping you warm at rest. The goal is managing heat and sweat while you are moving, then sealing in warmth when you stop or drop into a shaded valley. I have been riding year-round in temperatures from 25F to 55F for the past eight years, and I have ruined more base layers to bad layering choices than I would like to admit. This guide is the system I wish someone had handed me before my first cold season.
Below I will walk you through the three-layer system, the exact kit I wear at every temperature band from below freezing to 60F, the science of why starting cold is correct, and how to avoid the overheating problem that ruins most beginners’ first winter of riding. By the end you will have a complete cold weather kit plan and the confidence to face any temperature the forecast throws at you.
Table of Contents
What to Wear Cycling in Cold Weather: The Core Principle
Before we get into specific garments, let me share the single idea that will save you from overdressing on every cold ride. Experienced cold weather cyclists call it the “start cold” rule, and it works like this: dress for how you will feel ten to fifteen minutes into the ride, not how you feel standing next to your bike holding a coffee. If you are slightly chilly when you click in and push off, you are dressed correctly. If you feel perfectly comfortable at the start, you are overdressed and about to overheat.
One rider I follow on Reddit, a fat biker named Josh, summed it up perfectly. “I have frame and handlebar bags since packs are inconvenient for frequent clothing changes. Before descending I can easily pull my extra layers back out.” The takeaway is that any extra warmth you think you need at the start should be in a pocket or a frame bag, not on your body. You will warm up faster than you expect once the pedals start turning.
With that principle in mind, let’s break down the layering system that makes it work.
The 3-Layer System: Base, Mid, and Outer
Every cold weather cycling kit is built on three layers, and each one has a specific job. Skip a layer and the system fails. Add an extra layer and you cook yourself on the first climb. Jody Wilson, a Bivo ambassador and experienced cold weather rider, frames it this way: base layer manages moisture, mid layer traps heat, and outer layer blocks wind and water. Each layer must also be breathable, because sweat that cannot escape will soak you from the inside out.
Layer 1: Base Layer (Moisture Management)
The base layer sits against your skin and has one job: pull sweat off your body and move it outward so it can evaporate. A good base layer feels slightly cool and dry even when you are working hard. A bad base layer feels like a wet towel wrapped around your torso after twenty minutes of climbing.
For cold weather cycling, your two real options are merino wool and synthetic blends. Both work, both have trade-offs, and I keep a mix of each in my drawer.
- Merino wool base layer – Naturally odor resistant, warm even when damp, and soft against the skin. The downside is that 100% merino dries slowly. A soaked merino base layer on a cold descent can feel heavy and clammy. Look for merino blends (around 70% merino, 30% synthetic) if you want faster drying.
- Synthetic base layer (polyester or polypropylene) – Dries much faster than merino, costs less, and wicks aggressively. The trade-offs are that it holds odor after a few rides and can feel clammy against the skin in deep cold. Modern synthetics with brushed interiors have largely closed the comfort gap.
- Cotton base layer – Avoid. Cotton absorbs sweat, dries slowly, and loses all insulating value when wet. I learned this the hard way on a 35F ride in a cotton t-shirt, and I still remember the chill. The phrase “cotton kills” exists for a reason in cold weather circles.
Weight matters too. For temperatures from 50F down to about 35F, a lightweight or midweight base layer is plenty. Below freezing, I switch to a heavyweight merino or a thick synthetic for the extra insulation.
Layer 2: Mid Layer (Insulation)
The mid layer’s job is to trap warm air close to your body. Unlike a base layer, this layer should not touch your skin directly. The loft of the fabric creates the insulation.
Common mid layer materials include:
- Fleece – Cheap, breathable, dries fast, and works in a wide temperature range. The downside is bulk. A thick fleece mid layer can feel restrictive on the bike.
- Synthetic insulated jackets (PrimaLoft, etc.) – Light, packable, and warm for the weight. These are my go-to mid layer for anything below 45F because they compress small enough to fit in a jersey pocket.
- Down insulation – Warmth to weight ratio is unbeaten, but down loses all insulating power when wet. I only use down in dry, cold conditions or under a fully waterproof shell.
- Softshell – A stretchy, wind-resistant fabric that works as a combined mid and outer layer. Softshells are great for cold, dry days but are not fully windproof.
For most cold weather rides, a long-sleeve thermal jersey doubles as your mid layer. It is breathable, fits close to the body, and has a pocket on the back for storage. Save the heavier insulated jacket for genuinely cold days below 35F.
Layer 3: Outer Layer (Wind and Water Protection)
The outer layer is your shield. It blocks wind, repels light rain or snow, and lets the sweat vapor from your inner layers escape. This is the layer you will add or remove most often during a ride, so it needs to pack down small and be easy to stash.
Three common options:
- Wind vest – The single most versatile piece in a cold weather kit. It blocks wind on your chest and core (where it matters most) while leaving your arms free to dump heat. I wear a wind vest from 60F down to about 40F.
- Packable wind jacket – For temperatures from 50F down to freezing. Blocks wind everywhere, packs to the size of a fist, and weighs almost nothing.
- Softshell or hardshell jacket – For wet conditions, sub-freezing temperatures, or long descents. Hardshells with waterproof breathable membranes (Gore-Tex, Pertex Shield) are the gold standard for rain and snow, but they are less breathable than wind jackets. Softshells are more breathable but only water resistant.
The cycling-specific fit matters here. A regular running jacket will flap in the wind and create drag. Look for a jacket with a dropped tail, elastic cuffs, and a high collar that zips up over your chin.
Cold Weather Cycling Fabrics: What Works and What to Avoid
Beyond the three-layer system, the fabrics you choose within each layer make a big difference. Here is a quick comparison of the materials you will encounter most often.
Merino Wool vs Synthetic vs Cotton
Merino wool is the favorite of long-distance cyclists because it resists odor for days and stays warm when damp. The trade-off is drying time. A soaked merino base layer takes twice as long to dry as a synthetic one, which matters on multi-day tours or rides with intense climbs followed by cold descents.
Synthetic fabrics (polyester, nylon, polypropylene blends) dry fastest and are usually cheaper. Modern synthetics have closed the comfort gap with merino and often include anti-odor treatments, though they will never match merino’s natural odor resistance.
Cotton has no place in a cold weather cycling kit. It absorbs up to 25 times its weight in water, dries painfully slowly, and conducts heat away from your body when wet. The same cotton hoodie that feels cozy at a coffee shop becomes a liability on a 40F ride the moment you start sweating.
Windproof and Waterproof Membranes
Membranes like Gore-Tex, Pertex Shield, and similar technologies make a fabric windproof and waterproof while still allowing some water vapor to pass through. The trade-off is always between waterproofing and breathability. A fully waterproof shell will keep rain out but trap sweat inside. A highly breathable shell will vent sweat but let some rain through.
For most cycling, a fully waterproof shell is overkill. A windproof or water-resistant shell with pit zips or venting is the better balance. Save the heavy hardshell for rides where you expect sustained rain or freezing rain.
Temperature-by-Temperature Cycling Outfit Guide
Now the part most cold weather guides skip: the exact kit for each temperature band. I have tested these combinations over hundreds of rides and refined them based on what actually keeps me comfortable, not just warm. The key is matching layers to the actual temperature AND your effort level. A high-intensity interval session at 45F needs fewer layers than a recovery ride at the same temperature.
Below Freezing: Below 0C / 32F
This is the temperature range where layering mistakes are unforgiving. Too many layers and you will overheat on the first climb. Too few and your hands and feet will go numb within twenty minutes.
What to wear:
- Heavyweight merino or thermal synthetic base layer (long sleeve)
- Thermal long-sleeve jersey or fleece mid layer
- Insulated windproof jacket or softshell outer layer
- Thermal bib tights with wind-blocking front panels
- Lobster claw or full-finger insulated winter gloves
- Neoprene or insulated winter shoe covers
- Thick merino socks (single layer, not doubled)
- Skull cap or thermal cap under your helmet
- Balaclava or thick neck gaiter for descents below 25F
One important tip: do not double up socks. As one experienced rider on the Hincapie forum noted, “Layered socks only increase the chances of numb feet.” A single pair of thick merino socks with a well-fitted shoe cover keeps your feet warmer than two pairs squeezed into the same shoe.
Cold: 0 to 10C / 32 to 50F
This is the most common cold weather cycling range in temperate climates from fall through spring. Most of my year-round riding happens in this band, and it is where the layering system really pays off because the temperature can swing 15 degrees between morning and afternoon.
What to wear:
- Midweight merino or synthetic base layer (long sleeve)
- Long-sleeve thermal jersey (or regular jersey with a vest)
- Packable windproof jacket or vest (stashed if you warm up)
- Thermal bib tights (no chamois required, you can wear shorts underneath)
- Full-finger thermal gloves
- Toe covers or lightweight neoprene shoe covers
- Merino socks (midweight)
- Thin skull cap or headband under your helmet
- Light neck gaiter (you can pull it down or off as needed)
The secret at this temperature range is the wind vest or packable jacket. Start the ride slightly chilly, and within ten minutes the wind vest will feel just right. If you warm up on a climb, stash it. If you get caught in a headwind, put it back on.
Cool: 10 to 15C / 50 to 59F
This is the temperature range where beginners usually overdress the most. It feels cold when you walk out the door, but the first ten minutes of pedaling will warm you up quickly. Less is more here.
What to wear:
- Lightweight long-sleeve jersey or short-sleeve jersey with arm warmers
- Wind vest (optional but useful for early morning or descents)
- Bib shorts with leg warmers OR knickers
- Fingerless or thin full-finger gloves
- Lightweight merino socks
- Headband or thin skull cap (optional)
One experienced Bivo ambassador’s rule for this range: “Leg warmers for anything under 60F. No ifs ands or buts. Gotta keep the knees happy. Neck buff is a must in cold temps.” I have adopted this rule and it has eliminated my post-ride knee soreness in cool weather.
Arm warmers are a cycling-specific innovation worth mentioning. They let you start a cool morning ride with covered arms and peel them down to your forearms as you warm up, all without stopping. They pack small enough to fit in a jersey pocket and are one of the best values in cold weather cycling gear.
Mild Cold: 15 to 18C / 59 to 65F
This is borderline cold weather, but the question of what to wear still matters, especially for early morning starts or windy days. The kit is light, but the layering principle still applies.
What to wear:
- Short-sleeve jersey with optional light arm warmers
- Bib shorts (no warmers needed for most riders)
- Fingerless gloves (or thin full-finger for early morning)
- Wind vest if wind is forecast above 15 mph
At this temperature, the wind vest is the only piece you need to add or remove. Keep it in your jersey pocket until you hit a headwind or a long descent.
How to Avoid Sweating and Overheating on Cold Rides
This is the part of cold weather cycling that almost no guide covers well, and it is the part that matters most for comfort. Sweating into your base layer at 40F is the single fastest way to ruin a ride, because damp fabric loses insulating value and conducts heat away from your skin. When you slow down, climb a hill, or stop at a light, that wet kit turns into a cold compress wrapped around your body.
Start Slightly Cold, Not Comfortable
As I mentioned in the introduction, the start cold rule is the foundation of sweat management. If you feel perfectly warm standing next to your bike, you are overdressed. You should feel a slight chill on exposed skin, especially on your ears, nose, and hands. Within ten to fifteen minutes of pedaling you will warm up to a comfortable temperature.
The science here is straightforward. Cycling at a moderate effort produces roughly 400 to 600 watts of heat, compared to about 100 watts for standing still. Your body is a furnace, and your clothing needs to vent that heat, not trap it.
Use Zippers, Vents, and Layer Removal
Your main adjustment tools on the bike are zippers, vents, and removable layers. A quality winter jacket should have pit zips that you can open on climbs. Your base layer and mid layer should be easy to peel off and stash in a pocket or frame bag.
The cycling-specific feature called a “vented collar” lets you unzip from the top for heat release without flapping fabric. Look for this on any cold weather jacket you buy.
Carry an Extra Layer for Descents
One of the most common cold weather mistakes is being perfectly warm on the climb and freezing on the descent. Wind chill at 25 mph can make a 40F day feel like 25F on your skin, and a long descent can drop your core temperature fast.
Use a frame bag, handlebar bag, or large jersey pocket to stash an extra layer that you put on before descents. A packable wind jacket takes up almost no space and is the single best insurance policy against freezing on a cold descent.
Manage Your Effort to Avoid Sweating
On hilly rides, the climbs are where you overheat and the descents are where you freeze. If you tend to attack climbs and then coast down, you are setting yourself up for the freeze-sweat-freeze cycle. The fix is pacing your climbs to keep effort steady. Spin at a lower cadence in an easier gear and let the climb take a little longer. You will arrive at the top drier and more comfortable.
One interesting piece of physiological advice from the cold weather cycling community: keep your core warm and your hands and feet will follow. As one experienced rider put it, “After 2 years of trying assorted gloves and liner combos, another rider clued me in: get your core warmer. Excess core heat gets dumped to the extremities via nice warm bloodflow. It’s made a world of difference.” If your hands and feet are always cold, the answer is usually a warmer core layer, not thicker gloves.
7 Common Cold Weather Cycling Mistakes
After eight years of riding year-round and talking to dozens of other cold weather cyclists, these are the mistakes I see most often. Avoid them and your cold weather riding will be dramatically more comfortable.
Mistake 1: Dressing for Standing Still, Not Riding
This is the number one mistake. You feel cold when you walk out the door, so you pile on layers. Ten minutes later you are soaked. Dress for how you will feel once you are pedaling, which means starting slightly cold.
Mistake 2: Wearing Cotton
Cotton t-shirts, cotton socks, cotton hoodies. None of them belong in a cold weather cycling kit. Cotton absorbs sweat, dries slowly, and will chill you on the first descent. Replace cotton with merino or synthetic for any layer that touches your skin.
Mistake 3: Ignoring Wind Chill on Descents
Air temperature is not the same as what your body experiences. A 40F day with a 20 mph headwind feels like 28F on exposed skin. Always carry a windproof layer for descents, even if the temperature does not feel that cold at the start.
Mistake 4: Over-Layering Your Legs
Your legs are large muscle groups that generate a lot of heat while pedaling. Most riders can wear shorts or knickers down to about 50F without discomfort. Thermal bib tights are great below 45F, but heavier options are rarely needed above 35F. The exception is riders with cold sensitivity or those doing low-intensity recovery rides.
Mistake 5: Forgetting to Cover Your Head
You lose a surprising amount of heat through your head and neck. A thin skull cap under your helmet is enough for most cold weather, and a full balaclava is essential below 25F. The neck gaiter serves double duty by protecting your throat from cold air, which can cause coughing on long descents.
Mistake 6: Not Adjusting for Ride Intensity
A high-intensity interval session at 45F needs fewer layers than a recovery spin at 45F. Match your kit to your expected effort, not just the temperature. Interval days call for lighter layers you can easily remove, while endurance days in cold weather call for more substantial insulation.
Mistake 7: Choosing Style Over Function
A cotton hoodie and street jeans might look great, but they will leave you soaked and freezing within twenty minutes. Cold weather cycling clothing is designed to be aerodynamic, breathable, and quick-drying. Embrace the look. The function is the point.
Frequently Asked Questions
What is the 75% rule in cycling?
The 75% rule in cycling is a layering principle that suggests you should dress for conditions that feel about 75% of your expected effort. In practice, this means starting your ride feeling slightly cool. Within 10-15 minutes of pedaling, your body will warm up and you will feel comfortable. If you feel perfectly warm standing next to your bike, you are overdressed and will overheat once you start riding.
Is 40 degrees too cold to ride a bike?
40 degrees Fahrenheit (4C) is not too cold to ride a bike with proper clothing. At this temperature, wear a midweight base layer, a long-sleeve thermal jersey, a wind vest or packable wind jacket, thermal bib tights, full-finger gloves, a thin skull cap, and toe covers. The keys are wind protection and covering your extremities. Many cyclists ride comfortably down to 32F (0C) with the right layered kit.
What is the 80% rule in cycling?
The 80% rule in cycling most commonly refers to training intensity, where about 80% of training time is spent at low intensity and 20% at high intensity. In the context of cold weather clothing, the rule means your kit should handle 80% of expected conditions, while you carry an extra layer for the remaining 20%, like stops, descents, or sudden temperature drops.
What to wear cycling in 10 degrees celsius?
At 10C (50F), wear a lightweight merino or synthetic base layer, a long-sleeve jersey, a packable windproof vest, thermal bib tights or bib shorts with leg warmers, thin full-finger gloves, a thin neck warmer, and neoprene toe covers. Merino socks are ideal. You will warm up quickly, so stashable layers are essential for this borderline cold temperature.
What to wear cycling in 15 degrees celsius?
At 15C (59F), wear a short-sleeve jersey with arm warmers, bib shorts, optional lightweight knee warmers, fingerless or thin full-finger gloves, and optionally a thin skull cap. A windproof vest is useful for descents or windy days. This is a versatile temperature where light layering gives you the most flexibility as conditions change.
Final Thoughts on What to Wear Cycling in Cold Weather
What to wear cycling in cold weather comes down to a handful of principles, not a long list of expensive gear. Start slightly cold at the trailhead. Use a three-layer system that lets you peel off insulation as you warm up. Carry a windproof layer in a frame bag for descents. Cover your head, hands, and feet, which lose heat fastest. And avoid cotton like the plague.
The best cold weather kit is the one you refine over a full season of riding. Test combinations on shorter rides before committing to a long cold tour. Pay attention to what makes you sweat on climbs and what makes you freeze on descents. Within a few months you will have a personal system that works for your effort level, your climate, and your tolerance for cold. Then cold weather riding stops being something to endure and starts being some of the best cycling of the year.