
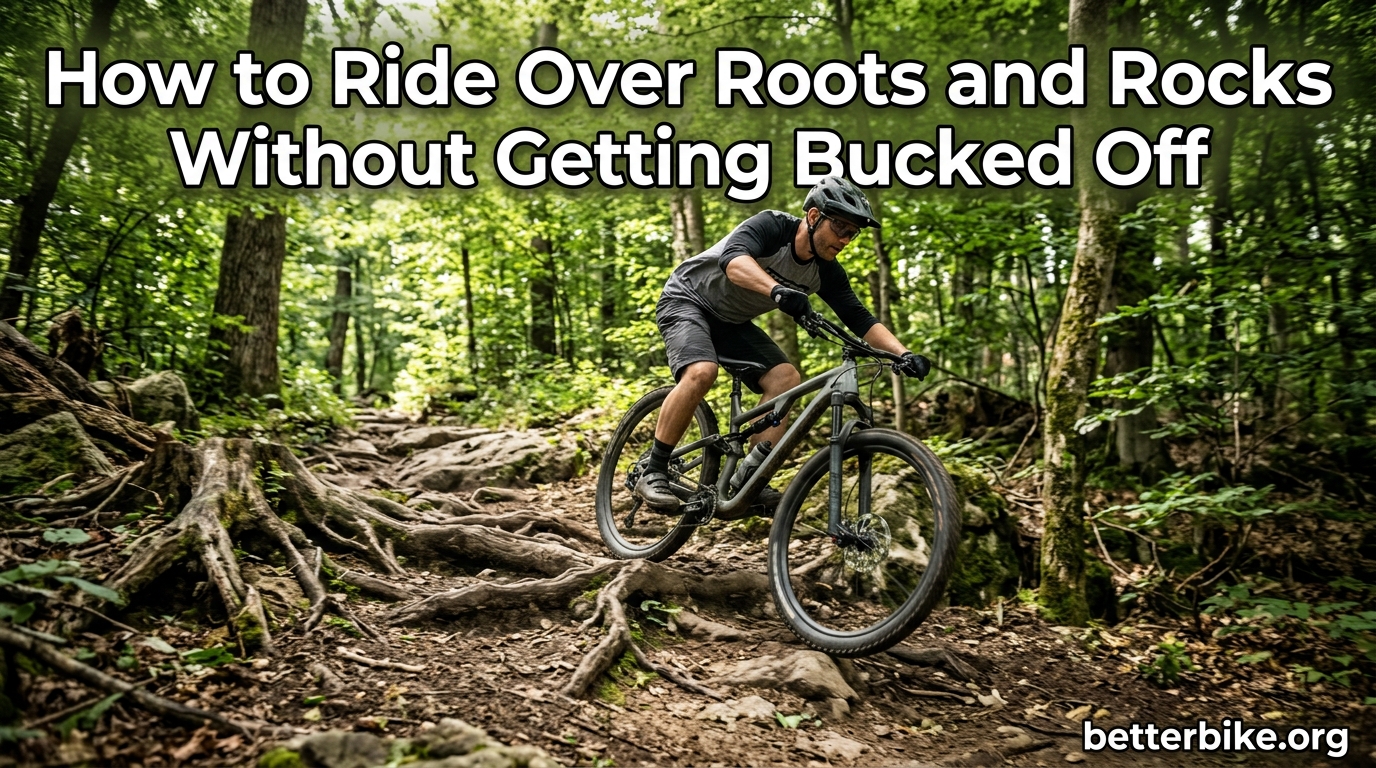
If your arms are sore after a ride and you keep getting thrown forward over the bars, you are not alone. The most common question I get from newer mountain bikers is some version of how to ride over roots and rocks without getting bucked off. The good news: getting bucked is almost always a body-position problem, not a strength problem. I have crashed more times than I can count learning this, and the techniques below are the ones I wish someone had handed me on day one.
In this guide I will walk you through why the bucking happens, the body position that absorbs it, the low-hinge trick that changed my riding, and a step-by-step process for rolling over roots and rock gardens. I will also cover line choice, why leaning back makes things worse, and a few simple drills you can run on your next ride.
Table of Contents
Why You Get Bucked Off Roots and Rocks
You get bucked off when the bike stops and your body keeps moving. Picture this: you are rolling toward a root at 10 mph, the front tire hits, the bike decelerates in a split second, but your chest, helmet, and hips are still traveling forward at 10 mph. Without the right position, that energy throws you straight over the handlebars.
There are three ingredients that create the bucked-off feeling:
- Stiff arms and legs. When you tense up, your body becomes a rigid lever. The bike hits something, the lever pivots at your hips, and you go flying.
- Weight too far back. Most riders instinctively slam the saddle with their rear end on approach. That puts your mass behind the rear axle, which is exactly where it catapults you forward from.
- Looking down at the obstacle. Your bike goes where your eyes go. If you stare at the root, you tense up, your chest drops, and the impact pushes you right over the front.
The fix for all three is the same: get low, stay loose, and look ahead. That is the whole game, and we are about to break it down.
Body Position: Stay Low, Loose, and Centered
The correct position for rough terrain is sometimes called the attack position or ready position. Think of it as a slightly squatted stance with weight centered over the bottom bracket, elbows wide, and knees soft. This is the foundation for everything that follows.
Set up the attack position in 4 checkpoints
- Pedals level. Keep the cranks horizontal, with your dominant foot forward. This keeps your center of gravity low and stable.
- Knees and elbows bent. Aim for at least a 20 to 30 degree bend. Your arms and legs are your suspension.
- Weight centered. Your hips should sit directly over the bottom bracket, not over the saddle or the handlebars. Hover just off the saddle if you are on a technical descent.
- Eyes up and 10 to 15 feet ahead. Look at where you want to go, not at the obstacle you are about to hit.
Stay loose on the bike
One of the best pieces of advice I ever got was from a Reddit thread that said, “Knees and elbows should be like springs and let the bike move from the impacts and try to float on the bike.” That sentence unlocked more progress for me than any other. A loose rider lets the bike dance underneath them. A stiff rider fights the bike and gets thrown around by it.
Try this on your next ride: as you roll across a rooty stretch, consciously relax your grip. You will feel the handlebars move under your hands. That is correct. The bike is doing what it is supposed to do. Your job is to absorb it, not resist it.
Use a Low Hinge to Absorb the Hit
The low hinge is a body position where you fold forward at the hips while keeping your back flat, dropping your chest closer to the handlebars without rounding your spine. It is the position you naturally take when you pick up a heavy box from the floor. It is also the position that lets you absorb a 6 inch root like it is not even there.
To get into a low hinge on the bike:
- Drop your heels slightly below the level of the pedals.
- Bend at the hips so your torso angles down toward the bars.
- Keep your chin up and your eyes forward.
- Let your arms do the work of absorbing. Do not lock the elbows.
The low hinge lowers your center of gravity, puts your weight in line with the impact, and lets your arms act as the primary shock absorber. A lot of riders who get bucked are sitting tall with their arms straight, so the impact has nowhere to go except forward and over the bars.
Pick Your Line: Where to Cross Matters as Much as How
Body position only gets you halfway. The other half is line choice. The fastest, smoothest line through a root field is almost never the one that looks the most direct.
Hit roots at 90 degrees when you can
A root crossed at 90 degrees (straight on) is much more predictable than one taken at an angle. The wheel rolls up and over a perpendicular root like a small ramp. The same root taken at 30 degrees can deflect the front wheel sideways and throw you off-line. A forum user on Thumpertalk put it simply: “Roots, go at 90 degrees if you can.” That one rule has saved me dozens of times.
Watch for bike traps
A bike trap is what riders call a root intersection or rock stack that wedges your wheels and stops you dead. Picture two roots crossing in an X right where you want to roll. Your front tire goes over the first, then smacks the second. Your rear tire is still on the first. You are now stuck mid-bike, off-balance, and about to fall sideways. The way out is to spot these early, pick a different line, or attack them with enough speed to power through.
Scan 3 to 5 seconds ahead
On a root or rock section, your line should be picked before you enter the section, not while you are in it. I scan roughly 15 to 20 feet down the trail. If I see a bad intersection, I pick the cleanest seam through the rocks. If I cannot find one, I slow down and scout. There is no shame in walking a section on your first go.
How to Roll Over Roots Step by Step
Use this 4-step sequence every time you approach a root line. After a few weeks it will become automatic.
- Look and line up. Spot the cleanest 90-degree line at least 15 feet out. Pick your entry point and your exit point.
- Get low and centered. Drop into a low hinge, pedals level, weight over the bottom bracket. Soften your elbows and knees.
- Unweight slightly and roll. Just before the front tire hits, push lightly into the bike and let the front wheel float up and over. Do not pull up on the bars. Think of your arms as giving, not grabbing.
- Stay loose through the exit. Let the rear wheel roll up and over without pedaling hard. Keep your eyes on the next section, not the root you just cleared.
Wet roots vs dry roots
Dry, bark-covered roots have decent grip and behave like small bumps. Bare, wet roots are basically ice. On wet roots, lean a touch more weight on the front wheel for traction, drop tire pressure by 2 to 3 PSI, and pick a smoother line. A user in the Singletracks comments nailed it: “Practice on wet roots slowly to learn how the bike slides.” You will get bucked a few times. That is part of learning the traction limit.
How to Roll Over Rocks and Rock Gardens
Rocks behave a little differently from roots. They are often sharper, taller, and more likely to deflect your wheel. The principles are the same, but the execution shifts a bit.
- Commit to a line. Rock gardens reward commitment. Pick a line, stick with it, and do not panic-brake mid-section.
- Build a little speed. Momentum is your friend over a rock garden. Too slow and you stall out halfway through. A rolling pace of about 8 to 12 mph works for most intermediate riders.
- Get into a low hinge. Drop your chest, bend your elbows, and let your arms absorb. The bike is going to ping-pong underneath you. That is fine.
- Float, do not peddle through. Coast through the rock garden. Pedaling forces the rear wheel to dig into the rocks. Coast, let the bike roll, and start pedaling smoothly only on the exit.
The biggest mistake I see in rock gardens is riders death-gripping the bars and sitting on the saddle. Both push your center of gravity too high and too far back. Hover, hinge, coast, look ahead.
Why Leaning Back Almost Always Makes It Worse
Leaning back feels safe. It is also the single fastest way to get launched over the handlebars on a drop, ledge, or square-edge root. Here is why.
When your weight sits behind the rear axle, the front wheel has very little load on it. The moment it hits a square edge, the edge acts as a pivot and the bike rotates around it. Since your mass is already behind the pivot point, the bike does a quick endo and your chest meets the dirt. This is what experienced riders call the catapult or projectile problem.
What to do instead: keep your hips over the bottom bracket, even on drops. If anything, lean the bike back slightly under you (by pushing the bars forward a touch) rather than throwing your body weight back. The bike moves. Your body stays centered.
The only time a rearward weight bias helps is on a steep, slow descent where you need to keep the front wheel light. In that case, slide far back off the saddle with your chest low, not your butt high.
Quick Bike Setup Tips for Roots and Rocks
Your body is the priority, but a well-set-up bike will make rough terrain much easier. A few quick wins:
- Tire pressure: Drop 2 to 4 PSI below your usual street pressure. More contact patch, more grip, fewer deflected wheels. Start around 25 to 28 PSI front and 28 to 30 PSI rear for a typical trail tire.
- Rebound damping: If your fork or shock is bouncing you around, slow the rebound by 1 to 2 clicks. The wheel will stay in contact with the ground longer.
- Sag: Set sag around 25 to 30 percent of your suspension travel. Too soft and you bottom out. Too stiff and you get bucked.
- Brake levers: Angle them down a touch so you can grab them one-fingered without rotating your wrists.
Practice Drills to Build Confidence on Rough Terrain
Skills like these are built, not bought. Three drills I run on a regular basis:
- Low-hinge holds: Find a flat patch of grass. Drop into a low hinge for 30 seconds, then ride normally. Repeat five times. Trains the position so it is automatic when you need it.
- Slow roll-overs: Find a single small root or curb. Roll over it at walking pace, focusing on staying loose and centered. Build up to faster speeds.
- Stop and go on a slope: Pick a mild rooty uphill. Stop, then ride through without dabbing. Teaches weight balance and front-wheel grip.
Run each drill once a week and the rough sections of your local trail will start to feel smaller.
Frequently Asked Questions
How do I stop getting bucked on my mountain bike?
Stay in a low hinge position with bent elbows and knees, keep your hips centered over the bottom bracket, and look 10 to 15 feet ahead. Most bucking comes from stiff arms and rearward weight, both of which throw you forward when the bike hits a root or rock.
How do I ride over rocks on a mountain bike?
Commit to a line, build a little speed, drop into a low hinge, and coast through without pedaling. Hover off the saddle, keep your weight centered, and let the bike move under you. Avoid braking mid-section, as that unloads the front wheel.
How do I ride over roots on a mountain bike?
Approach the root at 90 degrees when possible, drop into a low hinge, and let the front wheel roll up and over with a slight unweight. Keep pedals level, weight centered, and stay loose through your arms and legs. Coast the rear wheel over without pedaling hard.
What is ghost riding a bike?
Ghost riding is when a rider steps off a moving bike and lets it roll ahead on its own, usually on a climb or easy section. In mountain biking, the term is also used loosely for when a bike gets away from a rider mid-descent because of a missed line. It is generally a sign the rider is getting bucked or off-balance.
Final Thoughts: Stop Fighting the Bike, Let It Move
Learning how to ride over roots and rocks without getting bucked off is mostly about getting out of the bike’s way. Stay low, stay loose, keep your weight centered, and pick a clean line. Lean back only when you have to, and only a little. Run the three drills once a week and the roughest section on your local trail will start to feel like a rhythm you can dance through.
Go ride a section you have been avoiding. Take it slow, hinge low, look ahead, and let the bike do its job. You will get bucked a few more times. Everyone does. The trick is making those moments smaller and smaller until they stop happening at all.