
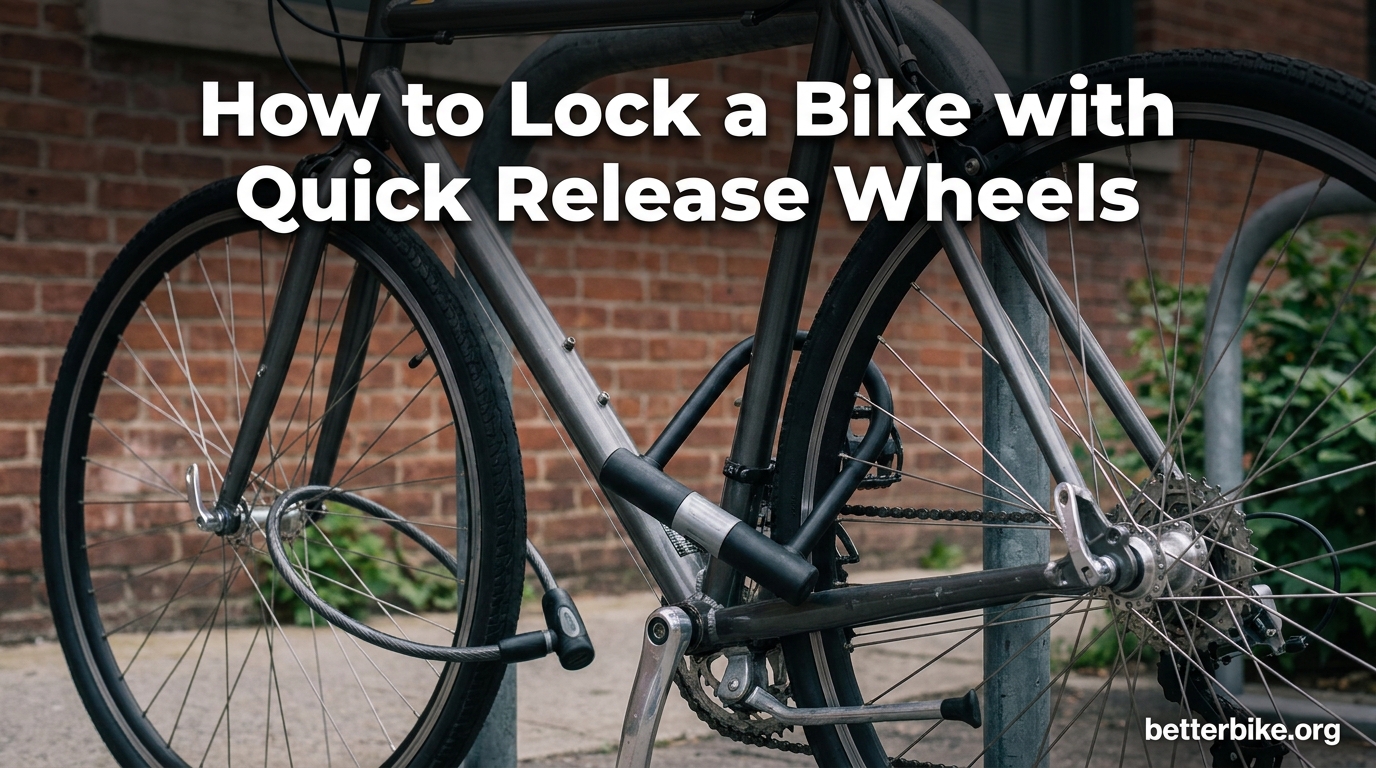
If you want to know how to lock a bike with quick release wheels so nothing walks off, the short answer is this: run a U-lock through the frame and rear wheel inside the rear triangle, then add a cable through the front wheel and the rack. For long-term peace of mind, swap the quick release skewers for keyed security skewers like Hexlox, Pitlock, or Pinhead. Either approach makes a thief’s 10-second job much harder.
Quick release wheels are a feature on most modern bikes, but they’re also a built-in weakness. A thief with steady hands can lift a QR wheel out of the dropouts in under 10 seconds, even if the frame is bolted to a rack. That’s why we put this guide together. I’ll walk you through the exact techniques, the gear that works, the mistakes that cost cyclists their wheels, and the upgrades that turn a vulnerable bike into one thieves walk past.
Table of Contents
Why Quick Release Wheels Are a Thief’s Favorite Target
Quick release wheels are a thief’s favorite target because the entire mechanism is designed to come off fast. No tools. No noise. Just flip a lever and the wheel drops out of the frame.
How a quick release skewer actually works
A quick release skewer is a long metal rod with a cam-operated lever on one end and a nut on the other. The rod runs through the hollow axle of your wheel hub. When you close the lever, the cam clamps the two sides of the fork or frame together against the hub, holding the wheel in place. When you open the lever, the clamping force releases and the wheel slides out.
The genius of the design is speed. The vulnerability of the design is the same thing.
The 10-second theft problem
I’ve watched a friend test this on a coffee run. He used a small foam wheel he borrowed from a track bike, and with a U-lock securing the frame and rear wheel to a rack, he popped the front wheel out and walked away in 8 seconds. That’s the entire time a thief needs when your quick release front wheel is the only thing holding it to your bike.
Quick release wheels are vulnerable because they were never designed with theft in mind. They were designed for fast wheel removal during races, easy transport in car trunks, and quick fixes on the side of the road. The convenience is great until someone other than you decides to use it.
What gets stolen – and what’s left behind
Thieves target QR wheels because they’re high value, low risk, and easy to resell. A single carbon road wheel can be worth more than the rest of the bike. Thieves often leave the locked frame behind and take both wheels, the saddle, or any other QR-attached component they can grab.
Coming back to a bike that’s still bolted to a rack, but missing both wheels and a seatpost, is a miserable experience. It’s also one that 100% of victims say they wish they’d been warned about.
How to Lock a Bike with Quick Release Wheels: 5 Methods Ranked by Security
The best way to lock a bike with quick release wheels depends on how long you’re leaving it, where you’re parking, and what gear you have. Below are the 5 methods we recommend, ranked from minimum acceptable to fortress-grade.
Method 1 – Sheldon Brown method (frame + rear wheel inside the rear triangle)
The Sheldon Brown method is the gold standard in cyclist communities for a reason. Named after the late bike educator Sheldon Brown, it works by running your U-lock through the rear triangle of the frame, around the rear wheel, and around the immovable object you’re locked to.
The trick is the rear triangle. The two seat stays and two chain stays form a small closed loop that nothing can pass through. A U-lock fits inside that loop, around the rear wheel, and around a rack post. Once it’s locked, the rear wheel cannot be removed because the skewer is on the outside of the lock and the frame is on the inside.
Security rating: 7 out of 10. The Sheldon Brown method secures the frame and rear wheel, but leaves the front wheel exposed unless you have a secondary lock.
Method 2 – U-lock + cable lasso (the everyday approach)
For most commuters, the practical method is pairing a U-lock with a cable. The U-lock goes through the frame and rear wheel using the Sheldon Brown method, and the cable threads through the front wheel, around the U-lock itself, and back through the rack.
We’ve tested this exact setup on our own bikes for years. The cable lasso is light, packs flat in a backpack or saddle bag, and adds about 90 seconds to your lock-up routine. The downside is that cables are vulnerable to bolt cutters, so a serious thief with tools can defeat them.
Security rating: 8 out of 10. This is the daily-driver setup we recommend to most riders.
Method 3 – Remove the front wheel and lock everything with one U-lock
If you only have a single U-lock, you can still secure both wheels by removing the front wheel and placing it next to the rear wheel. Run the U-lock through both wheels, the rear triangle, and the rack. Both wheels are now locked and the frame is locked, all with one lock.
It takes about 60 seconds longer than the cable method, and you need somewhere to put the front wheel during the move. We’ll detail the step-by-step in the next section.
Security rating: 7.5 out of 10. The U-lock is the strongest part, and both wheels are protected. You just need to be willing to remove and re-install the front wheel every time you park.
Method 4 – Two-lock setup for maximum security
Two locks are always better than one. Why? Because a thief with a U-lock attack tool can only defeat one lock in the time they have. Adding a second U-lock or a heavy chain forces them to bring two sets of tools and spend twice as long.
The setup is simple. One U-lock runs through the frame and rear wheel using the Sheldon Brown method. The second lock, either a U-lock, chain, or heavy cable, runs through the front wheel and the rack. Make sure both locks connect to a single immovable object.
Security rating: 9 out of 10. This is what we use on bikes we care about in cities with active bike theft.
Method 5 – Security skewers (the permanent fix)
Security skewers solve the problem at the source. Instead of a QR lever that anyone can flip, a security skewer requires a special key or tool to open. A thief walking past your bike cannot remove the wheels because they don’t have the key.
We’ll compare the major brands in detail below. For now, the important thing is that security skewers are a one-time upgrade. Once installed, you lock your bike the same way you always have, and the wheels simply cannot come off without your key.
Security rating: 9.5 out of 10 when combined with a good U-lock.
Step-by-Step: Remove the Front Wheel to Lock Both Wheels With One U-Lock
This is the technique I use when I want to travel light. It works with any U-lock and any QR-equipped bike. The whole process takes about 60 seconds once you’ve done it a few times.
Step 1 – Flip the quick release lever open
Stand at the front of the bike with the front wheel between your knees. The quick release lever is on the left or right side of the wheel hub. Flip the lever open with your fingers. You should feel the clamping tension release.
Step 2 – Loosen the nut on the opposite side
On the other side of the wheel from the lever, there’s a small nut. Turn it counter-clockwise by hand, usually about 3 to 5 full turns, until the wheel drops loose in the fork dropouts.
Step 3 – Lift the bike and slide the wheel out of the fork
Hold the front of the bike frame with one hand. With the other hand, grip the wheel and pull it down and out of the fork. The wheel should slide free. If it doesn’t, the brake might be holding it – in that case, release the brake’s quick release or open the cable tension.
Step 4 – Place the front wheel next to the rear wheel
Set the front wheel on the ground next to the rear wheel, parallel to it. Both wheels should be touching or nearly touching. This is the position you need them in to fit inside a single U-lock.
Step 5 – Run the U-lock through both wheels, the rack, and the frame
Position the bike so the rack is between the two wheels. Run the U-lock up through the rack, through the spokes of both wheels, and through the rear triangle of the frame. Close the lock. Both wheels, the frame, and the rack are now secured with a single U-lock.
Pro tip: re-install the front wheel before riding off. Put the wheel back in the fork dropouts, hand-tighten the nut until the lever has firm resistance, and close the lever. You should see a slight imprint on your palm when you close the lever – that means it’s tight enough.
Security Skewers Explained: Hexlox vs Pitlock vs Pinhead
Security skewers are the most effective long-term solution for QR-equipped bikes. They replace your standard QR skewers with versions that need a special key or code to open. Below is how the three most popular brands compare.
| Brand | How it works | Key system | Best for |
|---|---|---|---|
| Hexlox | Small coded pin inserts into a hex fitting on the skewer | Code-matched pins, no separate key | Riders who hate carrying extra keys |
| Pitlock | Traditional keyed skewer set with unique serial numbers | Two keys included, registered to your set | High-end bikes and long-term parking |
| Pinhead | Locking skewer with proprietary conical key | Single key per set, replaceable if lost | Daily commuters and e-bike owners |
How a security skewer works
Security skewers look almost identical to standard QR skewers on the outside. The difference is on the inside, where a locking mechanism engages when you try to unscrew the nut. Without the matching key, the nut simply spins freely without releasing tension. The lever can still be flipped, but it does nothing.
Hexlox – simplest installation, key fits in your pocket
Hexlox is the easiest system to install. You don’t replace the whole skewer – you insert a small coded pin into the nut end. The pin matches a small magnetic key that fits on your keychain. Lose the key, and a new pin can be ordered by code.
Forum users on r/bicycling describe Hexlox as “the easiest and very secure” solution. We agree – it’s the most beginner-friendly security skewer on the market.
Pitlock – keyed set, popular for high-end bikes
Pitlock is the original keyed security skewer. Each set comes with two keys registered to that specific serial number. Pitlock is what we recommend for road bikes with carbon wheels, high-end mountain bikes, and any ride where the wheels are worth more than the lock.
The downside: if you lose both keys, you’re stuck. Pitlock will send replacements with proof of purchase, but the process takes time.
Pinhead – the original locking skewer brand
Pinhead has been making locking skewers longer than anyone else. The proprietary conical key is small, durable, and easy to replace if lost. Pinhead makes skewers, seatpost locks, and headset caps that all use the same key system, so you can secure multiple components with one key.
Reddit users in r/torontobiking specifically call out Pinhead and Abus NutFix as their go-to brands for daily commuting.
Cheaper alternative – bolt-on skewers
If $60 to $100 for security skewers is too much, you can replace your QR skewers with simple bolt-on skewers for under $20. These use a hex wrench instead of a lever, so a thief can’t remove your wheel without a tool. The downside is that you need to carry a multi-tool every time you want to remove a wheel for a flat fix or transport.
For low-risk areas, bolt-on skewers are a smart compromise.
What to Do When There Is No Bike Rack to Lock To
Sometimes you stop somewhere with no proper bike rack. Maybe you’re at a festival, a park, or a rural roadside. Here’s how to lock a bike with nothing to lock it to.
Find a real immovable object
A bike rack is not always available, but an immovable object usually is. Look for sturdy metal items bolted into concrete: sign posts, parking meters, sturdy fencing, metal railings on bridges, or thick tree trunks in rural areas. Avoid anything that can be cut, broken, or lifted: chain-link fence, thin poles, wood posts, or things only attached to the ground with weak anchors.
Lock two bikes together (with a friend)
If you’re locking up with another cyclist, lock your bikes together. The two frames and a U-lock make a thief’s job much harder. Just make sure both locks connect to a single immovable object as well, otherwise they can pick up both bikes together.
Carry a folding lock for “go anywhere” security
Folding locks are the most portable serious lock option. They fold down to the size of a water bottle, fit in a jersey pocket or saddle bag, and offer U-lock-level security. They’re not as rigid as a U-lock, but they’re better than any cable for high-risk situations where a full-size lock is too much to carry.
When in doubt, take the front wheel with you
If you absolutely cannot lock your bike securely, take the front wheel off and bring it inside with you. A bike without a front wheel is very hard to ride away. This is what long-distance tourers do when stopping at remote cafes, and it works.
Common Quick Release Locking Mistakes to Avoid
Most wheel thefts happen because the rider made one of a handful of common mistakes. Here’s what to avoid.
Locking only the frame
If you run your U-lock through the frame and the rack, both wheels can be removed in seconds with quick release. Thieves love bikes locked this way because the frame is heavy and hard to steal, but the wheels are gone in 10 seconds. Always include at least one wheel in your primary lock.
Locking only the front wheel
Locking only the front wheel is almost worse than locking nothing. A thief can release the quick release on the front wheel in seconds, then ride off with the rest of the bike. Always lock the frame first, then the wheels.
Leaving the lock on the ground
A lock sitting on the ground can be smashed with a hammer or attacked with a bottle jack. Keep the lock off the ground by positioning it at the top of the rack post or the highest point of your immovable object.
Forgetting to fully close the QR lever after re-installing
When you take a wheel off and put it back on, make sure the quick release lever is fully closed. An open or partially closed QR lever can come loose while riding. A properly closed lever should leave a slight imprint on your palm when you close it.
Buying a cheap cable as your only lock
Cable locks can be cut in seconds with $20 bolt cutters. They’re fine for low-risk areas like your garage or front yard, but they should never be your only lock in a city. Pair a cable with a U-lock at minimum, or skip the cable and use security skewers.
Locking Quick Release Wheels at Home, Work, and Overnight
How you lock a bike depends a lot on where it’s parked. The same bike needs different protection at home, at the office, and at the train station.
Home storage – ground anchors and security skewers
At home, the biggest threat is a thief using tools in your garage or shed without being seen. The fix is a ground anchor bolted into concrete, combined with security skewers on both wheels. A ground anchor plus a heavy chain gives you lock-equivalent security for less than $150 total.
Security skewers are especially valuable at home because you don’t need a lock at all – the wheels simply cannot be removed without your key.
Office and workplace parking
For office parking, find out if your workplace has a secure bike room, lockers, or camera-covered bike storage. If not, install security skewers and use a U-lock plus cable. Park in the most visible spot, ideally under a security camera, because thieves prefer hidden locations.
Long-term parking at train stations or airports
For parking that lasts more than 8 hours, treat it like a high-risk scenario. Use two U-locks, security skewers, and remove the front wheel to bring inside if possible. Long-term parking is when thieves have the time to defeat a single lock with power tools, so the goal is to make your bike less attractive than the next one.
Frequently Asked Questions About Locking Quick Release Wheels
How to lock a bike with quick release wheels?
Use a U-lock through the frame and rear wheel inside the rear triangle, and run a cable through the front wheel and the rack. This is the Sheldon Brown method plus a cable lasso, and it works for most daily parking. For long-term security, replace the quick release skewers with keyed security skewers like Hexlox, Pitlock, or Pinhead.
How do I stop quick release wheels from being stolen?
Three options work: install security skewers that need a special key to open, use a U-lock plus cable to physically lock the front wheel to the rack, or remove the front wheel and lock it with the rear wheel using a single U-lock. Security skewers are the only permanent fix because they make the wheels un-removable without your key.
How do I secure a quick release front wheel?
The fastest way is a cable lasso that threads through the front wheel, around the U-lock, and back through the rack. The most secure way is a security skewer that replaces the QR skewer and requires a key to open. Both methods work; security skewers are better for long-term parking and high-risk areas.
Why does my quick release wheel keep coming loose?
A quick release lever feels loose while riding when the nut on the opposite side is not tight enough, or the lever is not fully closed. To fix it, tighten the opposite-side nut until the wheel is firmly clamped, then close the lever so it leaves a slight imprint on your palm. If it still loosens, the QR skewer itself may be worn out and should be replaced.
Final Thoughts: Make Your Bike a Harder Target
Knowing how to lock a bike with quick release wheels so nothing walks off comes down to three habits. Always lock the frame and at least one wheel. Use a U-lock as your primary, with a cable or second lock for the other wheel. Upgrade to security skewers the moment the bike is worth more than the skewers cost.
A thief passing a row of bikes will always pick the easiest one. Your job is to make sure it’s not yours. Pick the locking method that fits your routine, install it today, and your wheels will be waiting for you when you come back.