
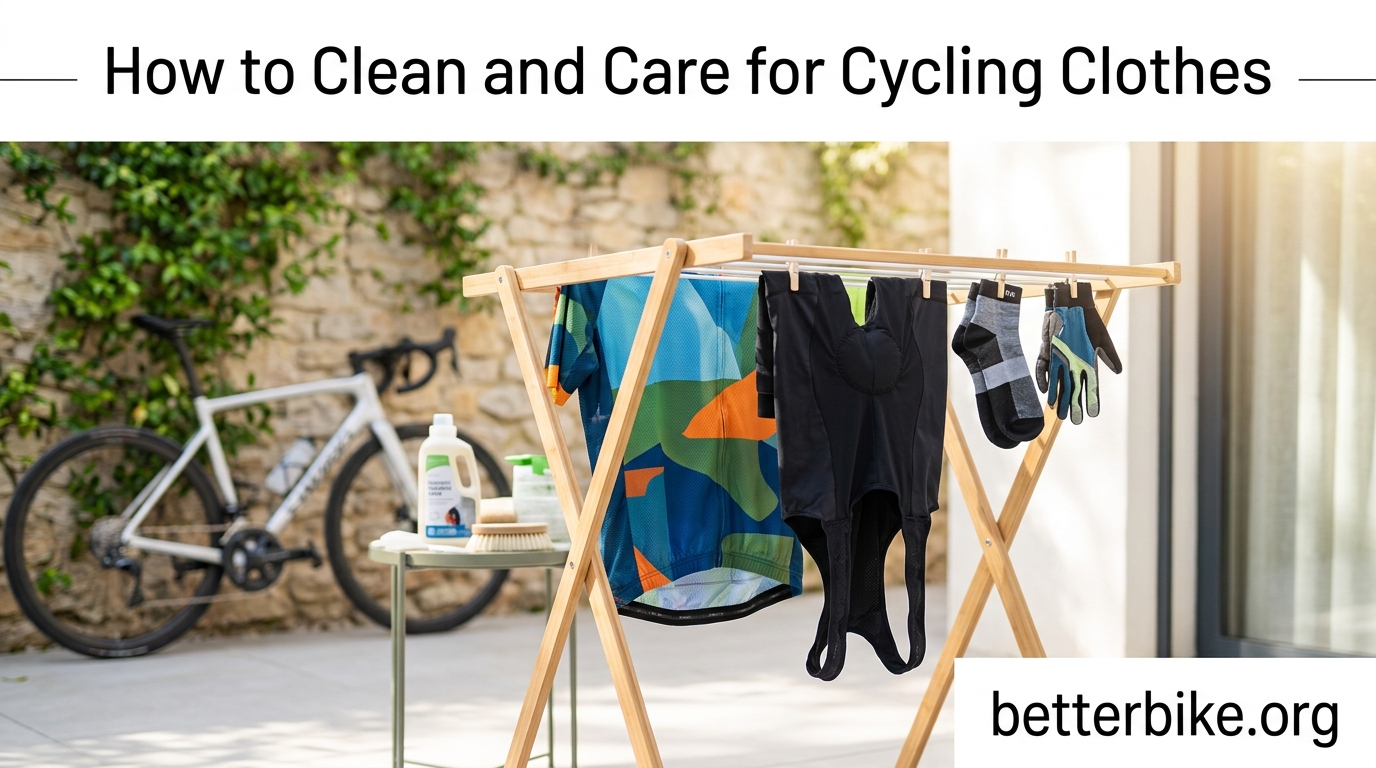
If you’ve ever pulled on a cycling jersey three rides in a row and caught a whiff of something that could strip paint, you’re not alone. The “funk” in cycling clothes is a near-universal pain point, and most riders are washing their kit wrong without realizing it. That’s why learning how to clean and care for cycling clothes so they last and don’t stink saves you money, prevents skin irritation, and keeps your favorite jersey ride-ready for years.
I started writing about cycling gear care after ruining two $200 bib shorts in a single summer. The fabric pilled, the chamois smelled permanently, and I learned the hard way that technical fabrics need technical care. In this guide, I’ll walk you through the exact system our team uses to keep cycling clothes fresh, functional, and lasting 2-3x longer than the industry average.
By the end of this article, you’ll know how often to wash your kit, the best detergent for cycling clothes, how to rescue even the worst-smelling bibs, and the mistakes that are quietly destroying your expensive cycling wardrobe right now.
Table of Contents
Quick Answer: How to Wash Cycling Clothes
To wash cycling clothes and remove odor, turn them inside out, use a sports-specific or enzyme-based detergent in cold water on a delicate cycle, skip the fabric softener, and hang dry. For stubborn funk, pre-soak in a mix of cold water and white vinegar for 30 minutes before washing. This approach protects the technical fabrics, prevents bacterial buildup, and extends the life of your cycling kit by years.
Below is a quick-reference checklist you can save:
- Turn every piece inside out before washing
- Use cool or cold water (under 30°C / 86°F)
- Choose a sports wash or enzyme-based detergent
- Skip fabric softener, dryer sheets, and bleach
- Close all zippers and use a mesh bag for velcro items
- Air dry on a rack or line, never in a hot dryer
Why Cycling Clothes Stink: The Fabric Science Behind the Funk
Cycling clothes stink because synthetic technical fabrics are designed to trap moisture against your skin, and that same property makes them trap body oils, dead skin cells, and the bacteria that feed on them. Polyester, lycra, spandex, and elastane fibers have a molecular structure that attracts oil-based compounds, and once those oils settle into the weave, ordinary detergent struggles to lift them out.
Here’s what’s actually happening in your kit after a hard ride. You sweat, mostly water but also containing salts, urea, and small amounts of fat and protein. Technical fabrics wick that moisture away from your skin to keep you cool, which is great for performance but creates a warm, damp environment perfect for bacterial growth. Bacteria like Micrococcaceae and Corynebacterium thrive on the oil-rich residue, and their waste products are what create that unmistakable “gym bag” smell.
Regular laundry detergent is formulated for cotton and natural fibers. It works by lifting water-soluble stains, but body oils and bacterial residue on synthetics need enzymes (to break down proteins) and nonionic surfactants (to dissolve oils) to come out cleanly. That’s why sports-specific detergents exist, and why switching to one is the single biggest improvement most riders can make.
The other key factor is heat. Hot water can set protein-based stains and actually help bacteria multiply if the wash doesn’t get hot enough to kill them. Cold or cool water is gentler on technical fabrics and works just as well with the right detergent. This is also why the dryer is your kit’s worst enemy. The high heat locks in any remaining odor molecules and breaks down elastane fibers, causing the fabric to sag and lose its compression.
How Often Should You Wash Cycling Clothes?
You should wash your cycling clothes after every ride, especially for items worn close to the skin like bib shorts, jerseys, and base layers. Socks and gloves can sometimes stretch to two wears if they don’t get wet or heavily soiled, but everything else should go straight into the wash.
The reasoning is simple: bacteria start multiplying the moment you finish your ride. The longer sweaty kit sits in a pile, in a gym bag, or in a hamper, the deeper the odor sets into the fibers. A wash cycle the same day keeps the bacterial load low and prevents the kind of “set-in” funk that takes multiple rescue treatments to remove.
Here is a quick reference by clothing type:
- Bib shorts and cycling shorts: After every ride (no exceptions)
- Jerseys: After every ride, especially in summer
- Base layers: After every ride, particularly if you sweat heavily
- Cycling socks: After every ride, or after two rides if the first was a short, dry one
- Arm and leg warmers: After every ride
- Cycling gloves: After every ride or every other ride
- Wind vest / jacket: Every 2-3 rides unless visibly soiled
If you commute by bike and wear your kit twice, you’re creating the exact conditions that make the funk unmanageable. The Reddit cycling community is unanimous on this point, and the science backs it up. Wash after every ride.
The Post-Ride Routine: What to Do in the First 30 Minutes
The first 30 minutes after a ride are critical for preventing odor from setting into your cycling clothes. Your goal is to keep bacteria from multiplying and to give the fabric a chance to start drying before you can get to a washing machine.
Here’s the post-ride routine our team uses:
- Strip your kit immediately. Don’t sit around in your sweaty jersey having a coffee. The faster you can get airflow to the fabric, the better.
- Turn everything inside out. This exposes the inner surface, where most of the bacteria and oil buildup lives, to air.
- Hang items separately, not in a pile. A wet pile traps moisture and accelerates bacterial growth. Use a drying rack, shower rod, or clothesline.
- Open zippers and unbutton jerseys. This improves airflow into the chamois pad and the body of the jersey.
- Pre-treat any visible stains. A small dab of sports detergent on mud, grass, or blood works better when applied fresh.
- Get the wash started within 24 hours. Even on a drying rack, bacteria keep growing. Don’t let kit sit for days before washing.
If you can’t wash right away, at minimum hang the items to dry thoroughly before tossing them in a hamper. Wet kit in a closed hamper is the number one cause of musty smell that no wash cycle seems to fix.
Step-by-Step: How to Wash Cycling Clothes in the Machine
Machine washing is the most common method, and it works fine for cycling kit if you follow the right steps. Here’s the process that keeps our team’s gear in top shape ride after ride.
- Sort by fabric and color. Wash dark kits with darks, lights with lights, and never mix cycling kit with abrasive items like denim or towels.
- Turn every piece inside out. This protects the outer logos, reflective elements, and the print on jerseys, while also exposing the dirtiest surface to detergent.
- Close all zippers and Velcro. Open zippers can snag on delicate fabric, and exposed Velcro is a disaster waiting to happen. Use a mesh lingerie bag for any item with significant Velcro (gloves, some jackets).
- Choose cold or cool water. Set the machine to 30°C / 86°F or lower. Hot water damages elastane and can set odors.
- Select the delicate or gentle cycle. A high spin cycle can stretch and stress technical fabrics.
- Add the right detergent. Use a sports-specific or enzyme-based detergent. Measure carefully, more soap does not mean cleaner clothes.
- Skip the fabric softener. Fabric softener coats fibers with a waxy residue that clogs moisture-wicking pores and traps odor.
- Run an extra rinse cycle if available. This ensures all detergent residue is removed, which matters for sensitive skin and prevents buildup over time.
- Remove items promptly. Don’t leave wet kit sitting in the washer. Transfer directly to your drying setup.
- Hang or lay flat to dry. Air drying is non-negotiable for technical fabrics. Never use a hot dryer.
For a complete load of sweaty kit, the wash takes about 45 minutes including the extra rinse, and the air drying adds another 4-6 hours. Plan accordingly if you ride daily and need kit ready for the next morning.
Hand Washing vs Machine Washing: Which Is Better?
Hand washing is gentler on technical fabrics and uses less water, but machine washing on a delicate cycle is more practical for most cyclists and produces nearly identical results. The choice comes down to how much time you have, how many pieces you need to clean, and how delicate the garments are.
Hand washing shines for a few specific situations. Expensive merino base layers, ultralight jerseys, or vintage wool kits benefit from a sink soak in cool water with a tablespoon of sports detergent. Agitate gently, let soak for 15-20 minutes, rinse thoroughly in cold water, then press (don’t wring) the water out before hanging to dry. This method prevents stretching and pilling that even a delicate machine cycle can cause.
Machine washing on delicate is the practical choice for daily riders. It’s faster, more consistent, and modern machines are gentler than ever. The key is using a mesh bag for anything with Velcro or aggressive hardware, and never overloading the drum. A crowded washer means clothes can’t move freely, detergent doesn’t circulate properly, and you’re more likely to end up with still-stinky kit at the end of the cycle.
For most riders, the machine is fine 95% of the time. Save hand washing for the items you’d cry over if they got ruined.
The Best Detergents for Cycling Clothes (And What to Avoid)
The best detergents for cycling clothes contain enzymes and nonionic surfactants that break down body oils and odor-causing bacteria. Look for sports-specific brands like WIN, Defunkify, Rockin Green, or 2Toms Stink Free, or use a fragrance-free enzyme-based household detergent as a budget alternative.
Here’s a comparison of the most popular options:
- WIN Detergent: Made specifically for athletic wear. Excellent odor removal, widely recommended on cycling forums, mid-range price per load.
- Defunkify: Plant-based formula, effective on tough smells, slightly higher price point.
- Rockin Green Active Wear Detergent: Powder form, gentle on fabrics, popular for sensitive skin.
- 2Toms Stink Free: Sports-specific, works on a wide range of technical fabrics.
- Fragrance-free liquid detergent (Tide Free & Clear, All Free Clear, etc.): Budget option that performs well for most riders. Skip anything with dyes or heavy perfume.
- White vinegar (as a pre-soak): Not a detergent replacement, but excellent for breaking down odors before washing. Cheap and effective.
What to avoid: regular scented detergents with dyes, any detergent containing fabric softener, and “sport” detergents that are mostly fragrance with no actual enzymatic action. The fragrance masks odor rather than removing it, and the dye can stain light-colored kits.
For riders who prefer DIY solutions, a homemade mix of washing soda, borax, and a bar of Fels-Naptha soap dissolved in hot water (then cooled) is a long-time forum favorite. It’s cheap, effective, and you control every ingredient.
Drying Your Cycling Clothes the Right Way
Air drying is the only safe way to dry cycling clothes. The high heat of a tumble dryer breaks down elastane fibers, causes shrinkage, sets in any remaining odor, and dramatically shortens the lifespan of expensive kit.
For best results, lay items flat on a drying rack or hang them on a clothesline away from direct heat sources. Turn items inside out so the inner surface dries first (that’s where most of the moisture is). A well-ventilated room or outdoor line works well, and sunlight has the added benefit of acting as a natural antibacterial agent. UV light kills many of the bacteria that cause lingering odors.
Most cycling kit dries in 4-6 hours indoors, faster outside on a breezy day. Jerseys and base layers can hang; bib shorts and socks do well on a flat rack. Avoid wringing or twisting water out of the fabric, as this stretches the fibers and can damage the chamois pad in bibs.
If you absolutely must use a dryer for time reasons, set it to the lowest heat or air-dry setting, and accept that you’re trading some longevity for convenience. The dryer is the fastest way to ruin expensive cycling clothes.
Special Care for Bib Shorts and Chamois Pads
Bib shorts and chamois pads need special care because the pad sits directly against your skin for hours at a time, accumulating bacteria and oils that are hard to remove. The two key moves are pre-soaking the chamois and always washing bibs inside out.
Before washing, turn bibs inside out so the chamois is exposed to detergent and water. This is the opposite of what feels natural, but the chamois is the dirtiest part of the garment, and turning it outward gives it direct contact with the cleaning action.
For bibs that have been sitting for a day or two, or that have stubborn odor, do a chamois pre-soak. Fill a basin with cool water, add a quarter cup of white vinegar and a tablespoon of sports detergent, and let the bibs soak for 30-60 minutes. After soaking, wash as normal.
Chamois pads are typically made of foam covered in a synthetic or microfiber layer. They don’t handle high heat well and they trap bacteria more readily than the rest of the fabric. With proper care, a quality pair of bibs should last 2-3 seasons of regular riding, but poor washing habits can cut that lifespan in half.
One more tip: never use cream or ointments right before washing. If you apply chamois cream, give it time to absorb or wipe off excess before tossing the bibs in the wash. The cream can build up in the fabric over time and contribute to odor retention.
How to Remove Stubborn Odors from Cycling Clothes
To remove stubborn odors from cycling clothes, soak the kit in cold water with white vinegar (one cup per gallon) for 30 minutes to an hour before washing, or add half a cup of baking soda directly to the wash drum. For severe cases, an overnight borax soak works when nothing else does.
Here are the most effective odor removal methods, ranked by severity:
- White vinegar pre-soak: Best for regular maintenance and mild funk. Add one cup of distilled white vinegar to a basin of cold water and soak for 30 minutes before washing.
- Baking soda boost: Add half a cup directly to the wash drum. Baking soda neutralizes acidic odor compounds and softens water.
- Borax overnight soak: For kit that has been neglected. Fill a bathtub with warm water, add half a cup of borax, and let the kit soak for several hours or overnight. The water will turn gray or brown as residue lifts out.
- Enzyme soak: A pre-soak in a sports wash with enzyme action can break down protein-based residue that survives regular washing.
- Sunlight treatment: After washing, hang kit in direct sunlight for a few hours. UV light kills odor-causing bacteria naturally.
If cycling clothes still smell after washing, the issue is almost always one of three things: the wash water wasn’t hot enough to kill bacteria (or the detergent didn’t have enzymes), the kit sat damp for too long before washing, or there’s a buildup of fabric softener or detergent residue that needs stripping. A borax soak followed by a hot wash (60°C / 140°F, only for whites and durable synthetics) usually resets the fabric.
What NOT to Do: 8 Common Cycling Clothes Care Mistakes
The most common cycling clothes care mistakes include using fabric softener, washing in hot water, putting kit in the dryer, leaving sweaty clothes in a pile, washing with rough fabrics, ignoring care labels, using too much detergent, and washing too infrequently. Avoiding these mistakes is the single biggest factor in how long your kit lasts.
- Using fabric softener. It coats technical fibers with a waxy film that clogs moisture-wicking pores and traps bacteria. This is the #1 mistake riders make.
- Washing in hot water. Hot water damages elastane, sets protein stains, and can shrink the fabric. Stick to cold or cool.
- Using the dryer. The high heat destroys stretch fibers and sets in any residual odor. Always air dry.
- Leaving sweaty kit in a pile. Bacteria multiply rapidly in damp, dark conditions. Hang or wash immediately.
- Washing with jeans, towels, or abrasive items. These items create friction that pills technical fabrics and can damage prints and logos.
- Ignoring care labels. Some merino kits and delicate pieces need special handling. When in doubt, follow the label.
- Using too much detergent. Excess soap doesn’t clean better; it leaves residue that traps odor over time. Measure carefully.
- Washing too infrequently. Even if the kit “looks clean,” bacteria are present after every ride. Wash after every use.
Most of these mistakes don’t show their damage immediately. The bibs feel fine after a few hot-dryer cycles. The jersey still wicks moisture after a year of fabric softener. But by month 18, the kit is stretched, saggy, permanently smelly, and falling apart. Avoid these mistakes from day one and your gear will outlast the bikes.
How to Make Your Cycling Kit Last Longer
To make cycling kit last longer, wash it less aggressively (cold water, delicate cycle, gentle detergent), air dry instead of using a dryer, rotate between multiple kits to reduce wear on any single piece, and store it properly between rides. Following these practices can extend the life of a quality kit from one season to three or more.
A $200 pair of bib shorts used once a week for a single season costs roughly $4 per ride. The same bibs, with proper care, can last three to four seasons and cost about $1 per ride. The math is straightforward: better care saves real money.
Other longevity tips:
- Rotate between at least two or three kits to give each piece time to fully dry and recover between rides.
- Wash in a mesh bag to prevent snagging and stretching.
- Avoid contact with Velcro, both during wear and during washing.
- Store flat or hung in a dry, ventilated area to prevent mildew.
- Repair small tears or popped seams immediately before they grow.
- Skip the chamois cream buildup by occasionally doing a strip wash with borax.
The riders who keep their kit looking new for years aren’t buying better gear; they’re caring for the gear they have.
Caring for Different Cycling Fabrics: Merino, Polyester, and More
Different cycling fabrics need slightly different care. Merino wool is naturally odor-resistant and gentle on skin, but it shrinks in hot water and pills with friction. Polyester and lycra blends are durable and quick-drying but trap odor and degrade with high heat. Knowing the fabric helps you adjust your routine.
Merino wool base layers and jerseys are the easiest to keep fresh. The natural lanolin and fiber structure resist bacterial growth, so they can often be aired out and worn again before washing. When you do wash them, use cool water, a wool-specific or gentle detergent, and lay flat to dry. Never put merino in the dryer.
Polyester and lycra blends dominate cycling kit because they’re cheap, lightweight, and high-performing. They do, however, hold odor more than any other fabric. Sports detergents and regular washing are essential. Avoid hot water, fabric softener, and the dryer at all costs.
Waterproof and water-resistant jackets (Gore-Tex, eVent, softshell) need their own care routine. Use a technical fabric wash (Nikwax Tech Wash is the standard), avoid regular detergent (it clogs the membrane), and periodically re-treat with a DWR (durable water repellent) spray. These jackets should be washed only when visibly soiled or losing water repellency, not after every ride.
Storing Your Cycling Clothes Between Rides
Store cycling clothes in a dry, ventilated space between rides. Hang items on a drying rack or hooks, never in a closed hamper, and make sure kit is completely dry before folding and putting it away. Damp fabric in a closed space is the fastest path to mildew and permanent musty smell.
If you ride daily, having two or three kits in rotation gives each piece at least 48 hours to fully air out and dry between wears. This also reduces wear on any single garment, extending overall lifespan.
For longer-term storage (end of season, off-season), wash everything thoroughly, make sure it’s completely dry, and store in a cool, dry place away from direct sunlight. Avoid plastic bins, which trap moisture. Breathable cotton bags or open shelves work better. A small sachet of cedar or lavender can help keep the storage area fresh, but skip the mothballs.
One last tip: if you ever pull out a kit at the start of next season and it smells musty, that means it wasn’t fully dry when stored. Give it a borax soak, a hot wash (if the fabric can handle it), and a long hang in the sun. Most of the time, the kit will come back to life.
How do I get the smell out of cycling clothes?
To get the smell out of cycling clothes, soak the kit in cold water with one cup of white vinegar for 30 minutes, then wash on a delicate cycle with cold water and a sports-specific or enzyme-based detergent. Skip the fabric softener and air dry. For severe cases, an overnight borax soak followed by a hot water wash removes built-up residue that regular cycles leave behind.
How often should you wash your cycling clothes?
Wash your cycling clothes after every ride, especially bib shorts, jerseys, base layers, and socks. Wet or heavily soiled kit should be washed the same day even if you have multiple kits in rotation. The longer sweaty kit sits, the more bacteria multiply and the deeper odors set into the fabric. Gloves, jackets, and other items worn over clothing can sometimes stretch to two or three wears before washing.
Can you put cycling clothes in the dryer?
No, do not put cycling clothes in the dryer. The high heat breaks down elastane and spandex fibers, causing the fabric to lose stretch, sag, and pill. Heat also sets in any remaining odor molecules, making funk permanent. Air dry cycling kit on a rack, line, or flat surface. If you must use a dryer for time reasons, use the lowest heat or air-dry setting, but accept a shorter lifespan for the garment.
What is the best detergent for cycling clothes?
The best detergent for cycling clothes is one with enzymes and nonionic surfactants that break down body oils and bacteria. Sports-specific options like WIN, Defunkify, Rockin Green, and 2Toms Stink Free are all excellent. For a budget alternative, any fragrance-free enzyme-based household detergent (Tide Free and Clear, All Free Clear) works well. Avoid regular scented detergents, fabric softeners, and bleach, which damage technical fabrics and trap odor.
Why do my cycling clothes still smell after washing?
Cycling clothes still smell after washing because bacteria have built up in the fabric, detergent residue is trapping new bacteria, or the kit sat damp for too long before washing. The fix is a strip wash: soak the kit in a borax solution overnight, then wash in the hottest water the fabric can handle with a sports detergent and an extra rinse. Sun-drying afterwards provides extra bacteria-killing power from UV light.
Why does indoor cycling gear smell worse than outdoor?
Indoor cycling gear smells worse than outdoor gear because there is no airflow to evaporate sweat during a trainer session. The sweat soaks into the chamois and fabric, and the warm, enclosed environment is ideal for rapid bacterial growth. Indoor riders should wash their kit immediately after every session, consider two kits per session, and use a pre-soak with vinegar for bibs that have had particularly sweaty sessions.
Final Thoughts on Cycling Clothes Care
Learning how to clean and care for cycling clothes so they last and don’t stink comes down to a few simple habits: wash after every ride, use the right detergent, skip the softener and dryer, and treat stubborn odors with vinegar or borax. Get those four habits right and your kit will outlast your bikes.
Start with one change this week. If you only do one thing, switch to a sports-specific detergent. The difference in odor and fabric feel is immediate, and once you see how much better your kit performs and smells, the rest of the routine falls into place. Within a few months, you’ll wonder how you ever rode in a jersey that was making the entire coffee shop recoil.
Your cycling kit is an investment. Treat it like one, and it will return the favor with years of comfortable, stink-free rides.