
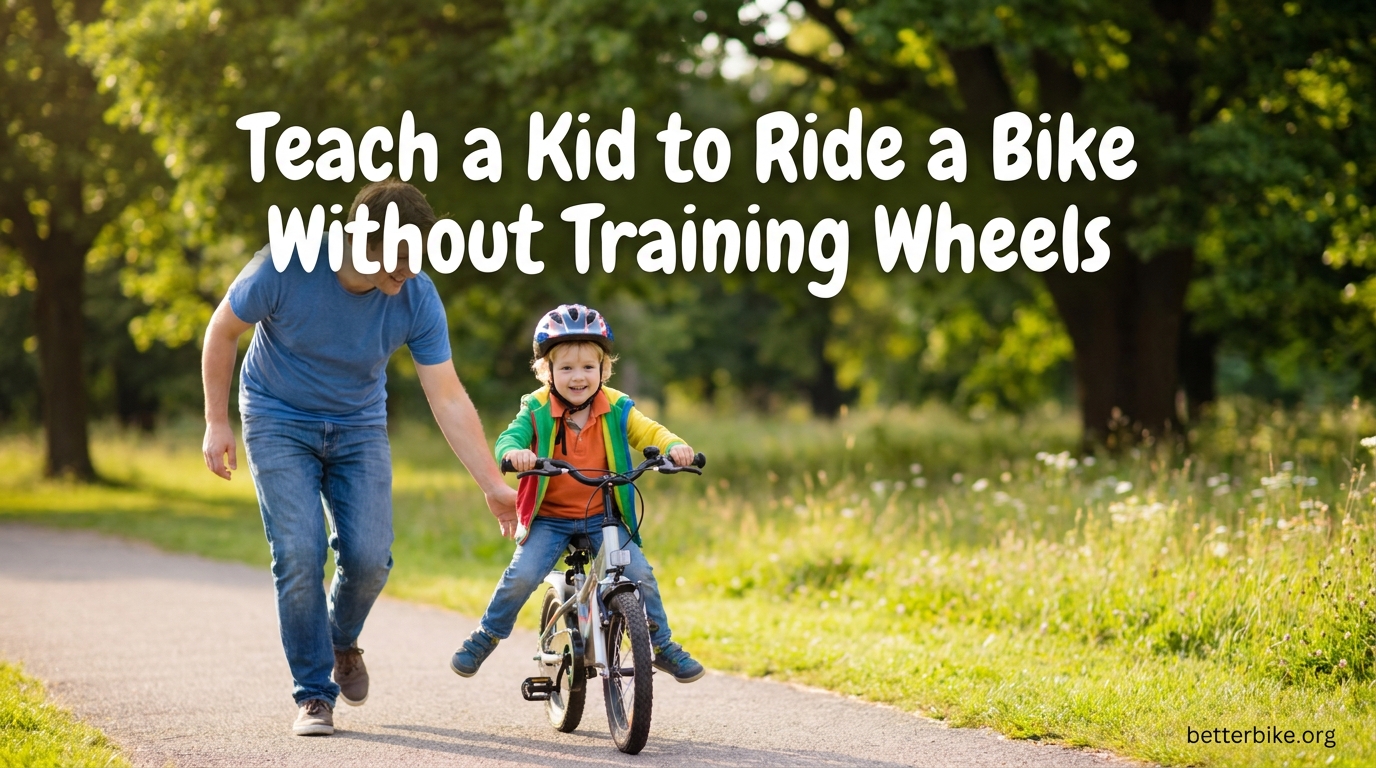
When I taught my daughter to ride, I made every mistake in the book. I held the seat too long, I pushed her too fast, and I spent one entire Saturday afternoon running bent-over behind her bike. She still could not balance. Two weeks later, after a friend told me to “just take the pedals off,” she was riding on her own. That is the heart of how to teach a kid to ride a bike without training wheels in 2026: skip the crutches, focus on balance first, and let everything else follow.
The balance-first method is the approach recommended by the League of American Bicyclists, Bicycle Coalition of Maine, and every cycling educator I have spoken with. It works for toddlers, for nervous 7-year-olds, and even for adults who never learned as kids. In this guide, I will walk you through the exact process our team uses when coaching families, plus the readiness checklist, the towel hack, and the mistakes that hold most kids back.
Table of Contents
Is Your Child Ready to Ride Without Training Wheels?
Readiness matters more than age. I have seen 3-year-olds ride independently within an hour and I have seen 8-year-olds still struggling because they were pushed before they were ready. The sweet spot for most kids is somewhere between ages 4 and 7, but the real test is developmental, not numerical.
Physical Signs Your Child Is Ready
Your child can probably start learning without training wheels if they tick most of these boxes:
- They can stand on tiptoes while flat-footed on the ground next to a bike that fits them.
- They can walk, run, and climb stairs without losing balance frequently.
- They can steer a tricycle or scooter confidently around obstacles.
- They can follow multi-step instructions (“push off, then put your feet up”).
- They have the attention span for a 30-to-60-minute practice session.
Mental and Emotional Signs
Physical skill is only half the picture. Watch for these emotional cues before you start the learning process:
- Your child has expressed interest in learning, not just you wanting them to learn.
- They are willing to fall and get back up. Falls are part of bike riding, period.
- They can handle mild frustration without shutting down for the rest of the day.
- They understand they need to wear a helmet and protective gear every time.
What About the Age Question?
Most kids are physically capable between ages 3 and 8. Three is not too early if your child shows the signs above, but most kids do best starting at 4 or 5. By 7 or 8, kids usually have longer attention spans and pick up the skill in a single afternoon, though they may also feel self-conscious if their friends already ride.
There is no harm in waiting until your child asks to learn. Motivation is the single biggest predictor of how fast they pick it up.
The Balance-First Method Explained (Why Training Wheels Hold Kids Back)
The balance-first method flips the traditional sequence on its head. Instead of adding stabilizers and then trying to remove them later, you remove the complexity first and add it back gradually. The reasoning is mechanical: balancing is the hard part, and pedaling is the easy part. Training wheels force kids to learn pedaling before balancing, which is why so many kids get stuck.
Here is what training wheels actually do, and why experts say to skip them:
- They hold the bike upright, so a child never has to learn to lean into a turn.
- They add weight to a frame that is already too heavy for small legs.
- They teach kids to pedal without steering properly, building habits that have to be unlearned.
- They give a false sense of security, so the moment they come off, the child feels the loss instantly.
The balance-first method replaces all of that with a gradual progression. A child masters balance on a no-pedal bike, glides with feet up, and only adds pedaling once the balance reflex is automatic. By the time pedals go back on, the hard skill is already learned.
Training Wheels vs Balance-First: A Quick Comparison
Here is a side-by-side look at how the two approaches compare across the things parents care about most.
| Factor | Training Wheels | Balance-First Method |
|---|---|---|
| Typical time to independent riding | 2 to 6 weeks | 1 afternoon to 3 days |
| Risk of bad habits | High (lean mechanics, wobble) | Low |
| Transition difficulty | Hard, often scary | Smooth, no “training wheels off” moment |
| Works for anxious kids | Sometimes | Almost always |
| Recommended by cycling educators | Rarely | Yes, across the board |
All Kids Bike and Ready to Ride, two of the largest school-based learn-to-ride programs in the United States, use the balance-first method exclusively. They have taught hundreds of thousands of children to ride, and the data is clear: balance first works.
Step-by-Step: Phase 1 – Teaching Balance
Phase 1 has one goal: teach your child to balance on two wheels with feet up. Everything else in the process depends on this skill, so resist the urge to rush it. Most kids need 30 minutes to 2 hours of practice spread over one or two sessions.
Before you start, you will need a bike that fits your child with the pedals removed. Most kids’ bikes use a 15mm wrench to take the pedals off. If you do not have a pedal-removal tool, you can buy a balance bike conversion kit at any bike shop, or simply start with a proper balance bike (no pedals at all).
Step 1: Take a Seat and Walk
Lower the seat so your child can sit with both feet flat on the ground and a slight bend in the knee. Have your child sit on the bike and walk it forward by pushing with their feet, just like a balance bike.
The goal here is comfort. Your child should feel in control of the bike, able to stop by simply putting their feet down, and able to steer around you. Spend 5 to 10 minutes on this step. If your child is struggling to walk and steer at the same time, that is normal. Stay close but do not hold the bike.
Step 2: Look Ahead
Once your child can walk the bike smoothly, the next habit to install is looking forward. Kids fixate on the front wheel when they are nervous, which actually makes balancing harder. Set up two cones, water bottles, or small objects about 20 feet apart, and ask your child to walk the bike toward one and then the other.
Tell them: “Eyes on me, not on the wheel.” When they look up, you will see a small but real change in their steering. Their lines will straighten, and they will start to feel the balance point of the bike beneath them.
Step 3: Practice Braking
Braking is the most important safety skill. If your child is on a balance bike or a no-pedal bike, they will use their feet to stop at first, but it helps to introduce the brake early so it becomes habit.
For a coaster brake (pedal backward to stop): Walk the bike, then have your child put one foot on the rear fender or a designated footrest and squeeze. Practice until they can stop smoothly from a walk.
For a hand brake: Walk the bike, then have your child squeeze the lever gently. Make sure the brake is properly adjusted so it does not require a death grip. A brake that is too stiff will frustrate your child and may even cause a fall.
Use a simple Red Light, Green Light game. When you say green, they walk the bike. When you say red, they stop using the brake. This is a fun drill that builds the stopping reflex without anyone realizing they are practicing.
Step 4: Feet Up and Glide
This is the magic step. Once your child can walk, look ahead, and brake, ask them to push off with both feet, lift their feet off the ground, and glide.
Most kids will catch on within minutes. Start on a very gentle slope, just enough to keep the bike rolling for a second or two. As they improve, move to a flat surface. The target is a clean 25-foot glide with both feet up, which the cycling experts at Wirecutter cite as the milestone that means a child is ready for pedals.
Do not be discouraged by the waddle phase. New riders wobble their feet back and forth like a penguin. That is not a mistake, it is how the body figures out the lean. Let it happen, and they will tighten up within a session or two.
Step-by-Step: Phase 2 – Adding Pedals and Riding
Once your child can glide 25 feet with feet up, it is time to put the pedals back on. The whole feel of the bike changes now, so expect a small step backward before another big leap forward.
Step 1: Reinstall the Pedals and Set Seat Height
Reattach the pedals with your 15mm wrench. Raise the seat so your child has a slight bend in the knee at the bottom of the pedal stroke. They should not be able to put both feet flat on the ground while sitting; one foot on the ground at a time is the right height.
If your child is on the balls of their feet when stopped, that is the correct seat height. They will need to lean the bike slightly to put a foot down at stoplights, which is normal.
Step 2: Teach the Power Pedal Position
The power pedal position is the single most useful starting technique. Before your child pushes off, they place one pedal at the 2 o’clock position (forward and high) and push down on it as they start to glide. That single downward stroke gives them enough momentum to get the other pedal around.
Practice this in slow motion on grass. Have your child sit on the bike, find the 2 o’clock position with the dominant foot, and push down. Once they can do it without thinking, they are ready to try it from a real start.
Step 3: Give Them a Push
Stand to the side, not behind, and give your child a gentle push on the back of the saddle or shoulder as they push down on the power pedal. Do not run alongside the bike. Running alongside builds a crutch; your child will start to depend on you being there, and the moment you let go, they will panic.
One or two pushes per attempt is plenty. If they wobble and put a foot down, that is a successful attempt. The next one will be longer.
Step 4: Do It Themselves
Step back, ask them to do the power pedal start on their own, and let them try. Most kids master this within 5 to 15 attempts once they have the balance phase down. Some kids will surprise you and ride off the first try. Others will need a few sessions. Both are normal.
Stay quiet during the attempt. The biggest mistake parents make is narrating every motion: “Pedal, pedal, look up, you’re doing it, no don’t look down.” Pick one cue and stick to it. I usually say “Eyes up” and nothing else.
Choosing the Right Bike (Size, Fit, and Brakes)
The most common reason a child struggles to learn is the wrong size bike. A bike that is too big cannot be controlled. A bike that is too small is unstable and forces weird posture. Get the size right and half the learning curve disappears.
How to Size a Kids Bike
Your child should be able to stand over the top tube with both feet flat on the ground and about 1 to 2 inches of clearance. For balance bikes, this is the same rule. For pedal bikes in the learning phase, lower the seat as described in the steps above.
By wheel size, a rough guide is:
- 12-inch wheels: ages 2 to 4, inseam 14 to 17 inches
- 14-inch wheels: ages 3 to 5, inseam 16 to 20 inches
- 16-inch wheels: ages 4 to 7, inseam 18 to 22 inches
- 20-inch wheels: ages 6 to 10, inseam 22 to 25 inches
- 24-inch wheels: ages 9 to 13, inseam 24 to 28 inches
Wheel size is a starting point, not a rule. The stand-over test is the only one that really matters.
Coaster Brake vs Hand Brake
For kids under 5, a coaster brake is usually easier to start with. They squeeze the handlebar to steer and pedal backward to stop. It removes one thing to think about during the first rides.
For kids 5 and up, especially if they will eventually ride in traffic or on hills, a hand brake is better. Hand brakes give more controlled stopping and are the standard on most adult bikes, so your child will not have to relearn braking later.
If the bike has a hand brake, make sure the lever is sized for small hands. Most kids’ bikes ship with adult-sized levers that smaller hands cannot pull comfortably. A simple fix: bring the bike to a local shop and ask them to adjust the reach.
Best Locations to Practice
Where you practice matters as much as how. A bad location sets kids up for failure: cracks, traffic, hills that are too steep, or spectators who feel like judges. Here are the best places, in order of how often I recommend them.
- Empty parking lot on a weekend morning: smooth, flat, no cars, plenty of space.
- Quiet cul-de-sac: as long as driveways are clear and traffic is genuinely low.
- School track during off-hours: smooth surface, soft edges, plenty of straightaway room.
- Synthetic running track at a local park: slightly cushioned, perfect for new riders.
- Flat grassy area for the very first few minutes: slower speeds, softer falls.
Avoid busy sidewalks, paved trails with other riders, anywhere with a steep hill, and anywhere with cars pulling in or out. Save those for when your child is fully confident.
If you have access to a gentle slope, use it for the gliding phase. A slope of 2 to 3 percent is plenty. A slope of 8 percent or more is too much for a new rider.
Essential Safety Gear Checklist
Gear is not optional. The first time your child falls, you will be grateful for every piece you made them wear. Here is the minimum kit I recommend for any new rider.
- Bike helmet: properly fitted, sits level on the head, two-finger width above the eyebrows, side straps form a Y under each ear, chin strap snug but not choking.
- Knee pads: lightweight, slip-on style, can be worn under pants.
- Elbow pads: same style as knee pads.
- Closed-toe shoes: sneakers only. No sandals, no Crocs, no flip-flops. Feet need to grip the pedal and be ready to put down for a stop.
- Long pants or leggings: even on a hot day, long pants protect against road rash on the knees and shins.
- Gloves (optional but recommended): protect palms during a slide, and give a better grip on the handlebars.
Buy the helmet first. A helmet that does not fit is worse than no helmet at all because the child will not want to wear it. Most bike shops will fit helmets for free.
Tips for Anxious or Struggling Kids
About 1 in 4 kids hits a wall of fear at some point in the learning process. Usually it happens after a fall, sometimes it happens for no reason at all. The good news: with the right approach, anxious kids can become confident riders. The bad news: pushing harder usually makes it worse.
Reset the Stakes
When a child is scared, the goal of “ride a bike” feels enormous. Break it down. The only goal for the next session is to sit on the bike and walk it back to the front door. That is it. Success feels easy, and the next session can be slightly more ambitious.
Take a Break From the Bike
One to two weeks off can completely reset a child’s attitude. Let them watch other kids ride. Let them play on the bike in the driveway without any pressure to learn. When they come back to it, they will often be ready in a way they were not before.
Make It a Game, Not a Lesson
“Practice” is a four-letter word to a 5-year-old. “Racing” is not. Set up cones, time them, count how many cones they can weave through, and turn the session into a competition against themselves. Anxious kids often do their best learning when they forget they are learning.
Address the “What If I Fall” Question Directly
Do not promise your child they will not fall. They will know you are lying, and the trust is more important than the comfort. Instead, say something like: “You will probably fall once or twice. That is normal. I will be right here. We will get back on.”
Then follow through. If they fall, do not overreact. Pick up the bike, dust them off, ask if they want to keep going, and let them decide. Most kids will choose to keep going if you make it feel normal.
Stay Out of the Saddle
The single most counterproductive thing a parent can do is hold the bike seat while the child pedals. It feels helpful. It is not. The child cannot develop the balance reflex if you are providing the balance. Stand beside them, run alongside for one or two pushes, and let go.
The Towel Hack and Other Parent-Tested Tips
The towel hack is a viral trick that thousands of parents swear by. It solves the “I cannot let go of the seat” problem by giving you something to hold that is not the bike. Here is exactly how to do it.
The Towel Method, Step by Step
- Take a standard bath towel and roll it lengthwise into a tight cylinder.
- Loop the middle of the towel under the child’s armpits, across the back.
- Hold both ends of the towel behind the bike, like a horse’s reins.
- Have the child push off and start pedaling while you walk behind.
- Use the towel to steady them only when they wobble. Let go as soon as they are stable.
- Shorten your grip on the towel over time, until you are barely holding it.
- Eventually let go entirely, and they will not even notice.
Why it works: the towel lets you provide just enough support to prevent a tip-over, but it does not provide balance. The child still has to balance the bike themselves. It is also more comfortable for them than having a hand on their shoulder, and more comfortable for you than bending over to hold the seat.
Red Light, Green Light for Braking
Already mentioned above, but worth its own callout. Red Light, Green Light is the single best brake-practice game for kids 4 to 8. It is fast, fun, and teaches the right reflex: stop when you hear “red.” You can add “Yellow Light” for slow-down practice, and “Police Officer” for full stops with a foot down.
Stickers and Milestones
Make a simple chart. Each successful glide over 10 feet gets a sticker. After 10 stickers, your child gets to pick the next family bike ride location. This is not bribery; it is clear feedback that progress is happening, which anxious kids desperately need.
Skateboard Tow
For older kids (6 and up) who can keep up on foot, have them sit on the bike while you hold the handlebars of a skateboard or scooter they are standing on. Roll forward slowly, let them feel the balance point, and let them learn to steer. This works especially well for kids who are too cool for the towel method but still need a little support.
Teaching Older Kids (7+) Who Haven’t Learned Yet
Older kids who have not learned to ride are a special case. They are usually capable of learning in a single afternoon, but they carry a hidden weight: embarrassment. Their friends already ride. They have been told that bike riding is “easy.” They may not want anyone, especially a parent, to see them struggle.
Pick the Right Time and Place
Do not try to teach your 8-year-old at the local park where other kids might see. Choose a private location, ideally at a quiet time. Tell only the people who need to know. Save the triumphant first ride for a moment your child controls.
Skip the Balance Bike
Older kids usually do not need the full balance-first progression. If they have good coordination and a strong sense of balance, you can teach them in one session using a regular pedal bike. Lower the seat, have them practice the power pedal position, give them one or two pushes, and let them go. Many older kids are riding within an hour.
Frame It as a Skill, Not a Milestone
Reframe the conversation. Instead of “I am going to teach you to ride a bike,” try “Want to learn a new skill this weekend?” The first framing positions the child as behind. The second positions them as leveling up.
Give Them Ownership
Let the older child pick the bike if possible. Let them pick the practice location. Let them pick the music you listen to during practice. Ownership is a powerful antidote to embarrassment, because it turns the experience from something being done to them into something they are choosing to do.
Most older kids can learn to ride in a single afternoon, and many will refuse to admit they ever needed help. That is a great outcome. Let them have it.
Common Mistakes Parents Make
Most of the parents I have coached make the same handful of mistakes. Avoiding these will save you hours of frustration and save your child a lot of stress.
1. Holding the Bike Seat
Already covered above, but it is the number one mistake. Holding the seat feels supportive, but it prevents the child from finding their own balance point. The moment you let go, they tip over, and the trust between you takes a hit. Use the towel method instead, or just stand beside them and let them ride.
2. Skipping the Balance Phase
It is tempting to skip straight to pedaling, especially if your child seems coordinated. Resist. The balance phase is short, often under an hour, and it is the foundation for everything. Kids who skip it almost always have to come back to it anyway, after a few frustrating falls.
3. Wrong Size Bike
A bike that is too big is the second most common mistake. If your child cannot flat-foot the bike while standing over it, the bike is too big. A bike that is too small is also a problem, because it forces an unstable, cramped riding position. When in doubt, size down.
4. Too Many Instructions at Once
“Look up, pedal, keep your elbows in, eyes forward, don’t squeeze the brake too hard, turn left, slow down.” Kids can only process one cue at a time. Pick the most important one for the moment, say it once, and wait. Less talking, more riding.
5. Practicing on a Slope That Is Too Steep
For the gliding phase, a tiny slope is helpful. A real hill is not. A child who has to brake hard on a steep hill is going to feel out of control, and they will associate that fear with the bike itself. Save the hills for week two.
6. Practicing When the Child Is Tired or Hungry
Hangry kids cannot learn. Soaked kids cannot learn. Tired kids cannot learn. Pick a 30-to-60-minute window when your child is fed, rested, and has energy to spare. Mornings usually work better than late afternoons.
7. Comparing to Other Kids or Siblings
“Your sister learned in an afternoon” is a sentence that should never be spoken. Every child learns at their own pace, and comparison adds shame on top of an already-frustrating process. Celebrate the small wins and ignore the timeline.
How Long Does It Take to Learn?
The honest answer: anywhere from 30 minutes to a few weeks, depending on the child. Here is a realistic timeline based on what I have seen across dozens of families.
- Fast learners (ages 4 to 6, motivated, no fear): 1 to 3 sessions, total 1 to 3 hours. Often riding independently by the end of session 1.
- Typical learners (ages 4 to 7): 3 to 6 sessions over 1 to 2 weeks. Riding confidently within 2 weeks.
- Anxious or cautious learners: 2 to 6 weeks. Often need 1 to 2 weeks off mid-process to reset. The end result is the same.
- Older kids (7+) starting fresh: 1 to 4 sessions, often a single afternoon is enough. Balance skills develop faster in older kids.
- Kids transitioning from training wheels: 1 to 3 weeks. They have to unlearn some bad habits first, then pick up real balance.
The biggest predictor is not age or coordination. It is motivation. A child who really wants to learn will surprise you. A child who is being made to learn will take longer, no matter how capable they are physically.
If your child has not clicked after a month of weekly practice, take a step back. Lower the seat further, remove the pedals, and start over from the gliding phase. Sometimes a fresh start is all it takes.
Frequently Asked Questions
At what age should a child start riding a bike without training wheels?
Most kids are ready to start learning to ride a bike without training wheels between ages 4 and 7, though readiness is developmental, not strictly age-based. Three is not too early if your child can balance well on one foot, follow multi-step instructions, and has shown interest in learning. By 7 or 8, most kids can pick up the skill in a single afternoon if they are motivated.
Is 3 years old too early to teach a kid to ride a bike?
Three is not too early to teach a kid to ride a bike, as long as the child shows the right physical and emotional signs. Many kids as young as 2.5 successfully learn on balance bikes, and the balance-first method works especially well for young children because it does not require complex coordination. If your 3-year-old can walk steadily, follow simple instructions, and shows interest in bikes, they are likely ready to start.
How to teach a kid to ride a bike without training wheels using a towel?
The towel method is a parent-tested trick for kids who are nervous about riding. Roll a bath towel lengthwise into a tight cylinder, loop the middle of it under the child’s armpits and across their back, and hold both ends behind the bike like reins. The towel lets you steady the child when they wobble, but it does not provide actual balance, so they still have to learn to balance themselves. Gradually shorten your grip on the towel until you are barely holding it, then let go entirely.
How long does it take to learn how to ride a bike without training wheels?
Most kids learn to ride a bike without training wheels within 1 to 3 practice sessions, totaling 1 to 3 hours, though the timeline varies. Motivated kids ages 4 to 6 often ride independently after a single afternoon. Anxious or cautious kids may need 2 to 6 weeks of patient practice. Older kids (7+) starting fresh often learn even faster, sometimes within an hour. Motivation is the biggest predictor of how quickly a child picks up the skill.
Why are training wheels bad for learning?
Training wheels are bad for learning because they prevent kids from developing the lean-and-balance reflex that real bike riding requires. They hold the bike upright, so a child never has to learn to lean into turns or shift their weight properly. They also add unwanted weight to a frame already designed for small legs, and they teach pedaling habits that have to be unlearned later. Cycling educators from the League of American Bicyclists to the Bicycle Coalition of Maine all recommend the balance-first method over training wheels.
What if my child is scared to ride without training wheels?
If your child is scared to ride without training wheels, lower the stakes, take breaks, and avoid pushing harder. Break the goal into tiny wins: the only goal for the next session might be to sit on the bike and walk it back to the front door. Take 1 to 2 weeks off if needed, and let them play on the bike without any learning pressure. Turn practice into a game with cones, races, or Red Light/Green Light, and avoid promising they will not fall. Most anxious kids become confident riders with the right approach; it just takes longer.
Final Thoughts: Trust the Process
Teaching a kid to ride a bike without training wheels is one of the most rewarding parenting experiences you will have. You will watch your child struggle, fall, dust themselves off, and try again. You will see the moment it clicks, the moment their feet leave the ground, the moment they realize they are doing it on their own. That moment is worth every bent-over running session, every dropped wrench, every scraped knee.
Trust the balance-first method. Trust your child. Trust the process. Within a few days or a few weeks, you will be watching them ride off down the sidewalk without you, and you will not be able to remember why it felt so hard.
That is the full guide on how to teach a kid to ride a bike without training wheels in 2026. Now grab a 15mm wrench, lower that seat, and go ride.